This article was co-authored by Art Fricke. Art Fricke is a home renovation and repair specialist and the owner of Art Tile & Renovation based in Austin, Texas. With over 10 years of experience, he specializes in bathroom and kitchen renovations. Art focuses on a single contractor approach to customized renovation work, and performs projects such as installing custom tile showers, fixing tiled shower leaks, replacing cracked tiles, and installing floor and wall tile.
This article has been viewed 35,168 times.
At first glance, installing tiles might seem like tough work. Indeed, very few people choose to install their tiles themselves during renovation, instead choosing to let a professional handle it. If you want to tackle the job yourself, a basic overview can help you on your way.
Steps
-
1Pick the right tile. Concrete floors are dull, drab and boring, but oftentimes people lack the time or the necessity to lay down an alternative floor. Most often, concrete floors are seen in basements and other out of the way places. However, if you choose to remodel your basement and need a new floor, the first thing to consider is what type of floor you need. Several varieties of tiles, including ceramic and vinyl, can be used; choose the one that best suits your anticipated use.[1]
-
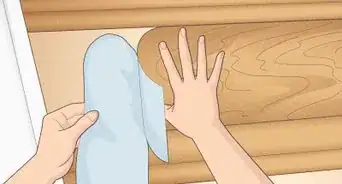
2Clean the concrete surface. This is a vital step of the project. Accumulated mud, dirt and other debris must be removed completely to ensure that the tiles are laid properly and stick to the concrete.[2] For this purpose, be sure to use a commercial or industrial strength cleaning agent, along with lots of water and a brush.Advertisement
-
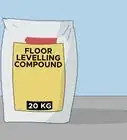
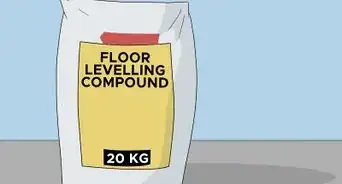
3Perform the concrete repairs and leveling. To lay an even surface, the underlying concrete needs to be uniform and level as well. To achieve this, get rid of any protrusions, bumps or cracks in the surface.[3] Using sandpaper to level the bumps and concrete and other fillers to stop cracks, you should be able to get a smooth surface. Be sure to wash it after this is done and let it dry.
-
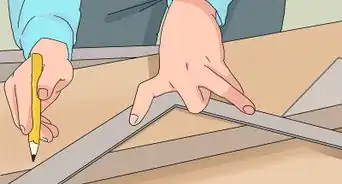
4Plan the layout. After preparing the surface, plan how you intend to lay down the tiles. Depending on size and shape, you can have a wide variety of patterns to choose from and you may even decide to get creative with your patterns and create something original. Be sure to plan this out carefully before starting the actual work to ensure that there are no mistakes.
-
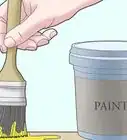
5Lay the tiles. Once everything is ready, start by applying a layer of mortar to the floor.[4] Mortar is basically the adhesive that helps the tile stick to the concrete, so choose the one that best suits your needs and your current situation. The commercially available mortars generally need to be mixed with a proportional amount of water. Be sure to read the manufacturers instructions on this.
- Once you have prepared your mortar solution, use a trowel to spread it onto the floor. Once the mortar has been spread evenly, gently lay the tiles and tap them into place with the trowel.
-
6Complete the finishing touches. Once the tiles have set properly, finish them off using grout. Grout is commercially available in a variety of colours, choose the one that suits your needs best. Mix as directed and apply to the gaps in the tiles.
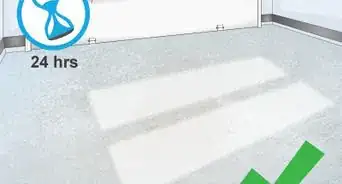
- Be sure to clean off the excess grout from between the tiles and any that spills onto their surface. After this is done, let the floor set for a couple of days. Clean off the floor one last time with a wet mop, and then it is ready for use.


Expert Q&A
Did you know you can get expert answers for this article?
Unlock expert answers by supporting wikiHow
-
QuestionHow do you evenly arrange tiles on your floor?
 Art FrickeArt Fricke is a home renovation and repair specialist and the owner of Art Tile & Renovation based in Austin, Texas. With over 10 years of experience, he specializes in bathroom and kitchen renovations. Art focuses on a single contractor approach to customized renovation work, and performs projects such as installing custom tile showers, fixing tiled shower leaks, replacing cracked tiles, and installing floor and wall tile.
Home Renovation & Repair SpecialistUse spacers to ensure that the tiles are properly spaced as you lay them into your envisaged patterns.
Support wikiHow by unlocking this expert answer.
-
QuestionWhat is thinset?Art FrickeArt Fricke is a home renovation and repair specialist and the owner of Art Tile & Renovation based in Austin, Texas. With over 10 years of experience, he specializes in bathroom and kitchen renovations. Art focuses on a single contractor approach to customized renovation work, and performs projects such as installing custom tile showers, fixing tiled shower leaks, replacing cracked tiles, and installing floor and wall tile.
Home Renovation & Repair SpecialistThinset is a concrete mix that is ideal for putting tile onto a substrate in a wet environment. There are lots of different brands and formulations, but basic, good quality concrete thinset is usually $10 for a 40 pound bag.Support wikiHow by unlocking this expert answer.


References
- ↑ Art Fricke. Home Renovation & Repair Specialist. Expert Interview. 1 July 2020.
- ↑ Art Fricke. Home Renovation & Repair Specialist. Expert Interview. 1 July 2020.
- ↑ Art Fricke. Home Renovation & Repair Specialist. Expert Interview. 1 July 2020.
- ↑ Art Fricke. Home Renovation & Repair Specialist. Expert Interview. 1 July 2020.
About This Article