This article was co-authored by wikiHow staff writer, Megaera Lorenz, PhD. Megaera Lorenz is an Egyptologist and Writer with over 20 years of experience in public education. In 2017, she graduated with her PhD in Egyptology from The University of Chicago, where she served for several years as a content advisor and program facilitator for the Oriental Institute Museum’s Public Education office. She has also developed and taught Egyptology courses at The University of Chicago and Loyola University Chicago.
There are 17 references cited in this article, which can be found at the bottom of the page.
This article has been viewed 52,569 times.
Learn more...
In most cases, identifying bacteria is done through a process of elimination to narrow down choices until you get to the right one. Doing it correctly is an incredibly complex process, partially because there are so many types—some scientists estimate the number of species of bacteria could be over a billion! Even with so many to choose between, identifying is especially important in clinical and medical settings. To make matters easier, there are standards for identifying that come from using staining techniques to examine the bacteria's appearance and observing the bacteria's reactions to different conditions.
Steps
Identifying Bacteria with Gram Staining
-
1Use Gram staining to see if bacteria are Gram positive or Gram negative. Gram staining is a procedure that allows you to divide bacteria into 2 common types: Gram positive, and Gram negative. Gram positive bacteria have an extra thick cellular wall (made of a polymer called peptidoglycan) that holds a dye stain better than the thinner cell walls of Gram negative bacteria.[1]
- Common Gram positive bacteria genera include Staphylococcus, Streptococcus, Micrococcus, and Listeria.
- Common Gram negative bacteria genera include Neisseria, Moraxella, Acinetobacter, Enterobacteriaceae, Haemophilus, Vibrio, Campylobacter, and Fusobacterium.
-
2Use safety precautions. The bacteria and chemicals that you will be handling during a Gram stain procedure are all potentially dangerous. Wear goggles, disposable nitrile gloves, and a lab coat while performing the stain. Put your disposable gloves and any other contaminated waste materials in a biohazard bag when you are done. Follow your lab's procedures for disposing of the biohazard bag.[2]Advertisement
-
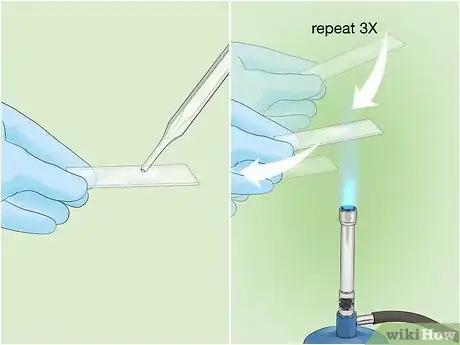
3Make a slide of your bacterial sample. To begin the process, place a small drop or piece of your bacterial sample on a sterile slide. Pass the slide through the flame of a Bunsen burner 3 times to heat fix the sample.[3] This will prevent the sample from washing away when you add reagents or rinse the slide.
-
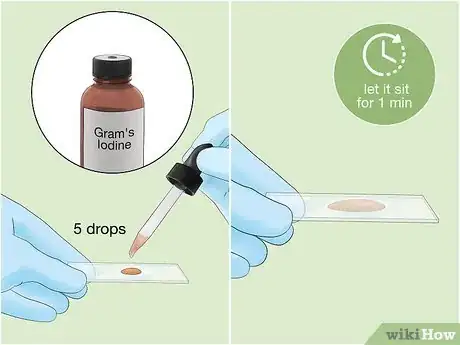
4
-
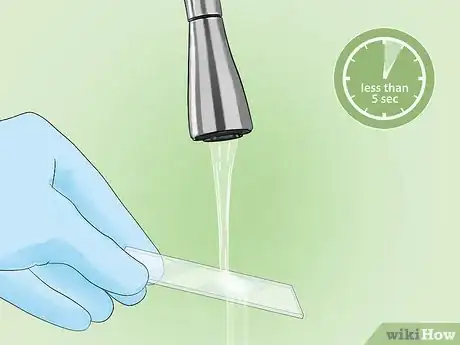
5Gently rinse the slide to remove the stain. Use a very gentle stream of water from a sink or squirt bottle. Don't rinse for more than 5 seconds.[6] This process will remove any dye that is not bound to the sample.
-
6
-
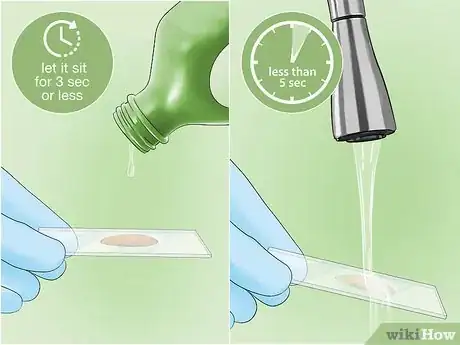
7Rinse the sample with alcohol or acetone. Alcohol and acetone are decolorizing agents. If your bacteria are a Gram negative strain, these agents will remove the stain from the bacterial cell walls. Allow a few drops of the decolorizing agent to trickle over the sample, and let it sit for no more than 3 seconds. Gently rinse with water for no more than 5 seconds to remove the alcohol or acetone.[9]
- If you let the decolorizing agent sit on the sample too long, it may strip the stain out of Gram positive bacteria, causing a false Gram negative result.
-
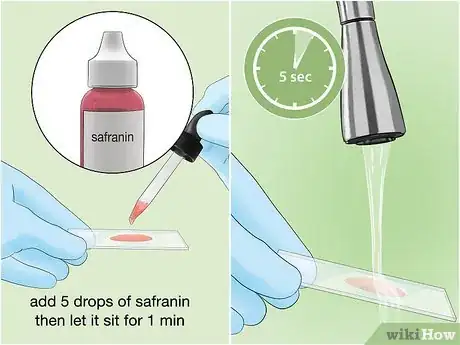
8Counterstain the solution with safranin. Safranin is a red dye, which will act as a counterstain to the crystal violet and dye any bacteria that did not hold the violet stain. Add about 5 drops of safranin solution to the sample, and let it sit for 1 minute. Rinse very gently with water for 5 seconds.[10]
-
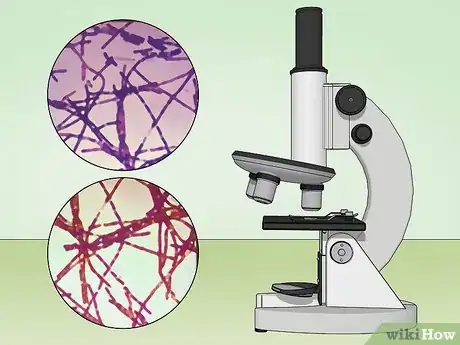
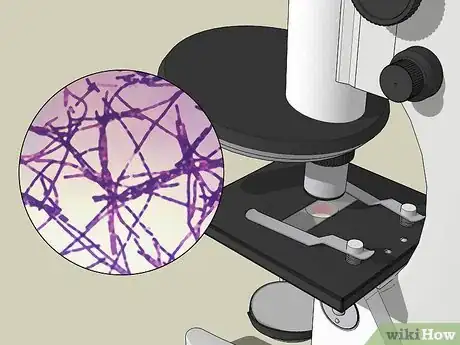
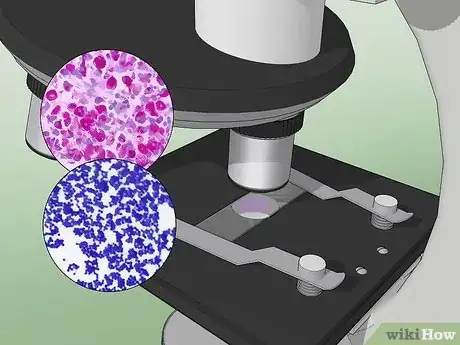
9View your sample under the microscope at 1000X magnification. If the bacteria are a Gram positive strain, they will appear purple or violet under the microscope. Gram negative bacteria will appear red from the safranin counterstain.[11]
Using the Ziehl-Neelsen Stain Technique
-
1Use Ziehl-Neelsen staining to detect acid-fast bacteria. Acid-fast bacteria contain a higher amount of lipid than other types of bacteria, making them resistant to the coloring agents used in Gram staining. Acid-fast bacteria belong to the genus Mycobacterium, which includes the bacterium that causes tuberculosis (M. tuberculosis). Acid-fast bacteria can be stained with a red carbol-fuchsin dye, which will resist being rinsed out with an acid alcohol or sulfuric acid solution.[12]
-
2Take proper safety precautions. The chemicals and biological materials used during a Ziehl-Neelsen staining procedure can be hazardous. You will also be using heat sources, such as a Bunsen burner, spirit lamp, or electric slide heater. Take the following precautions while performing this procedure:[13]
- Wear goggles, nitrile gloves, and a lab coat.[14]
- Take care not to inhale any fumes from the staining and decolorizing solutions, or get them on your skin or in your eyes. Keep any open containers under a fume hood.[15]
- Use great care when heating your slide, as many of the chemicals you will be using are flammable. There may also be traces of flammable chemicals on slide racks and other equipment.[16]
-
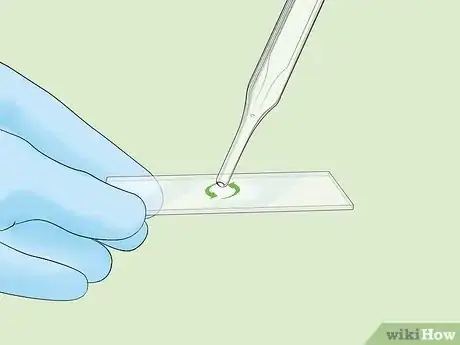
3Prepare a slide. Spread a smear of your sample evenly over the center of a sterile slide, using circular motions. Your smear should be about 10 mm (0.4 inches) by 20 mm (0.8 inches).[17]
-
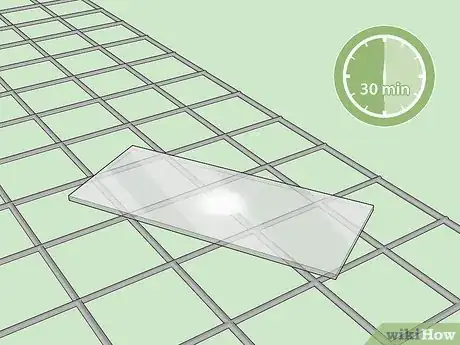
4Dry your slide. Place the slide on a drying rack smear-side up. Allow it to air dry for 30 minutes.[18] Do not attempt to blot the slide dry.
-
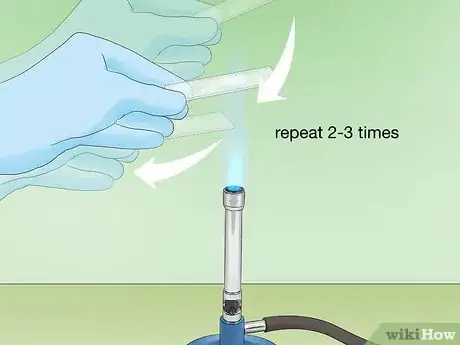
5Heat fix your smear. You can heat fix the sample by passing the slide over the flame of a Bunsen burner 2-3 times, smear-side up. Alternatively, place the slide on an electric slide warmer at 65°-75° C (149°-167° F) for at least 2 hours.[19] Take care not to scorch or boil the sample.
-
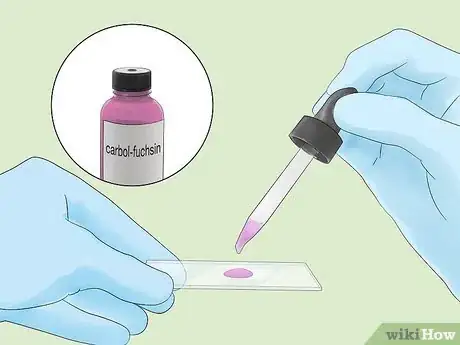
6Add carbol-fuchsin stain to your slide. Put several drops of carbol-fuchsin solution on the slide. Add enough to completely cover the smear.[20]
-
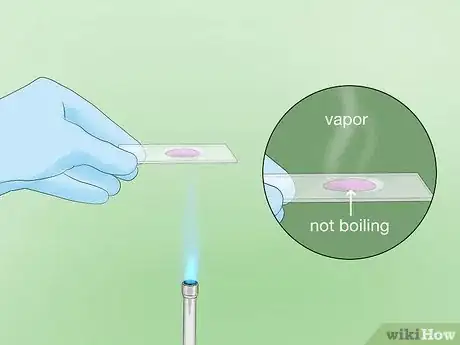
7Heat the stained slide to fix the stain to the smear. Gently heat the slide over a Bunsen burner or spirit lamp, smear-side up, or place it on an electric slide heater. Heat the slide until it reaches 60° C (140° F). You should see vapor beginning to rise. Let the heated stain sit on the slide for 5 minutes.[21]
- If you are using an electric slide warmer, set it to 60° C (140° F). If you are using a Bunsen burner or spirit lamp, you will need to watch carefully for the appearance of steam or vapor.
- To keep the slide at the desired temperature for a full 5 minutes, apply heat intermittently.[22]
- Take care not to boil, scorch, or completely dry out your stained smear.
-
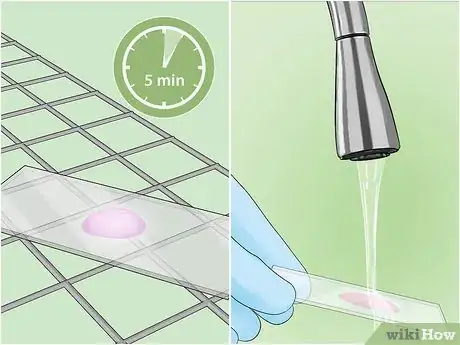
8Rinse the slide with cool water. Let the slide cool for about 5 minutes, then very gently rinse for a few seconds with clean water from a tap or squeeze bottle to remove any stain that is not bonded to the sample.[23]
-
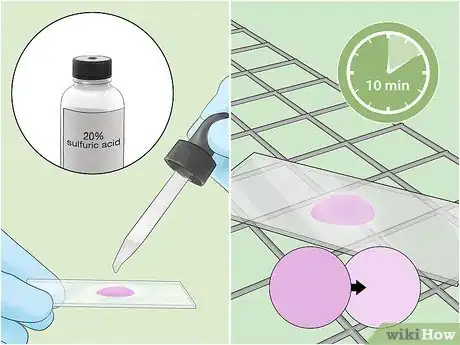
9
-
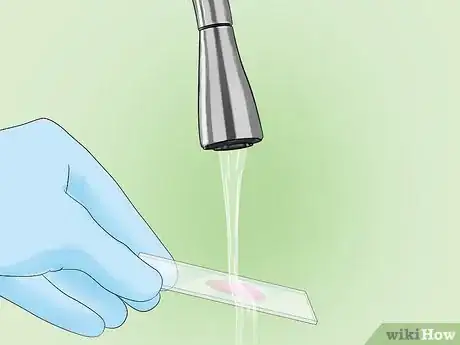
10Rinse the slide with clean water. Rinse gently with water from a tap or squeeze bottle, making sure to wash away all the acid and any remaining traces of dye.[26]
-
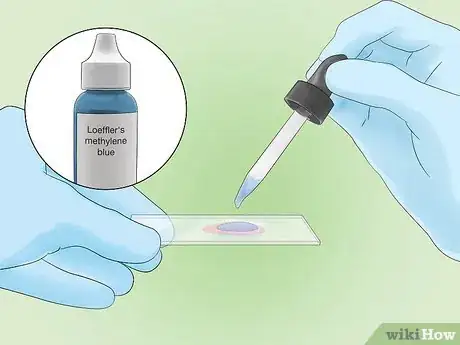
11Add counterstain to the slide. Once the slide is rinsed, cover your stain with malachite green or Loeffler's methylene blue solution. These solutions create a green or blue “background” that helps the red-dyed bacteria stand out, and will also stain any other biological material on the slide (such as human cells and bacteria that are not acid-fast). Let the stain stand for 1-2 minutes.[27]
-
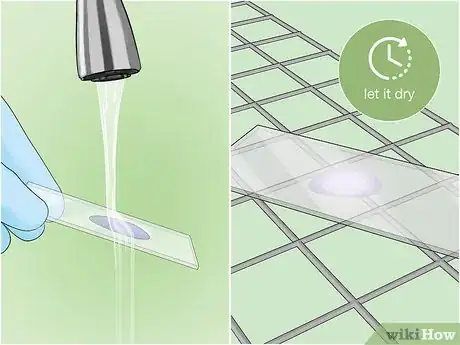
12Rinse and dry the slide. Wash the slide gently with clean water to remove any excess counterstain. When you are done, wipe the back of the slide with a clean cloth and place the slide on a rack to air dry.[28]
-
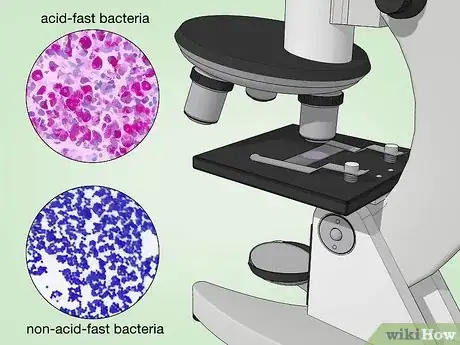
13Examine the slide under a microscope at 1000X magnification. Acid-fast bacteria should appear red or hot pink. Non-acid-fast bacteria, non-bacterial cells, and the background will appear blue or green.[29]
Observing Bacterial Appearance and Behavior
-
1Observe the shape of the bacteria. Once you have used staining to determine whether your bacteria are Gram positive, Gram negative, or acid-fast, it's time to narrow down the type of bacteria. The first step is to observe the shape(s) of the bacteria on the slide. The 3 most common shapes are coccus (spherical), bacillus (rod-shaped), and spiral.[30]
- There are numerous variations on all of these shapes. For example, coccus bacteria may appear in various formations, such as fused pairs (diplococcus), chains, clusters, or groups of 4 (tetrads).
-
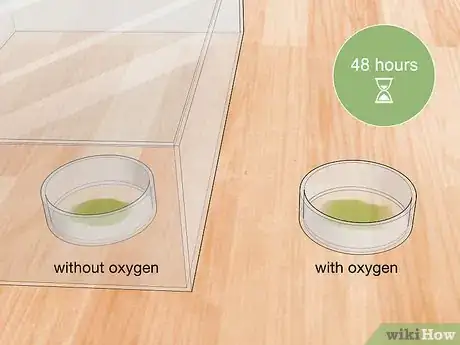
2Determine if the bacteria are aerobic or anaerobic. Take 2 samples of the bacteria and create 2 separate cultures. 1 culture should be anaerobic (grown without oxygen) and the other should be aerobic (grown with oxygen). Store your anaerobic culture in an oxygen-free environment at 35° C (95° F) for at least 48 hours before you attempt to observe bacterial growth.[31]
- If your bacteria grow in the oxygen-free environment, but not when exposed to oxygen, they are anaerobic.
- Bacteria that grow when exposed to oxygen, but not when kept in an oxygen-free environment, are aerobic.
- Bacteria that can grow in both environments are called facultative anaerobes.
-
3Do a motility test to find out if your bacteria are motile. Motile bacteria can move on their own by using 1 or more flagella to propel themselves around. Motility, or lack of motility, can be an important factor in identifying a strain of bacteria.[32] There are several types of motility tests, but the semisolid medium test is the safest and easiest to read.
-
4Create a culture for your motility test. Prepare a culture of bacteria in a nutrient broth. Prepare the broth according to the directions for your preferred broth medium.[33]
-
5Inoculate a tube of semisolid motility agar with your culture. Coat a sterile inoculating needle with some of the broth culture. Carefully stab the needle straight into a tube of semisolid agar formulated for motility testing (such as TTC agar). The needle should go about 2/3 of the way into the agar.[34]
- When you are done, carefully withdraw the needle, taking care not to break the original “stab line.”
- Incubate the tube at 30° C (86° F) for 48 hours.[35]
-
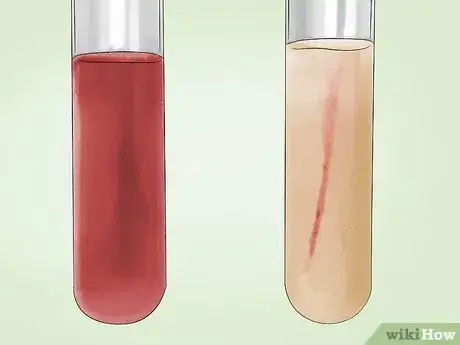
6Read the results of the motility test. Motility agar turns red when it comes into contact with bacteria. If your bacteria are motile, a red or pink color will be diffused throughout the agar. If they are non-motile, you will only see the red color along the original stab line.[36]
Putting It All Together
-
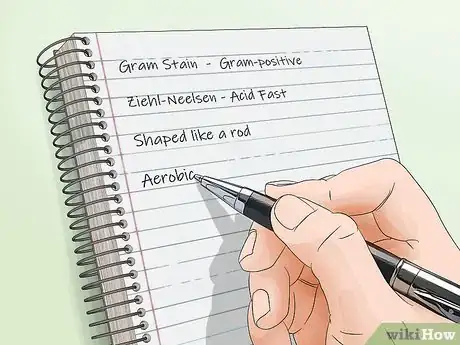
1Put your observations together. To narrow down the genus of bacteria, you will need to combine the information from your stains, cultures, and observations of bacterial shape. If you are testing a culture from a patient, information about their symptoms can also be useful for narrowing the field.
- For example, if your tests reveal that your bacteria are Gram negative, anaerobic, non-motile bacilli, and they are associated with abdominal pain, nausea, and vomiting in the patient, they are likely to be Bacteroides fragilis.[37]
-
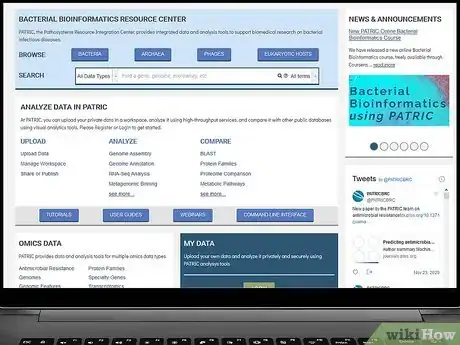
2Consult a database of bacteria. Since there are so many species of bacteria, it is impossible to remember or recognize all of them on your own. You will probably need to consult a clinical microbiology textbook or an online database and search for bacteria with all the characteristics of your sample.
- Good online resources for identifying bacteria include the Pathosystems Resource Integration Center (patricbrc.org) and the Pathogenic Bacteria database at GlobalRPh (globalrph.com/bacterial-strains.htm).
-
3Use genetic testing to determine the exact species of bacteria. In some cases, it may be necessary to identify the exact species of bacteria. The fastest and most effective way to do this is with DNA testing. DNA testing is also helpful for identifying bacteria that resist traditional forms of culturing or staining.[38] Modern microbial DNA testing can be done very quickly, sometimes in as little as 2 hours.[39]
- If you do not have access to a lab that does microbial genome sequencing, send a sample to a specialist facility, such as MIDI Labs or CD Genomics.
Warnings
- Always use safety precautions when working with microbial samples and staining reagents. If you feel sick after working with samples of bacteria, seek medical attention immediately.⧼thumbs_response⧽
- These procedures should always be done in a microbiology lab with equipment that is in good working order.⧼thumbs_response⧽
Things You'll Need
Identifying Bacteria with Gram Staining
- Bacterial samples
- Safety goggles
- Nitrile gloves
- Lab coat
- Microscope slides
- Slide drying rack
- Bunsen burner
- Spirit lamp or electric slide heater
- Clothes pin
- Water bottle
- Gram crystal violet solution
- Gram iodine solution
- Ethanol or acetone solution
- Gram safranin solution
- Microscope capable of 1000X magnification
Using the Ziehl-Neelsen Stain Technique
- Bacterial samples
- Safety goggles
- Nitrile gloves
- Lab coat
- Microscope slides
- Slide drying rack
- Bunsen burner
- Spirit lamp or electric slide heater
- Water bottle
- Fume hood
- Carbol-fuchsin solution
- 20% sulfuric acid or 3% v/v acid alcohol
- Malachite green or Loeffler's methylene blue solution
- Microscope capable of 1000X magnification
Observing Bacterial Appearance and Behavior
- Microscope capable of 1000X magnification
- Aerobic and anaerobic bacterial cultures
- Nutrient broth medium
- Semisolid motility agar
- Inoculating needle
References
- ↑ https://blogs.scientificamerican.com/disease-prone/peptidoglycan-the-bacterial-wonder-wall/
- ↑ https://www.cdc.gov/mmwr/preview/mmwrhtml/su6101a1.htm
- ↑ https://serc.carleton.edu/microbelife/research_methods/microscopy/gramstain.html
- ↑ https://serc.carleton.edu/microbelife/research_methods/microscopy/gramstain.html
- ↑ https://eng.umd.edu/~nsw/ench485/lab9b.htm
- ↑ https://serc.carleton.edu/microbelife/research_methods/microscopy/gramstain.html
- ↑ https://eng.umd.edu/~nsw/ench485/lab9b.htm
- ↑ https://serc.carleton.edu/microbelife/research_methods/microscopy/gramstain.html
- ↑ https://serc.carleton.edu/microbelife/research_methods/microscopy/gramstain.html
- ↑ https://serc.carleton.edu/microbelife/research_methods/microscopy/gramstain.html
- ↑ https://serc.carleton.edu/microbelife/research_methods/microscopy/gramstain.html
- ↑ https://microbeonline.com/ziehl-neelsen-technique-principle-procedure-reporting/
- ↑ https://microbeonline.com/ziehl-neelsen-technique-principle-procedure-reporting/
- ↑ https://library.med.utah.edu/WebPath/HISTHTML/MANUALS/AFB.PDF
- ↑ https://library.med.utah.edu/WebPath/HISTHTML/MANUALS/AFB.PDF
- ↑ https://microbeonline.com/ziehl-neelsen-technique-principle-procedure-reporting/
- ↑ https://microbeonline.com/ziehl-neelsen-technique-principle-procedure-reporting/
- ↑ https://microbeonline.com/ziehl-neelsen-technique-principle-procedure-reporting/
- ↑ https://www.aphl.org/programs/infectious_disease/tuberculosis/TBCore/TB_AFB_Smear_Microscopy_TrainerNotes.pdf
- ↑ https://microbeonline.com/ziehl-neelsen-technique-principle-procedure-reporting/
- ↑ https://microbeonline.com/ziehl-neelsen-technique-principle-procedure-reporting/
- ↑ http://www.microrao.com/micronotes/acidfast.htm
- ↑ https://microbeonline.com/ziehl-neelsen-technique-principle-procedure-reporting/
- ↑ https://microbeonline.com/ziehl-neelsen-technique-principle-procedure-reporting/
- ↑ http://www.microrao.com/micronotes/acidfast.htm
- ↑ https://microbeonline.com/ziehl-neelsen-technique-principle-procedure-reporting/
- ↑ https://microbeonline.com/ziehl-neelsen-technique-principle-procedure-reporting/
- ↑ https://microbeonline.com/ziehl-neelsen-technique-principle-procedure-reporting/
- ↑ https://microbeonline.com/ziehl-neelsen-technique-principle-procedure-reporting/
- ↑ http://faculty.ccbcmd.edu/courses/bio141/lecguide/unit1/shape/shape.html
- ↑ http://www.surgeryencyclopedia.com/A-Ce/Anaerobic-Bacteria-Culture.html
- ↑ http://www.austincc.edu/microbugz/handouts/Motility%20Handout.pdf
- ↑ http://microbiologyonline.org/teachers/preparation-of-media-and-cultures
- ↑ http://www.austincc.edu/microbugz/handouts/Motility%20Handout.pdf
- ↑ http://www.sas.upenn.edu/LabManuals/biol275/Table_of_Contents_files/8-Motility.pdf
- ↑ http://www.austincc.edu/microbugz/handouts/Motility%20Handout.pdf
- ↑ http://www.globalrph.com/bacteroides-fragilis.htm
- ↑ http://media.hhmi.org/biointeractive/vlabs/bacterial_id/index.html?_ga=2.228753236.953145462.1510764737-1700444386.1510764737
- ↑ https://www.forbes.com/sites/robertglatter/2013/05/13/new-dna-test-can-identify-bacterial-infections-in-under-2-5-hours/#45f1d5f456f8











-Step-11.webp)


