This article was co-authored by Melissa & Michael Gabso. Melissa and Michael Gabso are the Owners of MC Construction & Decks based in Los Angeles, California. With over ten years of experience, they specialize in exterior and interior remodeling and redesign, including kitchen, bathroom, and deck construction. MC Construction & Decks also provides plans and permitting services and is known for backyard beautification projects. MG Construction & Decks has been rated as one of the top contractors in the Los Angeles area year after year.
This article has been viewed 43,578 times.
Shutters are a great way to upgrade the look of your house, whether you are replacing old ones or adding entirely new ones. Adding shutters to a wooden exterior is easier, but attaching them to brick isn't much more difficult with the right tools. You'll need to use a hammer drill and a masonry drill bit to make the holes in the wall, and either masonry wall anchors or shutter fasteners to hang the shutters.
Steps
Using Pilot Holes to Mark the Brick
-
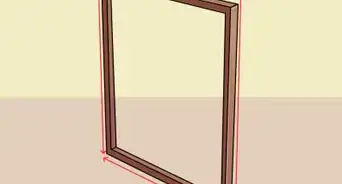
1Drill pilot holes for the screws into stationary shutters. You will need 1 pilot hole in each corner of each shutter. How far away you make the holes from the top, bottom, and side edges is up to you, but make sure that they are all even.[1]
- Use a regular drill and drill bit for this. Match the size of the drill bit to the screws that you will be using.
- Skip this step if you are using hinged shutters.
-
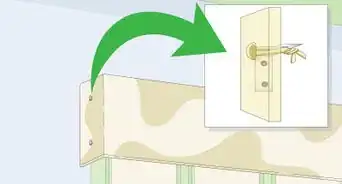
2Attach the hinges to shutters that open and close. Set the hinges against the left side edge of your first shutter. Use a regular drill and drill bit to drill the pilot holes through the screw holes. Insert the screws, then screw them into place. Repeat this step for the right side edge of your second shutter.[2]
- You can mark the pilot holes with a pencil first, set aside the hinges, then drill the holes.
- You will need 2 hinges per shutter: 1 towards the top edge and 1 towards the bottom edge.
- Skip this step if you are using stationary (decorative) shutters.
Advertisement -
3Place the first shutter against the wall. If you are attaching stationary shutters, start with just 1 shutter for now. Use a level to ensure that it is hanging straight; the air bubble should be between the 2 lines in the middle of the glass tube.
- If you are attaching your shutters with hinges, set both of them into the window frame in the closed position. Use wooden shims to keep them in place.[3]
-
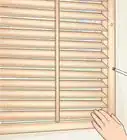
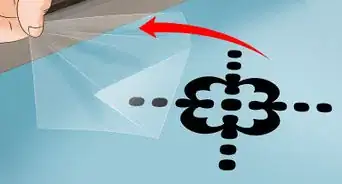
4Mark the brick through your hinge or shutter pilot holes. You can do this with a skewer dipped in paint or with a hammer drill and a masonry drill bit. If you are using the latter, choose a drill bit that is the same size as the screw hole.[4]
- You don't need to drill all the way into the brick wall; you just want to scuff the surface.
- If you are using pintle hinges, you will need to slide the pintle under the hinge and place it against the wall first.[5]
-
5Finish all of the pilot holes, then set the shutters aside. Do all of the pilot holes on your first hinge or shutter, then move onto the second shutter. If you set your hinged shutters in place with wooden shims, you can leave them in place; just remove the pintle so that you can see the pilot holes.


Drilling the Holes in the Wall
-
1Get a hammer drill and masonry drill bit. This is the key to making holes in a brick wall. A regular drill or drill bit won't cut it. Even if you add a masonry drill bit onto a regular drill, the regular drill may not be powerful enough to do the job.
- If you are attaching your shutters or hinges with screws, you'll need wall anchors too. Match the drill bit to the wall anchor, not the screw.
- You can use shutter fasteners to hang stationary shutters. Match the size of the drill bit to the screw part of your fastener.
-
2Drill the holes for the wall anchors, fasteners, or screws. Using your markings on the brick as a guide, make the holes with a hammer drill and masonry drill bit. Go slowly, and be sure to hold the drill steady so that the hole is straight, not crooked.[6]
- Allow the drill to continue spinning as you pull it out of the hole. This will help clear the brick dust out of the hole.
- The depth of the hole depends on the depth of the wall anchors, fasteners, or screws. Try to make it as accurate as possible. If it's too shallow, you'll meet resistance later on.
-
3Drill the holes deeper for a nicer finish on stationary shutters. There are 2 ways you can hang stationary shutters: with screws or with shutter fasteners. If you are using screws, you want to drill the holes deep enough into the wall so that the top of the screw falls about 1⁄4 inch (0.64 cm) below the surface of the shutter.[7]
- If you want to use shutter fasteners, you need to make them deep enough for the fastener, which you will be hammering in.[8]
- Shutter fasteners will appear as studs on the finished shutter.
-
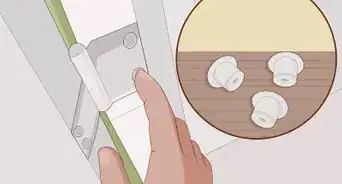
4Insert the wall anchors, if you are using them. Set your first wall anchor into your first pilot hole. Gently tap it into place with a hammer or mallet. Repeat this step for all of the pilot holes and anchors.[9]
- You do not need wall anchors for shutter fasteners. You can use wall anchors for stationary shutters with seamless screws, however.


Hanging Your Shutters
-
1Replace the shutters or pintles against the wall. If you removed your shutters earlier, pick 1 to start with, and position it against the wall. If you are using pintle hinge shutters, slide a pintle under 1 of the top hinges on your shutter.
-
2Insert the screws or shutter fasteners.[10] Start with the top holes in your hinge or shutter, then do the bottom holes. Once you finish the first shutter, move onto the second shutter.
- For hinges, drill the screws in until they meet with the surface of the hinge.
- For a seamless finish on stationary shutters, drill the screws until they are about 1⁄4 inch (0.64 cm) below the surface of the shutter.[11]
- If you are using shutter fasteners on stationary shutters, lightly tap the fasteners in with a hammer or mallet.[12]
-
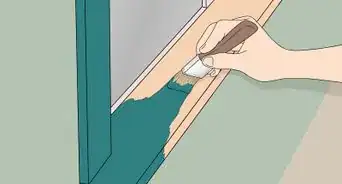
3Paint or stain stationary shutters, if desired. Cover the brick wall around each shutter with strips of painter's tape. Apply your desired paint or wood stain, then let it dry. Once it dries, peel the tape off.[13]
- If you screwed the stationary shutters in rather than using shutter fasteners, fill the holes in with wood putty first. Let the putty dry before painting the shutter.
- If you used shutter fasteners, you should paint over them so that they match the rest of the shutter.
-
4Add other accessories for hinged shutters, if needed. Some window shutters contain extra items, such as holdbacks. Once you have the shutters installed, you can add these extras. Remember to mark the pilot holes with pencil first, and to drill the holes into the brick with a hammer drill and masonry bit.[14]
- You can add these accessories to stationary shutters too, but they are not necessary.


Warnings
- Don't use the masonry drill bit on wood, or you could start a fire.[15]⧼thumbs_response⧽
Things You'll Need
- Shutters
- Hinges
- Screws or shutter fasteners
- Lead wall anchors (if using screws)
- Regular drill
- Hammer drill
- Regular drill bit
- Masonry drill bit
- Pencil
- Level
- Wood shims (optional)
- Helper (recommended)


References
- ↑ https://rainonatinroof.com/2017/11/how-to-hang-shutters-on-brick/
- ↑ https://www.thisoldhouse.com/how-to/how-to-install-shutters-brick-house
- ↑ https://www.thisoldhouse.com/how-to/how-to-install-shutters-brick-house
- ↑ https://rainonatinroof.com/2017/11/how-to-hang-shutters-on-brick/
- ↑ https://www.thisoldhouse.com/how-to/how-to-install-shutters-brick-house
- ↑ https://www.thisoldhouse.com/how-to/how-to-install-shutters-brick-house
- ↑ https://diy.blogoverflow.com/2012/07/first-time-diy-how-to-attach-wooden-shutters-to-brick/
- ↑ https://rainonatinroof.com/2017/11/how-to-hang-shutters-on-brick/
- ↑ https://www.thisoldhouse.com/how-to/how-to-install-shutters-brick-house
- ↑ Melissa & Michael Gabso. Remodel & Redesign Experts. Expert Interview. 7 October 2020.
- ↑ https://diy.blogoverflow.com/2012/07/first-time-diy-how-to-attach-wooden-shutters-to-brick/
- ↑ https://rainonatinroof.com/2017/11/how-to-hang-shutters-on-brick/
- ↑ https://diy.blogoverflow.com/2012/07/first-time-diy-how-to-attach-wooden-shutters-to-brick/
- ↑ https://www.thisoldhouse.com/how-to/how-to-install-shutters-brick-house
- ↑ https://diy.blogoverflow.com/2012/07/first-time-diy-how-to-attach-wooden-shutters-to-brick/
About This Article