This article was co-authored by Monique Capanelli. Monique Capanelli is a Plant Specialist and the Owner and Designer for Articulture Designs, an innovative design firm and boutique in Austin, Texas. With over 15 years of experience, Monique specializes in interior botanical design, living walls, event decor, and sustainable landscape design. She attended the University of Texas at Austin. Monique is a Certified Permaculture Designer. She provides plant and botanical design experiences, from small gifts to entire transformations, to shoppers as well as commercial clients including Whole Foods Market and The Four Seasons.
There are 22 references cited in this article, which can be found at the bottom of the page.
This article has been viewed 26,973 times.
Growing orchids from the roots is a way to turn a single plant into 2 or more plants. If you see your orchid growing roots above the soil, that's called a keiki (which means "baby" or "child" in Hawaiian). That bundle of roots is what's going to become your new orchid plant. It's very fragile, so separating it from the mother plant and giving it the right conditions will ensure you have a healthy, gorgeous new orchid. It takes 3 to 5 years for baby orchids to grow up and bloom, so be patient and attentive while your little orchid baby grows up!
Steps
Separating the Keiki from the Mother Plant
-
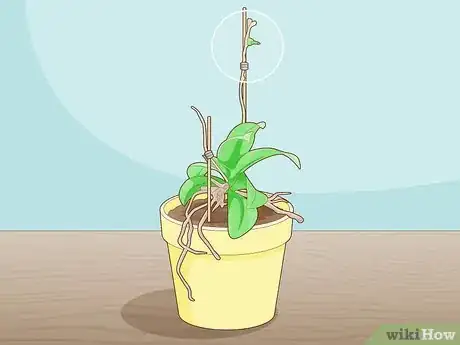
1Identify the keiki on the orchid. Keikis grow on the mother stem just above the root of the orchid. Look for a lot of stringy white tentacles coming off of the main stem of the plant—that's the baby plant you're going to propagate.[1]
- Phalaenopsis, Vanda, Dendrobium, and Catasetum are varieties of orchids that are most likely to grow keikis, but other varieties can grow them too.
-
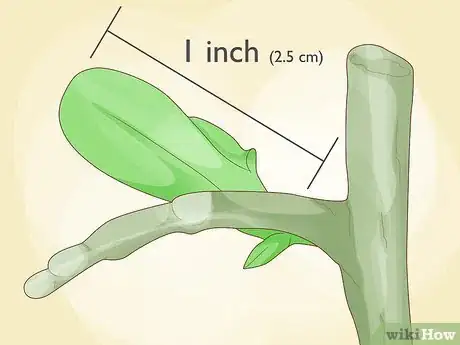
2Wait for the keiki to grow at least 1 inch (2.5 cm) long and sprout 2 leaves. Don't cut the keiki from the mother plant until you see it has its own little root system and at least 2 leaves. This usually happens when the keiki grows to be at least 1 inch (2.5 cm) long.[2]
- Be patient and continue watering your plant as usual.
- If your current orchid plant doesn’t have any keiki growing, you can apply keiki paste onto a node to encourage one to grow. You can buy keiki paste online, at a plant nursery (ideally one that specializes in orchids), or from most home improvement stores that have a garden section.[3]
Advertisement -
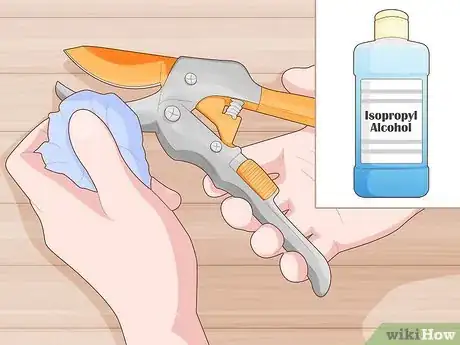
3Sanitize your clippers with isopropyl alcohol. Wet a cotton pad or paper towel with isopropyl alcohol. Rub the blades with the pad or towel, wiping away any grime or residue. This will ensure there’s no bacteria on the clippers that could harm the mother plant or the keiki.[4]
- Be sure to get the insides where the blades will meet the plant spike.
- You may want to wear gardening gloves to prevent accidentally cutting yourself.
-
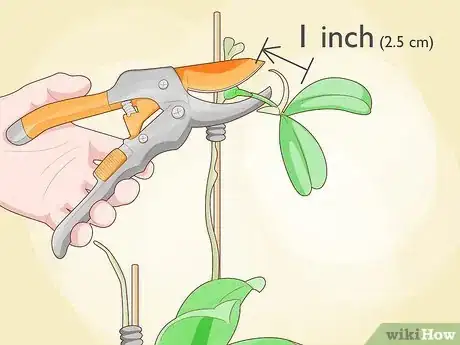
4Cut the stem just below the roots of the keiki. Use sharp clippers to cut the small budding plant off of the mother plant. Place the blade of your cutters at least 1 inch (2.5 cm) below the keiki's root system and snip it in 1 clean cut.[5]
- Don't snap, twist, or bend the keiki off of the main stem because that will damage the stem’s delicate structure.
- If the keiki grew near the base of the stem and has a long stem coming off of it, snip that off about 1 inch (2.5 cm) above the keiki’s root system. It’ll dry up anyway and may leech energy from the keiki while it’s trying to grow, so it’s best to get rid of it now.
-
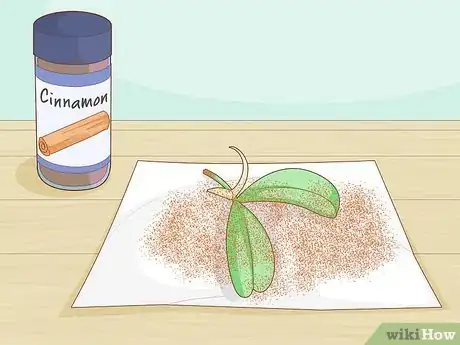
5Dip the end of the cut portion in cinnamon powder to sterilize it. Pour a pea-sized amount of cinnamon powder onto a paper towel. Hold the keiki by the leaves or another offshoot and dip the cut end into the cinnamon powder. [6]
- This will help heal the open wound on the stem and protect it from bacteria.
-
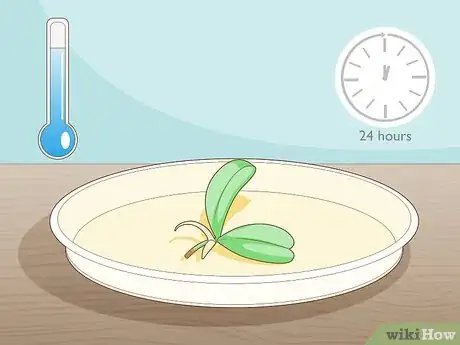
6Place the keiki in a cool, dry place for 24 hours. Put the keiki in a well-ventilated area for a day so the cut end of the stem can heal. It'll form a little nub or scab at the base when it's healed up and ready to be potted.[7]
- If you pot it right away, the cut end may start to rot in the potting mixture.
Potting the Keiki
-
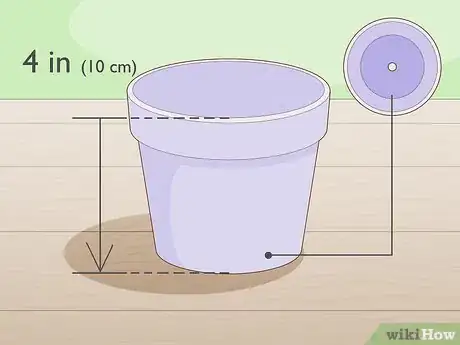
1Choose a small 4 in (10 cm) pot with a drainage hole. The keiki is little, so don't overwhelm it with a large pot. Pick a small, pint-sized pot until it grows big enough to graduate to an adult-sized planter.[8]
- If you have multiple keikis, make sure each one has their own small pot.
-
2Fill the pot 1/4 of the way full with sphagnum moss. Pull a handful of sphagnum moss out of the package it came in and pack it into the base of the pot. You can also use a potting soil made for orchids (which is usually a mixture of bark and coconut husk). If you’re using this premade mix, fill the pot up all the way.[9]
- Sphagnum moss or bark will allow lots of air to flow around the roots, so they’re the best potting mediums for aerial plants like orchids.
- Don’t pot the keiki (or any orchid) in regular potting soil because it will suffocate the roots and kill the plant.[10]
-
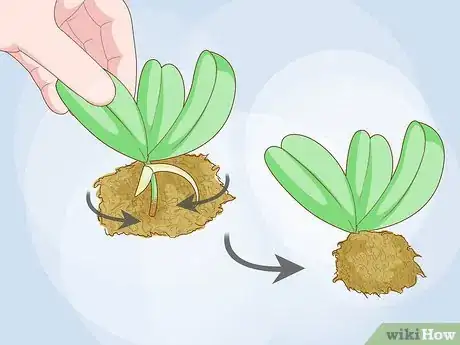
3Wrap the keiki with moss to form a bundle around the roots. Grab a handful of moss and bundle it around the roots of the keiki until the bundle looks slightly larger than pot. Use enough moss to hold it upright, but not so much that it'll be tightly packed into the pot.[11]
- Moss that's too tightly-packed won't allow for good airflow near the roots.
- If you're using bark, skip this step.
-
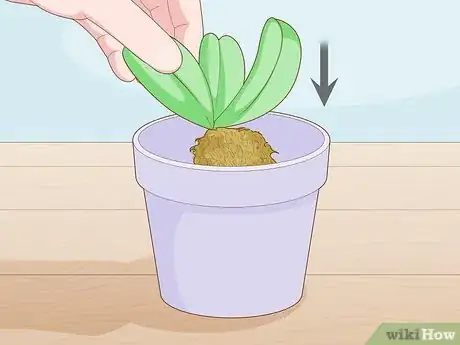
4Put the moss-wrapped ball into the pot with the leaves facing up. Place the keiki into the pot (with the root system facing down) and tamp down the moss with your fingers. Make sure it's not too tightly packed because too much moss will restrict airflow around the roots. It should feel nice and fluffy.[12]
- If you're using bark, simply place the root of the keiki (as is, no moss bundling necessary) into the pot and redistribute the bark so the keiki is held in place.
- If you poke the moss with your finger and it feels thick or solid, remove the keiki, thin out the moss bundle, and put it back in.
- You may want to label the pot with the species of orchid if you have more than 1 type so you can remember what kind it is and take care of it accordingly.
Watering the Baby Orchid
-
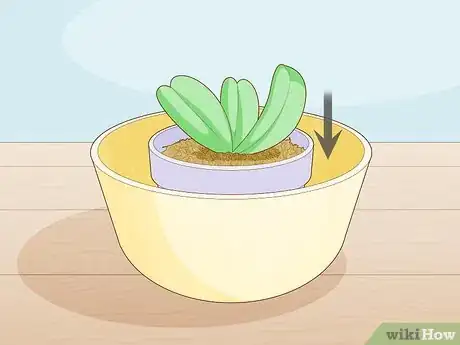
1Place the pot into a shallow bowl. Choose a bowl with a wide base so the pot can fit and still have some room around the sides. Make sure it's clean and free of dust or debris.[13]
- A cereal bowl is a good option.
-
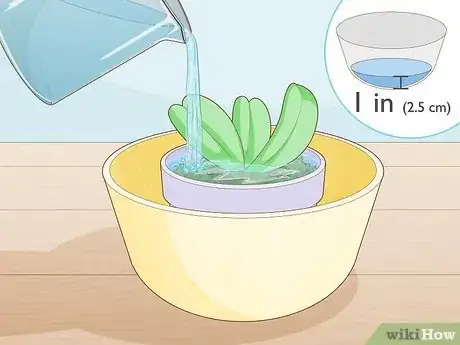
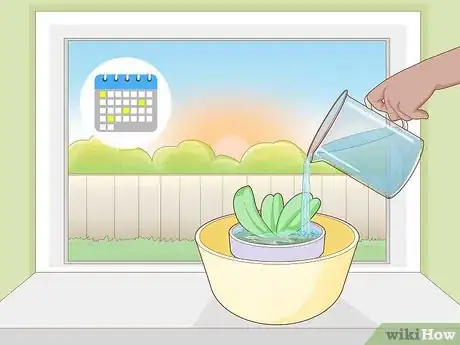
2Pour lukewarm water over the potting medium until 1 in (2.5 cm) pools in the bowl. Fill a pail with water and slowly pour it over the potting medium. Move the spout around to cover the most area around the plant. Keep pouring until you see water come out of the bottom of the pot and fill the bowl up by 1 inch (2.5 cm).[14]
- Don’t use cold water from the tap because it can be a little harsh for the fragile baby orchid.
-
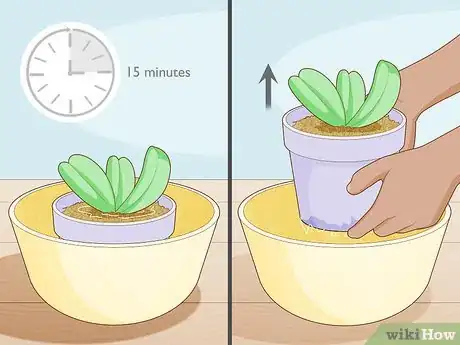
3Remove the pot from the water after 15 minutes. Lift the pot so all the water drains out into the bowl. You can also hold it over the sink. Place the pot on a dry ceramic dish or into a dry decorative pot to protect whatever table, windowsill, or other surface you plan to put it on.[15]
- Make sure there’s no extra moisture leaking out when you place it onto the dish or into the pot because orchids do not like wet feet!
-
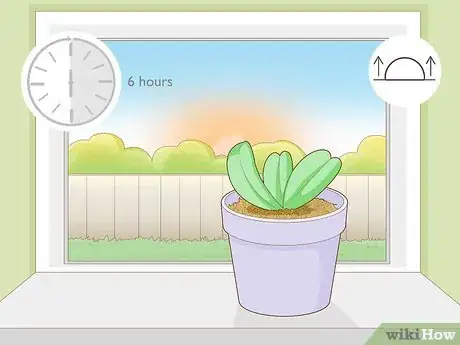
4Place the pot in an area that gets indirect morning or early evening sunlight. Too much sunlight can be too much for the baby orchid, so a windowsill that faces to the north or east is a good spot.[16] Avoid putting it anywhere that gets more than 6 hours of bright indirect sunlight a day—it can handle that later on when it's a strong adult plant but now it’d be too intense![17]
- Too little light will cause the plants to turn dark green, so move it to a sunnier spot if you see the leaves turning darker over the course of 1 or 2 weeks.
- Too much light can burn the leaves, so if you see any pale spots show up, move the orchid to a shadier place.
-
5Water the keiki once a week and don’t let it sit in water for longer than 15 minutes. Pour water onto the moss or bark in the pot—not on the leaves. Lukewarm or room-temperature tap water will do the trick. Make sure to place a water collection tray under the pot to catch the water and empty it out after 15 minutes.[18]
- It’s important to pour water onto the potting medium only because water can get into the crevices between the leaves and cause rotting over time.
- If your keiki is from a Brassia, Cattleya, Dendrobium or Oncidium orchid, plan to keep the potting mixture moist during growth periods (like Spring).
- Cymbidium, Miltonia, Odontoglossum, and Paphiopedilum varieties should stay lightly moist all the time, so stick your finger into the potting medium to feel for some amount of moisture every 5 days.
- Ascocenda, Phalaenopsis, and Vanda orchids need to dry out a little between waterings, so it's okay to withhold water for a day if the moss or bark feels dry.
-
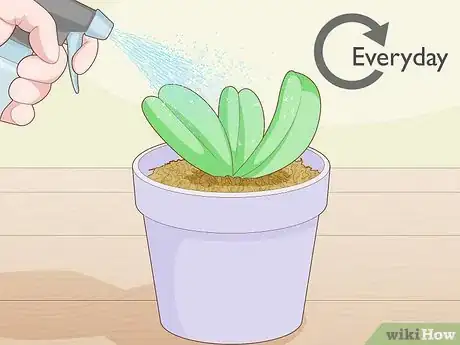
6Mist the leaves of the keiki every day if you like. Fill a spray bottle with water and spray 1 or 2 pumps onto the plant to mist it each day. This’ll add some humidity to the baby plant’s environment, which is just what orchids love![19]
- Don’t mist it with fertilizer because it will be too overwhelming for the plant and burn the leaves.
- You don’t have to do this, but it may help if you live in a super dry area.[20]
-
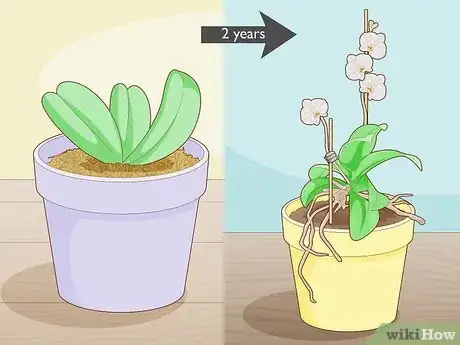
7Wait at least 2 years for your baby orchid to grow into an adult. It can take anywhere from 2 to 5 years for the baby to grow up and another 1 to 2 years for it to bloom, so be patient! Care for your growing orchid just like you would a fully grown plant, giving it weekly waterings and enough light to thrive.[21]
- If your keiki starts to grow aerial roots (above the moss or bark) after a while, don’t cut them off. Consider them as a backup in case the roots in the base of the planter die off.
Expert Q&A
-
QuestionWhere can I keep my orchid plant indoors?
 Monique CapanelliMonique Capanelli is a Plant Specialist and the Owner and Designer for Articulture Designs, an innovative design firm and boutique in Austin, Texas. With over 15 years of experience, Monique specializes in interior botanical design, living walls, event decor, and sustainable landscape design. She attended the University of Texas at Austin. Monique is a Certified Permaculture Designer. She provides plant and botanical design experiences, from small gifts to entire transformations, to shoppers as well as commercial clients including Whole Foods Market and The Four Seasons.
Plant Specialist You can keep it on an east-facing windowsill so that it gets consistent light and warmth.
 -
QuestionIs it okay to use rainwater for watering orchids?
 Monique CapanelliMonique Capanelli is a Plant Specialist and the Owner and Designer for Articulture Designs, an innovative design firm and boutique in Austin, Texas. With over 15 years of experience, Monique specializes in interior botanical design, living walls, event decor, and sustainable landscape design. She attended the University of Texas at Austin. Monique is a Certified Permaculture Designer. She provides plant and botanical design experiences, from small gifts to entire transformations, to shoppers as well as commercial clients including Whole Foods Market and The Four Seasons.
Plant Specialist Rainwater contains nutrients that satiate the plants. So it is good to use it for watering the plants.
Warnings
Things You'll Need
Separating the Keiki from the Mother Plant
- Adult orchid plant
- Garden clippers
- Paper towel or cotton pad
- Isopropyl alcohol
- Cinnamon powder
- Keiki paste (optional)
Potting the Keiki
- Small pot with a drainage hole
- Sphagnum moss (or bark/coconut husk potting soil for orchids)
Watering and Caring for the Keiki
- Shallow bowl
- Lukewarm water
- Water collection tray (for weekly waterings)
- Spray bottle (for misting, optional)
References
- ↑ https://youtu.be/OPNGthHw5IY?t=83
- ↑ https://youtu.be/MLrsskHxnAc?t=81
- ↑ https://youtu.be/eT7iGyQOOqM?t=258
- ↑ https://youtu.be/OPNGthHw5IY?t=198
- ↑ https://youtu.be/MLrsskHxnAc?t=98
- ↑ https://youtu.be/MLrsskHxnAc?t=155
- ↑ https://youtu.be/OPNGthHw5IY?t=287
- ↑ https://youtu.be/MLrsskHxnAc?t=175
- ↑ https://youtu.be/Uqf9TjZXSTU?t=117
- ↑ https://youtu.be/E7x7rFAF8BE?t=159
- ↑ https://youtu.be/Uqf9TjZXSTU?t=124
- ↑ https://youtu.be/Uqf9TjZXSTU?t=161
- ↑ https://youtu.be/Ps2PzjzJrfQ?t=186
- ↑ https://youtu.be/Ps2PzjzJrfQ?t=202
- ↑ https://youtu.be/XwsxyeLjdcA?t=160
- ↑ Monique Capanelli. Plant Specialist. Expert Interview. 22 September 2020.
- ↑ https://web.extension.illinois.edu/hortihints/0204d.html
- ↑ https://www.rhs.org.uk/advice/profile?pid=388
- ↑ https://web.extension.illinois.edu/hortihints/0204d.html
- ↑ Monique Capanelli. Plant Specialist. Expert Interview. 22 September 2020.
- ↑ https://hgic.clemson.edu/factsheet/orchids/
- ↑ https://youtu.be/pCOW1AIGEgo?t=287
- ↑ https://youtu.be/E7x7rFAF8BE?t=199
- ↑ https://web.extension.illinois.edu/hortihints/0204d.html
- ↑ https://youtu.be/E7x7rFAF8BE?t=88
