This article was co-authored by Ndeye Anta Niang. Ndeye Anta Niang is a Hair Stylist, Master Braider, and Founder of AntaBraids, a traveling braiding service based in New York City. Ndeye has over 20 years of experience in African hair including braiding box braids, Senegalese twists, crochet braids, faux dread locs, goddess locs, kinky twists, and lakhass braids. Ndeye was the first female of her tribe in Africa to move to America and is now sharing her knowledge of African braids passed on from generation to generation.
There are 16 references cited in this article, which can be found at the bottom of the page.
This article has been viewed 131,959 times.
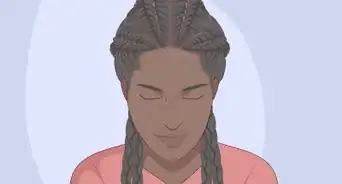
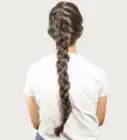
Just because you have shorter hair doesn’t mean you can’t enjoy the look of French braids! Learn how to create a single braid on the side of your head for a classy half-up style, or do reverse French braid pigtails for a fun look. Unless your hair is longer than 6 to 10 inches (15 to 25 cm), you probably won’t be able to do a single braid down the middle of your head, but you can do side-styles that are pretty and fashionable. By beginning with hair that hasn’t been washed in a day or so and using hairspray to help set your style, you can easily braid your short locks.
Steps
Making a Single Braid
-
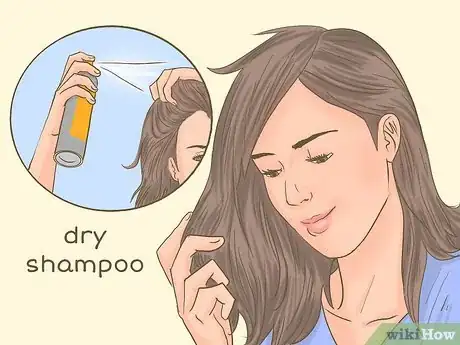
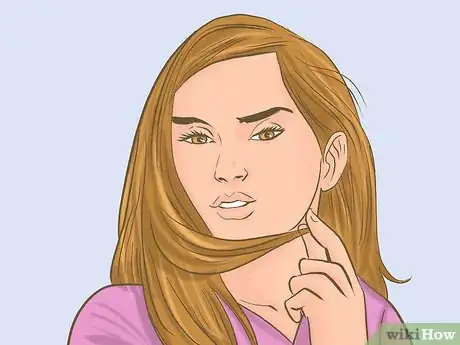
1Begin with dry hair that hasn’t been washed in 1 to 2 days. For best results, wait to braid your hair until it has been a day or so since you last washed it. If your hair gets really greasy between washes, try using dry shampoo. Before you begin to braid, brush your hair to remove any tangles.[1]
- Dry shampoo will also give your short hair a bit more texture, which makes it easier to grip as you braid it.
- If your hair is too clean, the strands of the braid may easily slip out and come undone.
-
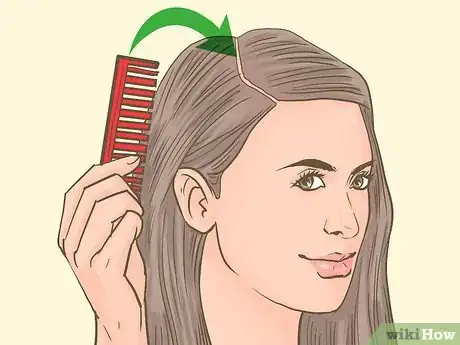
2Take a comb and create a side part on whichever side you prefer. Use a comb to divide your hair, and angle the part toward the middle of your scalp. Make a deeper part for more volume in your French braid.[2]
- Try out the part on both sides of your head to see which you like the best.
- Line up your part with the arch of your eyebrow for the most natural look.
Advertisement -
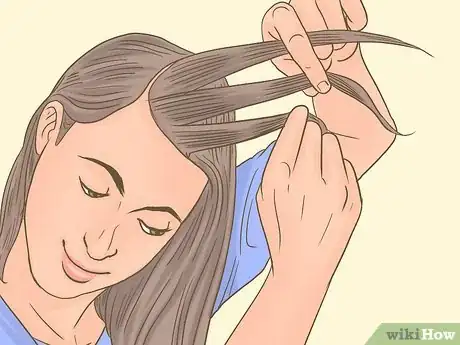
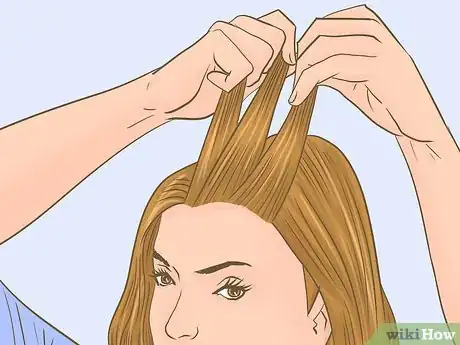
3Gather a section of hair along the part and divide it into 3 strands. Use the side of the part with the most hair to make your braid, and use the hair in the front to create your initial 3 strands.[3] Make each strand about 1 inch (2.5 cm) long. Hold each strand of hair between separate fingers so they don’t get mixed up.[4]
- For example, the first strand could go between your thumb and forefinger, the middle strand could go between the forefinger and middle finger, and the last strand could go between the middle finger and ring finger.
- The beginning of any French braid resembles a normal 3-strand braid.
-
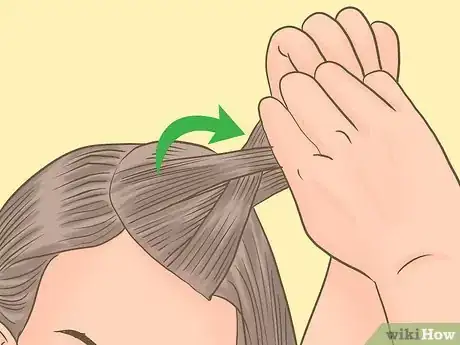
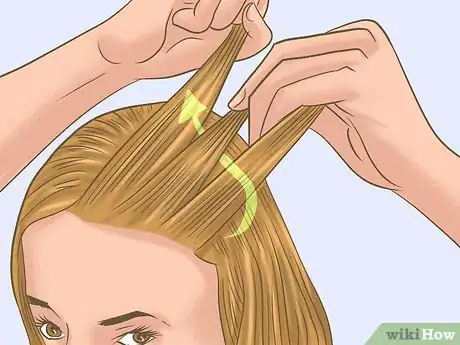
4Pass the front strand of hair over the middle strand of hair. Use the 1 inch (2.5 cm) section of hair that is at the front of your part. Cross it over the middle strand of hair, so that it becomes the new middle strand.[5]
- It can be helpful to remember that the outside strands of hair will always be braided in to become the middle strand. You’ll never cross an outside strand over the entire braid to mix with the other outside strand.
-
5Cross the back strand of hair over the new middle strand of hair. Keep the 3 strands of hair separate, and take a moment to make sure they are all secured between your fingers so you don’t accidentally drop a strand. Pass the back strand over the middle strand, so it, in turn, becomes the new middle strand.[6]
- You can make your braid as loose or as tight as you like. If you have really short hair, though, a tighter braid will help keep your strands in place and make them less likely to fall out.
- Keep in mind that you can always use bobby pins to tuck in any wayward strands after you’ve finished the braid.
-
6Add more hair to the front strand and cross it over the middle. Take the strand of hair that’s at the front of your head, and gather about 1 to 2 inches (2.5 to 5.1 cm) more hair to make the strand thicker. Pass the combined strand over top of the middle strand.[7]
-
7Gather more hair to the back strand and cross it over the middle one. Add 1 to 2 inches (2.5 to 5.1 cm) of hair from your part line to the back strand that you’ve been holding. Then take that strand and pass it over the middle one so it becomes the middle strand itself.[8]
- If you’re new to French braiding your hair, it’s okay if it takes a while to get the hang of the movements; just keep practicing!
-
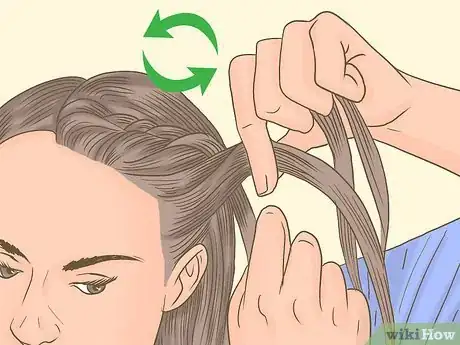
8Braid your hair toward the back of your head. Repeat the process of adding hair to the front and back strands and passing them over the middle strand to create your French braid. Move the braid at an angle so that it lines the middle of your parted section.[9]
- Keep the tightness of your braids the same as you go along so that it looks even.
-
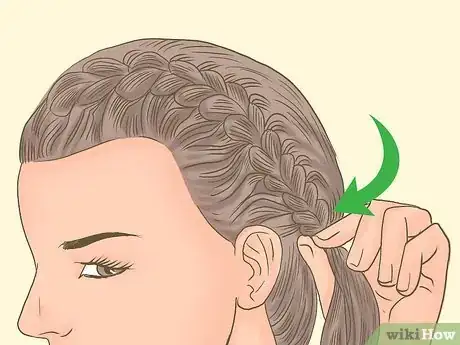
9Stop braiding when the end of the braid is level with your ear. Once your braid has reached about halfway down your head, you can stop braiding. End the braid right around where you would secure a half-ponytail.[10]
- While you could continue the braid to the base of your scalp, it may look odd since the other side of your hair is going to be left down. If your hair is longer than 1 to 2 inches (2.5 to 5.1 cm), braiding to your scalp might create a cute look, but very short hair may look weird.
-
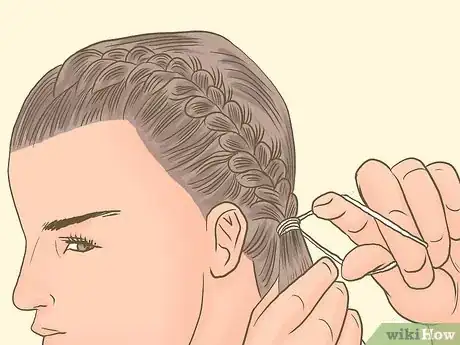
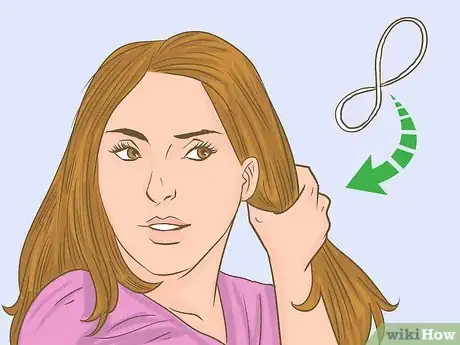
10Secure the braid to the hair beneath it with an elastic tie. To keep the braid from sticking out from your head, gather about 1 inch (2.5 cm) of hair from underneath and around the end of the braid. Secure the elastic tie around that hair and the braid so they’re combined together.[11]
- Choose a hair tie that matches your hair so it will blend in.
- You could also place several bobby pins across the end of the braid to secure it in place rather than using an elastic tie.
-
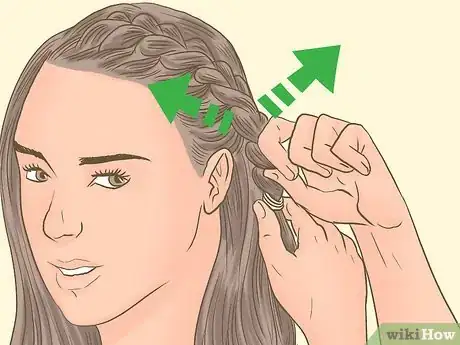
11Tug each section of the braid to give it more volume. Once the braid is secured, gently grasp and tug at each individual section, loosening the actual braid itself. Doing this adds volume to your braid. Try to keep each section even so that it looks uniform all the way down.[12]
- If your hair is really short and you’re worried about the sections coming undone if you tug them, you can simply place your fingertips over the braided section and gently shake them back and forth. This should create a little bit more volume without compromising the braids. However, it may also create some frizz.[13]
-
12Use hairspray on the braid to help keep the strands in place. If you have lots of flyaway hairs or short strands that you’re worried about staying in place, just spritz some hairspray over the braid and let it dry. Style the rest of your hair as normal.[14]
- You could straighten your hair or create curls.
Creating Reverse French Braid Pigtails
-
1Start with dry hair that hasn’t been washed in 1 to 2 days. Use slightly dirty hair to help your braids stay in place better. If you need to, use dry shampoo to absorb grease when you can’t shower. Additionally, the dry shampoo can even give your hair some more texture, which will make it easier to braid.[15]
- Clean hair might be too slippery to stay in place in the braids. This is especially true for straight or fine hair.
-
2Use a comb to part your hair down the middle. Take your comb and line it up lengthwise with the middle of your forehead. Bring the comb back, creating a straight line down the middle of your scalp and pull it through all the way to the base at the back.[16]
- For a more natural look, use your fingers instead of a comb.
-
3Tie off one side of the hair to keep it out of the way. Gather all the hair on one side of your part. Use an elastic tie to create a loose pigtail.[17]
- If you leave all your hair loose after you’ve made your part, you’ll probably lose the part and accidentally get hair from one side of your head in the wrong braid.
-
4Divide the hair at the front of your head into 3 sections. Start your braid on the side with loose hair. Create three 1 inch (2.5 cm) strands, and hold each strand between separate fingers to keep them apart.[18]
- To start any French braid, you simply begin with a normal 3-strand braid.
-
5Cross the first section of hair under the middle section of hair. Carefully pass the strand of hair that is closest to your face underneath the middle section. Keep the sections of hair separate from each other.[19]
- For the classic French braid, simply cross your sections of hair over the middle section, rather than under.
-
6Pass the back section of hair under the new middle section of hair. Take the strand of hair that is furthest away from your face, and pass it underneath the middle section to create the first full pass of your braid. Take your time so you don’t accidentally mix the strands together.[20]
- If you have really short hair, make your braids as tight as possible. This will help the strands stay in place.
-
7Add hair to the strand in the front and pass it under the middle strand. Gather about 1 to 2 inches (2.5 to 5.1 cm) of hair from the front of your hairline, and add it to the front strand. Take that strand of hair, and pass it underneath of the middle strand of hair.[21]
- Adding hair to each strand as you braid gives your reverse French braids more volume, and it incorporates all the hair on your head nicely.
-
8Join hair to the strand in the back and cross it under the middle section. Take 1 to 2 inches (2.5 to 5.1 cm) of hair from along your part line, and add it to the back strand of hair. Take that back strand, and cross it underneath of the middle strand of hair.[22]
- If you find yourself getting confused, that is okay! Just take your time and remember that you can always start over if you need to. It takes time to learn how to French braid.
-
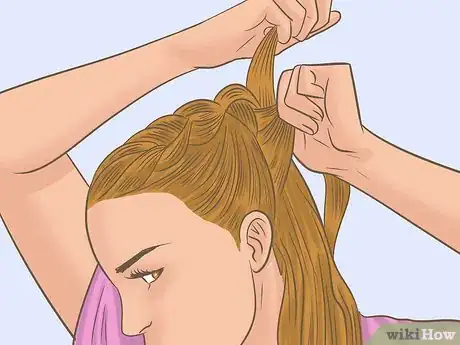
9Repeat this process until you reach the base of your scalp. Continue gathering more hair from your hairline and from the part line and adding them to your strands of hair. Braid your hair back until you reach the nape of your neck.[23]
- Use both of your hands as you braid, but remember to keep each strand of hair separated from the other ones.
-
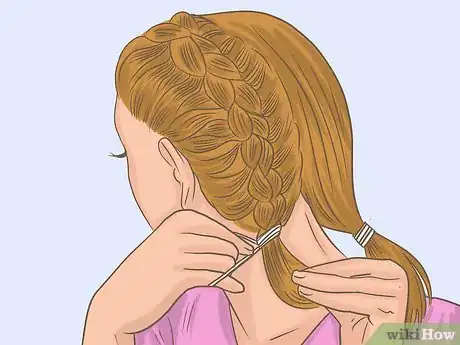
10Create a mini pigtail by securing an elastic tie around your hair. Use a tie and secure your pigtail close to the base of your head. Keep that position in mind as you move on to braid the next side so you can make your braids look even.[24]
- Normally, the ponytail section of the braid would be braided, too. But with short hair, it’s going to turn out better if you just put it into a ponytail, or even a small messy bun.
-
11Complete the braiding process again on the other side of your head. Take the rest of your loose hair, and braid it the same way you did the first side. Remember to take your time, and try to keep the spacing of your strands even to what you did on the first side.[25]
- Keep your braids tight so they don’t come loose.
-
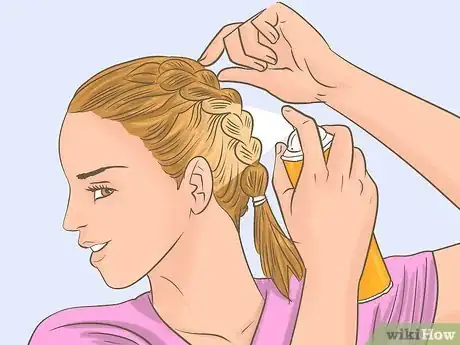
12Spray some hairspray over your braids to help them stay in place. If you have flyaways or short strands of hair that you’re concerned about, just spray a little bit of hairspray overtop of each braid. Keep your hands from getting sticky by letting the hairspray dry before you touch your braids again.[26]
- If you’re going to be out running around, bring a miniature can of hairspray with you so you can fix any sections that come loose during the day.
Expert Q&A
Did you know you can get premium answers for this article?
Unlock premium answers by supporting wikiHow
-
QuestionWhat is a fishtail braid?
 Ndeye Anta NiangNdeye Anta Niang is a Hair Stylist, Master Braider, and Founder of AntaBraids, a traveling braiding service based in New York City. Ndeye has over 20 years of experience in African hair including braiding box braids, Senegalese twists, crochet braids, faux dread locs, goddess locs, kinky twists, and lakhass braids. Ndeye was the first female of her tribe in Africa to move to America and is now sharing her knowledge of African braids passed on from generation to generation.
Hair Stylist & Master Braider It's actually the same thing as a French braid, except you add a step. While the French braid uses 3 strings along a sequence, with the fishtail you keep layering the strings over one another with a stop after every 2 strings. Then, you regather the 2 together and layer those together. It's just a slightly different process.
 -
QuestionHow long do short French braids last?
 Ndeye Anta NiangNdeye Anta Niang is a Hair Stylist, Master Braider, and Founder of AntaBraids, a traveling braiding service based in New York City. Ndeye has over 20 years of experience in African hair including braiding box braids, Senegalese twists, crochet braids, faux dread locs, goddess locs, kinky twists, and lakhass braids. Ndeye was the first female of her tribe in Africa to move to America and is now sharing her knowledge of African braids passed on from generation to generation.
Hair Stylist & Master Braider
-
QuestionHow do you do a double French braid?
 Ndeye Anta NiangNdeye Anta Niang is a Hair Stylist, Master Braider, and Founder of AntaBraids, a traveling braiding service based in New York City. Ndeye has over 20 years of experience in African hair including braiding box braids, Senegalese twists, crochet braids, faux dread locs, goddess locs, kinky twists, and lakhass braids. Ndeye was the first female of her tribe in Africa to move to America and is now sharing her knowledge of African braids passed on from generation to generation.
Hair Stylist & Master Braider
Things You’ll Need
Making a Single Braid
- Comb
- Elastic bands
- Hairspray (optional)
- Bobby pins (optional)
- Dry shampoo (optional)
Creating Reverse French Braid Pigtails
- Comb
- Elastic bands
- Hairspray (optional)
- Dry shampoo (optional)
References
- ↑ https://youtu.be/joRnbEYTXtk?t=30
- ↑ Ndeye Anta Niang. Professional Hair Stylist & Master Braider. Expert Interview. 10 January 2020.
- ↑ Ndeye Anta Niang. Professional Hair Stylist & Master Braider. Expert Interview. 10 January 2020.
- ↑ https://youtu.be/wiFTn4eghDg?t=65
- ↑ https://youtu.be/wiFTn4eghDg?t=77
- ↑ https://youtu.be/wiFTn4eghDg?t=84
- ↑ https://youtu.be/wiFTn4eghDg?t=100
- ↑ https://youtu.be/wiFTn4eghDg?t=107
- ↑ https://youtu.be/wiFTn4eghDg?t=130
- ↑ https://youtu.be/wiFTn4eghDg?t=196
- ↑ https://youtu.be/wiFTn4eghDg?t=206
- ↑ https://youtu.be/wiFTn4eghDg?t=216
- ↑ https://youtu.be/joRnbEYTXtk?t=352
- ↑ https://youtu.be/joRnbEYTXtk?t=400
- ↑ https://youtu.be/joRnbEYTXtk?t=30
- ↑ https://abeautifulmess.com/2016/09/double-dutch-pigtails-for-short-hair.html
- ↑ https://abeautifulmess.com/2016/09/double-dutch-pigtails-for-short-hair.html
- ↑ https://abeautifulmess.com/2016/09/double-dutch-pigtails-for-short-hair.html
- ↑ https://abeautifulmess.com/2016/09/double-dutch-pigtails-for-short-hair.html
- ↑ https://abeautifulmess.com/2016/09/double-dutch-pigtails-for-short-hair.html
- ↑ https://abeautifulmess.com/2016/09/double-dutch-pigtails-for-short-hair.html
- ↑ https://abeautifulmess.com/2016/09/double-dutch-pigtails-for-short-hair.html
- ↑ Ndeye Anta Niang. Professional Hair Stylist & Master Braider. Expert Interview. 10 January 2020.
- ↑ https://abeautifulmess.com/2016/09/double-dutch-pigtails-for-short-hair.html
- ↑ https://abeautifulmess.com/2016/09/double-dutch-pigtails-for-short-hair.html
- ↑ https://youtu.be/joRnbEYTXtk?t=400
- ↑ https://youtu.be/joRnbEYTXtk?t=68
- ↑ https://youtu.be/joRnbEYTXtk?t=441
About This Article
To create a single French braid with short hair, start by creating a side part. Gather a section of hair from the front of the side that has more hair so you can break it into 3 strands. Pass the front strand of hair over the middle strand, then cross the back strand over the new middle strand of hair. Once you finish one plait, add more hair to the front strand and cross it over the middle again. Continue to gather more hair into each section as you braid your hair toward the back of your head. Secure your braid with an elastic band right around ear level. To learn how to create reverse French braid pigtails, keep reading!
