wikiHow is a “wiki,” similar to Wikipedia, which means that many of our articles are co-written by multiple authors. To create this article, volunteer authors worked to edit and improve it over time.
There are 9 references cited in this article, which can be found at the bottom of the page.
wikiHow marks an article as reader-approved once it receives enough positive feedback. In this case, 90% of readers who voted found the article helpful, earning it our reader-approved status.
This article has been viewed 57,497 times.
Learn more...
Walnut oil is a wonderful addition to certain foods, your skin care regimen and even your medicine cabinet. However, it tends to get pricey because of its limited production. Luckily, if you have a few small kitchen tools, you’ll be able to produce your own batch of walnut oil from home.
Ingredients
- 8 lbs of walnuts
Steps
Shelling the Walnuts
-
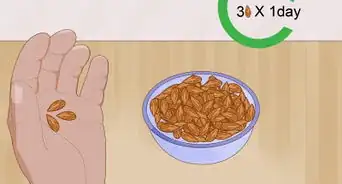
1Buy or collect 8 lbs of whole walnuts in the shell. These are your freshest option. The freshness of your walnuts will ultimately determine how much oil you will extract.
-
2Crack open the walnut. Using a hinged nutcracker, place the whole nut between the two metal hinges and squeeze tightly. [1]Advertisement
-
3Remove the meat. Separate the walnut meat from the shell, including the thin seed jacket. Don't worry about breaking the meat, as you will be grinding it in the next part.
-
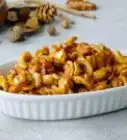
4Place walnut meat in a bowl. Collect your shelled walnuts in a bowl as you go, and throw out the shells.


Grinding the Walnuts
-
1Prepare your grinder. The walnuts should be ground using a meat grinder, a food processor, or even a Nutribullet, whichever you have access to.[2]
- When using a food processor or Nutribullet, make sure blades and nuts are at a cool room temperature before grinding. This will prevent overheating, and keep the nuts from turning into a paste.[3]
-
2Put a cup of walnuts at a time into your machine. It's important not to overfill food processors, as this will cause an uneven consistency during processing.[4]
-
3Grind the walnuts. “Pulse” grind your walnuts by turning your machine on for a couple of seconds and then off again.
-
4Repeat. Continue the pulse method of grinding until your walnut meat is a fine nut meal consistency.
- Do not blend continuously, or the oils will release too soon.[5]
-
5Place ground walnuts in a clean bowl. After grinding a cup of the meat, put it aside in a bowl while continuing to grind the remaining walnuts.


Cooking the Meat
-
1Pour the walnut meal into a pot. Pour your ground walnuts into a pot big enough for you to add water and still stir comfortably without spilling.
-
2Add water. Pour just enough water into the pot to cover walnut meat.
-
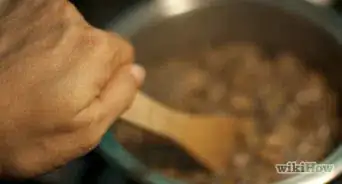
3Simmer for approximately 45 minutes. While the mixture is heating, it needs to be stirred continuously. Once the moisture has evaporated, it is ready to be pressed.


Pressing the Walnuts
-
1Learn your oil press. Every oil press is different. Some presses don't require the grinding step, while others don't require heating. Make sure you know what type of press you’ll be using in advance, and follow the instructions for your appliance.
-
2Place a clean bowl under your press. Have a clean container prepared to catch the oil as you’re pressing.
-
3Press the walnuts. Following the directions on your appliance, begin putting small amounts of the heated walnut meat into the press and squeeze until you get oil. [6]
- Once you’ve gone through all of your walnuts you should have approximately two quarts of oil, depending on the quality of your nuts.


Filtering the Oil
-
1Rinse the cheesecloth. Run the cheesecloth under cold water to remove any lint that may be stuck.
-
2Place the cheesecloth inside a colander or funnel. Shake open the cheesecloth and line the inside of your colander/funnel with it. The cheesecloth is doing the filtering, but the colander/funnel gives structure, making the process easier.[7]
-
3Place the funnel or colander over your pitcher. A pitcher will make it easier to dispense into bottles for storing.
-
4Pour the oil into the pitcher. Take the bowl of oil you caught from the press and pour the oil through the cheesecloth colander/ funnel and into the pitcher. The cheesecloth will catch any debris remaining in the oil.


Bottling the Oil
-
1Choose your bottles. Use small to medium sized brown or stainless steel bottles. These are better at protecting the oil from heat or damaging light. [8]
-
2Bottle the oil. Dispense the pitcher of oil into your chosen bottles.
-
3Seal the bottle. When you’ve filled a bottle, make sure to seal it to maintain freshness.
-
4Label the bottle. Put the date of production on your bottles, so you always have a time reference when you use it.
-
5Refrigerate the oil. Refrigeration is the best step in prolonging the life of your walnut oil.
- Walnut oil will be fresh for about two to three months.[9]


Things You'll Need
- 3 bowls
- Nutcracker
- 1 pitcher
- Meat grinder, food processor or Nutribullet
- Oil press
- Cheesecloth
- Colander or funnel
- Storage bottles that seal.


References
- ↑ https://delishably.com/misc/What-is-most-efficient-way-to-crack-walnuts
- ↑ https://www.reference.com/home-garden/can-nutribullet-replace-food-processor-b438d71f1d1e0729
- ↑ https://food52.com/blog/9162-how-to-make-your-own-nut-flours-without-making-nut-butter
- ↑ http://articles.sun-sentinel.com/1992-02-06/features/9201070236_1_abby-mandel-processor-three-common-mistakes
- ↑ https://www.goodhousekeeping.co.uk/institute/cookery-videos/nuts/how-to-grind-nuts
- ↑ http://oilypedia.com/how-to-make-walnut-oil-a-step-to-step-guide/
- ↑ https://www.leaf.tv/articles/how-to-strain-with-a-cheesecloth/
- ↑ http://www.recipetips.com/kitchen-tips/t--1193/oils-and-fats-handlingsafetystorage.asp
- ↑ http://www.recipetips.com/kitchen-tips/t--1193/oils-and-fats-handlingsafetystorage.asp