This article was co-authored by wikiHow staff writer, Amy Bobinger. Amy Bobinger has been a writer and editor at wikiHow since 2017. She especially enjoys writing articles that help people overcome interpersonal hurdles but frequently covers a variety of subjects, including health and wellness, spirituality, gardening, and more. Amy graduated with a B.A. in English Lit from Mississippi College in 2011 and now lives in her hometown with her husband and two young sons.
There are 13 references cited in this article, which can be found at the bottom of the page.
This article has been viewed 34,016 times.
Learn more...
Walnuts are a versatile nut that you can enjoy plain, toasted, candied, or added to your favorite dish. From savory dishes to desserts, this heart-healthy nut can lend its distinctive flavor and texture to any number of different foods. Whether you want to shell your own nuts or you’re trying to liven up a familiar recipe, you’re sure to find a way to enjoy eating walnuts!
Ingredients
- 1 pound (450 g) walnut halves
- 1 cup (340 g) white sugar
- 2 tsp (5.2 g) ground cinnamon
- 2 tsp (11.4 g) salt
- 6 tablespoons (89 mL) milk
- 1 teaspoon (4.9 mL) vanilla extract
Steps
Adding Walnuts to Your Favorite Recipes
-
1Add chopped walnuts to the top of a salad. Walnuts add a delicious, heart-healthy crunch when you add them as a salad topping. Whether you’re using toasted, candied, or raw walnuts, or you’re having a caesar, kale, or Waldorf salad, toss on a handful and enjoy!
- Walnuts are especially tasty when added to a salad that’s been topped with warm grilled chicken or veggies.[1]
-
2Top your canapes with walnuts. If you’re hosting an event and you’re serving small bites, walnuts can be a great way to add a new twist to some of your favorites. Try making tarts topped with goat cheese and candied walnuts, or serve a crostini with brie, prosciutto, and toasted walnuts.[2]Advertisement
-
3Mix walnuts into a recipe for homemade bread. Whether you're making bread for sandwiches or a sweet dessert bread, walnuts are a hearty addition to almost any loaf. Just mix in a couple of handfuls of walnuts after the dough has risen.[3]
- Banana bread and pumpkin bread both taste great with walnuts added!
-
4Use walnuts in place of the crust on your favorite meat dishes. Baked chicken, fish, and pork all can benefit from a hearty, crunchy crust made with walnuts. You can use walnuts on their own, or mix them with a breading like panko breadcrumbs.[4]
- You can also sprinkle toasted walnuts on top of savory meat dishes for an added crunch.
-
5Stir walnuts and fruit into a cup of Greek yogurt for a healthy treat. Just because you’re eating healthy doesn’t mean you can’t still enjoy a tasty snack! Add walnuts and your favorite fruit to a cup of plain Greek yogurt for a sweet treat you won’t feel guilty about.[5]
- If you prefer your yogurt to be a little sweeter, add a drizzle of honey on top of the fruit and walnuts!
-
6Mix walnuts into all of your favorite desserts. Walnuts can add an extra layer of texture and flavor to almost any dessert, including cookies, brownies, tarts, and bars. You can even put them on top of a cake for a tasty decoration![6]


Toasting Walnuts in the Oven
-
1Preheat your oven to 350 °F (177 °C). Since toasting walnuts doesn’t take very long, it’s a good idea to make sure your oven is all the way up to temperature before you begin. Furthermore, since walnuts are delicate, a gentle baking temp of about 350 °F (177 °C) is essential to make sure they don’t burn while you’re toasting them.[7]
-
2Toss the shelled walnuts in oil and seasoning if you like. Although it’s not necessary, you can add a little olive oil or clarified butter to the walnuts before you toast them to add flavor. In addition, you can toss the nuts in your choice of seasonings, but don’t go overboard, since you want the flavor of the walnuts to come through.[8]
- Try tossing the walnuts in a little salt, then add either cinnamon for a smoky sweet flavor, or cayenne pepper for savory and spicy nuts.
-
3Spread the walnuts on a rimmed baking sheet in a single layer. If you crowd the walnuts too much in the pan, they won’t brown evenly, so make sure that none are sitting on top of each other. If you need to, use more than one baking sheet.[9]
- For quick and easy cleanup, line your baking sheet with parchment paper before you add the walnuts.
-
4Toast the walnuts in the oven for 8-10 minutes, stirring occasionally. Your walnuts will burn quickly if you’re not watching them, so stay close while they’re in the oven. Several times during the cooking process, shake the pan or stir the walnuts with a long-handled spoon. This will help the walnuts brown evenly.[10]
- The walnuts should be about 1 shade darker than they started when they’re finished toasting.
-
5Let the walnuts cool and enjoy! You can serve your toasted walnuts plain, add them to your favorite savory dish or salad, or incorporate them in a delicious dessert! If you have any leftovers, store them in an airtight container for up to a week.
- You can keep walnuts in an airtight container in the freezer for 1-2 years.[11]


Toasting Walnuts on the Stovetop
-
1Toss the walnuts in butter and seasonings if you prefer. You don’t need any oil to toast your walnuts on the stovetop, but you can toss them in 1–2 teaspoons (4.9–9.9 mL) clarified butter to add a little extra flavor. In addition, you can sprinkle them with salt or other seasonings if you like, although this is also up to you.[12]
- For a sweet-and-spicy combo, toss the walnuts in butter and a pinch of cayenne pepper before you toast them, then toss them in a little sugar after you’re done.
-
2Add walnuts to a heavy-bottomed skillet over medium heat. A heavy skillet helps distribute heat more evenly, so you won’t have hot spots where some walnuts cook faster than others. Let the skillet get hot first, then add the nuts to the pan.[13]
- A cast-iron skillet is great for toasting walnuts, but any heavy skillet will work.
-
3Toast the walnuts for 2-5 minutes. Toasting walnuts–or any nuts–on the stovetop can be difficult because they go from almost-done to burnt with little warning. Watch the walnuts carefully while they’re cooking, and stir frequently. Take them off the heat immediately when they are done.[14]
- The walnuts will be about 1 shade darker than they started, and they should have a fragrant, nutty smell.
-
4Remove from the heat, cool, and enjoy! You can use your toasted walnuts in as many ways as your imagination will let you, or you can just put them into a bowl and have them for a snack! If you don’t use them all right away, place them into an airtight container, where they’ll keep for about a week.[15]
- If you need to store the walnuts longer, you can place the airtight container into the freezer, where they’ll stay good for 1-2 years.


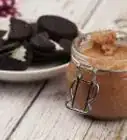
Making Candied Walnuts
-
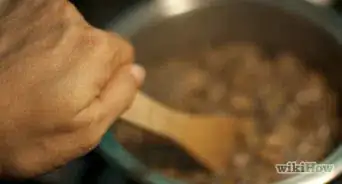
1Heat sugar, cinnamon, salt, and milk in a medium saucepan. This will be the basis for the caramel that candies your walnuts. Heat the mixture over medium-high heat for 8 minutes. The mixture should be at soft-ball stage, or about 236 °F (113 °C).[16]
- In soft-ball stage, if you drop a small amount of syrup into cold water, then roll the syrup with your fingers, you’ll find that it forms a ball that is soft and easily flattened under pressure.
- Add a generous pinch of cayenne if you want a spicy-sweet candied walnut.
-
2Remove your saucepan from the heat and stir in the vanilla. The mixture will start to harden as soon as it cools, so stir in your vanilla right away. This should leave you with a sweet-smelling caramel syrup that you can still stir around.[17]
- If you like, you can experiment with other flavorings, like orange or peppermint extract.
-
3Stir the walnuts into the syrup. Keep mixing until you’re sure all of the walnuts are fully coated. Remember, the mixture will be cooling, so you’ll need to do this step quickly or the nuts will get stuck to the saucepan.[18]
-
4Spoon the nuts onto waxed paper and separate with a fork right away. If you leave the walnuts piled together, they’ll harden that way, leaving you with a sticky clump that’s hard to eat. As soon as you move the walnuts to the waxed paper, spread them out so none of the nuts are touching each other.[19]
- Waxed paper will keep the caramel from sticking to the surface when it cools, and it will also make cleanup easier.
-
5Let cool, then serve them or store them in airtight containers. Candied walnuts, like their toasted counterparts, will stay good in airtight containers for about a week, but these are so good that they probably won’t last that long![20]
- Candied walnuts are a delicious addition to salads and desserts, or you can enjoy them by themselves as a snack.
- If you’re making candied walnuts near the holidays, place some in a decorative bag and tie it with a pretty ribbon for an easy last-minute hostess gift.


Removing the Shells from Whole Walnuts
-
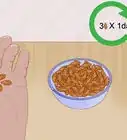
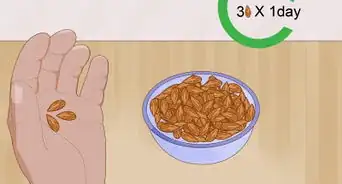
1Soak whole walnuts in water for about 1-2 hours to soften them. Place the whole walnuts in a large bowl or bucket, then fill it up with water so the walnuts are completely covered. Soaking the walnuts will make them easier to crack, and you’ll have better luck getting the meat out whole.[21]
- For best results, start with hot water.
-
2Dry the nuts off with a clean towel after soaking them. You won't get all of the water out of the shells, but drying off the surface of the walnuts will help keep them from slipping while you're trying to open the nuts. Use a clean towel so you don't deposit any germs onto the walnut shells.
-
3Place the walnut in a nutcracker if you have one. Walnuts are one of the toughest nuts to crack, so you’ll need some kind of a tool to help you. If you have a nutcracker, place the whole walnut inside and pull the lever or turn the knob that operates the nutcracker’s mechanisms.[22]
- If using the nutcracker doesn’t work at first, try again with a little more force.
- You can also place the walnut into a vice grip and turn the vice until the walnut shell splits.
-
4Hit the walnut with a hammer if you don’t have a nutcracker or a vice grip. Place the walnut on a flat surface with the pointed end facing up, and strike the top of the nut with the hammer until it cracks along its outside edge.[23]
- Opening walnuts with a hammer frequently leads to smashed fingers, so if you have another way of opening the nut, you might want to try that first. If you do use this approach, do so with caution.
-
5Pull the walnut shell apart with your fingers. Once the shell splits, use your hands to open the nut the rest of the way. This will help prevent the fragile walnut meat inside from breaking into smaller pieces.[24]
-
6Slide a nutpick under the meat to remove it. A nutpick is a thin, sharp tool used for removing the insides of nuts from the shells. Carefully slide it under the walnut meat, working it around the shell until the meat comes free.[25]
- If you don’t have a nutpick, use a small knife or an icepick instead.
- Once you've shelled the walnuts, you can enjoy them raw, cook with them, place them in an airtight container.
- Walnuts will keep in the pantry for 2-4 weeks, the refrigerator for up to a year, and the freezer for up to 2 years.[26]


Things You'll Need
Oven-Toasting Walnuts
- Oil, butter, salt, seasonings (optional)
- Rimmed baking sheet
- Parchment paper (optional)
- Oven
- Spoon for stirring
Toasting on the Stove
- Oil, butter, salt, seasonings (optional)
- Skillet
- Spoon
- Stove
Candying Walnuts
- Roasted walnuts
- Pan
- Spoon
- Wax paper
- Fork


References
- ↑ https://walnuts.org/recipe/kale-apple-pancetta-and-walnut-salad-with-creamy-walnut-dressing/
- ↑ https://walnuts.org/recipes/?
- ↑ https://www.kingarthurflour.com/recipes/walnut-bread-recipe
- ↑ https://www.bbc.com/food/recipes/loin_of_pork_with_00990
- ↑ https://walnuts.org/recipe/olive-cheese-ball-with-parmesan-toasted-walnuts/
- ↑ https://walnuts.org/recipes/?
- ↑ https://www.culinaryhill.com/how-to-toast-walnuts/
- ↑ https://www.culinaryhill.com/how-to-toast-walnuts/
- ↑ https://walnuts.org/recipe/toasted-walnuts/
- ↑ https://walnuts.org/recipe/toasted-walnuts/
- ↑ http://www.eatbydate.com/proteins/nuts/how-long-do-nuts-last-shelf-life-expiration-date/
- ↑ https://www.culinaryhill.com/how-to-toast-walnuts/
- ↑ https://www.culinaryhill.com/how-to-toast-walnuts/
- ↑ https://www.culinaryhill.com/how-to-toast-walnuts/
- ↑ https://www.culinaryhill.com/how-to-toast-walnuts/
- ↑ https://www.allrecipes.com/recipe/9443/dawns-candied-walnuts/
- ↑ https://www.allrecipes.com/recipe/9443/dawns-candied-walnuts/
- ↑ https://www.allrecipes.com/recipe/9443/dawns-candied-walnuts/
- ↑ http://www.kitchennostalgia.com/desserts/candied-walnuts.html
- ↑ https://www.allrecipes.com/recipe/9443/dawns-candied-walnuts/
- ↑ https://hortnews.extension.iastate.edu/1994/9-16-1994/bnut.html
- ↑ https://www.gardenguides.com/91378-shell-store-black-walnuts.html
- ↑ https://hortnews.extension.iastate.edu/1994/9-16-1994/bnut.html
- ↑ https://www.gardenguides.com/91378-shell-store-black-walnuts.html
- ↑ https://www.gardenguides.com/91378-shell-store-black-walnuts.html
- ↑ http://www.stilltasty.com/fooditems/index/18656
About This Article

If you want to toast your own walnuts, place them in a single layer on a baking sheet, then place them in a 350°F oven for 8-10 minutes. Stir or shake the walnuts frequently so they cook evenly, and watch them closely so they don't scorch. When they're ready, the walnuts will be about 1 shade darker brown than they started. Remove them from the heat and let them cool, then enjoy them plain or add them to your favorite dish! If you want to learn to make candied walnuts, keep reading!