wikiHow is a “wiki,” similar to Wikipedia, which means that many of our articles are co-written by multiple authors. To create this article, 45 people, some anonymous, worked to edit and improve it over time.
This article has been viewed 296,534 times.
Learn more...
If you think that drawing a Turkey is too difficult, you may be surprised to know that it is not. There are many ways of drawing a Turkey. You might have relished a Thanksgiving Turkey before but now you will make them. This tutorial will show you four different ways to draw a turkey. Let's begin!
Steps
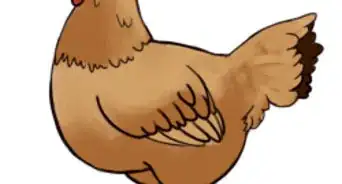
Cartoon Turkey (Beginners)
-
1Draw a squash shape.
-
2Draw a triangle in the center of the top of your squash.Advertisement
-
3Draw two circles slightly above the triangle.
-
4Draw two, darker circles inside of the circles already drawn.
-
5Draw a squiggle-line extending from the triangle.
-
6Draw elongated ovals extended from the squash, until it resembles a fan.
-
7Draw two, even lines extending from the bottom of the turkey.
-
8Draw two diagonal lines, extending from close to the bottom of the lines.
-
9Shade your turkey in the desired colors.
-
10Finished.
Cartoon Turkey (Intermediate)
-
1Draw a circle.
-
2Sketch a small circle on the right side of the big circle. Connect the small circle with the big one using two curved lines so that it will look like a head, neck and body. Add two curved lines that make a pointed angle on the head for the beak.
-
3Sketch two lines with an angle attached to the body. Draw a triangle on the ends of each line for the turkey’s legs.
-
4Draw a fan-like structure on the rear part of the turkey.
-
5Draw the eyes using small circles. Add a curved line line for the eyebrows. Draw the mouth and a dot for the nostril.
-
6Draw the neck and the caruncles using curved lines cascading from the beak to the neck.
-
7Draw the wings using a big fluffy shape with three curved lines for the feathers.
-
8Using the outline, sketch out the turkey’s body and add the legs. Sketch a series of curved lines forming a collar just below the neck for feather design.
-
9Draw the feet. A turkey’s feet has three claws in front and a small one at the back.
-
10Sketch two layers containing a series of curved lines for the turkey’s fan-like tail. Make the second layer bigger and more elaborate than the first one.
-
11Erase unnecessary lines.
-
12Color the drawing.


Drawing Realistic Turkey
-
1Draw a big circle for the body and an oblong overlapping the big circle on the right side.
-
2Add a small circle for the head and connect this to the oblong using two curved lines that serves as the neck. Add two small curved lines that form a pointed angle to the right side of the head for the beak.
-
3Draw lines for a rough outline of the legs and add a triangle on each end for the feet.
-
4Draw a curved line on the left side of the turkey and a fan-like structure for the tail attached to the curved line.
-
5Draw the eyes and define the beak. Draw the snood and the caruncles of the neck using curved strokes.
-
6Sketch out the body, taking note of the feather patterns. Note that the back portion of the turkey is a little bumpy so you can sketch out a few outlines of the feathers too.
-
7Darken the fan-like shape of the turkey’s tail.
-
8Sketch and define the legs and toes.
-
9Draw random small strokes all over the turkey’s body for a feathery appearance.
-
10Erase unnecessary lines and refine the feathers using small curved strokes.
-
11Color the drawing.


Making a Chef Turkey
-
1Draw an oblong with an overlapping big circle below it. This will form the sketch for the turkey’s body and head.
-
2Draw the details of the turkey’s head using circles and curve lines for the beak.
-
3Draw details for the wattle and the head.
-
4Draw the turkey’s hat or toque to look like a cartoon.
-
5Draw details for the left wing using curve lines and also for the feet.
-
6Draw the right wing which holds a ladle. Draw also details for the cooking pot.
-
7Draw the turkey’s fan-shaped tail and details for the feathers.
-
8Trace with a black pen.
-
9Color to your liking, then design the background.


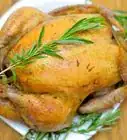
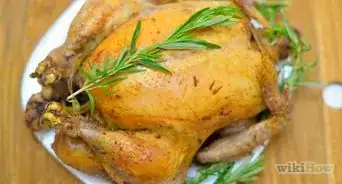
Making a Roasted Turkey
-
1Draw a horizontally elongated oblong.
-
2Draw a more flattened and elongated oblong below the first with an inner overlapping oblong. This will be the plate.
-
3Draw the details for the cut head, wings, and butt.
-
4Draw an oblong near the butt with small circles or oblongs below it.
-
5Draw the details for the turkey’s leg with a sketch for the leg bone. Draw details for leaves.
-
6Trace with a pen and erase unnecessary lines. Add details.
-
7Color to your liking!


Community Q&A
-
QuestionI want to draw a cop turkey. How can I?
 Undertale4141Top AnswererThis article gives you the guidelines, but you should feel free to adapt and change it however you like. Add some police gear to your turkey.
 -
QuestionAre there other ways to draw one?
 HatHatHatCommunity AnswerTurkeys can be draw in many ways, varying from different angles, styles, and species of turkey. If you are looking for other ways, feel free to look for them on other resources or ask a person who can draw to either explain it to you or give you a tutorial.
Things You'll Need
- Paper
- Pencil
- Pencil sharpener
- Eraser gum
- Colored pencils, crayons, watercolors or paint.
- Markers
-Step-15.webp)
About This Article
To draw a simple turkey, first draw a big circle to make the turkey’s body. Then, draw a smaller circle over the left half of the first circle to make the head. Next, add 1 line running from the center of the head to the left edge of the body, and make a parallel line starting from the right side of the head for the neck. Erase the overlapping lines to combine the head, neck, and body into 1 solid shape. Then, draw 2 touching circles inside the head to make the eyes, and add a cone-shaped beak underneath. Draw a small teardrop shape coming out of the bottom of the beak to make the turkey’s wattle. Now, draw feathers coming off the turkey’s backside. Add 2 thin lines coming out of the bottom of the turkey to give it legs. Finally, draw 2 toes in front of each leg and 1 toe on the back of each leg to finish your turkey. For more tips, including how to draw a realistic turkey, scroll down!