This article was co-authored by wikiHow staff writer, Kyle Hall. Kyle Hall works on the content team at wikiHow. He helps manage our team of editors and creates content for a variety of wikiHow projects. Kyle continually looks for new ways to improve the content at wikiHow and make it more helpful and enjoyable for readers. He graduated from Eckerd College in 2015, where he majored in Political Science.
The wikiHow Video Team also followed the article's instructions and verified that they work.
This article has been viewed 177,332 times.
Learn more...
Drawing a house is a fun way to use your imagination and practice your drawing skills, but sometimes it’s hard to know where to start. Fortunately, drawing a two-dimensional or three-dimensional house is simple once you know what to do. After you get the basic premise down, you can start customizing and adding your own personal touches to draw a house that’s unique and your own!
Steps
Drawing a Two-Dimensional House
-
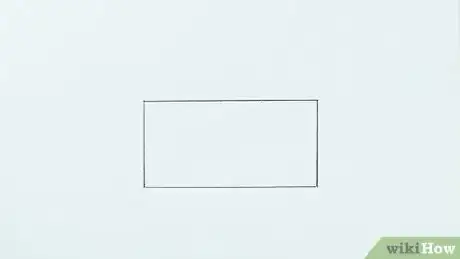
1Draw a rectangle. This first rectangle will be the frame of your house. The exact proportions of the rectangle don’t matter, but try not to make it too long and thin or your house might not look realistic.[1]
- Use a ruler or straightedge to draw the rectangle so all of the lines are neat and straight.
-
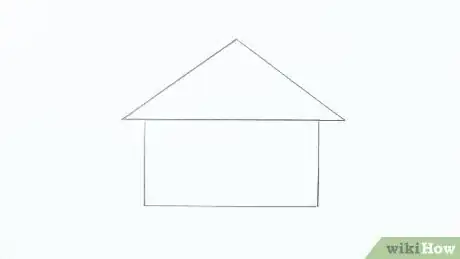
2Sketch a triangle on top of the rectangle to make the roof. The base of the triangle should line up with the top of the rectangle. Make the triangle wide enough that the bottom corners extend past the sides of the rectangle.[2]
- The triangle should be around the same height as the rectangle. If you make it too tall it won’t look realistic.
Advertisement -
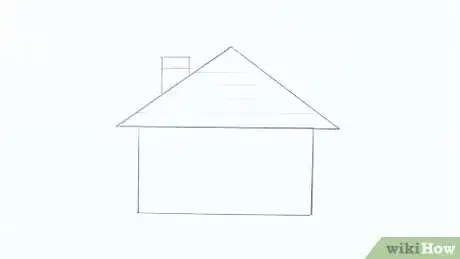
3Add a chimney and some horizontal panels to the roof. To make the chimney, draw a tall, narrow rectangle that extends up off the left side of the roof. Then, draw a smaller, horizontal rectangle on top of it. To make the roof panels, draw evenly-spaced horizontal lines from one side of the roof to the other.[3]
- The number of panels you draw doesn’t matter, but try to keep the space between each panel the same.
-
4Draw a couple of windows on the front of the house. To draw a window, make a rectangle and then draw a line through the middle of it horizontally and vertically so it’s divided into 4 sections. Then, draw a thin, horizontal rectangle underneath to make the window sill.[4]
- You can draw as many windows as you want, but remember to leave some space for the door.
-
5Sketch a vertical rectangle on the front of the house to make the door. The door should start at the bottom of the house and stop before the roof. You can also draw a circle near the middle of the door for a doorknob.[5]
- If you want your house to have a front step, draw a thin, horizontal rectangle at the bottom of the door.
-
6Color in your house to finish your drawing. There's no right or wrong way to color in your house, so you can get creative! If you want a realistic looking house, stick with basic colors like white, brown, gray, and black. If you want your house to be fun and colorful, experiment with colors like red, blue, green, and yellow.[6]
Sketching a Three-Dimensional House
-
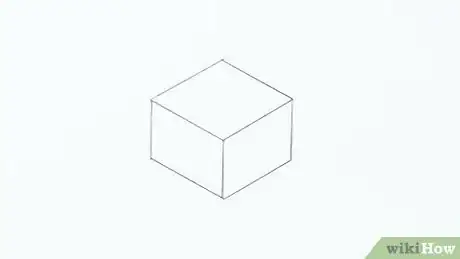
1Draw a cube. The cube will be the basic frame for your three-dimensional house. To draw a cube, start by drawing a thin, horizontal rhombus. Then, draw a vertical line extending down off of the 3 lowest points on the rhombus. Finally, connect the end of the vertical line in the middle to the end of the 2 vertical lines next to it.[7]
- The proportions of your cube don’t need to be exact, but make sure it’s not too short and narrow or tall and wide or your house might not look realistic.
-
2Sketch the side of the roof on top of the cube. To draw the side of the roof, start by drawing an angled, straight line extending off of the middle corner of the cube. Make the line the same length as the vertical lines you drew to make the edges of the cube. Then, draw a parallel line extending off of the right side of the cube that’s the same length. Finally, connect the ends of the 2 lines with a straight line.[8]
- When you’re finished, erase any extra lines that are inside of the shape you just drew.
-
3Connect the top left corner of the cube to the top of the roof. Draw a straight line between the 2 points to close off the roof. The line should be at an angle.[9]
- Erase any extra lines that are inside of the house’s frame.
-
4Add windows and a door to the sides of the house. To make the windows, draw small, vertical rectangles along the sides of the house. Make sure they’re evenly spaced and you leave room for the door. To make the door, draw a vertical rectangle extending up from the bottom of the house that lines up with the top of the windows.[10]
- You can also add a small, square window in the center of the gable (the triangle-shaped part of the wall) if you’d like.
-
5Draw in the finishing details to complete your house. You can crosshatch the side of the roof to create shingles and draw a chimney on top of the roof. To make the door and windows look more realistic, shade them in and draw a small circle on the door for a doorknob. You can even add a fence and draw some trees so your house has a yard.[11]
- Once you have the basic structure of your house, you can customize it by adding new rooms, a garage, more doors, or any other additions that you think your house should have!
- You can also color in your house when you're finished to make it pop.
References
- ↑ https://www.how-to-draw-funny-cartoons.com/cartoon-houses.html
- ↑ https://www.how-to-draw-funny-cartoons.com/cartoon-houses.html
- ↑ https://www.how-to-draw-funny-cartoons.com/cartoon-houses.html
- ↑ https://www.how-to-draw-funny-cartoons.com/cartoon-houses.html
- ↑ https://www.how-to-draw-funny-cartoons.com/cartoon-houses.html
- ↑ https://www.how-to-draw-funny-cartoons.com/cartoon-houses.html
- ↑ https://www.drawinghowtodraw.com/stepbystepdrawinglessons/2011/04/how-to-draw-houses-step-by-step-drawing-tutorial-with-this-easy-technique/
- ↑ https://www.drawinghowtodraw.com/stepbystepdrawinglessons/2011/04/how-to-draw-houses-step-by-step-drawing-tutorial-with-this-easy-technique/
- ↑ https://www.drawinghowtodraw.com/stepbystepdrawinglessons/2011/04/how-to-draw-houses-step-by-step-drawing-tutorial-with-this-easy-technique/
Community Q&A
-
QuestionHow do I draw a car in the garage?
 Community AnswerYou can draw the car first, then add a box around it that covers part of the car. Erase the part that's outside the box and that will become your garage.
 -
QuestionIf I can make a 2-D and a 3-D house, can I make 4-D?
 Community AnswerThe 4th dimension is generally considered to be time. If you make a video of yourself drawing the 3-D house and played it back, that may satisfy the requirement. With a little creativity and imagination, you could probably come up with other ways to add a 4-D element.
 -
QuestionHow do I draw a 4 dimensional house?
 Community AnswerThe 4th dimension is time, so this is not possible. You could make a video and watch it, though!
Things You'll Need
- Ruler or straightedge
- Paper
- Pencil
- Coloring supplies (optional)
About This Article
To draw a house, start by drawing a rectangle with a triangle on top of it. Then, draw evenly-spaced vertical lines running from one side of the triangle to the other to make the panels on the roof. You can also sketch a small, vertical rectangle coming up off the side of the triangle to make a chimney. Once you're done with the roof, draw a couple rectangular windows on the front of the house and a door in between them. Finally, color in your drawing and add the finishing touches. To learn how to draw a three-dimensional house, scroll down!
