This article was co-authored by Clinton M. Sandvick, JD, PhD. Clinton M. Sandvick worked as a civil litigator in California for over 7 years. He received his JD from the University of Wisconsin-Madison in 1998 and his PhD in American History from the University of Oregon in 2013.
This article has been viewed 48,978 times.
If you sell goods, then you might want to draft a warranty. A warranty is your promise to fix or replace the product if something goes wrong. Your warranty can be broad—promising to cover any defect—or it can be more limited, promising only to fix certain parts of a product or certain defects. Regardless of the content of the warranty, your warranty must be readable. Use a legible font size and typeface and use section headings that clearly identify the different parts of the warranty.
Steps
Beginning Your Warranty
-
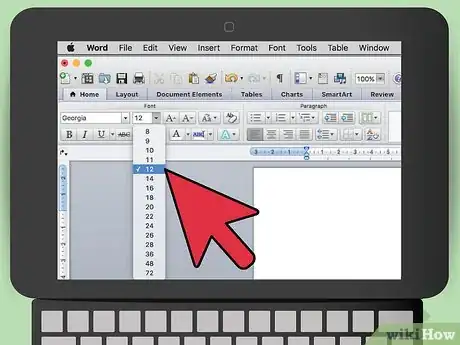
1Format your document. You want people to be able to read your warranty, so make sure the font size isn’t too small. Generally, anything below 10 point type is hard for people to read. Instead, use 12 point type or larger.
- Your document should be “justified” on the left-hand margin only. This means that the type lines up straight. However, you shouldn’t justify the right-hand margin. Instead, let the sentences be different lengths.
- If you want to emphasize a portion of text, then avoid all caps, which are hard to read. Instead, use bold or italics.
-
2Decide if your warranty is “full” or “limited.” These are the two types of warranties. A full warranty generally provides five promises. If your warranty is missing any of the five, then it is limited:
- You will provide warranty service to anyone owning the product during the warranty period.
- You will provide warranty service free of charge.
- You will provide either a replacement or a full refund, at the consumer’s choice, if you can’t repair the product.
- You will provide warranty service without requiring the consumer to return the warranty registration card.
- You will not limit the duration of any implied warranty.
Advertisement -
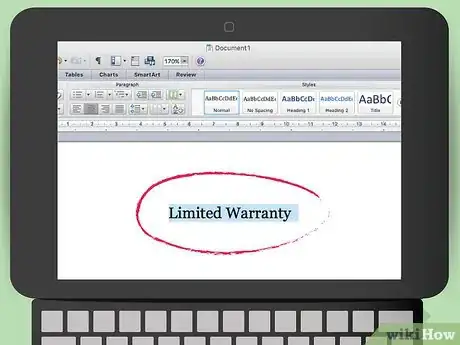
3Title the document. The title you give will depend on whether you are drafting a “limited” or a “full” warranty. Make sure to put the title at the top of the page, centered between the left- and right-hand margins. Make the typeface slightly larger than the rest of the text so that the title stands out.
- A full warranty. Make sure your title contains the words “full” and “warranty” as well as the period of coverage and a description of what parts or problems are covered. For example: “Full Two-Year Warranty on the Glass Liner of the Amesbury Water Heater.”
- A limited warranty. Simply use the words “Limited Warranty.” Don’t include other information, such as the duration, because the reader might assume the limitation only applies to the duration and not to other aspects of the warranty.
- A multiple warranty (contains both full and limited warranties). Use the title “Limited Warranty.”
Defining the Scope of Coverage
-
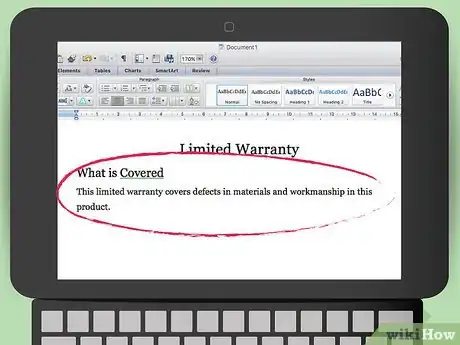
1Identify what the warranty covers. You should create a heading “What is Covered” in slightly larger type than the rest of the text. Then provide your explanation of what is covered beneath this heading. Using headings is a good way to make your warranty readable.
- You could write, “This limited warranty covers defects in materials and workmanship in this product.”[1]
-
2Identify what is not covered. It is also a good idea to tell the consumer what you are not covering with the warranty. Use the heading “What is Not Covered” and then explain underneath what your warranty excludes.[2]
- You might exclude any damage caused by the owner modifying, attempting to fix, or otherwise altering the product.
- You also might want to exclude warranties from certain parts, such as cables or attachments.
- You can also state that you are not warranting that the product won’t become obsolete at some point in the future.
-
3Identify how long the coverage lasts. Even full warranties typically have a time limit. You should tell the purchaser how long the warranty lasts. Use the heading “How Long Does this Coverage Last.”[3] Different parts might have warranties that last different lengths. Be sure to mention that.
- Sample language could read: “This warranty lasts for five (5) years from the date of original purchase of this product.”
- If the warranty lasts for the life of the product, you could write: “This warranty lasts for the lifetime of the product. Warranty coverage ends when the product becomes unusable for reasons other than defects in workmanship or material.”[4]
-
4Explain who is covered. With a full warranty, you will cover anyone in possession of the product. However, with a limited warranty, you might want to limit coverage to the original purchaser. Use the heading “Who is Covered” and the insert your information underneath this heading.
- Full warranties often don’t state who is covered since anyone who owns the product during the lifetime of the warranty qualifies.
- For a limited warranty, you could write: “This limited warranty covers only the original purchaser of the product. The limited warranty is not transferable to subsequent owners or purchasers of this product.”[5]
Identifying what You Will Do
-
1Tell the customer how to obtain services. Under the heading “How to Obtain Services” you should tell the customer what to do in order to get the product fixed. For example, the customer usually has to ship the product to you. Alternately, you could have the customer go to the store where they purchased the item.
- Sample language could read: “To obtain the benefit of this warranty, deliver the complete product via prepaid transportation to [insert your company’s name and address].”[6]
-
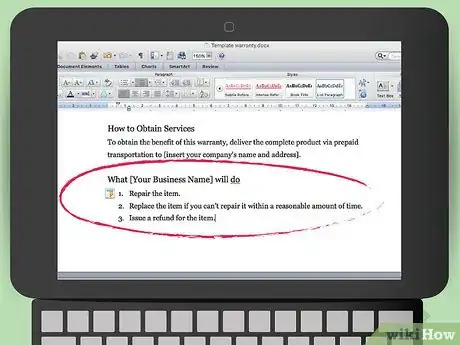
2Explain what you will do to fix the product. The purchaser needs to know what you will do if they return the product to you while it is under warranty. Use the heading “What [Your Business Name] will do.”[7] You generally have three options as the company making the warranty:
- Repair the item.
- Replace the item if you can’t repair it within a reasonable amount of time.
- Issue a refund for the item.
-
3Identify what you won’t do. You also should specifically identify what you won’t do if the purchaser returns the product while under warranty. Use the heading “What [Your Business Name] Will Not Do under this Limited Warranty.”[8]
- For example, you might not assume the risk of loss during shipment. You should specifically tell the owner that you won’t insure the product during its shipment to you.
-
4State that this is the exclusive warranty. You can protect yourself as the company by telling the purchaser that the remedies mentioned in the warranty are the only ones available. This helps clear up any confusion, in case the purchaser thinks there were other oral promises made. Use the heading “No Other Express Warranty Applies.”
- A sample provision could read: “This warranty is the sole and exclusive warranty. No employee, agent, dealer, or other person is authorized to alter this warranty or make any other warranty on behalf of [insert your company’s name].”[9]
-
5Insert a limitation of liability provision. This provision protects you in case of a lawsuit. For example, someone might use your product and be injured. They will want to sue you not only for the price of the defective product but also for their injuries. You should include a limitation on their ability to get consequential or incidental damages. This limitation provision might not be enforceable in court; however, you should include it just the same.
- Under the heading “Limitation on Liability” you could include this provision: “[Insert your company’s name] shall not be responsible for any incidental or consequential damages.”[10]
- You also have to let the consumer know how the warranty interacts with the consumer’s state law. You can provide that information along with the limitation on liability provision: “Some countries, districts, or states do not allow the limitation or exclusion of relief, incidental, consequential, special, or indirect damages, or the limitation of liability to special amounts, so the above limitations or exclusions may not apply to you.”[11]
Finalizing the Warranty
-
1Show your draft to a lawyer. Your warranty must comply with both state and federal laws, which cannot be summarized here. To make sure that your warranty is legal, you should schedule an appointment with a lawyer who can review your warranty.
- To find a lawyer, contact your local or state bar association. They should have information on how to find a lawyer or run a referral program.
- Once you have the name of a lawyer, schedule an appointment.
-
2Test your warranty. You should show the warranty to people and then test them in order to check that people can easily understand your warranty. You can ask friends, employees, or customers to look at the warranty and answer basic questions:
- How long does the warranty last for?
- Are all parts covered the same length of time?
- What parts are covered? What parts or problems are not covered?
- If you purchased the product on eBay from another person a year after it was made, can you get the product fixed under the warranty?
- Where can you take the product to have it fixed?
- If the product breaks and damages your home, will the company pay for the damage?
-
3Use illustrations, if you want. For example, you might want to include a picture of your product on the front of the warranty. This will help the consumer identify the correct warranty when searching for it through their papers.
- You could also use illustrations if they would clarify what part of a product you are referring to.
- Don’t use pictures if they will clutter up the warranty. The purpose of illustrations is to add to the clarity of the document.
References
- ↑ http://www.kramerelectronics.com/downloads/pdf/warranty.pdf
- ↑ http://www.kramerelectronics.com/downloads/pdf/warranty.pdf
- ↑ http://www.kramerelectronics.com/downloads/pdf/warranty.pdf
- ↑ https://www.ridgid.com/us/en/full-lifetime-warranty
- ↑ http://www.kramerelectronics.com/downloads/pdf/warranty.pdf
- ↑ https://www.ridgid.com/us/en/full-lifetime-warranty
- ↑ http://www.kramerelectronics.com/downloads/pdf/warranty.pdf
- ↑ http://www.kramerelectronics.com/downloads/pdf/warranty.pdf
- ↑ https://www.ridgid.com/us/en/full-lifetime-warranty
