This article was co-authored by wikiHow Staff. Our trained team of editors and researchers validate articles for accuracy and comprehensiveness. wikiHow's Content Management Team carefully monitors the work from our editorial staff to ensure that each article is backed by trusted research and meets our high quality standards.
There are 8 references cited in this article, which can be found at the bottom of the page.
This article has been viewed 80,278 times.
Learn more...
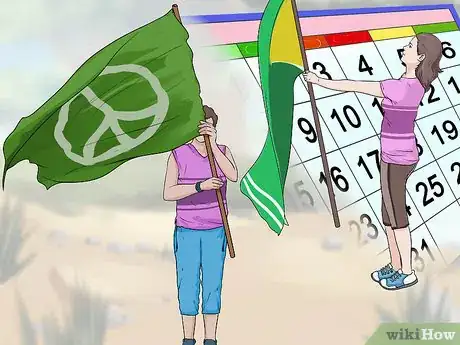
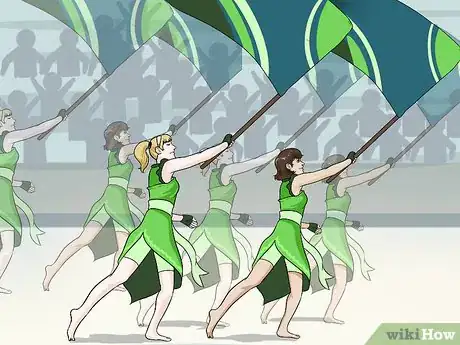
Color guard in a team context is an activity with military origins, for which flags, mock rifles, sabers, and dance movement are used to interpret music from a marching band. Color guard groups can be found in middle schools, high schools, colleges and universities, and as part of independent drum corps groups. Learn the basics of what is involved in color guard so that you can join and perform in this fun combination of sport and music yourself.
Steps
Learning Basic Flag Positions
-
1Start with the right shoulder position. Get familiar with the right shoulder position, one of the most common fundamental flag positions you will begin any other movement from. Start in a comfortable stance with feet shoulder width apart.[1]
- Hold a right shoulder position by placing your left hand around the tip or stopper of the flag’s pole and hold it at the height of your bellybutton. Place your right hand around the pole at the tape or “tab” where the pole and the silk of the flag meet.
- Perform a left shoulder position by switching the placement of your hands, with the right hand at the stopper and your left hand at the tab.
-
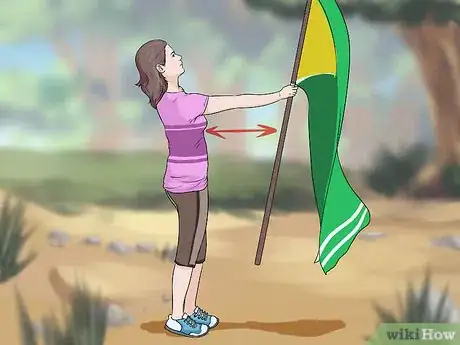
2Do a front and back present position. Build on right shoulder position by moving to front present or back present. Keep your hands in the same placement while you straighten your right or left arm for these positions.
- Get in front present position by beginning in right shoulder position. Push your right arm straight out in front of you. The left arm may be bent to bring the stopper slightly further in toward your belly button, while the right arm extends so that the pole tilts away from you at eye level.
- Begin in right shoulder position for back present. Push your left hand up and out straight in front of you so that it is parallel to the ground. This will cause your right hand to extend above your head, with the flag above and tilted to the back of you.
Advertisement -
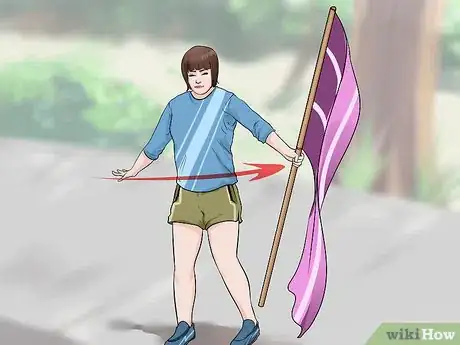
3Move to the right or left present position. Start in right shoulder position to transition to right present or left present. These positions create a diagonal angle with the pole to the right or left of your body.
- Start in right shoulder position and move your right arm out to the right for right present, keeping your left hand over the stopper at your belly button.
- Begin in the right shoulder position for left present as well, though this time your right hand will cross over your face and body to the left, with your left hand still at your belly button. Lower your shoulders so you can still see over your arm in this position.
-
4Perform a right or left slam. Create a slightly more dramatic movement with a slam. Use the same right shoulder position to create a diagonal line in either direction across your body.
- Begin in a right shoulder position for a right slam. Pull your right hand down toward your right hip at the same time that you pop your left hand up toward your left shoulder, keeping your hands in the same position on the flag.
- For a left slam, start in right shoulder position. Let go of the flag with your left hand and hold that hand face up and cupped at your left hip. Use your right hand to swing the flag down toward your left hip, “catching” your right hand in your cupped left hand. The pole will be tucked up into your right armpit.[2]
Learning Flag Movements
-
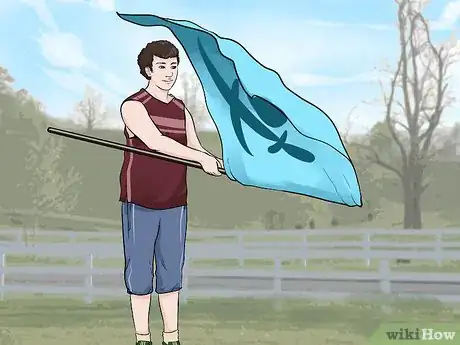
1Perform flag carving. Learn to move the flag in front of your body within a 45° plane. The common move goes by a variety of names, including figure eight, hourglass, cone, or witch’s broom.
- Start with hands at a right shoulder position on the flag. Move your right hand out into a front present position (point one), then across your body to the left, with the left hand to the right so that the pole creates a diagonal across your body (point two).
- Bring your left hand up parallel to the ground into a back present position (point three), then bring the pole down horizontally in front of your eyes (point four). Keep your hands in the same position on the flag to create the reverse of point one, with the stopper in the air and silk toward the ground (point five).
- Create the reverse of point two by bringing your right hand across to your left hip and left hand across to the right (point six). Create right slam position, with your right hand down to the right and left hand up to the left (point seven). Finish with the pole horizontal, but with your right hand pushed out so that the pole is at an angle.
- Repeat this circuit in one fluid motion to create the shape of a cone or figure eight with your flag.[3]
-
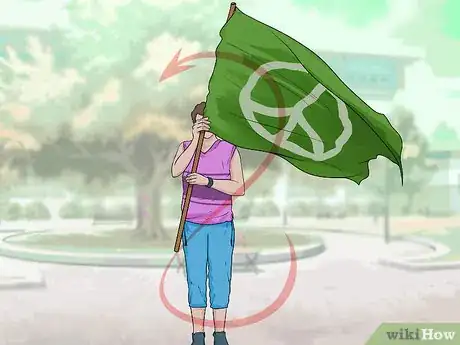
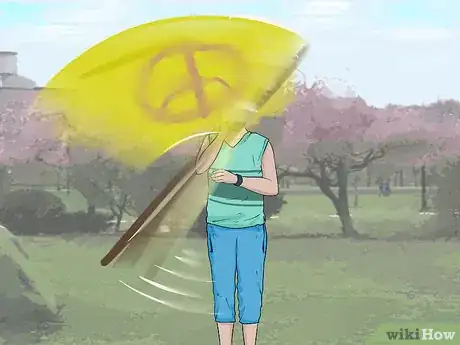
2Spin the flag. Execute a basic spin with the flag by alternating the hand that turns the flag to complete a full circle. There are a couple of different kinds of spins, but the drop spin is the most common.
- Start in right-hand position. Let go of the flag with your left hand and swing the flag down with your right so that the silk is now toward the ground and the stopper is in the air (point one).
- Meet the flag with your left hand in a cupped position to grab it, then let go with your right hand. Swing the flag upright again so that the silk is facing up (point two).
- Repeat this sequence, alternating which hand controls the flag until you can do it in one fluid motion to create the spin.[4]
-
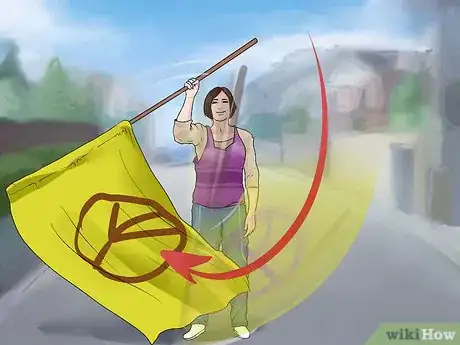
3Try a basic J toss. Try a simple toss of the flag, which you can execute by releasing the flag so that it spins once before catching it. You can also do this toss from a drop spin.
- Hold the flag in right-hand position, then release your left hand and hold it outstretched with the palm upright, which is called a “money hand.” Place the pole of the flag in the crook between the thumb and fingers of this hand to begin the toss.
- Let the flag drop down with your right hand at the same time that you push it up with your left hand to release it into the air. The flag should make one full rotation before you catch it upright with your left hand.[5]
Learning Rifle Movements
-
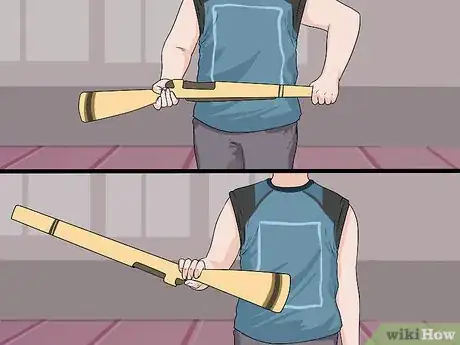
1Learn basic rifle positions. Place your hands correctly on a color guard rifle in preparation for any other movements you will do with it. Right and left flat are the two main positions you will use.
- For a right flat, place your right hand underneath the neck of the rifle, which is the skinny part between the butt and barrel. Your palm should be facing up and holding the strap to the rifle, and your thumb should be pressed against the back side of the rifle, not wrapped around.
- Place your left hand over the top of the tip of the barrel, with the palm facing down. Both of your hands should be holding the barrel parallel to the ground.
- For a left flat, reverse the direction of the rifle. Place your right hand over the top of the butt, and your left hand under the middle of the barrel (halfway between the bolt and the screw).[6]
-
2Do a drop spin. Perform a drop spin with a color guard rifle on either the right or left side. This maneuver is very similar to a drop spin with a flag, but the weight and the shape of a rifle is quite different, of course.
- Start in right flat by placing your right hand on the neck of the rifle (skinny part between butt and barrel), face up, and your left hand on the tip, face down.
- First push the tip of the rifle down with your left hand to swing downwards. Then release with your right hand to let it swing in the air and make a full rotation before catching it again.
- To do a spin on the other side, place your left hand on the middle of the barrel, face up, and your right hand on the butt, face down.[7]
-
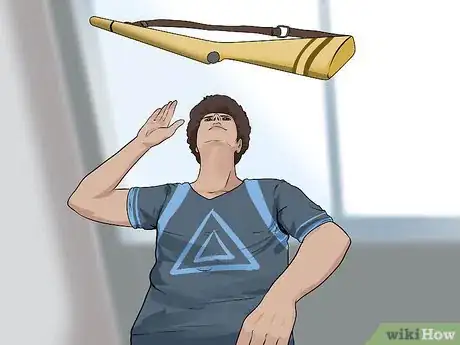
3Try a single toss. Toss the rifle with a similar movement as you use for a drop spin. This is virtually the same movement as a J spin with a flag.
- Start in right flat with your right hand under the neck and your left hand over the tip. Push the tip down with your left hand, so it drops toward the ground.
- Then release with your right hand to allow the rifle to spin once and catch it when it is flat in the opposite direction than you started from.
- The difference between this and a J toss with a flag is the timing. Instead of pushing with one hand and releasing with the other at the same time, as you would with a flag, you release just after you push with a rifle.[8]
Joining a Color Guard
-
1Talk to your school’s color guard leader. Ask who teaches color guard at your school. Talk to him or her about how to join the team or what’s involved in the sport.
- Ask questions of the director, like what is involved in the audition process, or what the team’s practice schedule is like.
- It’s also a good idea to watch color guard practices and performances to see what it’s like, or talk to other people already on the team about their experiences.
- Someone leading a color guard may also be called a caption head, or be involved with “auxiliary,” which can refer to all visual elements of a marching band, including color guard as well as dance teams, baton twirlers, etc.[9]
-
2Audition to join. Look out for posters or announcements regarding auditions for the color guard. Pay attention to the time, date, and what’s required.
- Auditions may require you to show off different skills, depending on whether they have a flag line, rifle line, saber line, etc. Ask what you’ll be expected to display, or if you can audition for a certain type of equipment.
- Make sure you know if you’re required to bring any of your own equipment or other items so you can come prepared.
- Auditions may very often involve an instructor teaching you a new skill that you may not know. Be prepared to listen closely and ask questions so you can pick up the skill. The instructor and any other judges won’t be looking for perfection, just that you are able to take instruction well.
-
3Practice consistently. Keep up with the new skills you learn from the team or on your own so that you can improve from season to season. You can practice on your own, or get a group together, even when the season isn’t in session.
- If you don’t make the cut in an audition, continue to practice basic skills on your own. Seek out instruction videos on the internet, or ask a friend or instructor to give you some tips in their spare time.
- Keep practicing your skills throughout the winter to stay sharp for when color guard practice starts up for the next season unless your school has a winter guard to join to keep practicing and performing.
-
4Consider joining winter guard. Ask the instructor that leads color guard about winter guard. Check for any information your school distributes about joining this off-season team.
- Join winter guard as a way to continue to improve your skills throughout the season, as well as get the chance to perform in competitions dedicated to the sport.
- Winter guard may be done with pre-recorded music, or with a live indoor percussion group, instead of a full marching band at outdoor events.[10]
Community Q&A
-
QuestionI am a boy. If I join Color Guard, will I be bullied?
 Community AnswerYou shouldn't be. In fact, boys are welcomed on most color guards.
 -
QuestionDo you have to do conditioning?
 Community AnswerBeing on a color guard team requires daily or otherwise regular practice, which generally includes warm-up stretches and workouts, drills, and choreography. You can perform similar conditioning if you are planning to join a team; the main thing is to be consistent in training every day if you can.
 -
QuestionDo I need dance experience to be on color guard?
 Community AnswerNot usually, but it depends on the type of color guard team you'll be joining. Generally, if you're joining a school team, dance experience won't be necessary.
Warnings
- When learning how to toss equipment, be sure that you have lots of room and everyone around you is aware of what you are trying to do so no one gets hurt accidentally.⧼thumbs_response⧽
References
- ↑ https://www.youtube.com/watch?v=puPcEKUGsDc
- ↑ https://www.youtube.com/watch?v=puPcEKUGsDc
- ↑ https://www.youtube.com/watch?v=xTqg-bDNrBw
- ↑ https://www.youtube.com/watch?v=W9n55fzO22A
- ↑ https://www.youtube.com/watch?v=QhpAVZ8RW90
- ↑ https://www.youtube.com/watch?v=zU7CfA2es8c
- ↑ https://www.youtube.com/watch?v=RmPwFvhpnog
- ↑ https://www.youtube.com/watch?v=RmPwFvhpnog
- ↑ http://colorguardeducator.com/blog/glossary-of-color-guard-terms/

