This article was co-authored by Tanglewood Sue. Tanglewood Sue is a DIY and Upcycling Specialist and the Owner of Tanglewood Works out of Hyattsville, Maryland. With over nine years of experience, Sue specializes in upcycled painted furniture and other handmade, personalized, and sustainable goods. With her passion for art and reinvention, marketing experience, and Bachelor’s Degree in Broadcast Media, Sue has been able to create a business that not only provides quality pieces but empowers customers to create their works through her library of DIY tutorials and live demos as well as DIY supplies.
There are 10 references cited in this article, which can be found at the bottom of the page.
This article has been viewed 571,799 times.
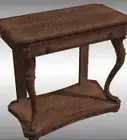
There’s nothing like the distinguished look of antique wood, but nobody has time to wait for their wooden furniture and accessories to age naturally. That’s where distressing techniques come in. Distressing wood lends it a well-worn appearance instantly, totally transforming the piece in a matter of minutes. There are many different methods you can use when distressing wood, but the core principle is always the same—mix up the strokes, strikes and pressure you use to make the finished piece look like a treasured heirloom rather than a cheap reproduction.
Steps
Creating General Wear and Tear
-
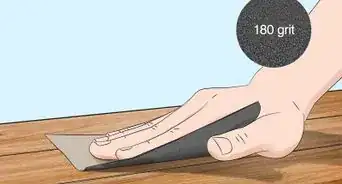
1Sand down the edges. Go over the angled edges of the piece with a sheet of sandpaper. Stick with a high-grit sandpaper and vary the amount of pressure you apply to each area for more natural-looking wear, or use sanders with different grits to change the character of each surface slightly.[1]
- You might also choose to go over the flat face surfaces as well, especially in smooth, glossy areas that give away the newness of the wood.
- Some strategic sanding alone can instantly make untouched wood look well-aged.
-
2Distress wooden boards using gravel. Simply lay one board flat on the ground and cover it with gravel from end to end. Place a second board over the top, then stand on the upper board and walk back and forth slowly. Your weight will grind the gravel into the surface of both boards, leaving behind distinct marks in a random pattern.[2]
- Don’t just walk on the boards—rock forward and backward, jump up and down, depending on how pronounced you want the distressing to turn out.
- Be sure to flip the boards over and repeat on the opposite surface if both sides of the board will be visible in the finished piece.
- This method can be a big time saver if you’re working with raw lumber rather than furniture or some other constructed item.
Advertisement -
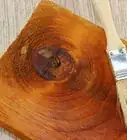
3Gouge the wood with a blunt object. Take a hammer, screwdriver, length of heavy chain, high-heeled shoe or similar tool and use it to strike the wooden surface all over. The impact will leave behind deep impressions that look like the result of bumps, drops and knocks collected over the years.[3]
- Chains can be especially useful if you want the distressing to be as realistic as possible, since the links will hit a differently with every swing.[4]
- Be careful not to overdo it—too many deep impressions may be a giveaway that the wood has been artificially distressed.
-
4Use wood screws to create wormholes. Drive half a dozen wood screws through a slender piece of scrap board so that the sharp ends stick out the other side. Hammer the wooden piece repeatedly using varying amounts of force. This will open up a series of small holes that look like insects have tunneled through them.[5]
- Change the position of the screw board or strike the piece from multiple angles so the wormholes don’t all have the same pattern.
-
5Chip the edges with chisel. Angle the flat tip of the chisel or awl against the side of the piece and tap it with a hammer. Go around the entire piece and repeat the chiseling process on all sides, making sure to notch the wood at irregular intervals.[6]
- If you want the wood to look severely distressed, work the chisel deeper into the surface to take off entire chunks.
- Simulated nicks can give wooden accessories a lot of extra personality, particularly on hard-wearing pieces like beams, door frames, desks and coffee tables.


Distressing with Paint
-
1Sand the wooden surface lightly. Before you jump straight into distressing, run a sanding block or sheet of high-grit sandpaper over the entire piece. A thorough sanding will open up the pores in the wood and help the paint hold better. This translates to a longer-lasting finish that, ironically, will have no problem standing the test of time.[7]
- Sand with a gentle circular motion, starting in a central spot and gradually working your way outward.
- Fold the sandpaper over squared edges and slide the entire sheet back and forth using smooth strokes.
-
2Paint the piece in a light color. A shade like white, eggshell or opal will work best. Don’t get too heavy-handed with the first coat—you just need to get the paint onto the piece, not achieve total coverage.[8]
- Work the base coat into corners, grooves and other hard-to-reach areas using the tip of your brush.
- Lighter colors will be more visible under additional coats of paint, enhancing the effect.
-
3Allow the base coat to dry completely. Leave the painted piece in a cool, dry place as it dries. This will usually take 8-10 hours, but you might want to wait up to 24 hours to ensure that the paint has had ample time to set. Once it has fully cured, you can move onto the next phase of the project.[9]
- Avoid handling the painted wood while it dries.
- If you’d rather show off the natural wood grain than a separate layer of paint, feel free to skip straight to the distressing phase.
-
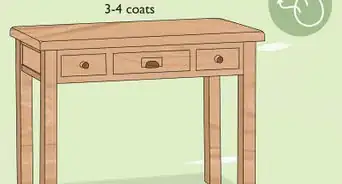
4Brush on a second coat of paint. Choose a bolder color for the topcoat that will stand in contrast to the lighter base coat underneath. This time, paint the entire piece. Use multiple coats to reach the desired depth and smoothness.
- Change up the direction of your strokes to work the paint into tiny crevices and other textured areas.
- To underscore the vintage aesthetic, go with a topcoat in a faded-looking pastel shade, such as brick red, powder yellow or robin’s egg blue.[10]
-
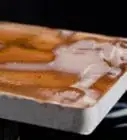
5Wipe the paint with a damp cloth. Wet a rag or soft kitchen scrubber and wring out the excess water. Use the rag or scrubber to smudge the paint while it’s still slightly sticky to the touch. Doing so will expose the lighter paint underneath, which creates the illusion that the piece has been repainted over the years.[11]
- Work slowly and rub the paint with minimal pressure to avoid taking off too much paint at once.
- If you accidentally remove more paint than you intended, simply brush on a fresh coat and start over.
- For a more exaggerated finish, you can also use high-grit sandpaper after the paint has dried.[12]


Staining the Finished Piece
-
1Leave the wood as-is. If you’d prefer that a particular piece keep more of a raw look, you may choose not to stain it at all. A few scratches and dings can go a long, especially if you’re working with salvaged wood that already has a bit of age on it.
- Go ahead and brush on a clear coat to put the finishing touches on the piece.
-
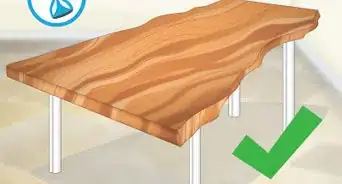
2Stain the piece to add tint. Dip a soft-bristled brush or the corner of a clean cloth into the liquid stain and blot it over the surface of the wood. Spread the pigment until it’s evenly distributed over the piece, applying additional coats as needed. Be sure to select a stain that complements the natural grain of the wood you’re working with and fits the sensibilities of the project.[13]
- A rich chestnut or mahogany, for instance, will make a chest of drawers look like it’s been handed down for generations, while softer hues can be used to produce a weathered effect on outdoor furniture and structures.
- The right stain will conceal the drab color of new wood and accentuate the distress marks you made, giving the piece a sense of timelessness.
-
3Distress the stain to create the appearance of age. Soon after applying the stain, use a dry cloth to wipe the wet areas and remove excess pigment. What’s left behind will set into the grain, highlighting its attractive textures while still looking somewhat faded.[14]
- For deeper tones, let the stain soak into the wood for several minutes prior to stripping it.
- It’s better to add more stain a little at a time until you reach the desired depth than to start with too much and try to remove it through other means.
-
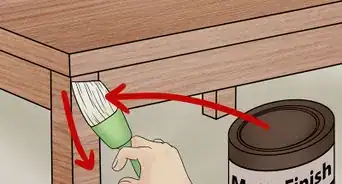
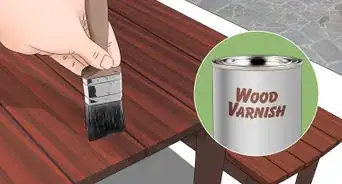
4Preserve your distressed finish with a final clear coat. Brush on an even coat of varnish or polyurethane over the entire surface, let it dry overnight, then apply a second coat. This will protect the wood from dust, scratches and exposure to the elements while locking in the modifications you made.[15]
- Use weather-resistant varnish on pieces that are meant for exterior use or display.
-
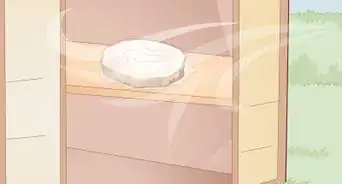
5Allow the clear coat to dry for 4-6 hours. Wait until the varnish or polyurethane loses its tackiness before moving, mounting or otherwise handling the piece. Your patience will be rewarded by a much more durable and long-lasting finish. Afterwards, you can delight in the rustic elegance of your new (old) wooden decor![16]
- Clear coats can sometimes take up to 4 weeks to cure completely. During this time, it may be wise to store outdoor pieces inside to prevent moisture from interfering with the hardening process.


Expert Q&A
-
QuestionHow do you make wood look distressed without sanding?
 Tanglewood SueTanglewood Sue is a DIY and Upcycling Specialist and the Owner of Tanglewood Works out of Hyattsville, Maryland. With over nine years of experience, Sue specializes in upcycled painted furniture and other handmade, personalized, and sustainable goods. With her passion for art and reinvention, marketing experience, and Bachelor’s Degree in Broadcast Media, Sue has been able to create a business that not only provides quality pieces but empowers customers to create their works through her library of DIY tutorials and live demos as well as DIY supplies.
DIY & Upcycling SpecialistSanding helps paint, stains, or primer adhere to the wood, so you're simply making it easier for the material you choose to wear away if you don't sand it. You can use whatever paint you plan on using and just skip the sanding. Use a cloth to pull up some of the paint. That should give you a distressed look. It may not last super long without sanding, though! -
QuestionWhat is the best paint for distressing wood?Tanglewood SueTanglewood Sue is a DIY and Upcycling Specialist and the Owner of Tanglewood Works out of Hyattsville, Maryland. With over nine years of experience, Sue specializes in upcycled painted furniture and other handmade, personalized, and sustainable goods. With her passion for art and reinvention, marketing experience, and Bachelor’s Degree in Broadcast Media, Sue has been able to create a business that not only provides quality pieces but empowers customers to create their works through her library of DIY tutorials and live demos as well as DIY supplies.
DIY & Upcycling SpecialistThere are a few different options out there. You can use a clay-based paint, which you would use for a wet stress. That's where you paint the wood, and then grab a damp rag and rub it wherever you want the distressed wood to be. You could also use chalk paint, which is a super popular way of doing it! -
QuestionWhat does it mean to distress wood furniture?Tanglewood SueTanglewood Sue is a DIY and Upcycling Specialist and the Owner of Tanglewood Works out of Hyattsville, Maryland. With over nine years of experience, Sue specializes in upcycled painted furniture and other handmade, personalized, and sustainable goods. With her passion for art and reinvention, marketing experience, and Bachelor’s Degree in Broadcast Media, Sue has been able to create a business that not only provides quality pieces but empowers customers to create their works through her library of DIY tutorials and live demos as well as DIY supplies.
DIY & Upcycling SpecialistIt's any process where you're intentionally creating a weathered look. It's popular in farmhouse-style homes and it's a great way to give a boring bit of furniture a more vintage flair.
Things You'll Need
- Wooden surface
- Sandpaper or sanding block
- Hammer, screwdriver, heavy chain or other heavy objects (for distressing)
- Chisel or awl
- Gravel of various sizes
- Acrylic, enamel or chalk paint
- Wood stain
- Clear coat varnish or polyurethane
- Soft-bristled paintbrush
- Clean rag or kitchen scrubber


References
- ↑ Tanglewood Sue. DIY & Upcycling Specialist. Expert Interview. 24 March 2021.
- ↑ https://www.lowes.com/cd_How+to+Distress+Wood_1365787848030_
- ↑ http://ecosalon.com/4-super-easy-diy-ideas-for-how-to-distress-wood/
- ↑ http://www.younghouselove.com/2011/04/how-to-distress-wood/
- ↑ https://www.lowes.com/cd_How+to+Distress+Wood_1365787848030_
- ↑ https://www.bobvila.com/articles/how-to-make-new-wood-look-old/#.WYy0C1GGPIU
- ↑ Tanglewood Sue. DIY & Upcycling Specialist. Expert Interview. 24 March 2021.
- ↑ Tanglewood Sue. DIY & Upcycling Specialist. Expert Interview. 24 March 2021.
- ↑ http://www.bhg.com/decorating/makeovers/furniture/how-to-paint-distressed-wood-furniture/
- ↑ http://www.hometreeatlas.com/6244/vintage-paint-colors-and-palette-home-style-guide/
- ↑ Tanglewood Sue. DIY & Upcycling Specialist. Expert Interview. 24 March 2021.
- ↑ https://www.youtube.com/watch?v=Dk-u5hC_WNs
- ↑ https://www.lowes.com/cd_How+to+Distress+Wood_1365787848030_
- ↑ http://www.younghouselove.com/2011/04/how-to-distress-wood/
- ↑ https://www.familyhandyman.com/project/how-to-apply-polyurethane/
- ↑ http://theflooringgirl.com/blog/how-long-does-it-take-polyurethane-to-dry.html
About This Article

If you want to distress wood with paint, sand the surface lightly so it will absorb the paint better. Then, paint the piece white, opal, or eggshell and let it dry. Paint a bolder color on top of that, but smudge it around while it is still a little sticky to reveal some of the paint underneath and make it seem old. You can even use sandpaper to make the effect more pronounced if you want. Read more to learn how to distress wood with chains, chisels, and wood screws!