This article was co-authored by wikiHow Staff. Our trained team of editors and researchers validate articles for accuracy and comprehensiveness. wikiHow's Content Management Team carefully monitors the work from our editorial staff to ensure that each article is backed by trusted research and meets our high quality standards.
There are 7 references cited in this article, which can be found at the bottom of the page.
This article has been viewed 40,151 times.
Learn more...
Designing a blouse may seem like a daunting task because there are so many different patterns and styles to choose from. However, you can simplify the process by narrowing down the type of basic design, fit, and other details you want your blouse to have. Then, it’s just a matter of creating your own pattern, sewing the blouse, and adding the finishing touches!
Steps
Sketching a Blouse Design
-
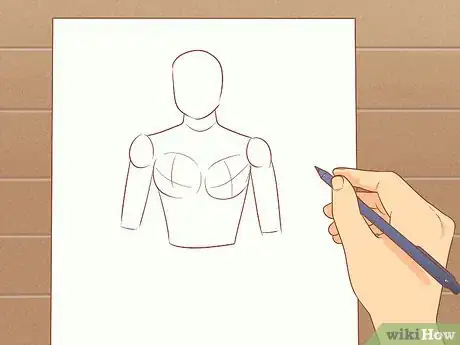
1Draw a croquis to model your blouse. A croquis is a simple human figure that fashion designers use to sketch their designs onto. If you want to draw your blouse design, start by creating a human figure on a 8.5 by 11 in (22 by 28 cm) piece of paper. You can divide the paper into 1 in (2.5 cm) sections starting from the top to help you draw the croquis.[1]
- For example, you can position the head of the croquis at the center of the page between lines 1 and 2, then draw the neck and shoulders between lines 2 and 3.
- A croquis is often slim, but you can draw the croquis to suit any body type you will be designing your blouse for.
-
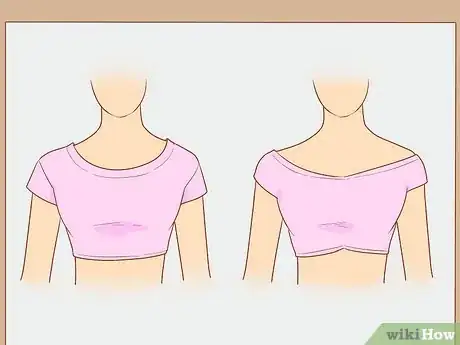
2Outline the basic shape of the blouse on the croquis’s body. Sketch the basic shape you want the blouse to have, how tight or loose you want the blouse to be, and how long you want your blouse to be. Some things to consider as you outline the blouse include:[2]
- Style. Asymmetrical, off-the-shoulder, jacket-style, t-shirt style, and strapless are just a few of the style options that you have for your blouse. Look at blouse styles to get more ideas and inspiration for your design.
- Fit. Your blouse can be loose, somewhat fitted, or stretchy so that it conforms to every curve of the wearer’s body. Decide what type of fit you’d like to create.
- Length. A few basic options include a blouse that is cropped above the belly button, sitting at the natural waist, falling down around the hips, or a tunic-length blouse that is even longer. However, you can create a blouse that is somewhere in between these lengths.
Advertisement -
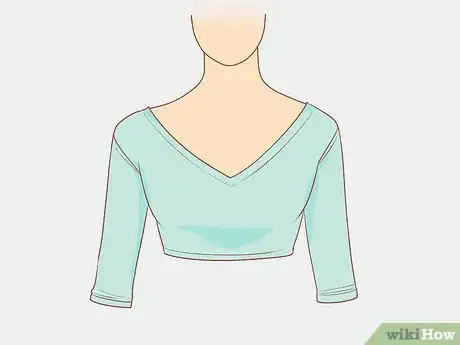
3Sketch the neck, sleeves, and back of the blouse. Once you have decided on a basic style for your blouse, think about how you plan to cut the other parts of the blouse. Add details to your sketch for the neckline, the sleeves, and the back of the blouse.[3]
- Some popular choices include sweetheart (a heart-shaped neckline that frames the cleavage,) halter, scoop neck, v-neck, square neck, and criss-cross necklines (where strands of fabric overlap each other to form an X in the front of the top.)
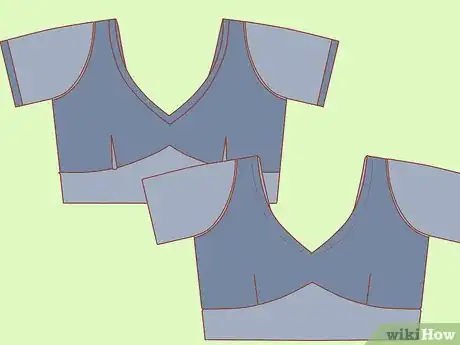
- Sleeves can be short or long. You could create a blouse that is sleeveless, cap sleeve, short-sleeve, 3/4 length sleeve, or long sleeve. The sleeves may be loose or form-fitting.
- The back of the blouse may be closed or open. You could opt for a small keyhole cutout, or have a more dramatic opening in the back of the blouse, such as a deep v-style back.
-
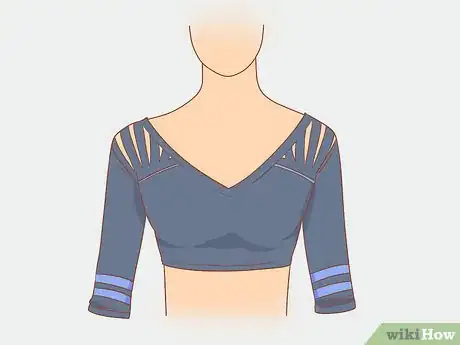
4Choose colors, textures, and embellishments to complete your design. After you have the design completed, think about how you will make the blouse. Consider what kind of fabric you'll use, how to embellish it, and how to secure the openings on the blouse. Add these details to your sketch, or make notes about these details in the margins.[4]
- You can use any type of fabric that you like for the blouse depending on how you want it to look. You can opt for layers of opaque and sheer fabric to create a blouse with an intricately layered look, or select 1 type of opaque or sheer fabric to make your design.
- Embellishments may include beads, sequins, or jewels that you sew or glue onto the finished blouse, such as around the neckline, sleeves, or back of the blouse. Make notes about what you’d like to add to your finished blouse to embellish it.
- You can secure a blouse with buttons, zippers, hook and eye closures, or cording depending on the look you are going for. Indicate on your design what type of closures you will use to secure the opening of the blouse.
Sewing the Blouse
-
1Take measurements to scale your pattern to the desired size. Before you start drawing your pattern, identify the size blouse you want to create. Use a tape measure to get measurements for the bust, waist, hips, and arms to ensure that your blouse will fit the wearer properly. Use these measurements to help you shape the dimensions of your blouse.[5]
- For example, if you want to create a blouse that will fit someone who is a size 14-16 US or XL, then identify the measurements you will need to use and scale the pattern to those measurements. This may result in a blouse that measures 40 in (100 cm) around the bust, 36 in (91 cm) around the waist, and 42 in (110 cm) around the hips.
- You may also find it helpful to use an adjustable dress form set to the desired size or a human model in the desired size. This way you can check your pattern pieces on the form or model as you go.
-
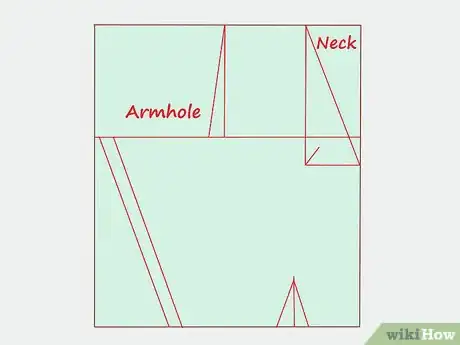
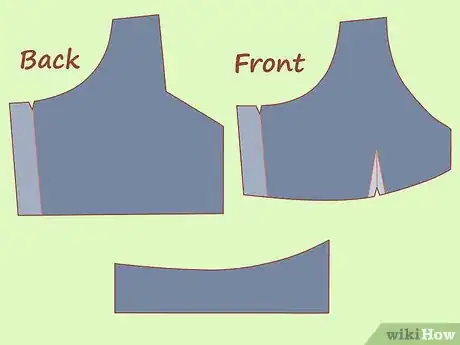
2Draw the pattern for your blouse design. Once you have finished your sketch and found your measurements, use these to create a pattern for your blouse design. Use pattern paper or another large piece of paper to cut out a template for cutting your fabric.[6]
- A typical blouse pattern has 4 to 6 pieces. These will include pieces for the front, back, sleeves, and neckline. Make sure to draw a template for each piece in your design.[7]
- Make sure to indicate any darts or other special marks on the pattern to help you when you cut it out of your fabric.
-
3Cut out the fabric according to your pattern. After you have made the pattern pieces, lay them onto your fabric and pin them into place. Then, cut along the edges of each of the pattern pieces. Make sure to use a sharp pair of fabric scissors to avoid creating any jagged edges in your fabric.[8]
- You may want to fold the fabric in half if you need to create more than 1 of some of your pattern pieces, such as the sleeves.
- Keep in mind that if you are lining the blouse, then you will need to cut out pieces of your lining material as well.
-
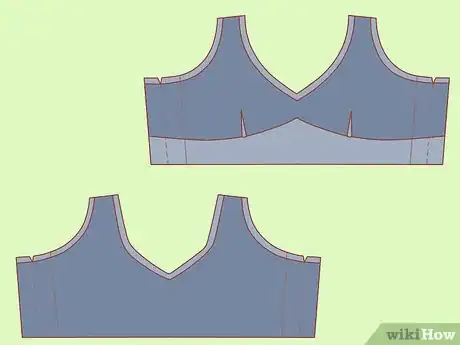
4Pin and sew the blouse pieces together. Once you have finished cutting out the fabric pieces, pin the pieces together that you want to attach. Then, sew along the edges of the pieces as needed to create your design. Sew a straight stitch about 0.5 in (1.3 cm) from the raw edges of the fabric to secure 2 pieces together.[9]
- Make sure that you line up your pieces with the right (print or outer) sides facing each other. This will ensure that the seams will be hidden on the inside of your blouse.
- Remove the pins as you sew. Do not sew over them or you may damage your sewing machine!
-
5Turn the blouse inside out after you finish sewing. Once you have finished sewing all of the pieces together, use a pair of scissors to trim away any loose threads along the seams of your design.
Adding Embellishments
-
1Add buttons, snaps, or other closures. Your design won’t be complete until the wearer can secure it! If your design requires any buttons, snaps, hook and eye closures, or other types of closures, make sure to add them.[10]
- You may need to hand sew items such as buttons, snaps and hook and eye closures.
- If you are adding a zipper to your blouse, then you can use your sewing machine to attach it.
-
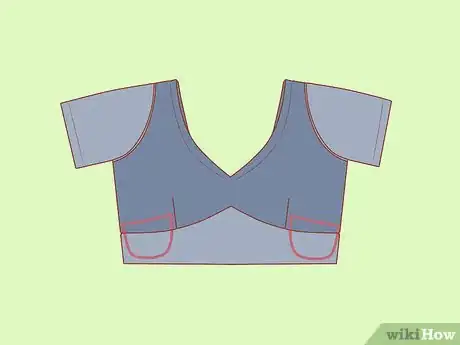
2Sew on pockets for a functional embellishment. Pockets won’t work with all blouse designs, but they can be a nice touch. Try adding a small pocket to 1 side of the front of your blouse or add a pocket to the side of the blouse if it is a longer length.[11]
- Make sure to hem the edges of a pocket before you sew it onto the front of your blouse.
-
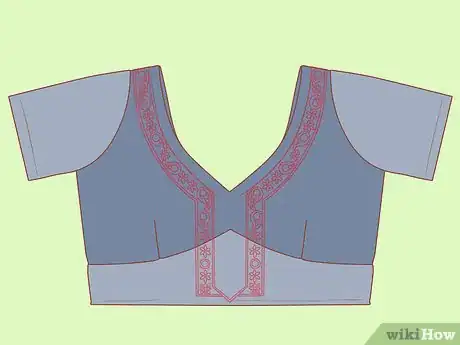
3Embroider the neckline, sleeves, or other parts of the blouse. Embroidering the neckline, ends of the sleeves, bottom of the blouse, or the opening in the back of the blouse can make it look more attractive and intricate. Choose a complementary thread color and embroider the edges of the blouse with flowers, squiggly lines, or another design.[12]
- Some sewing machines have embroidery settings, so you may be able to quickly embroider the edges of your blouse. If not, you can also embroider by hand using an embroidery needle and embroidery floss.
-
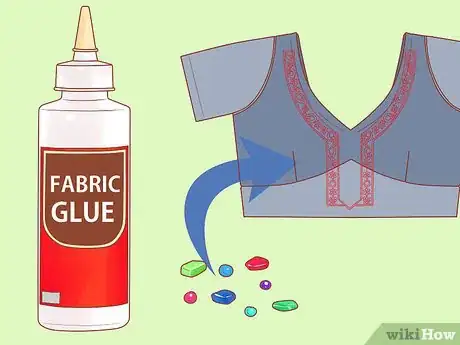
4Use fabric glue to attach chains, gems, and beads around the neckline. You can glue items onto the blouse to make it look even more intricate and interesting. Choose some items that will complement the colors and design of your blouse and use fabric glue to attach them along the edges of the neckline, the opening in the back, or on the edges of sleeves.[13]
- Let the glue dry for at least 8 hours or overnight.
Things You’ll Need
- Pencil
- Paper
- Ruler
- Fabric
- Chalk or fabric marker
- Scissors
- Pins
- Sewing machine
- Thread
- Closures
- Embellishments
- Fabric glue
References
- ↑ https://www.youtube.com/watch?v=hDyEjgEnZ9A&feature=youtu.be&t=60
- ↑ https://www.shaadisaga.com/blog/top-110-latest-trendy-blouse-designs
- ↑ https://www.shaadisaga.com/blog/top-110-latest-trendy-blouse-designs
- ↑ https://www.shaadisaga.com/blog/top-110-latest-trendy-blouse-designs
- ↑ https://sewguide.com/stitch-a-sari-blouse/
- ↑ https://www.youtube.com/watch?v=fBJWNjAbSaw&feature=youtu.be&t=17
- ↑ https://sewguide.com/stitch-a-sari-blouse/
- ↑ https://www.youtube.com/watch?v=fBJWNjAbSaw&feature=youtu.be&t=465
- ↑ https://www.youtube.com/watch?v=fBJWNjAbSaw&feature=youtu.be&t=600
