This article was co-authored by Claire Donovan-Blackwood. Claire Donovan-Blackwood is an Arts & Crafts Specialist and CEO of Heart Handmade UK, a site dedicated to helping people live a happy, creative life. With over 13 years of experience, Claire uses art as a form of therapy and focuses on mindfulness in the making of art. She makes crafting easy and accessible for those she works with. Claire received her B.A. in Photography & Visual Imagery from The University of Huddersfield.
There are 9 references cited in this article, which can be found at the bottom of the page.
This article has been viewed 17,479 times.
Whether you’re hanging them on a wall, setting them on a shelf, or using them in a larger design, wood letters are a great way to spice up a room. While standard-color cedar or birch blocks may be perfect for some projects, odds are you’ll want something a bit fancier and more creative. Thankfully, there are plenty of simple, fun ways to turn wood blocks from drab to fab.
Steps
Using Paper and Patterns
-
1Cover your blocks with paper. Find a pattern of paper you like and set it face down on a table. Place one of your letters on top. Using a utility knife, trace around the letter to make a cut out in the paper. Apply a layer of craft glue to both the paper and the wood, then press the two together. Let it sit for about 15 minutes, then apply another coat of craft glue on top. Repeat this for every letter.[1]
- Try using paper themed to the area your blocks will be put in, like flower designs for letters kept in a garden.
- If your letters will spell out the name of a friend or family member, use paper themed after them, like music notes if your friend is a piano player.
-
2Cover your blocks with patterned tape. A quick and easy way to decorate your letters is by using patterned washi or duct tape. They’re naturally sticky, so all you have to do is cut a strip off the main roll and press it to the wood.[2]
- Instead of using one pattern for all the letters, try switching between 2 or 3 to keep things interesting.
- If you’re using solid colors, try using a slightly different shade on each letter to create a gradient effect.
Advertisement -
3Tie ribbon or string around your letters. Ribbon and string are a great way to add color and texture to the wood. Because craft letters are typically small, you can simply wrap the material around each block, keeping it tight as you go. When everything is covered, either tie the material’s ends together or glue them to the back of the wood.
- To keep with the theme, glue string or ribbon to the back of your letters in the shape of a loop. Use this to hang them from the wall.
-
4Make a collage on your letters. Though they may not have as much space as a board or box, wood letters can still be used for creative collage work. Gather a series of photos, pictures, drawings, and similar items, cutting them out if necessary. Spread a light amount of craft glue on the front of your letter and the back of each object, then press the items to the block to make a collage. When it’s dry, coat the block with a second layer of craft glue to help it set.[3]
- If your letters spell out someone’s name, try making a collage using photos of them.
- If your letters spell out a room name, use images related to it, like pictures of food over the word ‘Kitchen.’


Staining and Painting
-
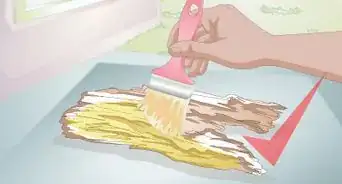
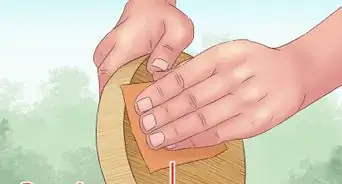
1Sand the wood. Since they’re sold as craft supplies, most store-bought wood letters can be painted right away. However, rough or hand-made blocks may need a little touch-up first. Use a small piece of fine, 150-grit sandpaper to make sure the surface is smooth. Rub your sandpaper back and forth in short, gentle motions, staying parallel with the grain of the wood.
- The grain of the wood is the direction naturally traveled by the lines on your block.
-
2Prime the wood. Before using acrylic or watercolor paints on a letter, use primer to make sure the wood is a solid color. With a small brush, apply a layer of white or grey primer to the wood. Let it dry for 1 hour and, if necessary, apply more coats until you have a uniform, single-colored block. After your final coat of primer, let the wood dry for 3 hours before applying paint.[4]
- If you’re using dark paint, like black, navy blue, or forest green, apply grey primer.
- If you’re using light paint, like baby or pastel colors, apply white primer.
-
3Paint with acrylics. Acrylic paint provides an easy way to decorate wood that leaves room for hundreds of creative design ideas. To apply it, use a small brush to simply rub your paint onto the block. Let this layer dry for about 20 to 30 minutes before continuing. When you have a design you’re happy with, wash your brush and use it to apply 1 to 2 coats of matte, gloss, or satin sealer.[5]
- Acrylic paints are perfect for small patterns like polka-dots, zig-zags, and swirls.
- Try painting objects based on what the letters will spell out, like silverware over ‘Dining Room.’
-
4Paint with watercolors. Watercolors bridge the gap between acrylics and wood stains because they have both the color variety of paint and the soft, dyed look of stains. Prepare a set of watercolors in whatever shades you like, using a brush to mix the paint with water. Now, just paint. If you’re working with layers, leave 30 minutes to dry between each. When it’s done, let your wood dry overnight.[6]
- If you’re covering whole letters, try placing your watercolors in bowls or cups and dipping the wood inside to dye it.
-
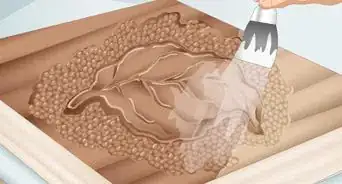
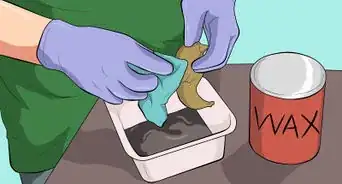
5Stain the wood. To enhance the natural beauty of your letters and keep their wooden look, try staining. Use a brush to apply a layer of pre-stain wood conditioner to the surface of a letter, serving as a substitute for primer. Let it dry for about 10 minutes, then apply one layer of wood finish or wood stain. When the letter has turned a color you like, use a rag to wipe off any extra liquid and apply a coat of clear finish for protection.[7]


Accessorizing
-
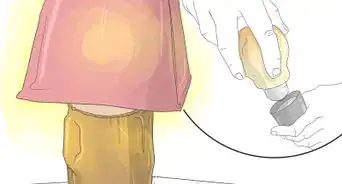
1Cover the wood in glitter. Using a small brush, apply a layer of craft glue to the surface of your wooden letter, making sure to get any corners and inside grooves. Pour glitter over the wood. Once it has set, gently shake the letter so extra glitter can fall off. Use a can of clear gloss to spray the letter and seal everything in, making sure to hold it about 2 feet (61 cm) away from the wood.[8]
- Use black and white glitter to create scary letters for Halloween or cosmic letters for an outer space theme.
- Use rainbow glitter to create fun, festive letters that will make a room pop.
-
2Add stickers to the blocks. Stickers are an easy way to decorate letters since, like patterned tape, you can simply press them onto the wood. Flat stickers can be found in general markets, dollar stores, and activity books, while bubble, 3D, and specialty stickers are sold at craft stores.[9]
- Use stickers that match what the letters will spell out, like hearts for a romantic nickname or animal stickers for a pet’s name.
-
3Bedazzle your letters. To make your letters really shine, try adding craft jewels to them. Attach each jewel to the wood using a bedazzling gun or hot glue. Press down on the jewels to make sure they’re secure, then let them dry. Try combining this with glitter to create wonderfully over-the-top blocks.
-
4Add objects themed around what you’re spelling. You can glue just about anything onto wood, so why not try accessorizing with themed objects? Fake flowers, toys, and other small items can make your letters stand out while enhancing whatever word they spell. Look for objects that can be combined to create simple patterns or designs so you don’t detract from the main shape.
- Nails, buttons, pencils, and other craft tools can be used on letters representing workshops or creative spaces.
- LEGOs, trading cards, dice, and similar items can be used on letters representing lounges or game rooms.


Expert Q&A
-
QuestionWhat can I add to wooden letters?
 Claire Donovan-BlackwoodClaire Donovan-Blackwood is an Arts & Crafts Specialist and CEO of Heart Handmade UK, a site dedicated to helping people live a happy, creative life. With over 13 years of experience, Claire uses art as a form of therapy and focuses on mindfulness in the making of art. She makes crafting easy and accessible for those she works with. Claire received her B.A. in Photography & Visual Imagery from The University of Huddersfield.
Arts & Crafts SpecialistYou can really use anything you want, like paper flowers or leaves, washi tape, sequins, or beads. The possibilities are endless. You can paint them and decorate them using paint pens. You can even try embossing foil on the letters or using a wood-burning pen to burn designs around them.

References
- ↑ https://www.heytherehome.com/mod-podge-wooden-letters/
- ↑ http://www.apartmenttherapy.com/design-on-a-dime-duct-tape-152774
- ↑ http://www.prima.co.uk/craft/easy-craft-ideas/news/a21431/get-started-decoupage/
- ↑ https://www.familyhandyman.com/painting/painting-how-to-choose-and-use-primers/view-all/
- ↑ https://modpodgerocksblog.com/2012/02/8-tips-for-how-to-use-acrylic-craft.html
- ↑ https://www.art-is-fun.com/watercolor-paint/
- ↑ https://howtonestforless.com/2012/07/18/staining-101/
- ↑ https://www.twotwentyone.net/diy-glitter-letters-mod-podge/
- ↑ https://artfulparent.com/2015/12/13-sticker-art-projects-for-kids.html
About This Article

To decorate wood letters, try coating them with craft glue and then shaking glitter over them. Or, you can cover the letters with fun stickers or patterned duct tape. Alternatively, you can use hot glue to bedazzle the letters with craft gemstones or embellish them with buttons, fake flowers, and other cute decorations. Also, if you want to hang up your wood letters, try tying ribbon or string around them. For more decorating tips, like how to stain or paint wood letters, scroll down!