This article was co-authored by Nicole Bolin and by wikiHow staff writer, Hunter Rising. Nicole Bolin is a Crafting Specialist and the CEO of Stencil, a DIY Craft Studio in Phoenix, Arizona. Nicole specializes in interior design and various craft and DIY projects. Nicole holds a Certificate in Interior Design from the New York Institute of Art and Design. She opened Stencil in 2017 to teach others to create DIY projects that fit their home and lifestyle.
There are 14 references cited in this article, which can be found at the bottom of the page.
wikiHow marks an article as reader-approved once it receives enough positive feedback. In this case, 100% of readers who voted found the article helpful, earning it our reader-approved status.
This article has been viewed 186,902 times.
Putting your pictures onto wood is a fun and simple way to create rustic decorations for your home. As long as you have a picture printed with a laserjet or HP printer, you'll be able to transfer the photo and make a beautiful piece of art to display. With a few simple supplies that you have at home or can find at your local craft store, you’ll be able to make new decor that you’ll love to show off!
Steps
Using Mod Podge
-
1Cut the printed photo to the same size as the wood. Use a pair of scissors to cut the photo to size. Make sure the main focus of the picture is in the middle of the piece of wood when you’re done cutting it down.[1]
- Make sure the photo is flipped horizontally if there are any words on it so they don’t transfer backwards.
- Wood slices with bark can be purchased at your local arts and crafts store, but any smooth, flat piece of wood will work.
-
2Paint a thin layer of Mod Podge on the wood’s surface.[2] Mod Podge is an adhesive and transfer agent used in many crafts. Pour a coin-sized amount onto the wood’s surface and spread it evenly with a foam brush. Make sure there are no bubbles or large pools of the Mod Podge on the wood. Smooth out all of the liquid and remove any excess with the edge of the foam brush.[3]
- You can also use any photo transfer medium in place of the Mod Podge.
Advertisement -
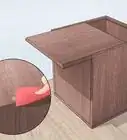
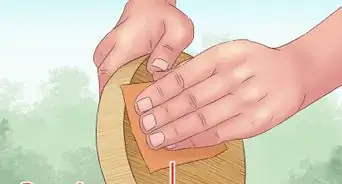
3Press the photo onto the wood.[4] Set the photo on top of the wood face-down so it lays flat on the Mod Podge. Use the side of your fist to rub the photo onto the wood to remove any air bubbles and ensure the photo completely transfers.[5]
- Use a rubber roller, or brayer, to help flatten the picture.
-
4Let the photo set for 24 hours. Leave the photo in a cool, dry place so it can fully transfer onto the wood’s surface. Don’t lift the photo off the piece of wood at all.[6]
- Keep the wood on a counter or tabletop out of reach of pets so it can dry undisturbed.
-
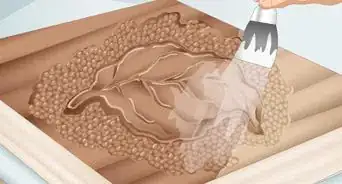
5Wet a cloth and gently rub the back of the paper. Run a washcloth under warm water and wring it out. Lay the rag on top of the paper and press it down to get the picture wet. Use gentle back and forth motions to rub the paper away from the photo. The paper should easily tear away while the picture stays on the wood.[7]
- You can let the picture dry and then rub it again with another wet cloth to pull up any remaining residue.
-
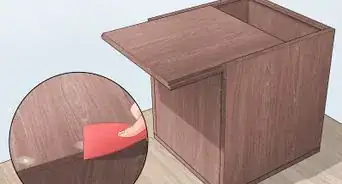
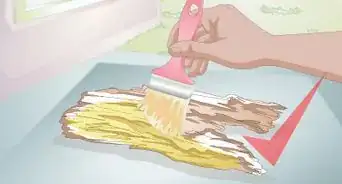
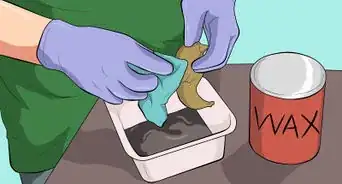
6Seal the photo with a matte finish. Paint a thin layer on the wood’s surface to protect the picture.[8] Let the first layer dry before painting the second layer in the opposite direction. Once it’s dry, your photo is complete![9]
- Purchase a matte finish from your local arts and crafts store.
- Remember to wash off your paint brush when you finish!


Transferring Photos with Nail Polish Remover
-
1Put a printed photo face-down on the piece of wood. Print the picture on regular paper with a laser or HP printer. Make sure the photo is the same size as the piece of wood you’re using.[10]
- If the photo has words on it, flip it horizontally on your computer so the words read the right way once it’s transferred.
-
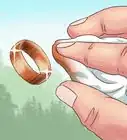
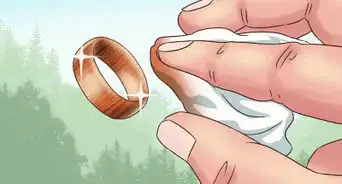
2Wet a cotton ball with nail polish remover and rub the back of the picture. Dip the cotton ball in the nail polish and rub it back and forth across the picture. The paper will become slightly transparent so you can see the picture on the other side. Coat the entire picture with the remover.[11]
- Use makeup cleaning pads instead of cotton balls to cover more surface area.
-
3Press the photo onto the wood with the back of a spoon. As soon as you’ve applied the nail polish remover, put firm pressure on the back of the spoon to transfer the photo onto the wood’s surface. Move back and forth across the back of the photo so it lays down evenly.[12]
- Alternatively, use a brayer to roll the photo smooth.
-
4Peel the paper off of the piece of wood slowly. Pinch the corner of the paper between your fingers and peel it back from the wood. The photo should have completely transferred onto its surface.[13]
- If the paper starts to rip, try pulling it from a different corner instead.
Printing on Wax Paper
-
1Glue a piece of wax paper to a sheet of printer paper. Use a glue stick to attach the wax paper to a regular sheet of printer paper. Make sure the glossy side of the wax paper is facing up. This will make it easier for the wax paper to go through the printer without ripping or jamming.[14]
- Don’t leave any lumps of glue between the paper since this could jam the printer.
-
2Print the picture onto the wax paper.[15] Feed the paper into the printer so the photo prints on the glossy side of the wax paper. Make sure the photo prints out to the same size as your piece of wood.[16]
- You can use either a laser or inkjet printer on the wax paper.
- Mark a regular piece of paper in your printer and make a test print. Look for the mark on the test print to determine which way the paper feeds through your printer.
-
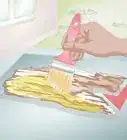
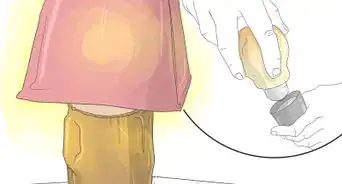
3Press the printed photo onto a flat piece of wood.[17] While the ink is still wet, lay the piece of paper on top of the wood. Use the side of your fist to press on the photo firmly. Rub it so the ink transfers onto the wood.[18]
- Work quickly after the photo is printed since the ink will only sit on the surface of the wax paper for about 5 minutes before it dries.
-
4Lift the paper gently off of the wood. Peel the paper off of the wood slowly so the picture doesn’t smear. The picture will look faint and the wood grain will be visible. Let the wood dry for 30 minutes before handling it.[19]

Expert Q&A
Did you know you can get premium answers for this article?
Unlock premium answers by supporting wikiHow
-
QuestionWhat kind of paper do you use to transfer pictures to wood?
 Nicole BolinNicole Bolin is a Crafting Specialist and the CEO of Stencil, a DIY Craft Studio in Phoenix, Arizona. Nicole specializes in interior design and various craft and DIY projects. Nicole holds a Certificate in Interior Design from the New York Institute of Art and Design. She opened Stencil in 2017 to teach others to create DIY projects that fit their home and lifestyle.
Crafts & DIY SpecialistIt will work best if you use paper with a waxy finish, like freezer paper or wax paper.
Support wikiHow by unlocking this expert answer.
-
QuestionCan you transfer photos to wood with an iron?
 wikiHow Staff EditorThis answer was written by one of our trained team of researchers who validated it for accuracy and comprehensiveness.
Staff AnswerwikiHow Staff EditorStaff AnswerYes—however, for this to really work well, you’ll need to use a picture that’s printed on iron-on transfer paper. While this type of paper is designed to work on fabric, it will also work on wood and other porous surfaces.Support wikiHow by unlocking this staff-researched answer.
-
QuestionCan you use Elmer’s glue to transfer pictures to wood?wikiHow Staff EditorThis answer was written by one of our trained team of researchers who validated it for accuracy and comprehensiveness.
Staff AnswerwikiHow Staff EditorStaff AnswerYes, Elmer’s will work for this. The process is similar to using Mod Podge—you’ll need to coat the picture with glue and let it sit on the wood overnight, then soak it off with cool water the next day.Support wikiHow by unlocking this staff-researched answer.
Things You’ll Need
Using Mod Podge
- Laser-printed photo
- Scissors
- Piece of wood
- Mod Podge
- Foam brush
- Washcloth
- Matte finish
Transferring Photos with Nail Polish Remover
- Laser-printed photo
- Piece of wood
- Nail polish remover
- Cotton ball or swab
- Spoon
Printing on Wax Paper
- Wax paper
- Printer paper
- Gluestick
- Printer
- Piece of wood


References
- ↑ https://youtu.be/sdQO425CQeU?t=5m41s
- ↑ Nicole Bolin. Crafts & DIY Specialist. Expert Interview. 9 September 2020.
- ↑ https://youtu.be/qRDU1kAq7Is?t=2m51s
- ↑ Nicole Bolin. Crafts & DIY Specialist. Expert Interview. 9 September 2020.
- ↑ https://youtu.be/qRDU1kAq7Is?t=3m35s
- ↑ https://modpodgerocksblog.com/how-to-transfer-photos-to-wood/
- ↑ https://youtu.be/qRDU1kAq7Is?t=4m12s
- ↑ Nicole Bolin. Crafts & DIY Specialist. Expert Interview. 9 September 2020.
- ↑ https://youtu.be/qRDU1kAq7Is?t=5m26s
- ↑ https://youtu.be/0yhRsyXYiic?t=48s
- ↑ https://youtu.be/0yhRsyXYiic?t=51s
- ↑ https://youtu.be/0yhRsyXYiic?t=1m45s
- ↑ https://youtu.be/0yhRsyXYiic?t=2m15s
- ↑ https://youtu.be/sdQO425CQeU?t=2m8s
- ↑ Nicole Bolin. Crafts & DIY Specialist. Expert Interview. 9 September 2020.
- ↑ https://youtu.be/sdQO425CQeU?t=2m8s
- ↑ Nicole Bolin. Crafts & DIY Specialist. Expert Interview. 9 September 2020.
- ↑ https://youtu.be/sdQO425CQeU?t=2m18s
- ↑ https://youtu.be/sdQO425CQeU?t=2m51s
About This Article

To transfer pictures onto wood, first cut the picture to the same size as the piece of wood, making sure that the center of the image is in the middle. Then, pour a coin-sized amount of mod podge onto the wood and spread it out with a foam brush. Once the wood is coated, lay the photo face down on the mod podge. Leave the photo in a cool, dry place for 24 hours so it can transfer to the wood. After 24 hours, run some warm water onto a towel, ring it out, and gently dab the back of the photo paper to loosen it up. Finish by painting 2 more coats of mod podge on top to seal the photo, allowing the first coat to dry fully before adding the second one. For tips on how to transfer photos using nail polish remover, keep reading!