wikiHow is a “wiki,” similar to Wikipedia, which means that many of our articles are co-written by multiple authors. To create this article, 10 people, some anonymous, worked to edit and improve it over time.
This article has been viewed 56,263 times.
Learn more...
A number pad, or "numeric keypad", is great for entering a series of numbers with a few quick taps. It's been standard on computer keyboards for many years. But computing has changed. The mouse has gone from a niche gadget to a constant complement to typing and the main tool for navigating through many kinds of data. The number pad, conversely, has gone from a sometimes-noticed-and-handy accessory outboard of the alphabet for the calculations that comprised much of an early PC's work to a frequent roadblock for the mouse. It has to be continually reached over and can require an awkward off-center placement of the main keys in front of the user, or keep the mouse out of a comfortably low keyboard drawer entirely.
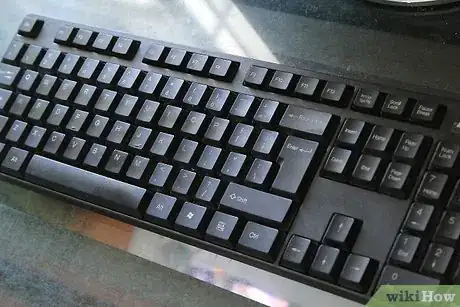
Keyboards are usually simple and inexpensive. But as of early 2011, finding a full-size, full-throw, fully ergonomically curved and tilted keyboard without a number pad is difficult or impossible. Fortunately, you can cut the number pad off such a keyboard. Well, not quite cut it off--you'll have to do a little surgery. Afterward, you'll be much more comfortable, and maybe more productive too.
This article discusses the Microsoft Natural Elite keyboard, a long-popular ergonomic model which uses very common dome-switch technology[1]
for keys with subtle "snap" tactile feedback and quiet, cushioned plastic-on-plastic clicks. Most modern full-size keyboards are similar.
This will void the warranty on your keyboard and may kill it. It will make the keyboard more vulnerable to spills and less durable. Have another keyboard ready before you begin, and set it up on your computer before you start if you'd like to be able to check the Internet as you work on this project.
Steps
-
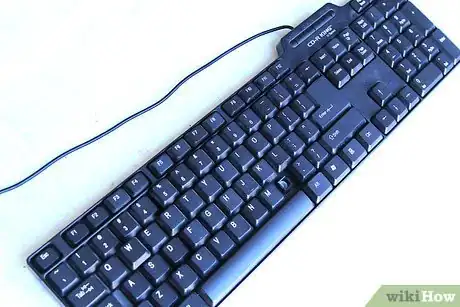
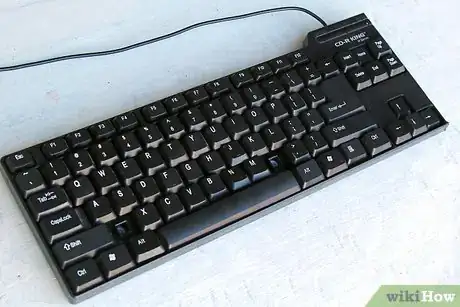
1Choose a keyboard to modify. There's not much point if a very similar keyboard with no number pad is affordable. The keyboard should have nothing other than the number pad keys on the number pad side, which is to be cut off. The project will be simpler if the keyboard has no special buttons, just the usual keys.
-
2Remove the keyboard from the computer. Turn off the computer and unplug the keyboard that you're going to modify. If you like, plug in a backup keyboard and restart the computer if you'll need it during the project.
- Swapping a USB keyboard generally doesn't require a restart, but that will usually fix any problems. And using the not-yet-unplugged old keyboard is the best way to make sure you can shut the computer down cleanly.
Advertisement -
3Take the keyboard to a work area away from the computer. Find a place where it's OK to scatter plastic shavings and possibly scrape something with a saw. The workspace should also be well-lit so you can see what you're doing, tidy so that you don't lose things, and fairly clean so that you don't contaminate the keyboard's inner workings. There should be an electrical outlet nearby for a vacuum to clean up messes throughout the project.
-
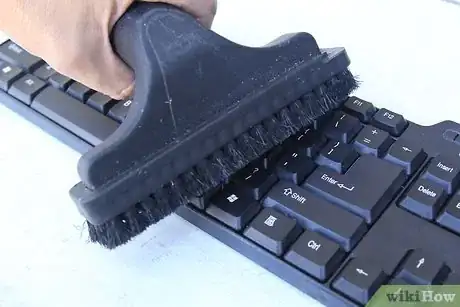
4Prepare to work. Clear your workspace. Plug in the vacuum and set it to to suck through a nozzle and preferably a clean soft bristle attachment which will be perfect for dislodging keyboard dirt and plastic shavings. Gather the blower and canned air for cleaning accumulated dirt from the key assemblies, saw(s), screwdriver(s) to fit the screws on the bottom of your keyboard, work gloves, and safety glasses.
- Some electronics are sensitive to static, so a warm, humid day would be best. You could let a humidifier run in the area for a few hours first if the air is dry: heated winter air generally is. You could use a wrist strap and other antistatic devices[2] when handling the electronic parts, but they're unwieldy, and keyboards are tough and cheap as electronics go.
-
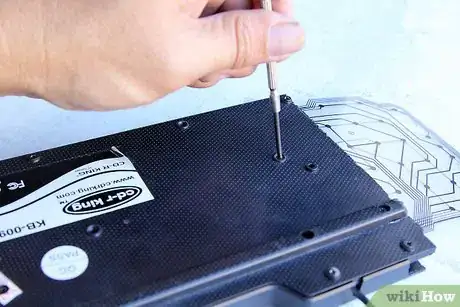
5Open the keyboard. You'll need to remove all the working parts from the space between the number pad and the other keys so that the case can be cut without damaging the insides with less-than-ideally placed or stress-focusing ragged cuts to mechanical parts, or with breaks in electronic circuits. To do that, you have to open up the keyboard. Before you take apart something complicated or unintuitive, or once you notice that you have (seeing, for instance, an array of different-length screws), make a reminder of how to put it back together. Take notes or a digital picture.
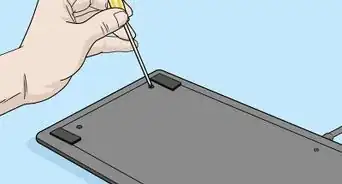
- Turn the keyboard upside down and remove the screws from the back.
- Sometimes, a plastic case may be held together partly by one or more screws hidden under a sticker. If so, poke into and slice around the edges of a round depression or lump in it with a small knife, or just poke a screwdriver through. In an area that would show, gently lift up the edge of the sticker with a knife (a blunt one will often do) and peel it up, lifting more than rolling back so as not to crease it, impart a strong bend that won't go back down, or damage the surface. If you remove it entirely, set it sticky-side-up out of harm's way until time to replace it.
- Sometimes a plastic case may be held together by an interlocking tab at an edge. If so, lift out the other edge first or bend one or both mating parts to free it.
- Sometimes a case may be held together by screws extending from the top into the bottom, such as screws under the spacebar, which pops off, on a Microsoft Natural Ergonomic 4000, or screws under stickers.
- When you have the bottom free, set the keyboard on a table to complete disassembly so its parts don't dump out before you see how they all fit together.
-
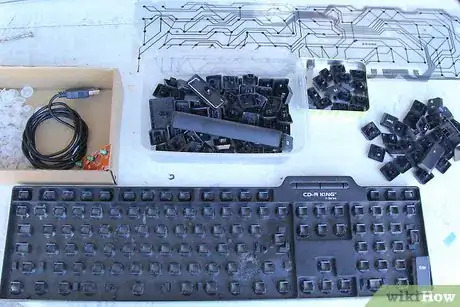
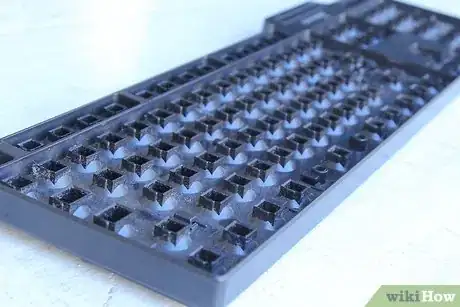
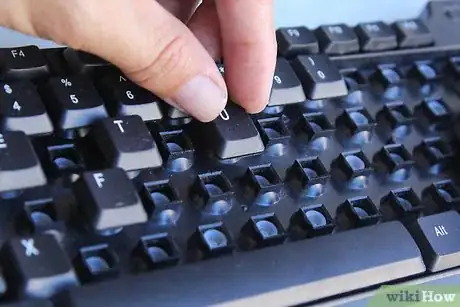
6Disassemble the keyboard. Set the keyboard on a table keys down: all the parts fit into openings and projections of the top part, with the bottom normally just pressing them into place, so gravity will keep them nestled in the top until you take them out. Once you can get something out of the outer case, there's no need to disassemble it further. It's best to take out all of the keys and big, loose items so they don't get broken and the plastic shavings you'll make by cutting the case can be vacuumed away, but anything small and firmly mounted entirely away from the number pad can stay. You'll notice the following parts, from the now up-facing bottom of the keyboard to the top:
- Case screws. You already loosened these to free the bottom cover. Take them out and set them aside or carefully set the bottom aside with them still in the holes so they don't fall and get lost.
- Bottom cover.
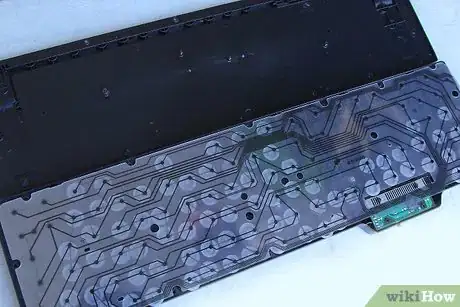
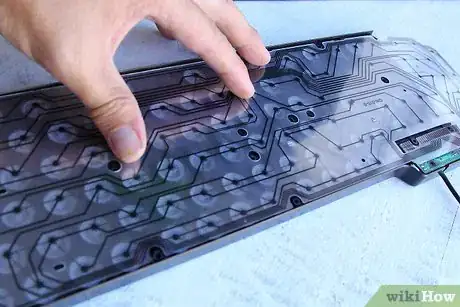
- Multi-layer keyboard membrane set of thin, non-stretchy plastic with electrical circuit traces. Keep this together so that dirt doesn't get between the layers and put it aside. It's delicate and possibly susceptible to water damage, so don't clean it except to gently wipe off any excess dirt. Notice that it has holes which fit over pegs in the top cover to keep it from sliding around under the set of keys which is supposed to tap it in particular places to indicate what is being pressed. If it is held down somehow, remove whatever is holding it down. Unscrew screws and wiggle it past or cut off any bits of plastic holding it. Do not cut the membrane itself! Notice that the keyboard has an electrical connection to some electronics themselves connected to the USB cable. If those are permanently connected, remove them from the keyboard with the membrane. If it's removable, check that it can connect only one way or note how it connects. On the Microsoft Natural Elite keyboard, the membrane has a set of contacts at an edge that press between a rubber pad in a pocket and a set of contacts on the edge of a rigid printed circuit board that lays over it.[3]
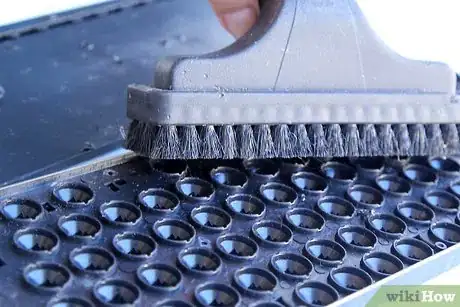
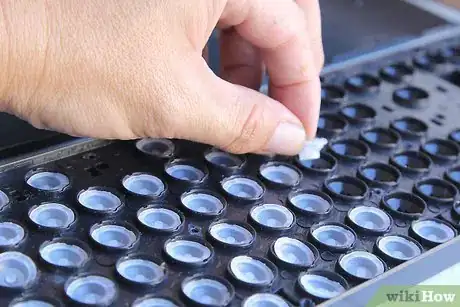
- One or more silicone sheets of dome switches to provide one dome per key. Notice that the domes face the keys, which would kink them to tap the membrane, and that, like the membrane, they fit over pegs to keep them from sliding around. They don't themselves contain any electronic parts, so wipe them or even wash them gently if you like, but make sure they are dry before reassembling the keyboard.
- One or more key assemblies - banks of keys in plastic frames. On an old keyboard, these probably have lots of dirt that might even interfere with their smooth travel. Blow it out from between the keys with a small blower or canned air. Wash them if you like, even in a dishwasher (away from the heating element, which could melt them) but make sure they are dry before reassembling the keyboard. It's not easy to remove the keys from their plastic carriers and you might break something trying.
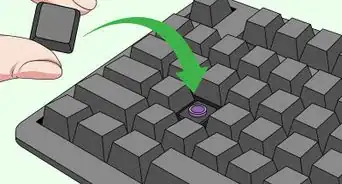
If the keys of the to-be-removed number pad are mounted in a common assembly with others, such as the navigation keys, remove the keys in the leftmost row of the number pad for room to work in cutting the assembly. It's best to put the risk of mistakes closest to the keys you don't want, and, depending on the keyboard's design, a plastic rib remaining on the number-pad side will help anchor the truncated key assembly securely in position with the truncated keyboard case. On the Microsoft Natural Elite keyboard, a key is best removed by squeezing catches on the back and pushing it through the frame.
In some keyboards, such as the Microsoft Natural Ergonomic 4000, the key assemblies may be affixed to the top cover. It's OK to leave them there, but take extra care to get out the plastic shavings after cutting off the number pad so they don't interfere with the keyboard's operation. - Num Lock, Caps Lock, and Scroll Lock indicator lights. These may be attached to another electronic assembly or, as with the Microsoft Natural Elite keyboard, rest on contacts on the membrane. Check the orientation of the assembly and its contacts. Even if it appears symmetrical at first glance, it may have to go back in a particular orientation. Note which end faces a particular way on tape attached to the assembly before removing it if there is a risk of confusion.
- Cord and main circuit board. On the Microsoft Natural Elite keyboard, the cord is woven through several small gaps in the top cover to diffuse and relieve strain from pulls on it before leading to the circuit board, which connects to the membrane with an edge connector that rests against the membrane, which in turn is pressed down by a rubber pad. Set this assembly, and the pad, aside.
- Spacebar and its separate dome switch. Some keyboards may not have a separate dome switch or mounting for the space bar, but the Microsoft Natural Elite keyboard does. Take out the dome switch so it doesn't collect plastic shavings (dirt tends to cling to the silicone), and remove the spacebar too.
- Top cover. If you've removed everything electronic from it, you can wash it. You can wash the bottom cover, too.
-
7Reassemble the empty keyboard top and bottom covers. Screw them together. Use at least the screws close to the gap between the navigation keys and number pad. You'll cut through the top and bottom covers together so that the cut parts mate neatly.
-
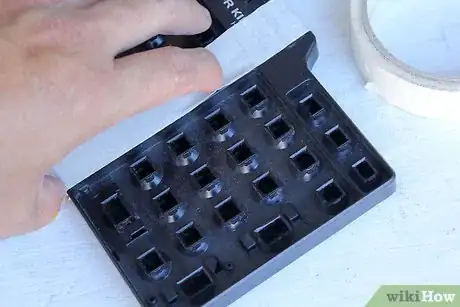
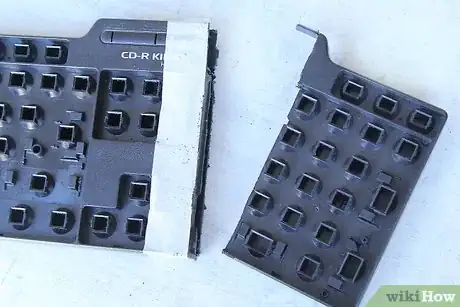
8Mark the empty keyboard top and bottom covers for cutting. In addition to creating a straight, square profile, take care to preserve the stiffening flanges and ribs near the number pad.Wide masking tape is great for marking straight lines: place it on the side to be kept, with its far edge indicating the place to cut. It stays fairly straight when stretched taut (stretch any tape from the middle of its width, rather than along one edge, to reduce curving) to automatically continue a straight line and may reduce lifting of little bits of plastic, i.e., burring, at the cut edge.On the Microsoft Natural Elite keyboard, there is a squarish stiffening flange extending inward at the edge of the top cover's hole for the number pad. Keep this for strength. Tear off several inches of tape, set the edge of the tape along the edge of this flange (next to, but not into, which you'll cut), and continue the tape forward and back.If you'll use a long, stiff saw to cut the case, you'll just saw across the whole breadth at once and continue down through the bottom cover. If not, you may need to mark the bottom cover for cutting. You may not just be able to wrap the tape around, since a varying cross section from one end to the other might cause the tape not to continue straight around. Use a separate piece of tape lined up with the first at the front and back of the keyboard before the places its path curves. Or line up the bottom cover marking tape with measurements taken inward from the right edge of the case by a ruled carpenter's square hanging over that edge, matching measurements from given points at the margin of the top-cover tape to the edge of the case to corresponding points at the margin of the bottom-cover tape. (Because the bottom cover is smaller than the top cover, tucking into it, you can't just measure equal distances inward from the edge of each cover separately).
- If the keyboard case has stick-on or otherwise removable feet where you will cut, or on the part you will cut off, peel them off and set them aside to leave the adhesive untouched, and stick them at uncushioned corners after you reassemble the keyboard.
-
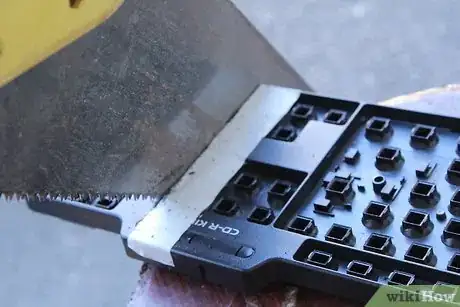
9Cut the keyboard case. It's just thin plastic, so pretty much anything will cut it. But shears would twist and break it. A sharp, coarse-bladed hacksaw or a backsaw will be best: lay the blade flat on a flat part of the line to be cut, press and drag it somewhat firmly to start the kerf (take care to start a single distinct cut without marring the surrounding material), and keep the blade vertical as you saw through the top and bottom covers. No need to press hard once the saw is started in its kerf: push back and forth gently, and let it do the work until the keyboard case just comes apart.If you have only a little saw, you can cut the frame from one end to the other (watch the number-pad left flange and cut next to it). If you have a hobby rotary tool such as a Dremel, you could follow the tape all the way around. Wear hand and eye protection, particularly if you are using a hacksaw (whose blade can break), a saw with big teeth, or a small power tool (a big one would be very dangerous). Protect the work surface with something like scrap wood or an old telephone book.
- Save the removed pieces. You might be able to use part of the removed bottom cover, especially if it was cut off perfectly straight, to close up the cut edge of the keyboard.
- You can use sandpaper to smooth very-rough areas. But it will create many fine, messy plastic particles. Don't turn a fairly straight, rough edge into a smooth, wavy edge through uneven sanding if you plan to attach a flat, rigid cover to the cut edge. A sanding block to hold the paper flat would help avoid this and the gaps it would leave.
- Unless you're going to glue a rigid plate over the entire cut end, you can gently round the cut corners by stroking a flat file around them a few times for appearance. Since the rounded profile will look good, but the cut edge won't, keep the file in a vertical plane. You could use sandpaper on a flat surface or in a sanding block instead of a file.
- Once you've finished cutting and grinding, remove the tape and open the keyboard case again so you can clean out the shavings.
-
10If the number pad is part of a larger key assembly, cut it off. On the Microsoft Natural Elite keyboard, the number pad is part of the same bank of keys as the navigation keys, which you'll need to keep. There is a rib at the left edge of the number pad. Keep this, and cut immediately to the right of it: it adds strength and rests against the top-cover flange that was at the left of the number pad to keep the key assembly from slipping left. Cut the key assembly as you did the keyboard case. Mark it, similarly, before cutting if you like.
-
11Vacuum up the plastic shavings. A clean soft bristle attachment would be best, and any small nozzle would be good, for breaking their static cling to surfaces and sweeping away burrs from cut edges.
-
12If the number pad dome switches are part of a larger sheet, cut them off. If the number pad keys are part of a larger assembly, the dome switches probably are part of a larger sheet. They're held in place under the keys by being squeezed at the edges, and their sheet is soft and probably translucently inconspicuous, so it's best to leave a fraction of an inch (cm) margin beyond what is needed than to leave too little. Be sure to only cut off the number key switches, not the navigation key switches, and trim close to the switches to be removed rather than close to the ones to keep. Use a single cut with a paper cutter or a full-size scissors to avoid jagged edges that can focus tension and tear.
-
13Do not cut the multi-layer keyboard membrane. Do not crease it, which could bring the layers into contact in the wrong place or break the circuit traces, either. It has a network of circuits from which the number pad is not cleanly separable. You'd probably wreck the keyboard.
-
14Reassemble the keyboard. You'll essentially reverse the disassembly process. This will be easiest if you support the front cover by edges or corners so the key assemblies can drop in fully rather than themselves resting on a table. Put in the electronic controller, lights, and keys; put in the dome switches; put in the membrane; and set up electrical connections (on a Microsoft Natural Elite keyboard, don't forget the rubber pad that squeezes the membrane-controller connection together). Line up all of the the dome switches' and membrane's retention holes. Screw on the back cover. Put on any rubber feet you removed and, after the keyboard is working and this project is otherwise finished, replace any stickers you removed. The number pad part of the keyboard membrane will just hang out of the keyboard case for now. Touching the protruding membrane may cause errors such as unwanted number-pad keystrokes.
-
15Test the keyboard. Check that all of the remaining keys gently snap and rebound when tapped, as before. Plug in the keyboard and check that all of the keys work. You may need to restart the computer for it to recognize that the keyboard has been attached. If the keyboard doesn't work, check that it's plugged in to a working port, and, if that's not the problem, open the keyboard and inspect the assembly. If only some of the keys do not perform correctly, check the assembly near them in particular.
-
16Tuck away the number pad's part of the membrane. You have a few options for this flap:
- Wrap it underneath the bottom edge of the keyboard and hold its edge in place with cellophane tape. This is quick and easy. But it looks sloppy. It leaves the membrane vulnerable to contamination, especially from spills--though those aren't much of a risk in a dedicated keyboard drawer. It leaves the keyboard unsuitable for placement on surfaces that might press on the membrane and thereby register keystrokes, such as the user's lap. If the keyboard erroneously registers keystrokes from the flap, try shielding one of its layers from the other with plastic wrap. You could still tuck it under, rather than into, the keyboard. In that case, don't put plastic wrap over the spot the tape is to attach.
- Prevent it from registering keystrokes by separating its two outer layers from one another and other surfaces with plastic wrap, then tuck it back into the keyboard. This looks much better, and protects the flap from the environment. But it risks damaging the membrane and thus killing the keyboard by bending and breaking it or flaking off its circuit traces, either immediately or over time. It also risks mechanical and electrical interference with the keys it's tucked under, usually the navigation keys.
To do this, cut a strip of plastic wrap a little longer than the length of the protruding membrane flap (which, with standard plastic-wrap width of 12"/30cm or so, will be much wider). Draw the plastic wrap around the bottom layer of the membrane flap, which needs to be separated not only from the top flap but from the bottom flap area nearby inside the keyboard case which it will be bent up against. Pair up the cut edges at the right edge and the top or bottom edge of the plastic wrap (whichever isn't wrapped) and press them together so they cling. Keep the plastic wrap only one layer thick and trim off any great excess extending past the membrane layer edge. A 1/2 inch (1 cm) margin is plenty.
You could try plastic tape instead of plastic wrap. It would stay in place readily. But attempting to remove it, as you might want to try if something doesn't work initially, could damage the circuit traces--possibly invisibly--and kill the keyboard.
Turn the keyboard over and loosen the screws holding the number-pad side of it together, and if necessary the others, so that the cut edge of the keyboard can loosen by a small fraction of an inch (a few mm). Bend over the membrane flap, all layers together, and tuck it in under the navigation keys' adjacent membrane. You may have to tuck the membrane flap in at a slight angle to best accommodate the screws and other obstructions extending through the keyboard. Leave at least the very edge of the fold out so that it doesn't get creased hard and possibly soon break on its own. You could roll up the flap, too, but it might be harder to store or cover if it is rolled up and under tension to expand than if it is simply bent over.- Folding the membrane into many layers (which will bulge around the folded edges, inside and outside the keyboard enclosure) to tuck into a small space will likely make it too thick and press on the adjacent navigation key switches from underneath. So, you may be left with most of it tucked in and a little sticking out at the keyboard edge. Ignoring that works great.
You could cover the cut edge of the keyboard with wide, strong tape such as mailing tape, a hard cover of another material, or even a flat piece of plastic made from the cut-off piece of the bottom cover, tipped upward. If you use tape, and have to remove the tape, carefully free it from the plastic wrap or you may pull that off and have to replace it. If you use part of the bottom cover, you may have to remove or trim down its rim and ribs, and mark its inside edge for cutting by reference to the contour of the edge of the top cover above the bottom cover. After cleaning the mating surfaces, you could attach the plate made from the bottom cover or other rigid material with glue, solvent cement, or strong double-sided tape suitable for the materials involved. If glued or cemented, they would probably have to be held firmly with a device such as a strap clamp until dry. Attaching an improvised cover with a strong adhesive or cement could frustrate opening the keyboard later.
- Folding the membrane into many layers (which will bulge around the folded edges, inside and outside the keyboard enclosure) to tuck into a small space will likely make it too thick and press on the adjacent navigation key switches from underneath. So, you may be left with most of it tucked in and a little sticking out at the keyboard edge. Ignoring that works great.
Warnings
- Do not use a power saw other than a small hobby rotary tool such as a Dremel. It would be much too unwieldy and dangerous.⧼thumbs_response⧽
Things You'll Need
- Keyboard to modify
- Backup keyboard
- One or more screwdrivers to match screws in keyboard. Often #2, medium-size, Phillips. Possibly an unusual kind which you could identify with the aid of a screw-head chart like Wikipedia's.[4]
- Masking tape, preferably wide (recommended)
- Ruled carpenter's square (optional)
- Work gloves (recommended)
- Safety glasses or goggles
- Small blower or "canned air" (optional)
- Long (about 12 in. / 30 cm), stiff-bladed or framed handsaw such as a hacksaw (preferably with a blade that is coarse as hacksaw blades go, and not dull from cutting much metal) or backsaw. Any kind of saw will work, but a long, stiff, relatively fine-toothed handsaw will make all the cuts very straight.
- Scrap wood or books such as telephone books to protect work surface
- Sandpaper (optional)
- Sanding block (optional)
- Flat file (optional)
- Vacuum cleaner with hose or small nozzle without rotating brush, preferably with a clean soft bristle attachment. (recommended)
- Full-size scissors or paper cutter (the knife type is potentially dangerous[5] )
- Cellophane office tape to tape membrane flap under keyboard or plastic wrap to shield it for tucking under navigation keys' membrane
- Mailing tape (optional)
- Glue, solvent cement, or strong double-sided tape suitable for keyboard case plastic and any other material being attached to it (optional)
