This article was co-authored by Ryaan Tuttle and by wikiHow staff writer, Christopher M. Osborne, PhD. Ryaan Tuttle is a Home Improvement Specialist and the CEO of Best Handyman, Inc. in Boston, Massachusetts. With over 17 years of experience, he specializes in building home service businesses, focusing on creating scalable and efficient brands. With the help of his global team, the companies have achieved over 10+ million in sales and received recognition through magazine features, and enjoy partnerships with wikiHow and Jobber field service software. Boston Magazine and LocalBest.com have named Best Handyman Boston the Best Handyman in Boston. Ryaan holds Construction Supervisor and Home Improvement Contractor Licenses.
This article has been viewed 96,543 times.
Installing wire shelving is a great way to make your pantry, closet, or garage a more functional storage space. Better yet, it makes a great DIY project! Cutting the shelving to size might seem like a challenge, but it's actually quite simple if you use a good set of bolt cutters. A hacksaw also does a decent job, while a Dremel or similar rotary tool will get the job done adequately. In any case, always cut safely.
Steps
Using Bolt Cutters
-
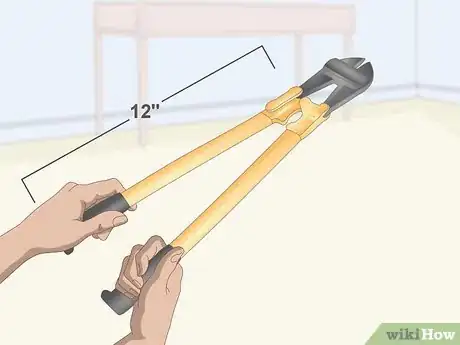
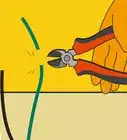
1Buy or rent bolt cutters with at least 12 in (30 cm) handles. While your first instinct will probably be to cut through a wire shelf with a saw, bolt cutters are actually the easiest and best tool for the job. Bolt cutters with at least 12 in (30 cm) long handles will have sufficient cutting power to easily slice through the standard wire shelving sold at home improvement stores.
- If you're installing heavy-duty wire shelving with thicker than normal wires, opt for bolt cutters with longer handles. The longer the handles, the more cutting power.
- You can buy bolt cutters for under $20 USD at many home improvement retailers, or you may be able to rent them from a tool rental shop.
- As an alternative, try using dikes, or diagonal pliers.
- Always wear eye protection when using bolt cutters or other tools. Even though they rarely create metal shards when cutting, there's always a small chance of getting small, sharp pieces of metal debris in your eye.
-
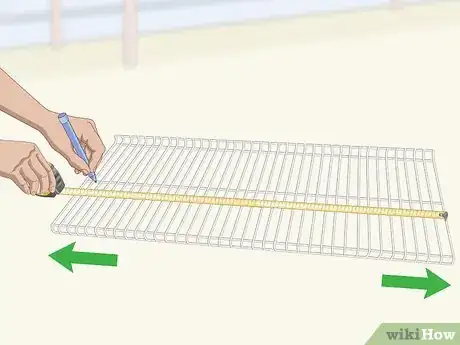
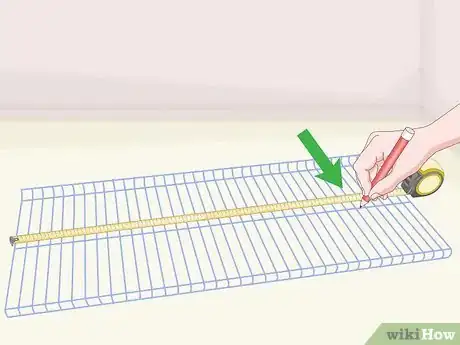
2Measure and mark for your cuts, but reduce the length measurement slightly. Use a tape measure to determine the dimensions for your shelving, then subtract 1 in (2.5 cm) from the total length. Subtracting this small amount from the length will make it easier to fit the shelving into the end brackets that help hold the shelving in place. Transfer your adjusted measurements to each piece of wire shelving that needs cut, and mark the cut lines clearly with a permanent marker.[1]
- For instance, say you have 2 sections of 24 in (61 cm) long shelving and want to fit them into a 37 in (94 cm) wide closet. In this case, adjust your length measurement to 36 in (91 cm) and mark the pieces as desired—either one whole section and one 12 in (30 cm) section, or two 18 in (46 cm) sections.
Advertisement -
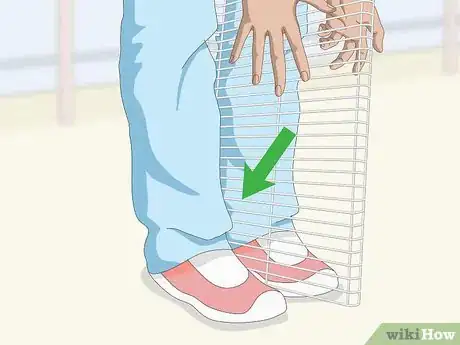
3Pinch the shelf between your ankles to hold it steady. If desired, you can clamp the section of shelving to a work table with a towel beneath and soft clamps to prevent marring of the finish. However, so long as you have good leg strength, it's quicker and easier to pin the shelf between your legs and cut it from above.[2]
- Squeeze the shelf at or just above your ankles so that you have at least 2–3 in (5.1–7.6 cm) of clearance off the ground.
- Position the shelf so that your cutting point is about 3–4 in (7.6–10.2 cm) in front of your legs. However, if you need to cut the shelving near either of your feet, re-position the shelving so the cutting point is 2–3 in (5.1–7.6 cm) beyond your toes.
-
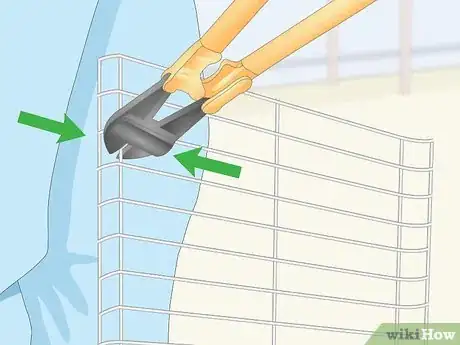
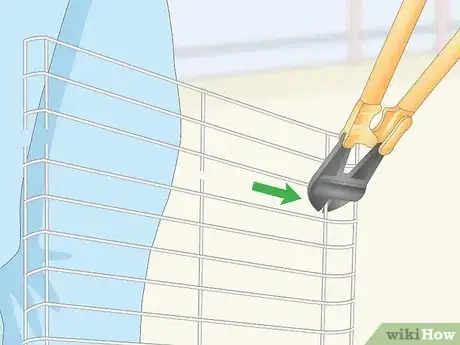
4Line up the jaws of the bolt cutters and make your first cut. Go over your cut lines again with a permanent marker if they're not easily visible. Grab the bolt cutters securely by the handles, bend over, and position the jaws above and below your first cut line. Squeeze the handles firmly to clench the jaws and cut straight through the metal wire.[3]
- For most shelving cuts—for instance, trimming 1 ft (30 cm) from the length of a shelf section so it fits inside your pantry—you'll need to cut through a series of wires. Mark each wire individually, and cut through them sequentially.
-
5Slice through additional wires as needed to complete your cuts. With a firm, steady squeezing action, you should be able to chomp right through each piece of wire that you've marked. If it's a struggle for you to cut through the wire, you may need to switch to bolt cutters with longer handles.[4]
- If you're using an older set of bolt cutters with dulled edges on the jaws, you can sharpen them by passing a metal mill file back and forth a few times over each jaw blade, making sure to follow the existing bevel of the edges. Alternatively, a machine shop, tool rental store, or home improvement retailer may offer sharpening services.[5]
- You can buy a mill file at any tool retailer.
-
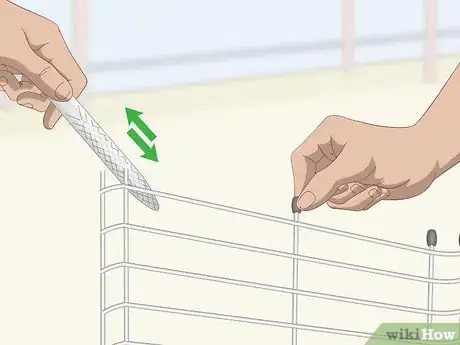
6Add plastic caps to your cuts, file down any burrs, or do both. Bolt cutters create clean cuts, so you likely won't have any sharp edges or metal burrs to deal with. If there are any, though, you can smooth them down by running a metal mill file back and forth over them.[6]
- Instead of filing down the burrs, or in addition to doing so, you can cover the cut edges with the plastic caps that come with many wire shelving sets—they look like small soda bottle caps. Just press them firmly over the cut ends of the wires until they are securely in place.
Cutting with a Hacksaw
-
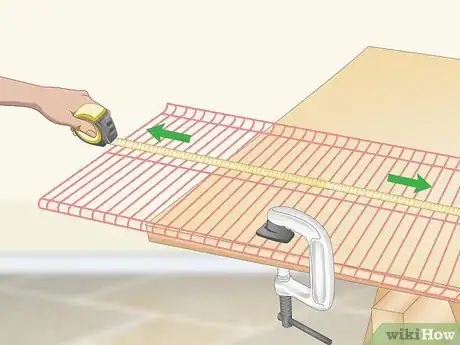
1Measure accurately, subtract slightly from the length, and mark your cut lines. Use a tape measure to get accurate dimensions for your shelving, and reduce the total width of your shelving span by 1 in (2.5 cm). This 1 in (2.5 cm) “wiggle room” will make installation much easier, especially in tight spaces.[7]
- Transfer your measurements to the shelving with a permanent marker so they're easy to see while cutting.
-
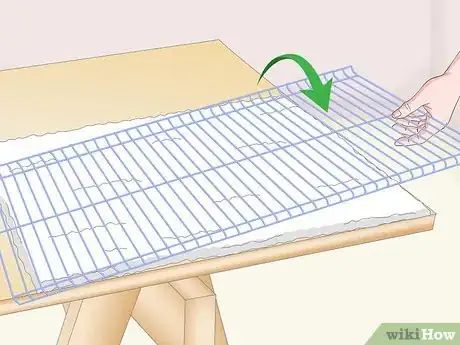
2Lay the shelf on a workbench with a towel underneath. Most wire shelving units have a white, powder-coated finish that is easy to scratch or mar, so use a towel to create a cushion between the wire and the workbench surface. Position the shelving so that your first cut line overhangs the edge of the bench by about 2–3 in (5.1–7.6 cm).
- You can also use a sturdy table, but make sure you protect its top with the towel.
-
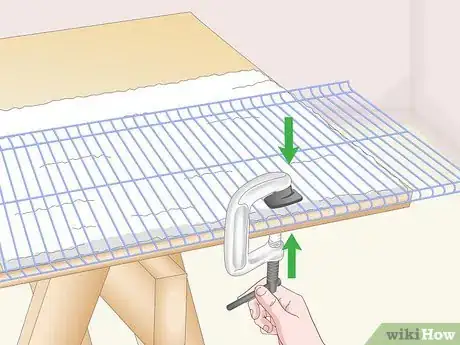
3Secure the shelf to the bench with soft clamps. It's important to keep the shelving as still as possible while cutting through it, but the rough surfaces of typical clamps may damage the coating on the shelving. Opt for clamps that have padded clamping surfaces to prevent marring.
- You can make spring-loaded clamps, C-clamps, or practically any other type of workshop clamp work for this application.
- Use at least two clamps. Secure them to the underside of the table and the top of the shelving where it starts to extend out over the edge of the table. Add more clamps for extra security.
- Make sure the clamps are tight, but not so tight that they dent or bend the shelf wires.
- In a pinch, you can make your own padded clamps by putting strips of cloth between the clamp and the shelving.
-
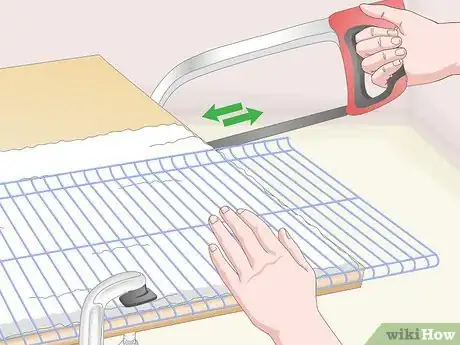
4Slice through the metal with smooth, even saw strokes. Grab the hacksaw handle firmly in your dominant hand, and place your other hand on top of the shelving, near the end of the table—but a safe distance from the cutting area. Point the tip of the saw at about a 45-degree downward angle and place the blade right over the cut line. Draw the saw back and forth over the cut line using even pressure and a steady rhythm.
- Hacksaws are made for cutting through metal, so a standard cutting blade will do the job well here.
- If your blade has dulled from use, you can easily replace it with a new one. Simply loosen the wingnut above the handle, remove the old blade, set the new one in place, and re-tighten the wingnut.
- A cordless bandsaw could also work to cut through wire.
- Wear eye protection, work gloves, and long sleeves when using a hacksaw or any hand saw.
-
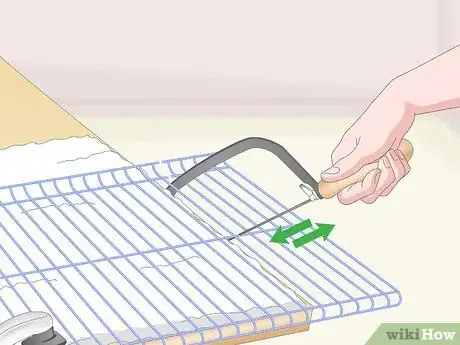
5Switch to a small hacksaw for any cuts in tight spaces. Depending on the types of cuts you're making, it may be tough to get a traditional hacksaw into all the tight spaces between the shelving wires. In this case, try using a mini hacksaw, which looks a bit like a cross between a traditional hacksaw and a knife.
- It takes a lot longer to cut with a mini hacksaw, so only use it when the bigger version won't fit.
- If you're simply cutting pieces of shelving to length—which is typical in most applications—you'll almost certainly be able to make all the cuts with a standard hacksaw.
-
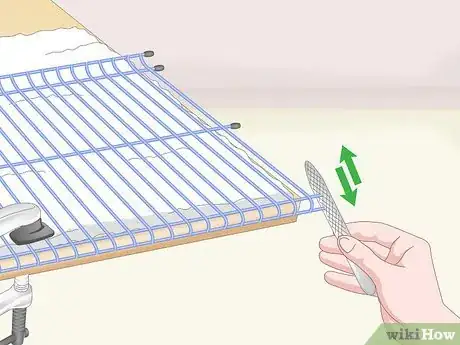
6File down the cuts and cap them if possible. Use a metal mill file—which you can pick up at any hardware store—to smooth out any burrs or metal shards created by your cuts. If your wire shelving comes with plastic caps (similar to small soda bottle caps) that you can press on to cover up cut wire ends, use those as well.[8]
- Run the mill file back and forth over the cut metal a few times to smooth it out.
- Press the caps on firmly until they are securely in place.
- Even if you work slowly and carefully, using a hacksaw will create rougher cuts and more burrs than will using bolt cutters.
Trying a Dremel or Similar Rotary Tool
-
1Measure, mark, and clamp the metal like you're using a hacksaw. Cutting through wire shelving with a rotary tool, like a Dremel, requires essentially the same setup as when using a hacksaw. The only real difference is that the rotary tool will do the cutting for you![9]
- Dremel is the best-known brand of rotary tool, but there are several different manufacturers. Compare options at your local home improvement store.
- Alternatively, use an angle grinder with a metal cutting blade.
- Always take proper safety precautions before using a rotary tool. Wear eye protection and long sleeves, put on thick work gloves, remove any dangling jewelry, and tie back any long hair. You should also use hearing protection.
-
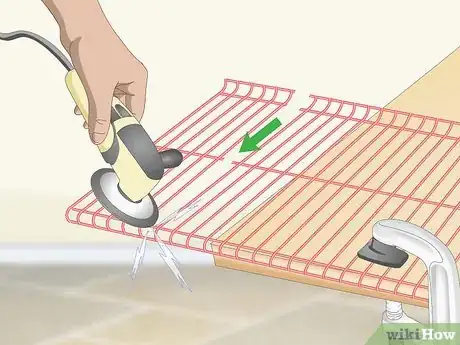
2Cut through the wires with a metal cutting wheel attachment. Choose a cutting wheel attachment intended for use with metal, and attach it to the end of your rotary tool as described in the product instructions. Line up the cutting wheel over your first cut line, turn on the rotary tool, and slice straight down through the wire. Turn off the tool, reposition it over the next cut line, and repeat the process.[10]
- Rotary tools vary in how you secure the attachments and turn on the motor, so read your product instructions carefully.
- If you need to cut through several pieces of shelving, you'll likely wear out multiple cutting wheels—so buy several backups before you start cutting.
-
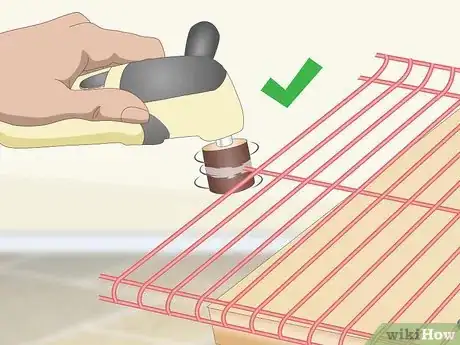
3Put on a drum sander attachment and smooth out your cuts. Once you're done making all your cuts, remove the cutting wheel attachment and put on a drum sander attachment that's intended for use on metal. Turn on the device and run the drum sander back and forth over each cut a few times to remove any burrs or metal shards.[11]
- If your wire shelving kit comes with plastic end caps that look like small soda bottle caps, press them firmly onto each cut wire end until they're securely in place. This will provide extra protection against any burrs that might still be present.
Things You'll Need
Using Bolt Cutters
- Tape measure
- Permanent marker
- Bolt cutters with 12 in (30 cm) or longer handles
- Mill file
- Safety glasses
Cutting with a Hacksaw
- Tape measure
- Permanent marker
- Towel
- Soft clamps
- Standard hacksaw
- Mini hacksaw (optional)
- Mill file
- Safety glasses and gloves
Trying a Dremel or Similar Rotary Tool
- Tape measure
- Permanent marker
- Towel
- Soft clamps
- Rotary tool with cutting and sanding attachments
- Safety glasses and gloves
- Hearing protection
References
- ↑ https://www.familyhandyman.com/closet/how-to-install-wire-shelving/
- ↑ https://www.familyhandyman.com/closet/how-to-install-wire-shelving/
- ↑ https://www.familyhandyman.com/closet/how-to-install-wire-shelving/
- ↑ https://www.familyhandyman.com/closet/how-to-install-wire-shelving/
- ↑ https://www.doityourself.com/stry/how-to-sharpen-bolt-cutters
- ↑ https://www.familyhandyman.com/closet/how-to-install-wire-shelving/
- ↑ https://www.familyhandyman.com/closet/how-to-install-wire-shelving/
- ↑ https://www.familyhandyman.com/closet/how-to-install-wire-shelving/
- ↑ https://www.dremeleurope.com/general/en/cutwireshelving-7299-ocs-pj/
