This article was co-authored by wikiHow Staff. Our trained team of editors and researchers validate articles for accuracy and comprehensiveness. wikiHow's Content Management Team carefully monitors the work from our editorial staff to ensure that each article is backed by trusted research and meets our high quality standards.
wikiHow marks an article as reader-approved once it receives enough positive feedback. In this case, 92% of readers who voted found the article helpful, earning it our reader-approved status.
This article has been viewed 339,505 times.
Learn more...
A wire tree sculpture can be a lovely homemade decoration. You can make your own wire tree sculpture to decorate your home, liven up your office, or even to give as a gift. To create this tree you must prepare the branches, twist the wire, and secure the tree in a container.
Steps
Creating the Branches
-
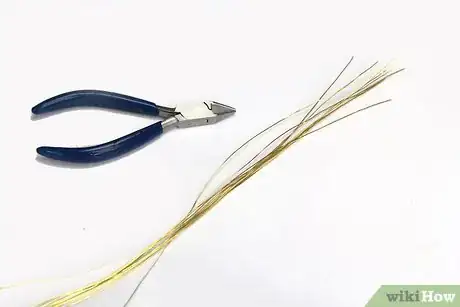
1Purchase 25 feet (7.6 m) of 22-gauge wire. Metal wire can be found at a local craft store. You will find it in the jewelry making supply aisle. It’s usually sold in a gold or silver finish.
-
2Cut the wire into 10 strips. Each strip will be cut to be 2 ½ feet (76 cm) long. Make the cut using a pair of wire cutters. Set the wires off to the side.[1]
- The wire cutters are sharp. Use caution.
Advertisement -
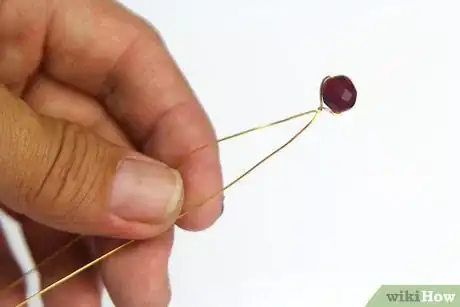
3Add a bead to the first wire. String a bead onto your first wire. Bring it down to the center of the wire. Bend the wire around the bead until the ends meet. Twist the wire tightly, moving down from the bead about ¾ inch (19 mm). You will be left with two ends on either side of the twist.[2]
-
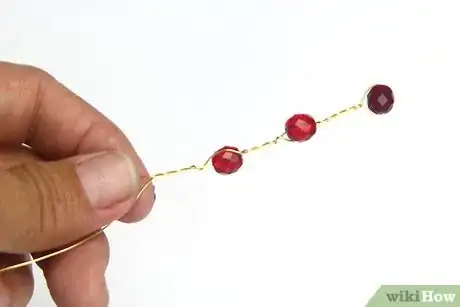
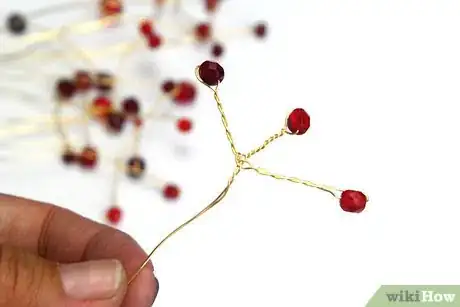
4Add two more beads to the wire. Add another bead to one of the ends of your wire. Bend and twist the wire around the bead like you did in the last step. You will have about ¾ inch (19 mm) of wire below the bead. Repeat this step on the remaining end of the wire.[3]
-
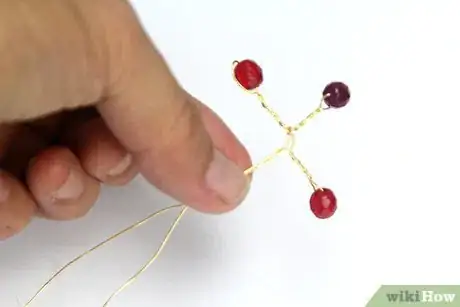
5Secure the beads. You now have three beads on the wire in a “t” shape. Secure the beads by twisting the remaining wire together below the “t”. Twist these two wires together about ¾ inch (19 mm).[4]
-
6Repeat this process with the remaining nine wires. Add three beads to each of the remaining wires. You will end up with 10 “t” shaped wires with three beads on each wire.[5]
Twisting the Wire into a Tree
-
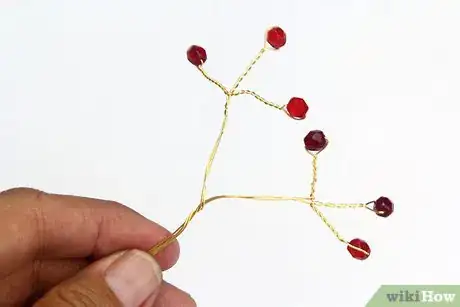
1Twist two branches together. Cross two branches over each other and twist them together at the base of the beads. Do this with each of the branches so that you have five pairings.
-
2Twist the grouped branches into a tree. Take one pairing of branches and cross another pairing over it. Begin twisting the pairings together. Add another pairing, and another, until you have added all of the pairings. Continue twisting the pairings together. This twisting is creating the “trunk” of the tree.[6]
- Create a thick, wide trunk by twisting the bases of the branches on top of each other.
- Create a thin, swirling trunk by stretching the bases of the branches out as your twist them together.
-
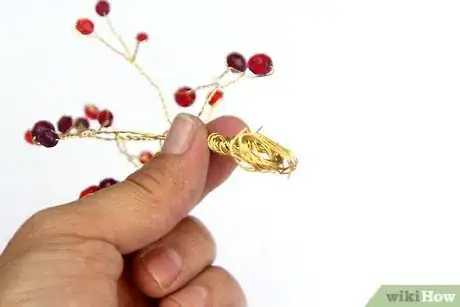
3Create a ball at the bottom of the tree. When you near the bottom of the wires, twist the wires around each other to create a ball. This ball will help to stabilize the tree within its container.[7]
Securing the Tree in a Container
-
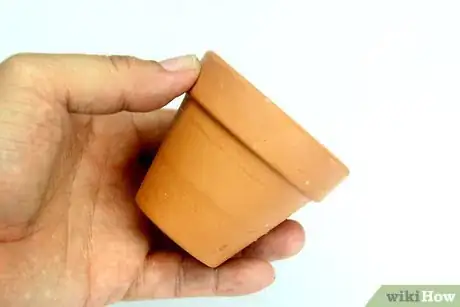
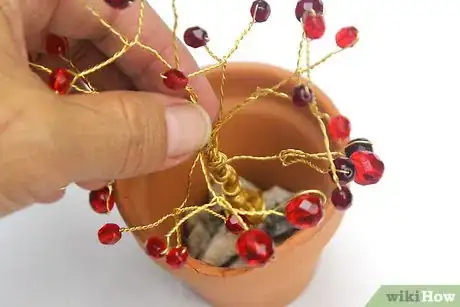
1Place the tree into the desired container. Add a liberal amount of glue to the bottom of the container using a hot glue gun. Push the ball of the tree into the hot glue. Hold onto the tree while the glue dries.[8]
- The container can be a small planter or decorative bowl.
-
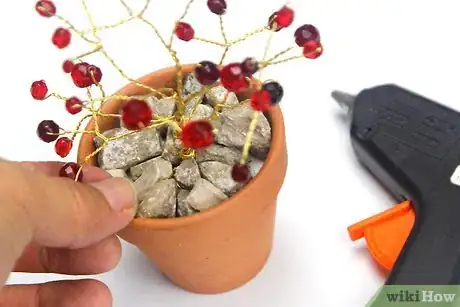
2Add one layer of pebbles to the container. While the glue is still hot, add a layer of pebbles to the container. All of the pebbles should fit down into the glue. They should be surrounding the tree trunk. They will offer the tree more support once all of the glue is dry.[9]
- Remember to continue to hold the tree while adding the pebbles. If you need to free your hands, prop the tree up with something to prevent it from falling over.
- Work quickly as your glue will dry within one to two minutes.
-
3Glue more pebbles inside of the container. Add another layer of glue on top of the first layer of pebbles. Continue to add pebbles to the glue. Repeat this process several times until you have reached the top of the container.[10]
-
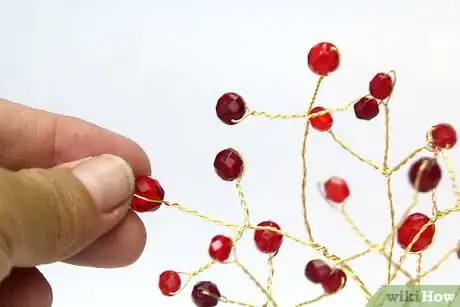
4Adjust the branches. Once the glue has dried, you can adjust your tree branches. Bend the wire branches so that the tree takes your desired shape.[11]
- Turn the branches down to resemble a weeping willow tree.
- Fray the branches out and slightly up to resemble a maple or oak tree.
-
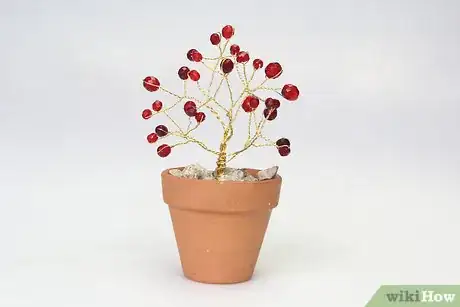
5Finished.
Community Q&A
-
QuestionWhat do I put on the wire?
 Community AnswerAnything that will go with the decor of your home or the room where you will place the sculpture. Search "wire tree sculpture" on Google Images for some ideas.
 -
QuestionBefore reading this, I thought it would be easier to start with the branches if using beads. How do the beads attach securely when starting at the roots?
 T. ChinsenTop AnswererWith the final bead at the open end, pass one wire through the bead hole a second time for the most secure method. It can also be secured by making a wire spiral against the bead. Make the spiral large enough to cover the bead hole and press it onto the bead.
 -
QuestionIs there a way to add branches to the tree once it's done?
 Community AnswerYes. You just have to twist the branch all the way up the trunk to secure it.
Warnings
- Use caution with the hot glue gun. The glue can get very hot and burn your skin.⧼thumbs_response⧽
- The wires may poke your fingers while you are twisting them into place.⧼thumbs_response⧽
Things You'll Need
- 25 feet of 22-gauge wire
- Wire cutters
- Ruler
- Beads
- Hot glue gun
- Pebbles
- Small container to hold the tree
References
- ↑ https://rings-things.com/blog/wire-jewelry-101/
- ↑ http://www.motherearthnews.com/diy/how-to-make-wire-tree-craft-zmaz11zsto?pageid=2#PageContent2
- ↑ http://www.motherearthnews.com/diy/how-to-make-wire-tree-craft-zmaz11zsto?pageid=2#PageContent2
- ↑ https://www.youtube.com/watch?v=7jalyVAdPSw
- ↑ http://www.motherearthnews.com/diy/how-to-make-wire-tree-craft-zmaz11zsto?pageid=2#PageContent2
- ↑ https://www.youtube.com/watch?v=7jalyVAdPSw
- ↑ https://www.youtube.com/watch?v=7jalyVAdPSw
- ↑ https://www.youtube.com/watch?v=7jalyVAdPSw
- ↑ https://www.youtube.com/watch?v=7jalyVAdPSw
About This Article
Making a wire tree sculpture is an easy way to decorate your home or office. All you’ll need is a roll of 22-gauge wire, wire cutters, beads, and a small plant pot filled with stones. You'll first need to cut your wire into 10 strips that are each 2 ½ feet long. To make your sculpture, string 3 beads onto each wire strip every ¾ inch and twist the wires around them to keep them in place. Twist each wire into a cross shape, then twist the wires all together into a tree formation. When you've finished, place the stem of your tree into your plant pot filled with stones so it will sit on your desktop or other surface. For more tips, including how to glue your tree into the pot, read on!
