X
wikiHow is a “wiki,” similar to Wikipedia, which means that many of our articles are co-written by multiple authors. To create this article, volunteer authors worked to edit and improve it over time.
This article has been viewed 15,258 times.
Learn more...
This wikiHow teaches how to add new environment variables in Windows 10. Environment variables are useful to specify paths internally in the OS for specific programs. It is basically stored in the form of a name and value pair. OS has a lot of builtin environment variables like 'PATH' where paths to installed Softwares are stored. Stick to this article, to find out how to add environment variables in Windows 10.
Steps
-
1Locate the "This PC" icon on your system. You may find it on your desktop screen. You can go to your desktop by pressing Ctrl+D.
-
2Right-click on the "This PC" icon. This will show a small popup, with few options.Advertisement
-
3Click on the "Properties" option. You may find this in the last position below the "Rename" option. This will open a new window with all the system details like RAM, Processor, OS, etc.
-
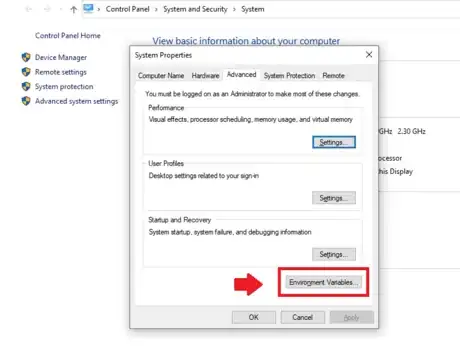
4Click or double click on "Advanced System Settings". You may find this option on the left-hand side of the newly opened window (System Details). This option is below the "System Protection" option.
-
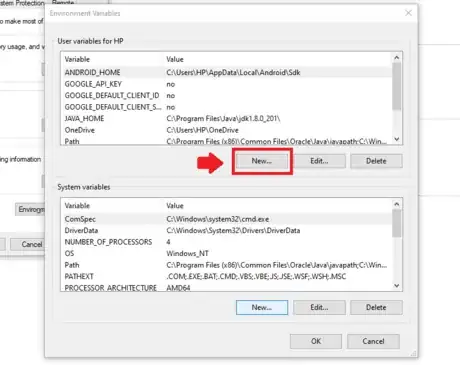
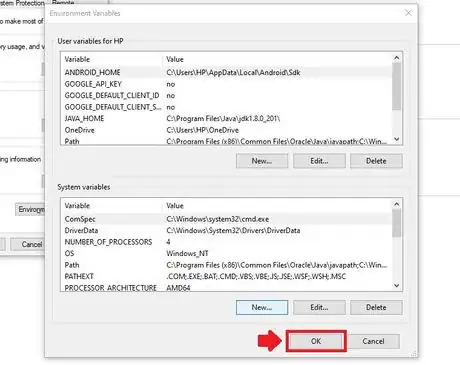
5Click on Environment Variables. After clicking, it will show a new window dialog called "Environment Variables".
-
6Decide which variable to add (User / System). Click the New option in any (User/System) section.
-
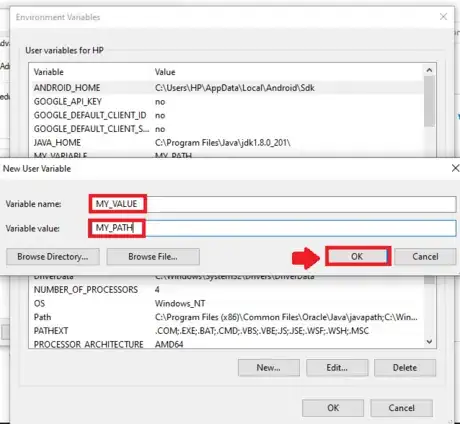
7Add the variable name and variable value and click OK. In variable_name, you can give a name to your user variable and specify PATH in the variable_value, finally, click "ok" to save the changes.
-
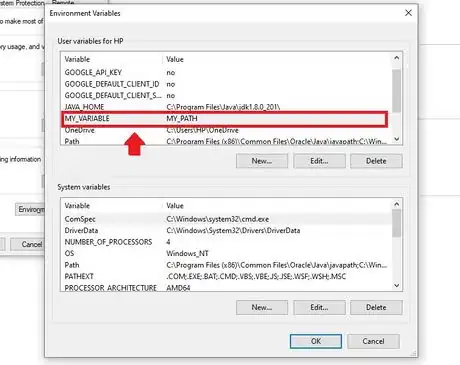
8View the environment variables. After saving a new variable with path, you can see the entry of variables.
-
9Click OK. After clicking OK, you will have successfully created a new User variable with a PATH attached to it.
Advertisement
About This Article
Advertisement




-Step-17.webp)






-Step-17.webp)


