This article was co-authored by wikiHow staff writer, Darlene Antonelli, MA. Darlene Antonelli is a Technology Writer and Editor for wikiHow. Darlene has experience teaching college courses, writing technology-related articles, and working hands-on in the technology field. She earned an MA in Writing from Rowan University in 2012 and wrote her thesis on online communities and the personalities curated in such communities.
This article has been viewed 11,738 times.
Learn more...
This wikiHow will show you how to create frames in Photoshop with your computer as well as how to add frames to your photos using Photoshop on your mobile phone or tablet.
Steps
Creating a Frame on a Computer
-
1Open your image in Photoshop. On a Mac or Windows computer, you'll be able to open the program from your Start Menu or the Applications folder in Finder.
- This will work for Photoshop on Mac and Windows.
- You may be prompted to open a file or create a new project, but if you aren't, go to File > Open to open your picture, you can also press CTRL + O (Windows) or CMD + O (Mac) on your computer's keyboard.
-
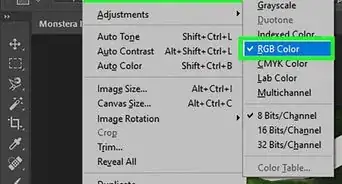
2Click the Image tab. You'll find this in the menu at either the top of the program window or at the top of your screen.Advertisement
-
3Click Canvas Size. When you open your image, the canvas size is the same as the dimensions of your picture. You'll want to add extra space around your canvas so you can add a frame.
-
4Change the canvas size numbers. Change the width and height to percent instead of pixels so you don't have to worry about calculations.
- Make sure your anchor is set to the middle of the canvas using the image below "Relative."
- You can also change the canvas extension color here. It defaults to white.[1]
- Click OK to continue.
-
5Click the icon that looks like a half grey and half white circle. You'll see this at the bottom of the Layers panel next to the folder icon. A menu should pop-up.
-
6Click Solid Color. This is at the top of the pop-up menu and launches a pop-up window.
-
7Set the color. You can choose any color here, but white is the default. Click OK to continue.
-
8Drag and drop the frame layer to the back. When you drag your layer below the image layer in the panel, you should see your image in your canvas instead of the other layer.
- You should now see your frame around your picture. You can experiment with frame colors by double-clicking the left-most thumbnail in the frame layer in the Layers panel. You can also return to the "Canvas Size" menu in Image to change how much or little frame you see.[2]
-
9Save your image. You can press CTRL + S (Windows) or CMD + S (Mac) to save your image or go to File > Save.
Adding a Frame to Your Picture in the Mobile App
-
1Open your image in Photoshop. On a mobile phone or tablet, this app icon looks like blue letters “P” and “S” in the middle of a diamond on a black background. You can find this app on your home screen, in your app drawer, or by searching.
- As soon as you launch the app, you should be prompted to open an image.
-
2Swipe the bottom menu. This is the menu of icons starting with the three empty, overlapping circles.
-
3Tap the last icon that looks like a border and image combo. This will change your editing options to Basic, Edges, and Frames.
-
4Tap Frames. Since you aren't given the option to enlarge the canvas, some of the frames available will cover some of your image.
- Tap through the frames to preview what they'll look like with your image in the preview above.
-
5Tap Export. You'll see this at the top right of your screen.
- All the saving options will appear. You can save the image to your gallery or share with a friend over Facebook.
References
About This Article
1. Open your image in Photoshop.
2. Click the Image tab.
3. Click Canvas Size.
4. Change the canvas size numbers.
5. Click the icon that looks like a half grey and half white circle.
6. Click Solid Color.
7. Set the color.
8. Drag and drop the frame layer to the back.
9. Save your image.


-Step-9-Version-2.webp)


