This article was co-authored by wikiHow staff writer, Rain Kengly. Rain Kengly is a wikiHow Technology Writer. As a storytelling enthusiast with a penchant for technology, they hope to create long-lasting connections with readers from all around the globe. Rain graduated from San Francisco State University with a BA in Cinema.
This article has been viewed 75,343 times.
Learn more...
Do you want to create a 3-dimensional box or packaging mockup in Adobe Photoshop? Luckily, Photoshop has a 3D feature that allows you to create 3D shapes such as rectangles, cubes, and more. You can easily design a cube and adjust its lighting in a few simple steps. You can also use the Free Transform tool to create a 3D cube or mockup using gradients or original images. This wikiHow will show you how to create a 3D box or cube in Adobe Photoshop.
Things You Should Know
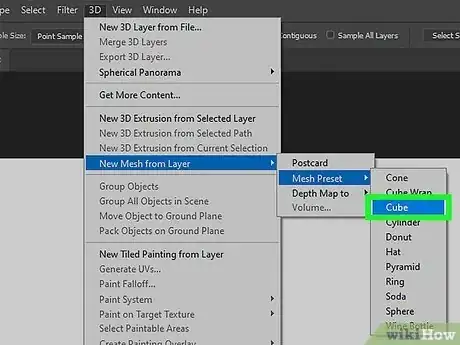
- When using the 3D tool, click "Window", "3D", then "Mesh from Preset". Click "cube" to create a 3D cube.
- When using the Transform tool, use a gradient or original designs to create a cube or box mockup.
- Photoshop will replace 3D features with Adobe's Substance collection in the future.
Steps
Using 3D Object Tool
-
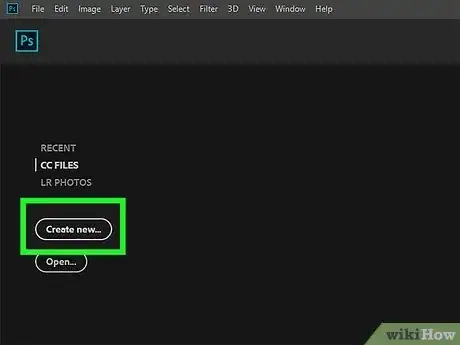
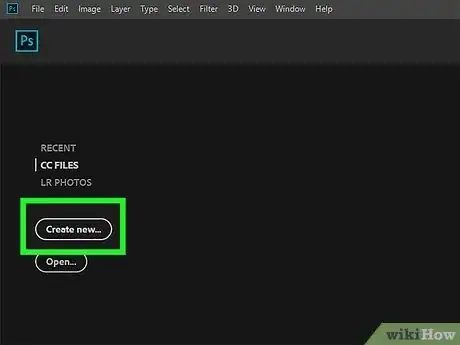
1Open Photoshop and create a new document.[1]
- You'll need an Adobe subscription to use Photoshop and Photoshop's tools.
-
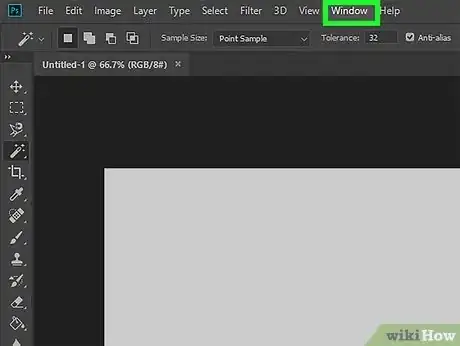
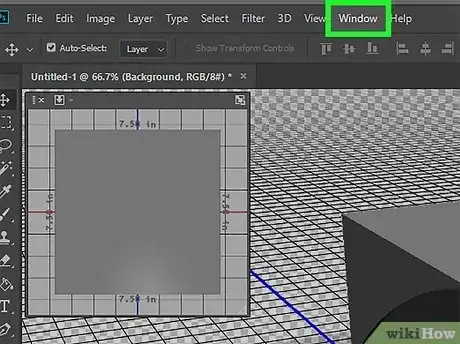
2Click Window. This will open a drop-down menu.Advertisement
-
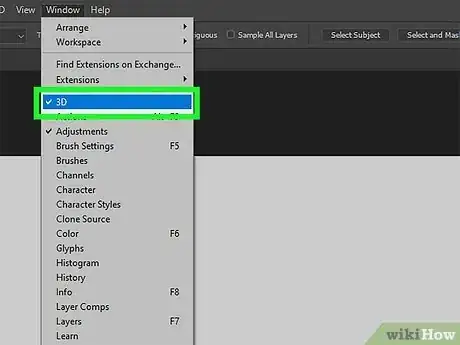
3Click 3D. A new panel will open.
-
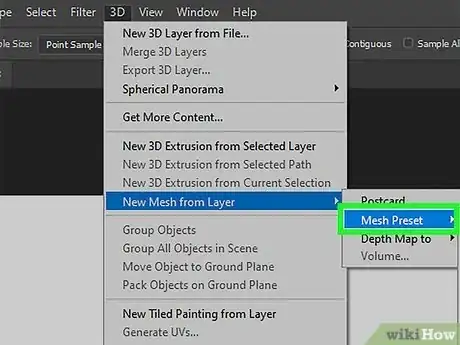
4In the 3D panel, click Mesh from Preset. This will select the option.
-
5Click the drop-down menu and select Cube. This will be between Cube Wrap and Cylinder.
- You can also select other shapes.
-
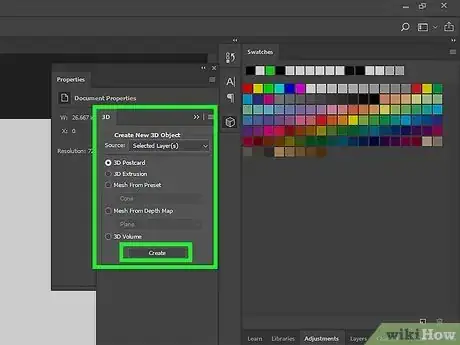
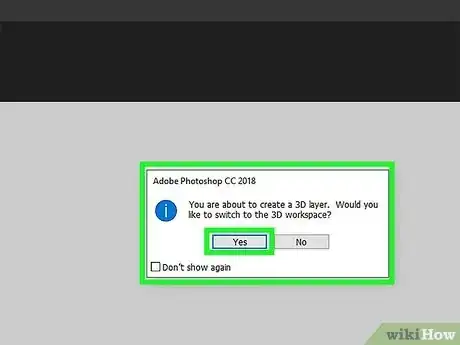
6Click Create. A prompt will appear to switch to the 3D workspace.
-
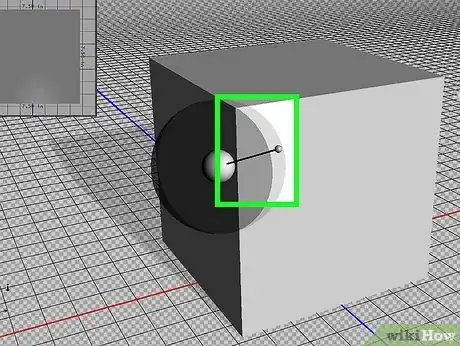
7Click Yes. Your cube will appear in the 3D workspace.
- You can pan your camera by using the three icons at the bottom left corner of the screen.
- Click Orbit the 3D Camera to move around the camera and see the cube.
- Click Pan the 3D Camera to pan the camera.
- Click Dolly the 3D Camera to adjust the distance of the camera from the cube.
-
8Edit your cube. You can change the lighting using the 'Infinite Light icon on the top right corner of your workspace. The icon will look like a wand with short rays.
- If you don’t see Infinite Light, you can navigate to the 3D panel and select Infinite Light to activate it.
- Click and drag the wand to adjust the lighting of your cube.
-
9Click Window.
-
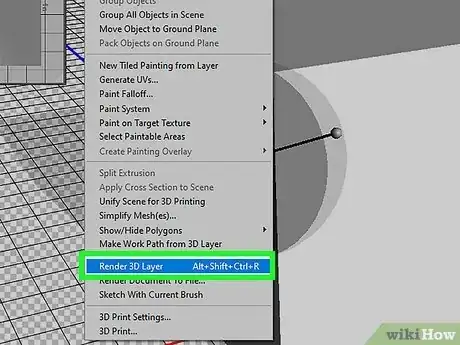
10Click Render 3D Layer. This will begin rendering your cube.
- Alternatively, you can click the cube icon in the Properties panel. This will be next to the trash can icon.
- You'll be able to see the remaining rendering time at the bottom left corner, next to zoom percentage.
- If you want to work on this project later, you can make a PSD file.
Using Transform Tools
-
1Open a new Photoshop project. If you want to make a 3D box for a mockup of a product, you can use Photoshop's Transform tools to create your packaging.[2]
-
2Prepare your images. You can create a simple cube by using a gradient. You can also use original images and designs to create a 3D packaging mockup.
- To use a gradient, create a new layer. Fill it in using a gradient with the lightest color at the top left.
- Duplicate the gradient layer. Go to Image → Transform → Flip Horizontal.
- Create a third layer and fill it in using a gradient with the lightest color now at the bottom left.
- To use original images as the faces of your cube, import at least three images.
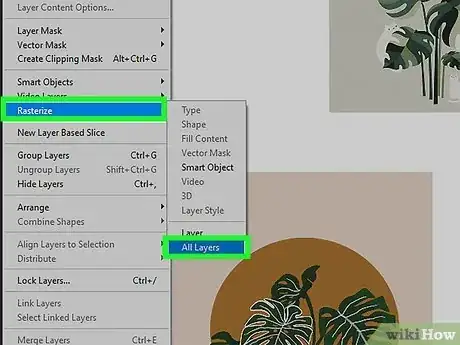
- Be sure to rasterize your image layers.
- Select all image layers. Go to Layers → Rasterize → Layers.
- To use a gradient, create a new layer. Fill it in using a gradient with the lightest color at the top left.
-
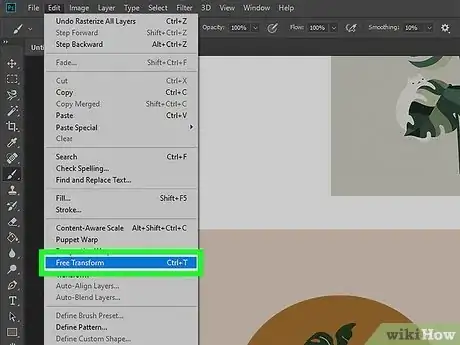
3Click Edit in the top menu, then Free Transform. A selection box will appear.
- Alternatively, you can press CTRL + T (Windows) or CMD + T (Mac) to enter Free Transform mode.
-
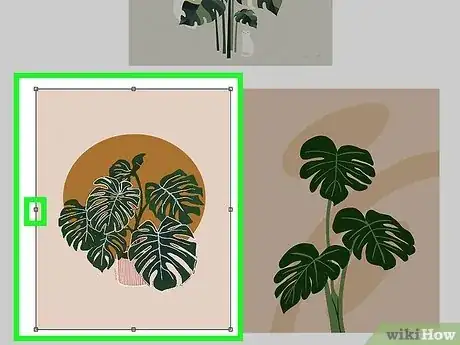
4Edit the front-facing cube face. Use your gradient layer.
- For original images, decide which of the three prepared images will be the front of your cube.
- Hold down CTRL or CMD and click the middle dot on the left side of the image.
- Drag the image up until it rests at an angle.
-
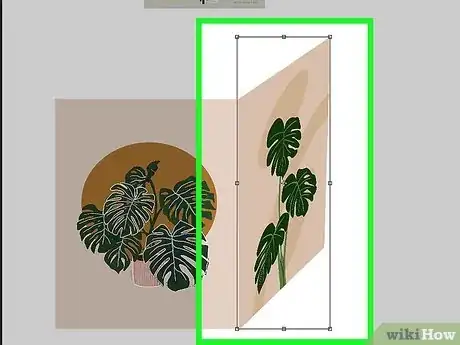
5Edit the side-facing cube face. Use the gradient layer flipped horizontal.
- For original images, decide which of the remaining two images will be the side of your cube.
- Move your image until the left side meets the right side of the first image. Make sure the top-left and bottom-left corners meet.
- Hold down CTRL or CMD and click the middle dot on the right side of the second image.
- Drag the image up until it rests at an angle.
-
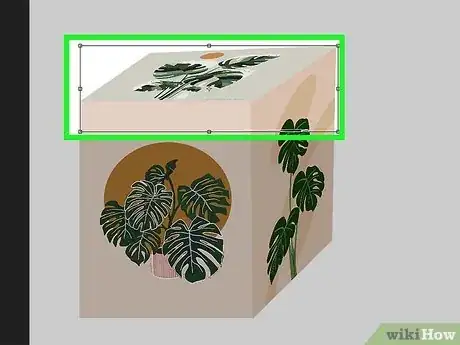
6Edit the top-facing cube face. Use the gradient layer with the lightest color at the bottom-left.
- For original images, use the remaining image as the top of your cube.
- Move your image until the bottom-left corner connects to the top-left corner of your first image.
- Hold down CTRL or CMD and click the middle dot on the right side of the third image.
- Drag the image down until the third image lines up with the first image.
- Hold down CTRL or CMD and click the middle dot on the top side of the third image.
- Drag the image down until the bottom-right corner connects to the first and second image.
-
7Add effects. You can trim the back corner for a more realistic look. You can also add a drop shadow.
- To trim the back corner, select the Rectangular Marquee tool in the Tools panel.
- Select a small segment at the back corner of the cube. Press del on your keyboard to delete the selection.
- To add a drop shadow, use the Rectangle tool to create a black square the same dimensions as the bottom of your cube. Hold down CTRL or CMD and drag to adjust as necessary.
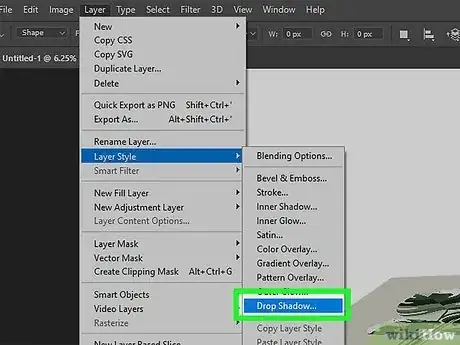
- Go to Layer → Layer Styles → Drop Shadow. Adjust the drop shadow settings, then click OK.
- To trim the back corner, select the Rectangular Marquee tool in the Tools panel.
