This article was co-authored by wikiHow staff writer, Nicole Levine, MFA. Nicole Levine is a Technology Writer and Editor for wikiHow. She has more than 20 years of experience creating technical documentation and leading support teams at major web hosting and software companies. Nicole also holds an MFA in Creative Writing from Portland State University and teaches composition, fiction-writing, and zine-making at various institutions.
This article has been viewed 54,545 times.
Learn more...
Do you want to convert a WebM file to the MP4 format? While this open source format is commonly found on HTML5 sites like YouTube, some video players may not support WebM videos. Fortunately, converting videos with the .webm file extension videos to MP4 is fast and easy. If you want to create an MP4 video that has the same resolution and size as the original file, you can use any video converter, including VLC Media Player, or an online converter that works on any platform. And if you want an easy way to decrease the video's quality and size, try HandBrake on your PC or Mac. This wikiHow guide teaches you 5 easy ways to convert a WebM video to the MP4 format.
Steps
Using Veed.io (Any Platform)
-
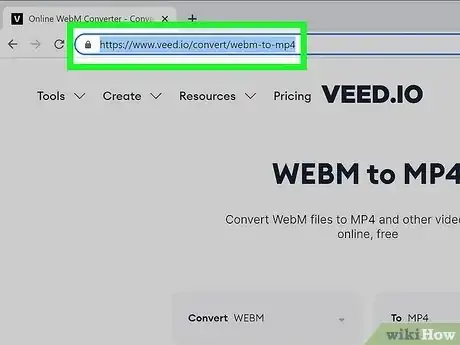
1Go to https://www.veed.io/convert/webm-to-mp4 in a web browser. Veed.io is one of many online converters that makes it easy to convert WebM files to the MP4 format. You can use this tool on any platform, including your computer, Android, iPhone, or iPad.
- This method is great if you just want a quick way to convert a WebM file to MP4 without making changes to the resulting video. You can even use this tool on your Android, iPhone, or iPad.
- The Veed.io free plan allows users to convert videos no more than 250MB. The maximum export length is 10 minutes. Moreover, there will be a watermark attached in your video. So if you convert WebM to MP4 online with Veed.io, you may need to remove watermark manually. Or you can subscribe to Veed.io to get watermark-free online video conversion.
- While Veed.io allows you to convert much larger files than most other online converters, it might not be the best option if your WebM file is very large—uploading large files can take a lot of time. If your WebM file is very large, it's better to use a converter like VLC or Handbrake.
-
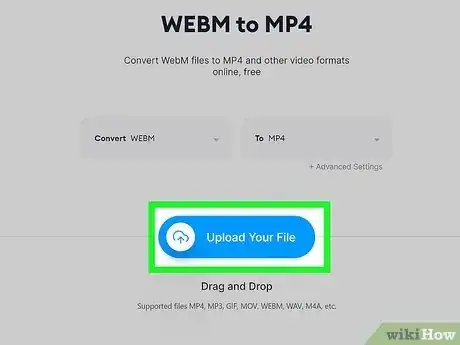
2Click Upload Your File. This opens your device's file browser.Advertisement
-
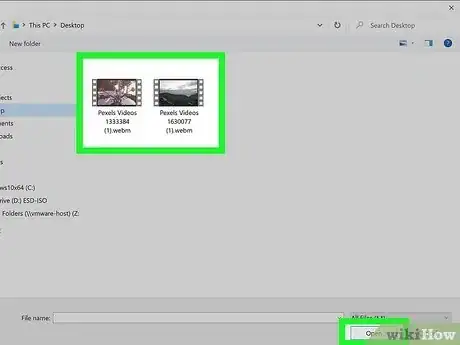
3Select your file. Select the file ending in ".webm," then choose Open or "'Upload as prompted. This uploads your WebM file to Veed.io.
-
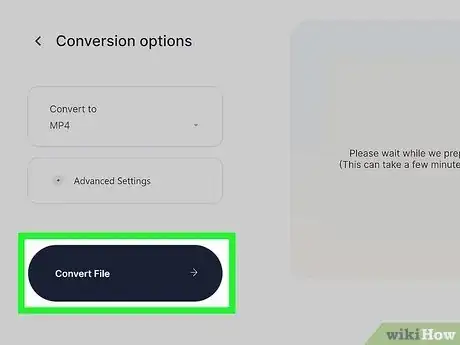
4Click Convert File. It's the large oval button at the bottom of the page. Once the file is converted, you'll see a preview.
-
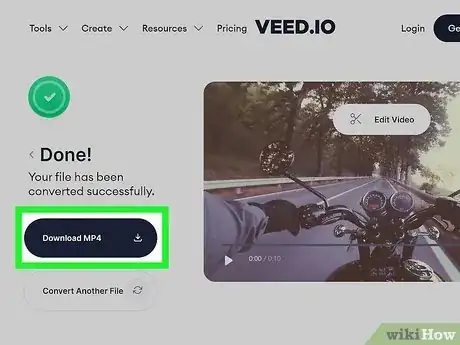
5Click Download MP4. This downloads the file to your computer, phone, or tablet's default download folder.
- You may have to tap Save to save the file locally.
Using Handbrake (Windows & Mac)
-
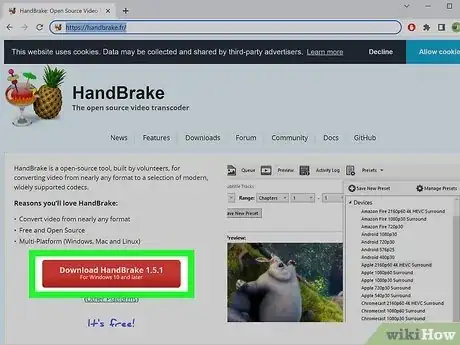
1Open Handbrake on your PC or Mac. Handbrake is an open-source video conversion tool that can easily convert your WebM files to the MP4 format. If you don't have Handbrake, you can download it from https://handbrake.fr.
- Handbrake has several easy-to-use presets that make it easy to change the quality and scale of the resulting MP4 file. While you can't really improve the quality of a low-quality video with Handbrake, you can use it to produce a smaller file that you can easily share.
-
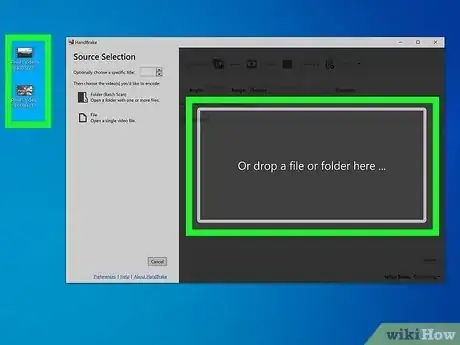
2Drag and drop the WebM file to the window. Alternatively, you can click File to select the file using your PC or Mac's file browser.
-
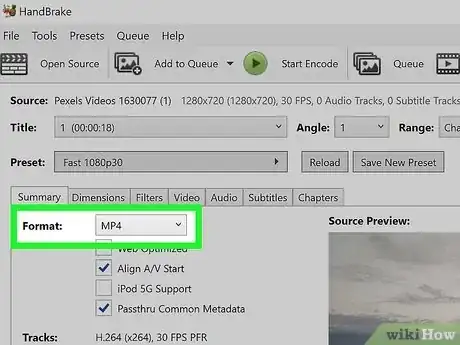
3Select MP4 from the "Format" menu. If this option is not preselected, select it now. This ensures that you're creating an MP4 file with the correct codec (H.264).
-
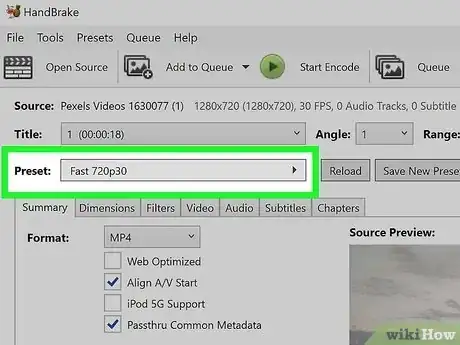
4Select a preset from the menu. To make sure you're choosing the best preset for your video, start by looking at the resolution and the FPS (frame rate) next to "Source" at the top of the window. The higher the quality, the larger the file.
- If you don't want to change the quality at all, you'll want to choose a preset that has the same resolution and frame rate (or close) that you see in the source.
- If you want to convert a 4K WebM file (4096x2034) to a 4K, choose the Vimeo YouTube HQ 2160p60 4K preset from the Web menu.
- To reduce a higher-quality video to make the file size smaller, choose a lower resolution to downscale the video.[1]
- For example, if you have an 1080p 60 FPS HD video and want to make the file smaller without losing a ton of quality, you can choose one of the 720p30 presets.
- The General presets are designed to work on all devices, while the Web presets are mainly for sharing videos on the internet.
- For more details on all of HandBrake's presets, visit https://handbrake.fr/docs/en/latest/technical/official-presets.html.
- If you don't want to change the quality at all, you'll want to choose a preset that has the same resolution and frame rate (or close) that you see in the source.
-
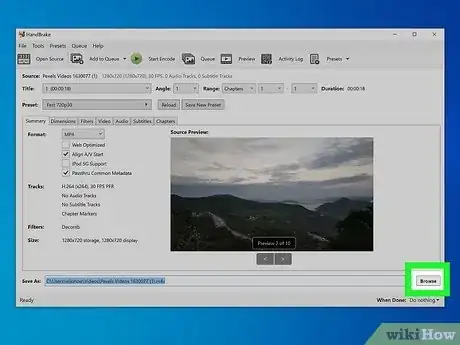
5Choose a saving location and file name. Here's what you'll need to do to make sure you're creating an MP4 file:
- Click Browse. You'll see it next to "File" on a Mac, and next to "Save As" on a PC.[2]
- Choose a location to save the file, and type a new file name if desired.
- Click Save.
- You'll notice that the new file ends with the .m4v file extension instead of .m4a. But don't worry—MP4 and M4V are exactly the same.[3] The file is given this extension to make it compatible with QuickTime.
- If you want to be able to play the video in QuickTime Player on a Mac, you will need to keep the .m4v file extension. Otherwise, delete the .m4v at in the file name (next to "File" or "Save as") and replace it with .mp4.
-
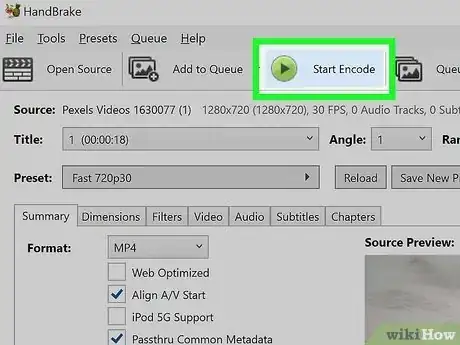
6Click Start Encode (PC) or Start (Mac). You'll see it at the top of the window. This converts the file to the MP4 format.
- If you're working with a large video, this can take a while. For smaller videos, this will only take a few seconds to a few minutes.
- Once the conversion is complete, the MP4 file will be available at the location you selected.
Using VLC Media Player (Windows)
-
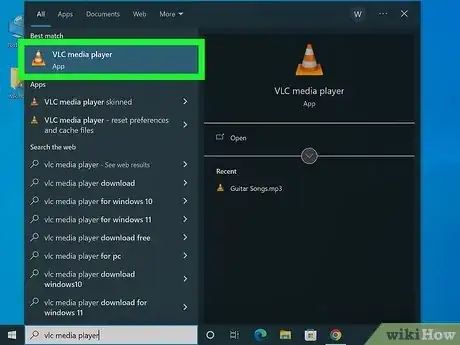
1Open VLC Media Player on your PC. VLC Media Player is a free media player that supports playback of just about any type of audio or video file. VLC also makes it easy to convert WebM files to other formats, including MP4.
- If you don't have VLC Media Player, you can get it from https://www.videolan.org.
- If you want to reduce the quality of the resulting video, it'll be easier to use Handbrake. You can use VLC to change the quality, but Handbrake's easy presets make it so you don't have to specify all of your preferences manually—this means that you're far less likely to produce a poor quality (or completely broken) MP4 file.
-
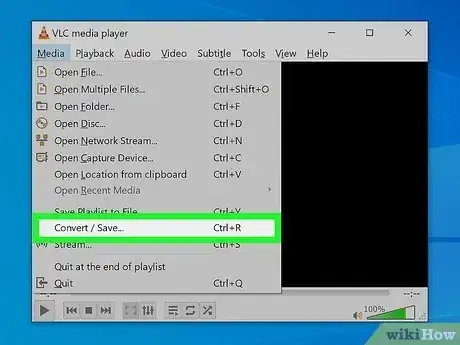
2Click the Media menu and select Convert/Save…. The Media menu is at the top-left corner of VLC Media Player.[4]
-
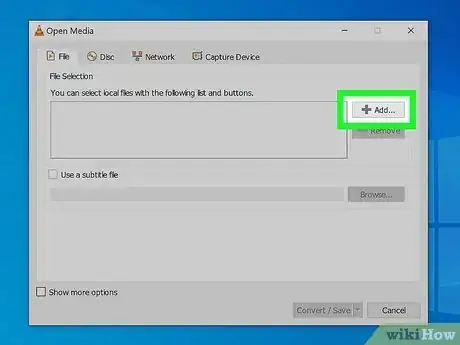
3Click the Add button. You'll see this near the top of the window.
-
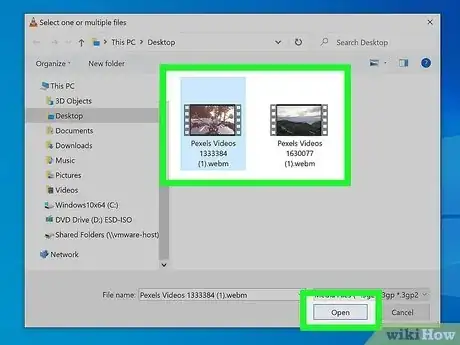
4Select your WEBM file and click Open. This adds your file to the top of the window.
-
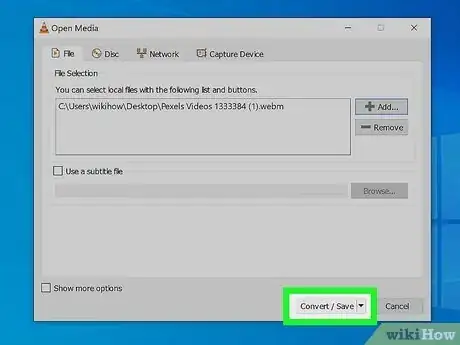
5Click the Convert/Save button. You'll see this at the bottom of the window.
-
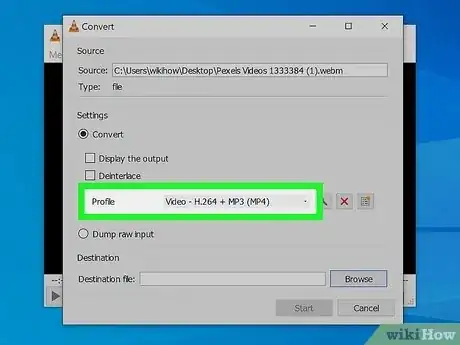
6Select the MP4 profile. Click the "Profile" dropdown menu, then select the profile called Video - H.264 + MP3 (MP4).
-
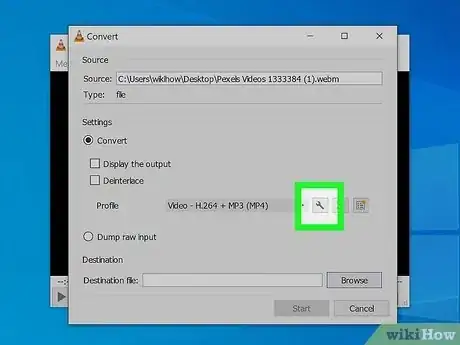
7Click the wrench button. You'll see it next to the "Profile" menu.
-
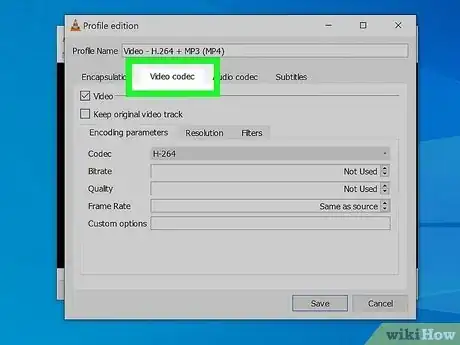
8Choose your video codec settings. To make sure the resulting video has the same settings as the original video, choose these options:
- Click the Video codec tab.
- Select H-264 from the "Codec" menu.
- Select Same as source from the "Frame Rate" menu.
- Click the Resolution tab and make sure all options are set to Auto.
- You can reduce the resolution if you'd like. But increasing it beyond the original video's resolution won't give you a better looking file.
- Increasing the scale of a low-resolution video will result in a poorer quality file.
- Click the Audio codec tab.
- Check the boxes next to Audio and Keep original audio track.
- Click Save.
-
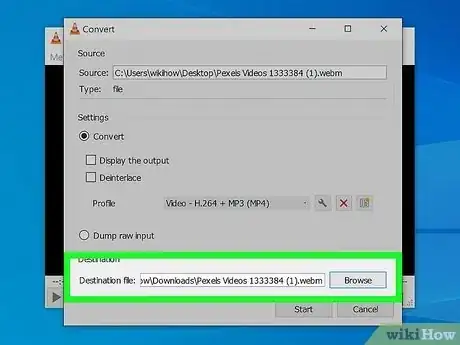
9Select a destination file. Now you'll need to choose a folder on your computer to save the new file to. Here's how:
- Click Browse next to "Destination file."
- Browse to the folder where you'd like to save the MP4.
- In the "File name" field, replace .webm with .mp4.
- Click Save.
-
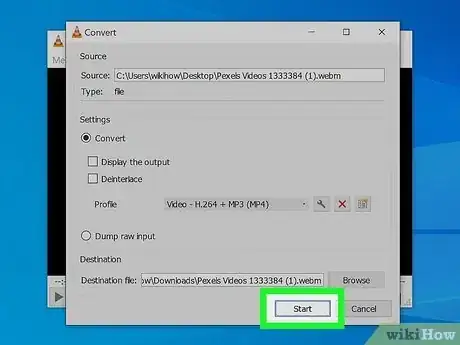
10Click Start to convert the video. You'll see this button at the bottom of the window. This converts the WebM file to the MP4 format.
- The process can take several minutes if the file is large, but it should be fairly quick for smaller files.
- Once the conversion is complete, you'll find the new file in the folder you selected.
Using VLC Media Player (Mac)
-
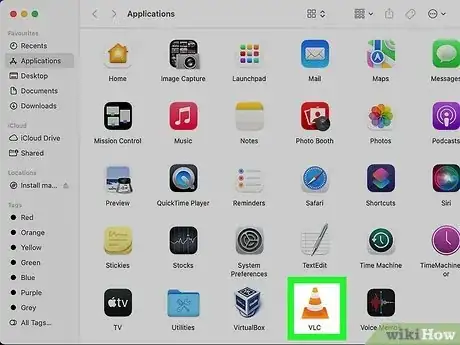
1Open VLC Media Player on your Mac. VLC Media Player is a free media player that supports playback of just about any type of audio or video file.
- VLC also makes it easy to convert WebM files to other formats, including MP4. If you don't have VLC Media Player, you can get it from https://www.videolan.org.
-
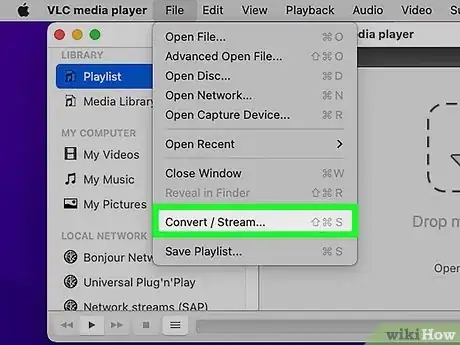
2Click the File menu and select Convert/Save…. The File menu is at the top-left corner of the screen.
-
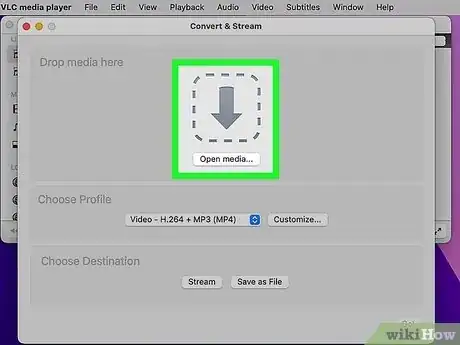
3Open your WebM file. Here's how:
- Click the Open media… button.
- Select your WebM file.
- Click Open.
-
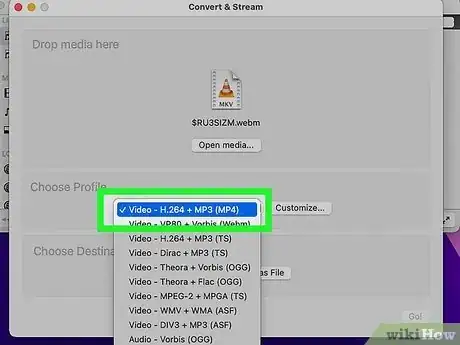
4Select the MP4 profile. If it's not selected by default, click the "Choose Profile" menu and select Video - H.264 + MP3 (MP4).
-
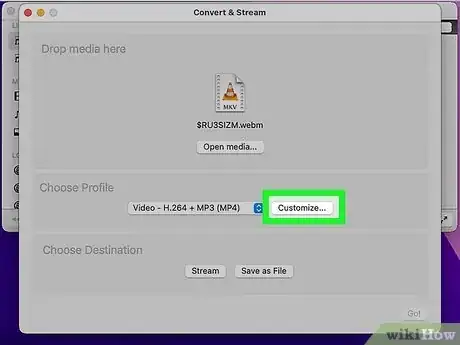
5Click the Customize… button. You'll see this to the right of the profile you've selected.
-
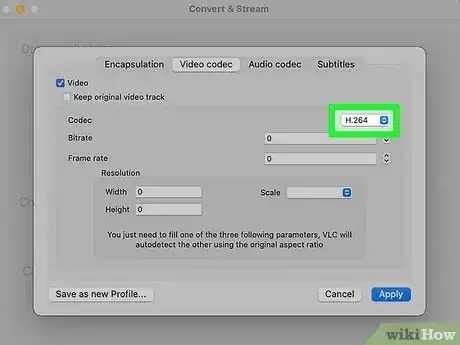
6Select the H.264 video code. This tells VLC how to convert the file. Here's how:
- Click the Video codec tab.
- Select H.264 from the "Codec" menu. It might already be selected, but if not, choose this option from the menu.
- It's best to leave the remaining settings as their defaults so VLC uses the video's original scale and resolution in the resulting video.
- You can reduce the resolution if you'd like, but increasing it beyond the original video's resolution won't give you a better looking file.
- Increasing the scale of a low-resolution video will result in a poorer quality file.
-
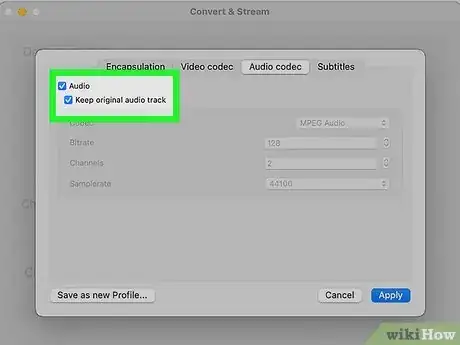
7Keep the original audio track. This ensures that you'll have audible sound in the converted video:
- Click the Audio codec tab.
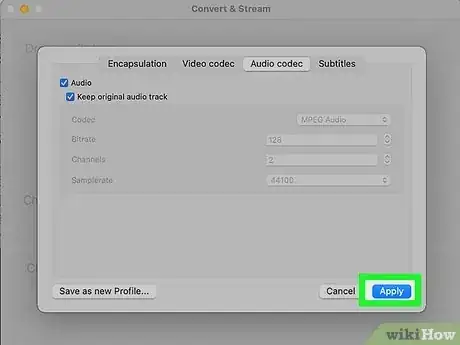
- Check the boxes next to "Audio" and "Keep original audio track."
- Leave the remaining options set to their defaults.
-
8Click Apply. This saves your changes and returns you to the Convert & Stream window.
-
9Select a destination file. Now you'll need to choose a folder on your Mac to save the new file to. Here's how:
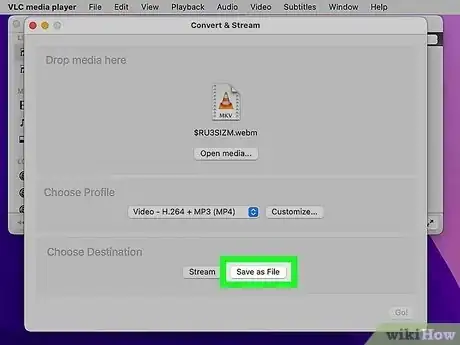
- Click Save as File under "Choose Destination."
- Click the Browse… button that appears.
- Browse to the folder you want to save the MP4 to.
- Type a new file name into the "Save As" field at the top. Just type a name for the file (such as movie and don't type ".mp4" at the end.
- Click Save.
-
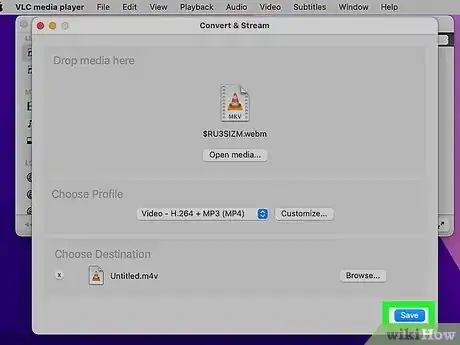
10Click Save to convert the file. You'll see this button at the bottom of the window. This converts the WebM file to the MP4 format. The process can take several minutes if the file is large, but it should be quick for smaller files.
-
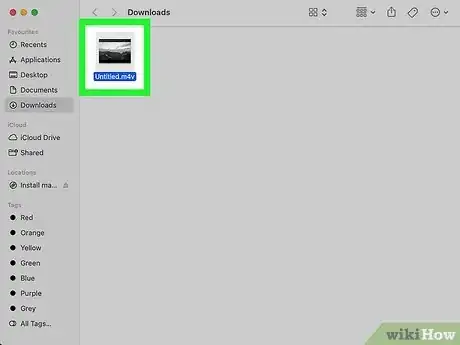
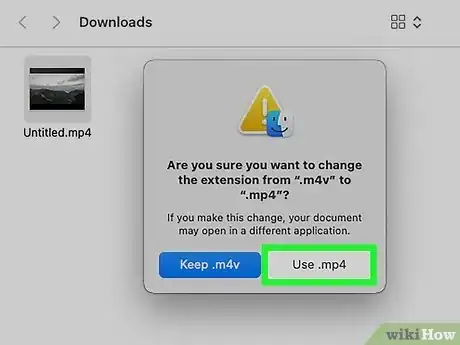
11Open the folder containing your new file. You'll notice that the new file ends with the .m4v file extension instead of .m4a. But don't worry—MP4 and M4V are exactly the same.[5] The file is given this extension to make it compatible with QuickTime.
- If you want to be able to play the video in QuickTime Player (the default media player on your Mac), you will need to keep the .m4v file extension.
- If you don't care about QuickTime, you can easily rename the file to give it the .mp4 extension and it will play in all other video players that support the MP4 format.
-
12Rename the file (optional). If you want to add the .m4v extension to the file and don't mind not watching the video in QuickTime Player, you can easily do so:
- Click the file once to select it, then press Return.[6]
- Replace .m4v with .mp4. For example, if the file is called movie.m4v, change it to movie.mp4.
- Press Return.
Using Online Convert (Any Platform)
-
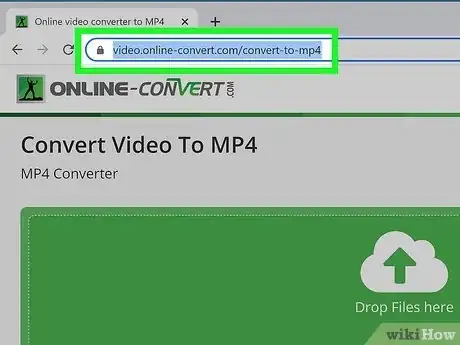
1Go to https://video.online-convert.com/convert-to-mp4. Online Convert is a free web-based tool that lets you convert many different file types (including WEBM) to the MP4 format.
- This tool is helpful for quickly converting smaller WebM files to MP4 without making changes to the resulting video. If you're working with a video that's larger than 100MB, you'll want to try another method. Also, if you want to convert 2, 3, and more videos to MP4 in bulk, you may upgrade to its Premium plan or try other online converters.
-
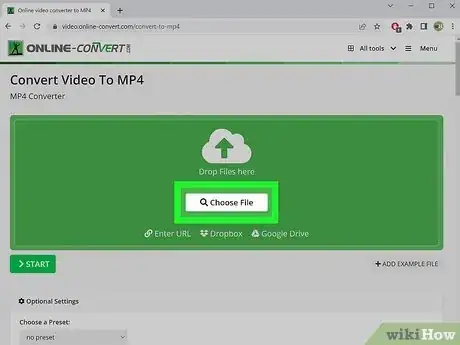
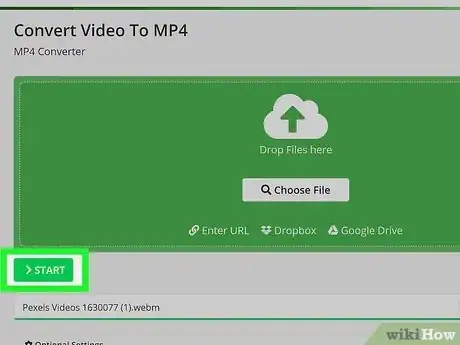
2Click Choose File. It's the white button on the green box.
-
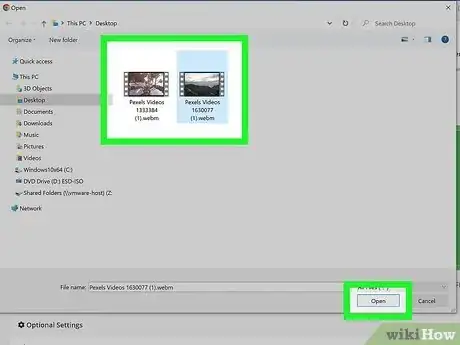
3Select your WebM file. Navigate to the file ending in ".webm," select it, and then choose Open or Upload as prompted.
-
4Click START. It's the green button below the file name. This begins the conversion. Once the conversion is complete, you'll be prompted to download the MP4 file.
-
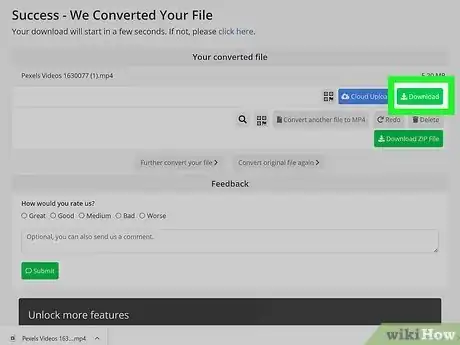
5Save the downloaded file to your computer, phone, or tablet. If the download doesn't begin automatically, click or tap Download. When prompted, choose a location to save the file to on your computer, Android, iPhone, or iPad, and then click or tap Save to save your new MP4.
References
- ↑ https://handbrake.fr/docs/en/latest/technical/official-presets.html
- ↑ https://support.serato.com/hc/en-us/articles/204594364-Re-encoding-video-files-using-Handbrake
- ↑ https://handbrake.fr/docs/en/1.3.0/technical/containers.html
- ↑ https://docs.videolan.me/vlc-user/3.0/en/basic/tipsandtricks/index.html#converting-a-media-file-format
- ↑ https://handbrake.fr/docs/en/1.3.0/technical/containers.html
- ↑ https://support.apple.com/guide/mac-help/rename-files-folders-and-disks-on-mac-mchlp1144/mac
About This Article
1. Go to https://www.online-convert.com.
2. Click Convert to MP4 in the “Video converter” menu.
3. Click Go.
4. Click Choose File.
5. Navigate to the WebM file.
6. Select the file and click Open.
7. Click Convert file.
8. Click Save.
