This article was co-authored by wikiHow staff writer, Nicole Levine, MFA. Nicole Levine is a Technology Writer and Editor for wikiHow. She has more than 20 years of experience creating technical documentation and leading support teams at major web hosting and software companies. Nicole also holds an MFA in Creative Writing from Portland State University and teaches composition, fiction-writing, and zine-making at various institutions.
There are 8 references cited in this article, which can be found at the bottom of the page.
The wikiHow Tech Team also followed the article's instructions and verified that they work.
This article has been viewed 1,365,606 times.
Learn more...
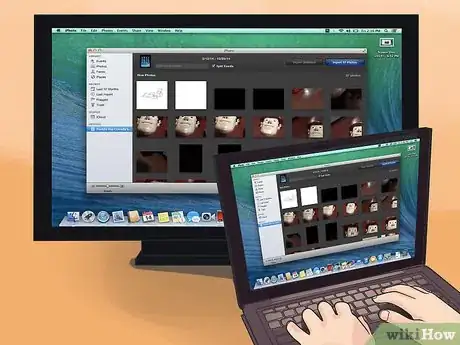
If you need to access files that are stored on your desktop computer from your laptop (or vice-versa), you can set up file sharing between the two computers to make file transfers simple. We'll show you how to connect any Windows or macOS laptop to a Windows or macOS desktop computer—even across platforms!
Steps
Windows to Windows with an Ethernet Cable
-
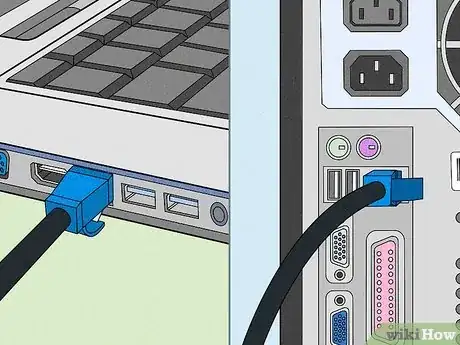
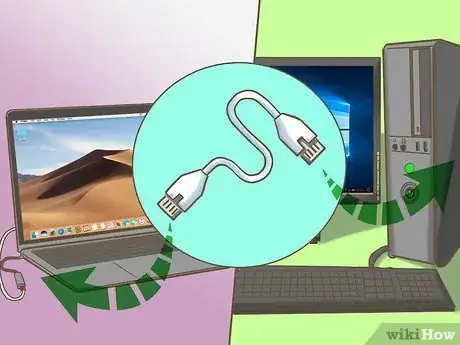
1Connect the two computers with an ethernet cable. Plug one end of the ethernet cable into the square port on the back of your desktop PC, then plug the other end of the cable into the matching port on the side of your laptop.
-
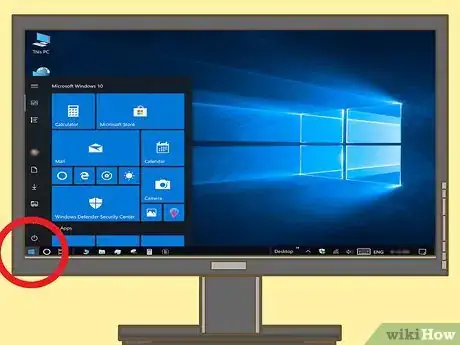
2Open the Control Panel on the first computer. You can do this by typing control panel into the search bar next to the Windows menu and clicking Control Panel in the search results.Advertisement
-
3Click Network and Internet. It should be on the left side of the Control Panel page.
- If your Control Panel page has "Small icons" or "Large icons" in the top-right corner, skip this step.
-
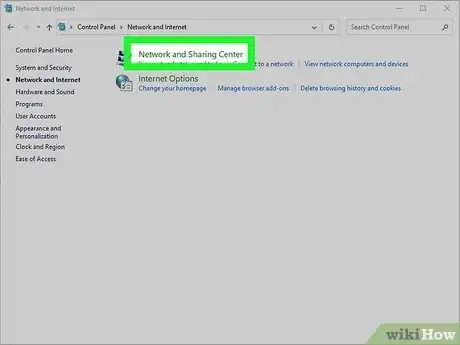
4Click Network and Sharing Center. This opens a list of all current connections, including your Ethernet connection to the laptop computer.
-
5Click Ethernet. It's a link to the right of the "Unidentified Network" connection in the right panel.
-
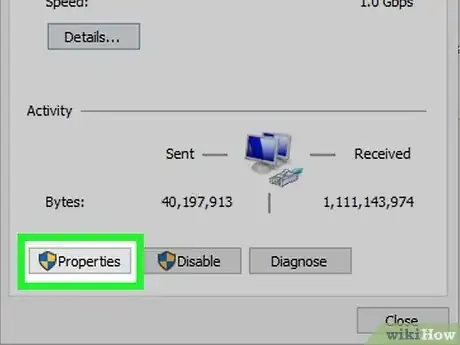
6Click the Properties button. This is in the bottom-left corner of the window.
-
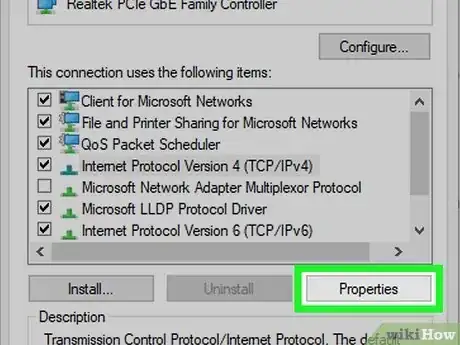
7Click Internet Protocol Version 4. You'll find this line of text in the middle of the window. Clicking it will select it.
-
8Click Properties. It's in the lower-right side of the window.
-
9Change the IP address for your connection. Check the "Use the following IP address" box near the top of the page, then fill out the following fields:
- IP address - Type in 192.168.1.1
- Subnet mask - Type in 255.255.255.0
-
10Change the IP address on your laptop computer. To do so:
- Go to the Network and Sharing center in the same way that you did on the desktop.
- Open the Ethernet properties, select Internet Protocol Version 4, and click Properties
- Check the "Use the following IP address" box at the top of the page.
- Type 192.168.1.2 into the "IP address" field.
- Type 255.255.255.0 into the "Subnet mask" field.
- Click OK twice.
-
11Open File Explorer on either computer. You can do this by clicking the folder icon in the taskbar or by clicking File Explorer in the Windows menu.
-
12
-
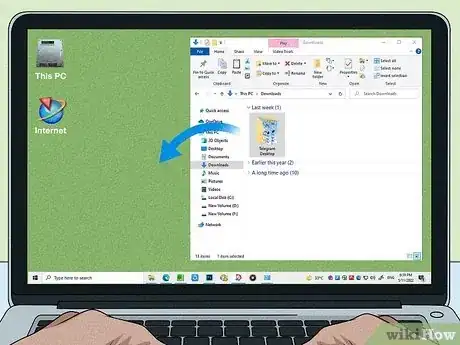
13Select a share folder. Click on a folder that you want to share from your desktop to your computer.
- You can also create a new folder to share.
-
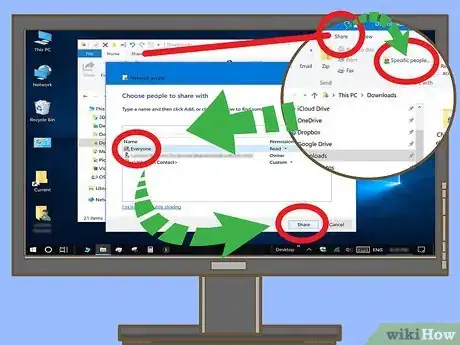
14Share the folder. To do so:
- Click Share in the top-left side of the window.
- Click Specific people...
- Click the drop-down arrow.
- Click Everyone
- Click Share
- Click Done when prompted.
-
15Place files to share in the folder. To do so:
- Find the files that you want to share.
- Select the files.
- Press Ctrl+C to copy the files.
- Open the shared folder.
- Press Ctrl+V to paste the files.
-
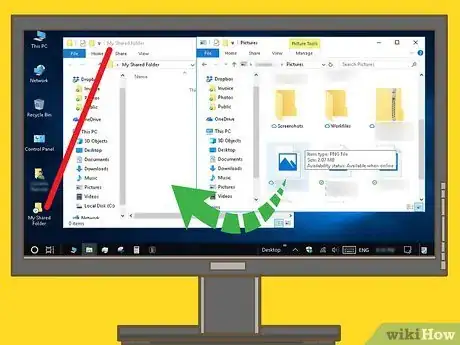
16Switch to the other computer. Go back to the Windows laptop or desktop on which you want to access the shared folder.
-
17
-
18Move the shared files onto your laptop. Select the files, press Ctrl+C, open a folder in which you want to store them, and press Ctrl+V.
- You can also add files from your laptop to the shared folder if you want to access them on the desktop computer.
Windows to Windows Wirelessly
-
1Connect the Windows desktop and laptop computers to the same Wi-Fi network. As long as both PCs are connected to the same Wi-Fi network, accessing the other computer to share files will be simple.
- You can also use this method if both computers are connected to the same network using an ethernet cable, such as through a router or switch.
- The steps are similar in both Windows 10 or Windows 11.
-
2Open File Explorer on the computer that has files you want to share. You can do this on both the desktop and the laptop computer if you want folders to be accessible from both sides.
- File Explorer is the folder icon on the taskbar or in the Windows menu.
-
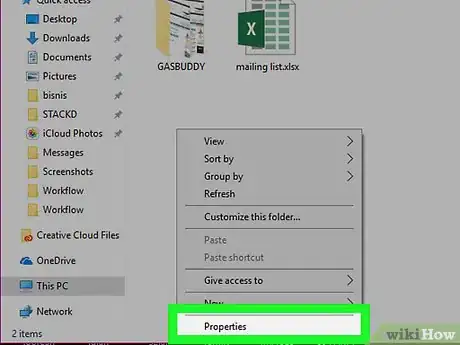
3Right-click the folder you want to share and select Properties. A dialog window will expand.[1]
- You can also share individual files instead of folders if you'd like.
-
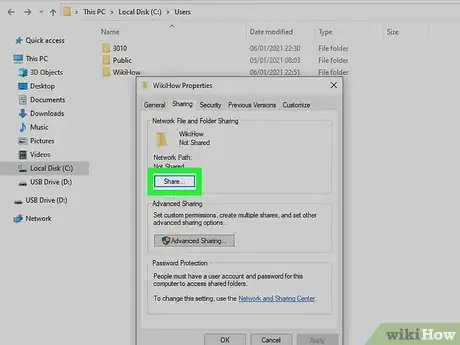
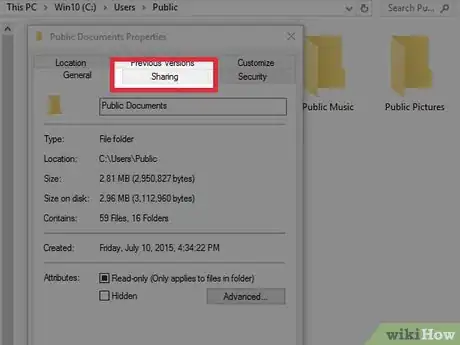
4Click the Sharing tab. It's at the top of the window.
-
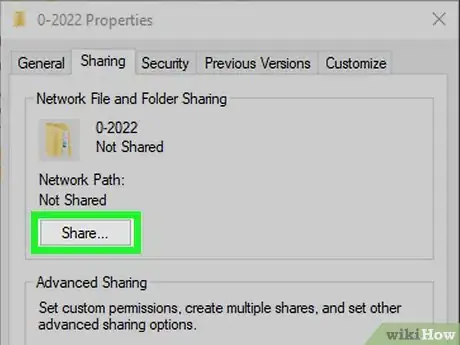
5Click the Share… button. This opens a window that lets you share the folder with certain people.
-
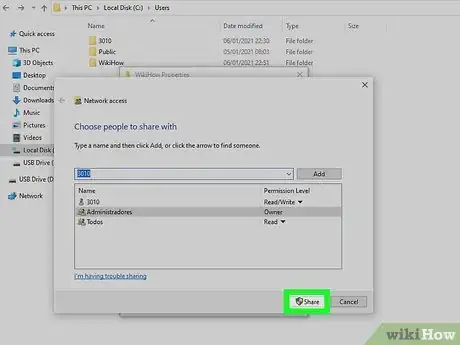
6Select the user you want to share with. Click the menu to see a list of accounts, and then choose the account you want to share with. Click Add to add that user.
- By default, the file or folder is automatically shared with the owner's account. If you sign in to both the laptop and the desktop using the same account, you don't have to add any other accounts.
-
7Choose permissions for the shared content. If you're sharing with another account, Read permissions are assigned by default. If you want to give that account full permissions, click the drop-down menu next to "Read" and choose Read/Write.
- If you're the owner of the file and plan to sign in with the same account on both computers, you don't need to adjust permissions—you already have full permissions.
-
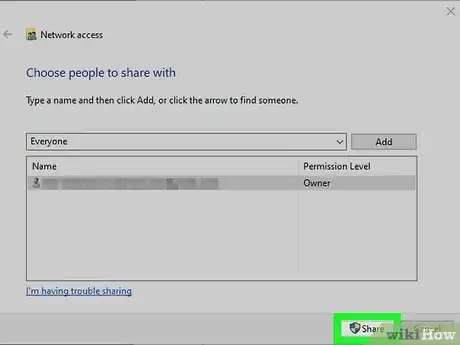
8Click the Share button. This shares the file with the selected user(s).
- If network discovery and file sharing are not turned on, you'll be prompted to turn these services on now. You can choose No if you're currently on a private network, such as at home, or Yes if you want to enable file sharing over public networks (such as coffee shops and college campuses).
-
9Open File Explorer on the other computer. Now that the folder or file is shared on one computer, you can access it from the other.
-
10Click Network in the left panel. This displays computers on the network that have shared files.
- If this computer doesn't have network discovery and file sharing turned on, you'll need to turn it on now. Click the yellow bar at the top of the window, and then choose No if you're currently on a private network, or Yes if you want to enable file sharing over public networks.
-
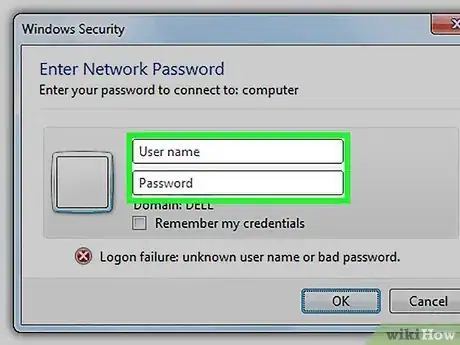
11Double-click the name of the computer that's sharing the files. You'll be prompted to sign in.
-
12Log in with the account that has permission to access the shared files. Once you're signed in, you can access the shared files in the selected folder.
Mac to Mac Wirelessly
-
1Connect the laptop and desktop to the same Wi-Fi or LAN network. If your MacBook and Mac desktop are both connected to the same network—either wirelessly or wired through a router or switch—it's easy to set up file sharing between the two.
-
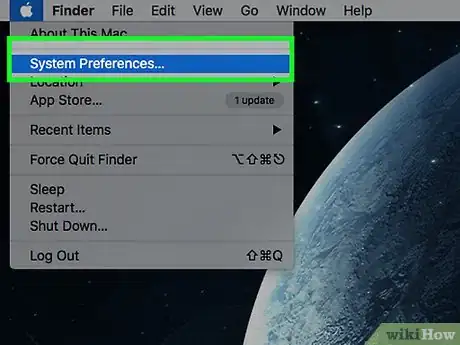
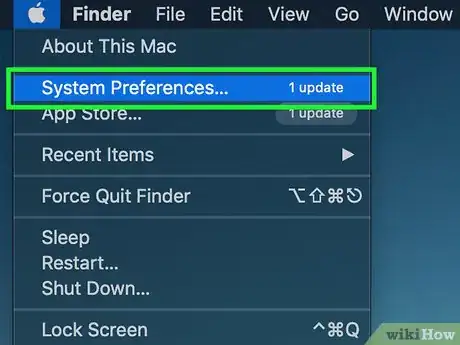
2Open System Preferences on the Mac with files to share. For example, if you want to be able to access a folder that's located on your desktop while you're using your MacBook, open System Preferences on your Mac desktop.
-
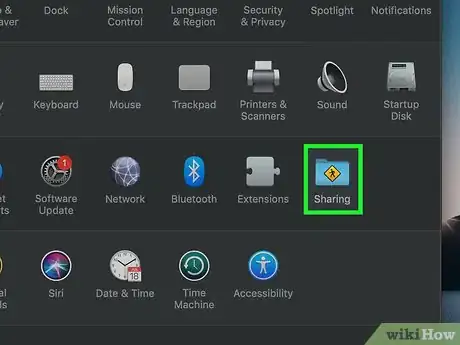
3Click the Sharing icon. It's the blue folder with a plus sign.[2]
-
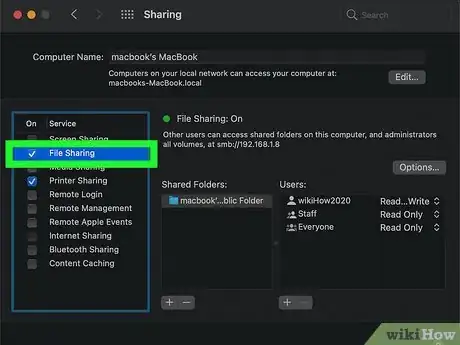
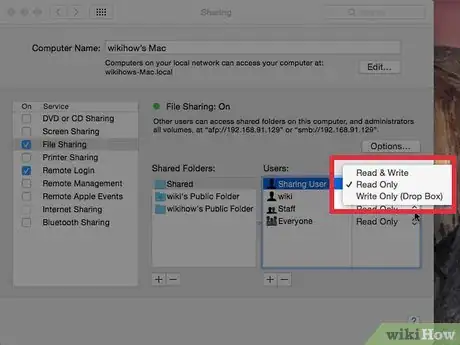
4Check the box next to "File Sharing." You'll see this option in the list of services in the left panel. This turns on file sharing.
-
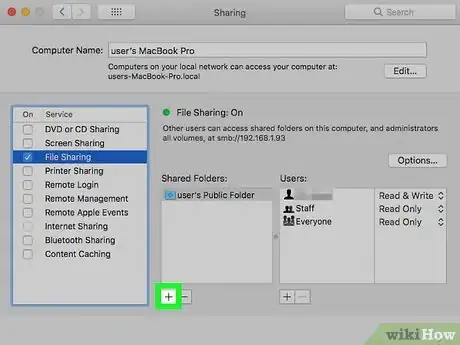
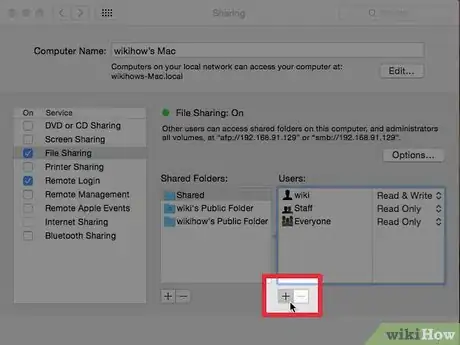
5Add the folder(s) you want to share. To do so, just click the + under "Shared folders" in the right panel, browse to the folder, select it, and then click Add.
- Repeat for all other folders you want to share.
-
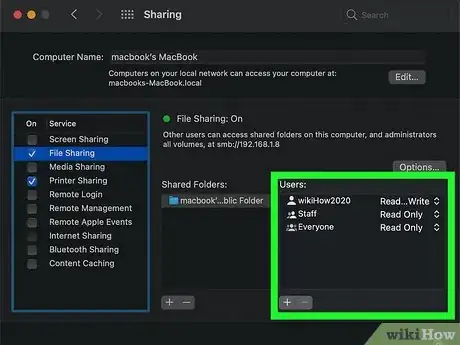
6Choose who can access the shared content. Select the folder you're sharing, and then choose an account in the "Users" section to share with. You can also click + to share with an account that isn't listed here.
- You can choose Everyone to make the files available to anyone who connects to your network, or select a group to make the file available to everyone in that group.
-
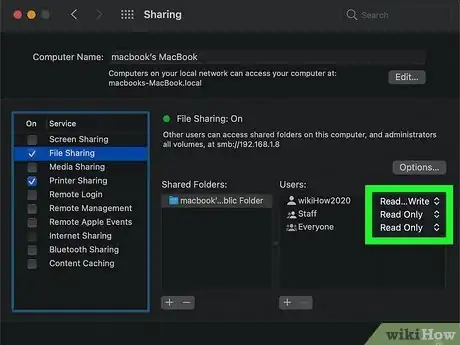
7Choose which permissions to assign. Next to each user, you can select what type of permission they'll have—for example, if you want full access to the folder when you're logging in from your desktop or laptop, assign all permissions (Read & Write).[3]
- The folder or file(s) are now shared.
-
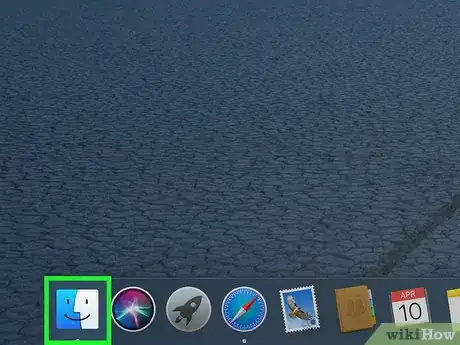
8Connect from the other Mac in Finder . Now that you're sharing a folder or files from one of your Macs, you can open Finder on the other Mac to access the shared files. Open Finder, and then:
- Click Network under "Locations" in the left panel. After a moment, you'll see the name of the other Mac in the list.
- Double-click the name of the other Mac.
- Click Connect As at the top-right corner.
- Log in to the other Mac using any active account.
- You can now drag and drop files between the desktop and laptop.
Mac to Mac with a Thunderbolt 3 or 4 Cable
-
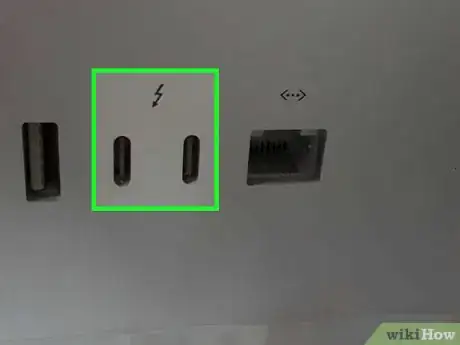
1Check for a Thunderbolt 3 or Thunderbolt 4 port on your Mac. Most modern Macs from 2016 and later have this type of port. Look for an oval port with a lightning bolt near it on the laptop and the back of the Mac desktop.
- Transferring files over Thunderbolt is a lot faster than transferring files over Wi-Fi.[4]
- You can also visit https://support.apple.com/en-us/HT201736 to find out which Mac models have Thunderbolt 3 and 4 ports.
-
2Connect the two Macs with a Thunderbolt 3 or Thunderbolt 4 cable. You'll want to make sure the cable you use is specifically labeled as "Thunderbolt 3" or "Thunderbolt 4," as there are other cable types with the same style of connector.
- If one of your Macs has Thunderbolt 2 instead of Thunderbolt 3 or 4, you can use a Thunderbolt 2 to Thunderbolt 3 adapter.
-
3Open System Preferences on one of the two Macs. You'll want to complete these remaining steps on both the laptop and the desktop Mac. System Preferences is located in the Apple menu at the top-left corner of the screen.[5]
-
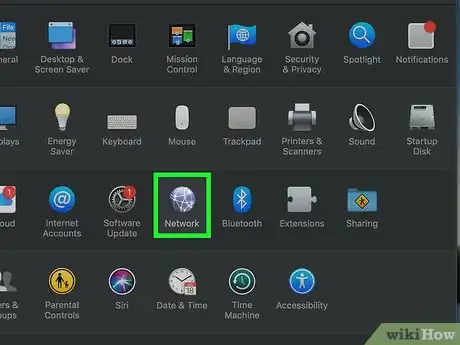
4Click the Network icon. It's the globe icon.
-
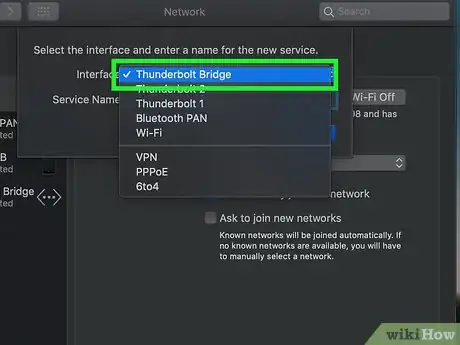
5Select Thunderbolt Bridge. You'll see this option in the left panel. Once choosing this option on both Macs, the status on the left under "Thunderbolt Bridge" will change to "Self-assigned IP." Once you see this, you can start transferring files from one Mac to the other.
- If you don't see this option, click the + below the list of connections in the left panel, select Thunderbolt Bridge from the "Interface" menu, and then click Create.
-
6Connect to the other Mac in Finder . Now that the Macs are connected with a Thunderbolt bridge, you can access files over the network. On either of the two computers, open Finder and do the following:
- Click Network under "Locations" in the left panel. After a moment, you'll see the name of the other Mac in the list.
- Double-click the name of the other Mac.
- Click Connect As at the top-right corner.
- Log in to the other Mac using any active account.
- You can now drag and drop files between the desktop and laptop.
Windows from a Mac Wirelessly
-
1Open File Explorer on the Windows PC. If you want to be able to access files that are stored on your Windows desktop or laptop computer from a Mac, start by sharing the files from File Explorer.
- File Explorer is the folder icon on the taskbar or in the Windows menu.
-
2Right-click the folder you want to share and select Properties. A dialog window will expand.
- You can also share individual files instead of folders if you'd like.
-
3Click the Sharing tab. It's at the top of the window.
-
4Click the Share… button. This opens a window that lets you share the folder with certain people.
-
5Select the user you want to share with. The Mac user will need to sign in to this PC with the user account you select here. Click the menu to see a list of accounts, and then choose the account you want to share with. Click Add to add that user.
-
6Choose permissions for the shared content. If you're sharing with another account, Read permissions are assigned by default. If you want to give that account full permissions, click the drop-down menu next to "Read" and choose Read/Write.
- If you're the owner of the file and plan to sign in with the same account on both computers, you don't need to adjust permissions—you already have full permissions.
-
7Click the Share button. This shares the file with the selected user(s).
- If network discovery and file sharing are not turned on, you'll be prompted to turn these services on now. You can choose No if you're currently on a private network, such as at home, or Yes if you want to enable file sharing over public networks (such as coffee shops and college campuses).
-
8Open Finder on the Mac Finder. Now that files are shared from the PC, you can connect to it in Finder.
-
9
-
10Click Browse…. This tells your Mac to find all networked computers that are accepting connections. The Windows PC should appear.
-
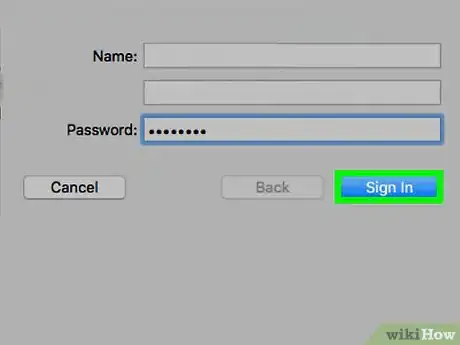
11Select the Windows PC and click Connect As. A sign-in field will expand.
- If you don't see the PC, click All to display all shared computers first.
-
12Sign in to the PC if prompted. Once you're signed in, you'll be able to browse, drag, and drop files between the two computers as defined by the permissions you set.
Windows to Mac with an Ethernet Cable
-
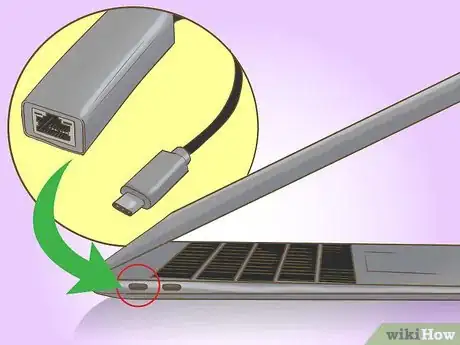
1Buy a USB-C to Ethernet adapter for the Mac. Macs don't have Ethernet ports anymore, but you can purchase a USB Ethernet plug-in item that attaches to one of your Mac's USB ports.
-
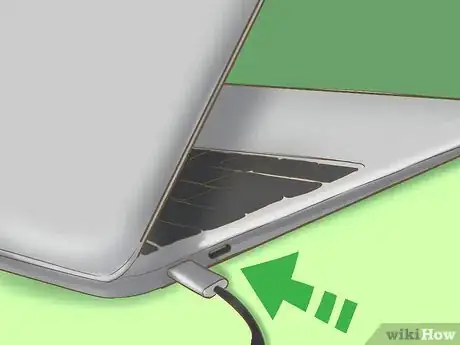
2Attach the adapter to your Mac. Plug the USB cable side of the adapter into one of the USB ports on your Mac.
-
3Connect the two computers with an Ethernet cable. Plug each end of the Ethernet cable into a square Ethernet port on each computer.
-
4
-
5
-
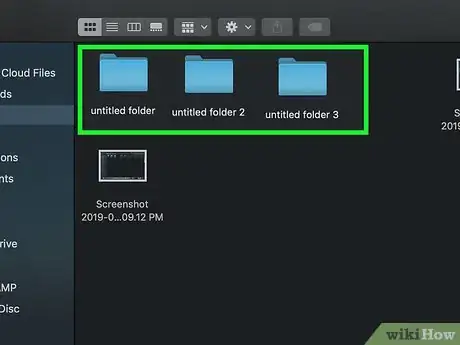
6Select a share folder. Click on a folder that you want to share from your desktop to your Mac computer.
- You can also create a new folder to share.
-
7Share the folder. To do so:
- Click Share in the top-left side of the window.
- Click Specific people...
- Click the drop-down arrow.
- Click Everyone
- Click Share
- Click Done when prompted.
-
8Switch to your Mac computer and click Go. This menu item should be at the top of the screen.
- If you don't see Go in the menu bar, open Finder or click the desktop to make it appear.
-
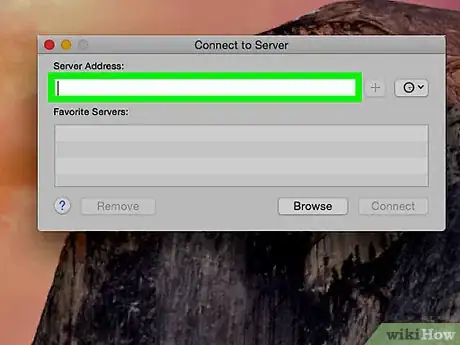
9Click Connect to Server. It's near the bottom of the Go drop-down menu.
-
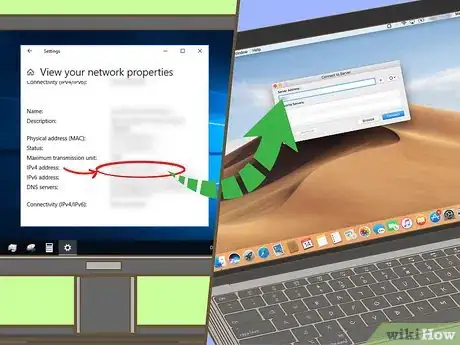
10Enter your Windows computer's IP address. Type the IP address for your Windows computer into the text field at the top of the window.
- You can find the Windows computer's IP address by opening Start, clicking Settings , clicking Network & Internet, clicking Status, clicking View your network properties, scrolling down to the "Name: Wi-Fi" section, and looking at the address to the right of the "IPv4 address" heading.
-
11Click Connect. Doing so will bring up another window.
-
12Enter your Windows computer's information. To do so:
- Check the "Registered User" box.
- Enter the desktop's account username into the "Username" text field.
- Enter the desktop's account password into the "Password" text field.
- Click Connect
-
13Place files in the shared folder. Switch back to your Windows computer, then do the following:
- Find the files that you want to share.
- Select the files.
- Press Ctrl+C to copy the files.
- Open the shared folder.
- Press Ctrl+V to paste the files.
-
14Retrieve the files on your Mac. Go to your laptop, then do the following:
- Open Finder if it's not already open.
- Click the Windows computer's name on the left side of the Finder.
- Open the shared folder.
- Select the shared files.
- Click Edit at the top of the screen, then click Copy
- Select a folder in which you want to store the shared files (e.g., Desktop).
- Click Edit at the top of the screen, then click Paste Items
-
15Share files from your Mac to your Windows computer. To do this, simply place files from your Mac in the shared folder, then open the shared folder on the Windows computer and copy the files from there.
Mac from Windows Wirelessly
-
1Open System Preferences on the Mac. If there are files on your Mac laptop or desktop computer that you want to be able to access from your Windows computer, start by opening System Preferences from the Apple menu.
- Both the Windows and Mac computers will need to be connected to the same Wi-Fi or wired network to use this method.
-
2Click the Sharing icon. It's the blue folder with a plus sign.
-
3Check the box next to "File Sharing." You'll see this option in the list of services in the left panel. This turns on file sharing.
- Write down the IP address that you see under "File Sharing: On" that looks something like this: smb://17.212.167.33. You'll need this address to connect from the Windows PC.
-
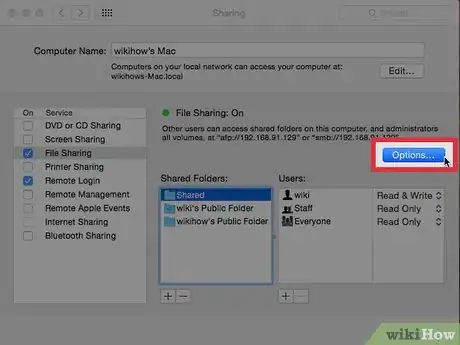
4Click the Options button. This opens settings for sharing with Windows. [7]
-
5Check the box next to "Share files and folders using SMB." Now you can choose an account on your Mac that can share with Windows users.
-
6Select your account and click Done. You'll have to enter your password to confirm.
-
7Add the folder(s) you want to share. To do so, just click the + under "Shared folders" in the right panel, browse to the folder, select it, and then click Add.
- Repeat for all other folders you want to share.
-
8Choose who can access the shared content. Select the folder you're sharing, and then choose an account in the "Users" section to share with. You can also click + to share with an account that isn't listed here.
- If you want to share with a Windows user who doesn't already have an account on this Mac, you should create an account for that user and select it here.
- You can choose Everyone to make the files available to anyone who connects to your network, or select a group to make the file available to everyone in that group.
-
9Choose which permissions to assign. Next to each user, you can select what type of permission they'll have—for example, if you want full access to the folder when you're logging in from your desktop or laptop, assign all permissions (Read & Write).
- The folder or file(s) are now shared.
-
10Allow incoming connection from Windows computers. There's a change you'll need to make in your network settings to allow your Windows desktop or laptop to connect to your Mac:
- View menu and select Network.
- Select your current connection and click Advanced…
- Click the WINS tab.
- Enter the workgroup name from the Windows PC. If you don't know it, go to Control Panel on the Windows PC, click System, and then click Workgroup. The default name is usually WORKGROUP.
- Click OK and then Apply.
-
11Access the Mac from Windows. Now that files are shared from the Mac, you can access them from Windows in File Explorer. Here's how:
- Open File Explorer on the PC—it's the folder icon in the taskbar or in the Windows menu.[8]
- Click Network in the left panel. If network sharing isn't turned on, you'll be prompted to turn it on now.
- Double-click the Mac and enter your login info. The files are now available.
Community Q&A
-
QuestionI would like to connect my laptop to my desktop to use as a second monitor, but my desktop ethernet port is already being used by the internet. Can I tether it another way?
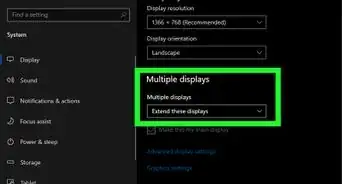
 Bryan Beege BerryCommunity AnswerLaptops are not designed to act as displays. There is no hardware-supported way to do this. The best alternative may be to use some sort of screensharing software between the desktop and laptop, but this will not allow you to do things like extend display.
 -
QuestionCan I use Ethernet adapters?
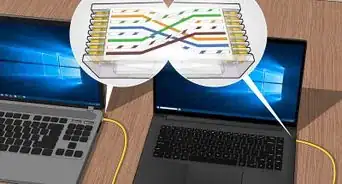
 Community AnswerYes, there's a special Ethernet cable, called a "crossover cable," designed for directly connecting two computers. This will create a miniature network between the two.
 -
QuestionWhat if the second PC can't access the internet still?
 Community AnswerYou can restart the computer, unplug and plug the wires back in, and if it's WiFi, turn WiFi off or disconnect it, then reconnect. if it is still not working, contact the brand's customer support.
References
- ↑ https://support.microsoft.com/en-us/windows/file-sharing-over-a-network-in-windows-10-b58704b2-f53a-4b82-7bc1-80f9994725bf
- ↑ https://support.apple.com/en-az/guide/mac-help/mh17131/12.0/mac/12.0
- ↑ https://support.apple.com/et-ee/guide/mac-help/mchlp1203/mac
- ↑ https://www.youtube.com/watch?v=eb0qK738wTI
- ↑ https://support.apple.com/en-au/guide/mac-help/mchld53dd2f5/mac
- ↑ https://support.apple.com/en-in/guide/mac-help/mchlp1660/12.0/mac/12.0
- ↑ https://support.apple.com/en-au/guide/mac-help/mchlp1657/mac
- ↑ https://support.apple.com/en-in/guide/mac-help/mchlp1658/12.0/mac/12.0
About This Article
If you want to connect your Windows computer to a Windows laptop, use an ethernet cable to connect the devices together. Once they’re connected, go to the computer’s “Control Panel” and select “Network and Internet” in the left column, then click ”Network and Sharing Center”. Next, click the “Ethernet” link and then “Properties”. From there, click ”Internet Protocol Version 4” and change the IP address for your connection. In the “IP address” field, type 192.168.1.1, for “Subnet mask” type 225.225.225.0, and for “Default gateway” type in 192.168.1.2. On your laptop, set your “IP address” to 192.168.1.2, “Subnet mask” to 225.225.225.0, and “Default gateway” to 192.168.1.1. For more help, like how to share files between your connected computers, scroll down.
