This article was co-authored by wikiHow Staff. Our trained team of editors and researchers validate articles for accuracy and comprehensiveness. wikiHow's Content Management Team carefully monitors the work from our editorial staff to ensure that each article is backed by trusted research and meets our high quality standards.
This article has been viewed 40,363 times.
Learn more...
A kegerator is a refrigerator that stores and cools kegs of beer. A tap is connected to the top to dispense the beer. The kegerator can keep draft or home-brew beer fresh for a couple of months. Keeping your kegerator clean is important since it will ensure the quality of your beer and make sure there is no contamination in future kegs. To clean your kegerator, clean it between each keg, soak the faucet and keg coupling, and flush the beer lines.
Steps
Maintaining the Exterior
-
1Clean your kegerator after each keg. Every time you use your kegerator, you should clean it afterwards. This helps remove all beer residue from the line and faucet. Cleaning after every use helps you avoid messing up other beers.[1]
- If you don’t clean between kegs, microbial infections may occur in the kegerator that will alter the beer.
-
2Turn off the kegerator. Before you start cleaning, shut down the kegerator completely. Unplug the kegerator. Make sure you turn off the CO2. Then, you want to close the regulator, disengage the tap, and completely remove the keg.[2]Advertisement
-
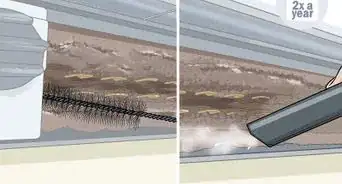
3Wipe down the surfaces with mild soap and warm water. Start by cleaning the outside of the kegerator. Make sure to wipe down the tap, lines, spill tray, regulator, and tank. You also should wipe the inside of the cooling unit. Then, clean the inside surfaces, such as the beer lines, the spigot, and the tap. Use soap without any scent and warm water to wipe down all surfaces.[3]
- Any spilled beer, puddles, or drops can get in your kegerator and cause problems with future kegs.


Cleaning the Removable Parts
-
1Purchase a beer line cleaning kit. You may want to purchase a beer line cleaning kit. They come with a bottle, pump, and hose that connects to your beer lines. They also come with a cleanser that will sanitize your beer lines.[4]
- You can buy kits that are hand pumped, that connect to your CO2 pump, or that have a pressurized pump.
- Some people make their own cleaning pumps with quart bottles or soda kegs and tubes.
-
2Disassemble the faucet and remove the keg coupler. To start sanitizing your kegerator, you need to remove the faucet and keg coupler. Use your faucet wrench that came with your kegerator to loosen the faucet, and rotate it to the right to loosen it. When it is loose, twist it off with your hands.[5] Take the faucet apart. Depending on your faucet, there will be approximately five different parts. [6]
- The keg coupler will be attached to the opposite end of the beer lines.
-
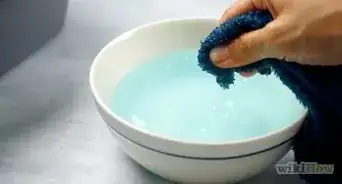
3Soak the faucet parts and keg coupler in cleaning solution. Place both the faucet parts and keg coupler in a bowl of warm water. Add beer line or kegerator cleaner. Let the parts soak. [7]
-
4Scrub away any debris. If the faucet parts or keg coupler have debris caked on them, use a brush to scrub them clean. Any debris left on the parts may carry bacteria and contaminate your brew.[8]
- Rinse the parts before reassembling.


Cleaning the Beer Lines
-
1Prepare the solution. The solution used to sanitize the beer lines should be mixed and put into the cleaning bottle or bucket. Read the specific directions for your beer line cleaner and follow them exactly. Mix with hot water for proper sanitizing.[9]
- Don’t use bleach to clean your kegerator. Instead, use an oxidizing cleaner.
-
2Attach the bottle to the beer lines. With the faucet and keg coupler removed and soaking, you should clean the beer lines. Stick one end of the beer line into a bucket so it can empty into it. Then, attach the end of the cleaning bottle tube to the faucet opening.[10]
-
3Pump cleaning solution through the beer lines. Using the pump mechanism attached to the cleaning bottle, pump the solution through the beer lines. Let the solution stand in the tubes for a few minutes. Then, rinse the tubes with warm water.[11]
- The solution will run through the beer lines and empty into the bucket.
- Rinse the beer lines at least three times. You want to make sure to remove all cleaning solution from the beer lines.
-
4Check the parts. Before reassembling your kegerator, check the various parts to make sure they are okay. Check the rubber gasket and the O-rings. These wear fast, so if they show wear or have become flattened, replace them.[12]
- Make sure there is still enough food-grade lubricant on the O-rings.
- Also check the washers to make sure they are still in good shape.
-
5Reassemble your kegerator. Put the faucet back together and reconnect it to your kegerator by turning the coupling nut counter-clockwise. Make sure the sealing gasket is back in place. Connect the keg coupler to the beer line and CO2 hose.[13]
- Turn the valve back to on, and then re-tap your keg.


Things You'll Need
- Faucet wrench
- Beer line or kegerator solution
- Beer line cleaning kit
- Soap
References
- ↑ http://www.micromatic.com/how-to-clean-beer-lines
- ↑ http://www.kegerators.com/articles/cleaning-your-home-draft-system.php
- ↑ http://www.kegerators.com/articles/cleaning-your-home-draft-system.php
- ↑ http://www.beveragefactory.com/draftbeer/faqs/FAQ_CLEAN.shtml
- ↑ https://learn.kegerator.com/how-to-clean-a-kegerator/
- ↑ http://www.kegerators.com/articles/cleaning-your-home-draft-system.php
- ↑ http://www.micromatic.com/how-to-clean-beer-lines
- ↑ http://www.micromatic.com/how-to-clean-beer-lines
- ↑ https://learn.kegerator.com/how-to-clean-a-kegerator/
About This Article

Before cleaning a kegerator, turn off the CO2, close the regulator, disengage the tap, and remove the keg. Next, wipe down the exterior and interior surfaces with mild soap and warm water. Then, soak the faucet parts and keg coupler in a solution of beer line cleaner and warm water. To flush out the beer line, stick the end of the line into a bucket, then attach a bottle filled with cleaner and hot water to the faucet opening. Run the solution through the line, let it sit for a few minutes, then rinse with warm water. For more advice, including how to reassemble a kegerator after cleaning, read on.