This article was co-authored by wikiHow staff writer, Nicole Levine, MFA. Nicole Levine is a Technology Writer and Editor for wikiHow. She has more than 20 years of experience creating technical documentation and leading support teams at major web hosting and software companies. Nicole also holds an MFA in Creative Writing from Portland State University and teaches composition, fiction-writing, and zine-making at various institutions.
This article has been viewed 235,783 times.
Learn more...
To change the font color in Illustrator, select the text with the Selection tool, then choose the color from the palette. If you have more than one text area that needs to be changed, just hold down the Shift key as you select additional areas. You can also change the color of an individual character by selecting only that character with the Text tool.
Steps
Changing the Color of a Text Object
-
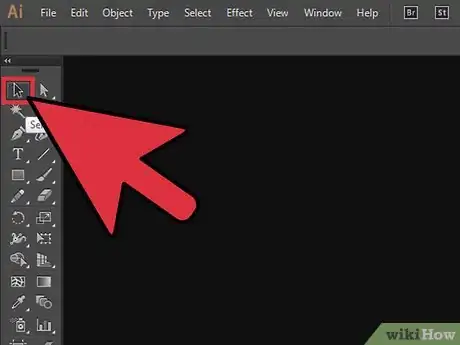
1Click the first arrow in the toolbar to use the Selection tool. If you are not happy with the color of a text object (a block of text) in your document, you can change it easily using the Selection tool.[1]
-
2Click to select the text area that you want to change. When you click the text you want to change, a bounding box will appear around it.
- You can also select text in the Layers panel. Find the layer that contains the text you want to change, then click the circle at the end of the layer name to select it.
- If the Layers panel is not already open, hit F7 to open it now.
Advertisement -
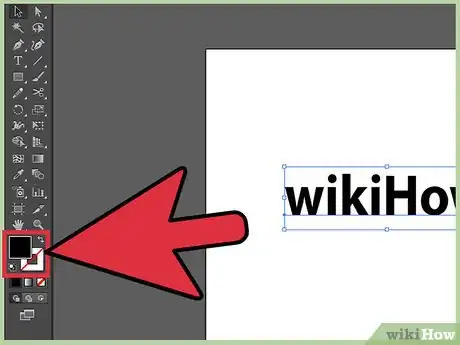
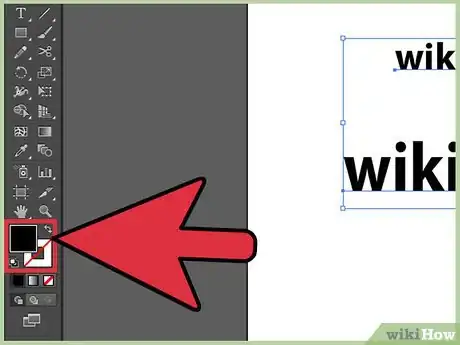
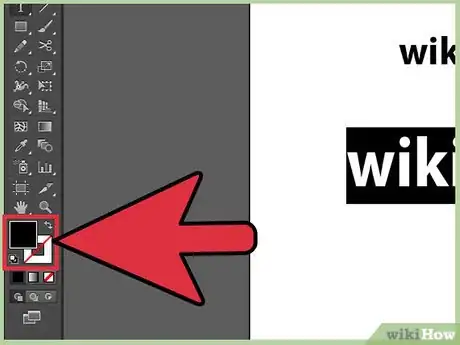
3Double-click the color palette in the toolbar. The palette is represented by a box that’s the same color as the currently-selected text. A larger palette will appear, containing a variety of colors from which to choose.
- To change the Stroke (the outline surrounding the text rather than the text itself), double-click the bottom of the two boxes. It will either have a red line over it (if there is not currently a Stroke color) or will be displayed as a box with a thick outline around it.
-
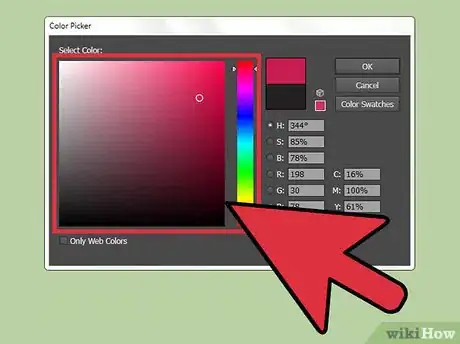
4Select a color, then click “OK.” The text in all of the selected areas will now change to the one you selected.
- If you’re dissatisfied with the color, press ⌘ Cmd+Z (Mac) or Ctrl+Z (Windows) to undo the changes.
Changing Multiple Text Objects at Once
-
1Click the first arrow in the toolbar to use the Selection tool. If you have multiple areas of text in a single document that you want to change to the same color, you can make it happen with the Selection tool .[2]
-
2Click to select one text area that you want to change. A bounding box will appear around the selected text area.
- You can also select text by selecting it in the Layers panel. Find the layer that contains the text you want to change, then click the circle to select it.
- If the Layers panel is not already open, hit F7 to open it.
-
3Hold down the ⇧ Shift key and click each additional text object. Keep the ⇧ Shift key held down as you click each area. Each selected area will now also be surrounded by a bounding box.
- If you are using the Layers panel, you can select multiple layers by holding down ⇧ Shift as you click additional circles.
- Once you have selected all of the areas (using the Selection tool or in the Layers panel), let go of the ⇧ Shift key.
-
4Double-click the color palette in the toolbar. The palette is represented by a box that’s the same color as the currently-selected text. A larger palette will appear, containing a variety of colors from which to choose.
- To change the Stroke (the outline surrounding the text rather than the text itself), double-click the bottom of the two boxes. It will either have a red line over it (if there is not currently a Stroke color) or will be displayed as a box with a thick outline around it.
-
5Select a color, then click “OK.” The text in all of the selected areas will now change to the one you selected.
- If you’re dissatisfied with the color, press ⌘ Cmd+Z (Mac) or Ctrl+Z (Windows) to undo the changes.
- You can also change other text attributes this way, such as font face and size.
Changing the Color of Specific Characters
-
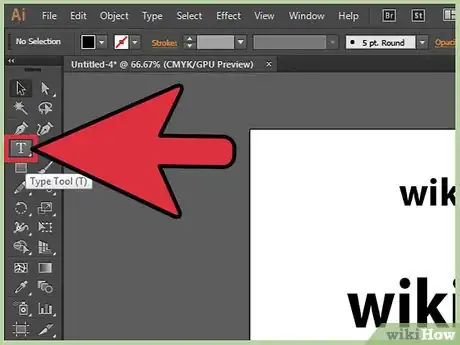
1Click the Text tool (T) in the toolbar. If you want to change an individual character (or string of characters) without changing all of the text, you can do so by selecting the character(s) with the text tool.[3]
-
2Highlight the characters you want to change. The selected character(s) should now have an outline surrounding them.
-
3Double-click the color palette in the toolbar. The palette is represented by a box that’s the same color as the currently-selected text. A larger palette will appear, containing a variety of colors from which to choose.
- To change the Stroke (the outline surrounding the text rather than the text itself), double-click the bottom of the two boxes. It will either have a red line over it (if there is not currently a Stroke color) or will be displayed as a box with a thick outline around it.
-
4Select a color, then click “OK.” The characters you highlighted will change to the color you selected.
- If you’re dissatisfied with the color, press ⌘ Cmd+Z (Mac) or Ctrl+Z (Windows) to undo the changes.
- You can also change the font face and size of individual characters using this method.
Community Q&A
-
QuestionWhere is the spot color option in Illustrator?
 Community AnswerDouble-click a color in the Swatch palette panel to open the Swatch Options, then change "Color Type" to "Spot Color."
