This article was co-authored by wikiHow staff writer, Eric McClure. Eric McClure is an editing fellow at wikiHow where he has been editing, researching, and creating content since 2019. A former educator and poet, his work has appeared in Carcinogenic Poetry, Shot Glass Journal, Prairie Margins, and The Rusty Nail. His digital chapbook, The Internet, was also published in TL;DR Magazine. He was the winner of the Paul Carroll award for outstanding achievement in creative writing in 2014, and he was a featured reader at the Poetry Foundation’s Open Door Reading Series in 2015. Eric holds a BA in English from the University of Illinois at Chicago, and an MEd in secondary education from DePaul University.
There are 13 references cited in this article, which can be found at the bottom of the page.
This article has been viewed 7,184 times.
Learn more...
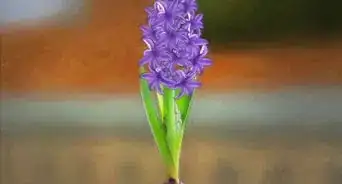
Echinacea is the Latin name for a genus of plants that are commonly known as coneflowers. Coneflowers are a type of perennial, which is a term used for plants that come back healthy after they die in the winter. Coneflowers are native to North America, and require a temperate climate with cold winters and periodic rain. They’re beautiful plants that regularly grow 2–5 feet (0.61–1.52 m) tall and have a tendency to stay healthy during droughts. If you live in a climate that can grow coneflowers, their resilience, size, and tendency to improve the ecosystem makes them an excellent addition to your garden!
Steps
Choosing a Planting Location
-
1Plant coneflowers in your garden if you live in a wet, temperate climate. Coneflowers are only found in the eastern region of the United States, and you may not be successful planting them if the weather and temperature in your area doesn’t match this part of the world.
Coneflowers are perennials, and they require a few weeks of freezing in the winter and regular rain in the spring. If you live in an area with extreme weather, coneflowers may not be the best choice for your garden.[1]
Coneflowers are only found naturally in North America. You can grow them anywhere though, so long as the temperature is regularly 70–80 °F (21–27 °C) in the early summer and the length of each season is evenly distributed.Warning: It’s pretty difficult to grow coneflowers indoors. While it can be done with a big enough pot, coneflowers tend to grow 2–5 feet (0.61–1.52 m) high and require a lot of sun. These can be exceptionally difficult requirements for a potted plant, so avoid trying to keep them potted or indoors.
-
2Find a spot in your garden where the coneflowers will get a lot of direct light. Coneflowers require a lot of sunlight and do not tolerate heavy shade. This is particularly true during their blooming period in the late summer. Choose an area in your garden where the coneflowers will not be obstructed by buildings, trees, or overhangs.[2]
- If you live in an area that isn’t prone to droughts, your cone flowers may tolerate light shade for a few hours a day.
Advertisement -
3Place your coneflowers at least 3 ft (0.91 m) away from other plants. Coneflowers struggle to compete with weeds and other plants. To ensure that your coneflowers grow healthy, plant them at least 3 feet (0.91 m) away from other plants. Clear the planting site of weeds and other plants to ensure that your coneflowers aren’t fighting for resources.[3]
- If your planting site is overrun with weeds, use a natural weed killer to clear the area 1-2 months before you plant your coneflowers.
-
4Use a well-drained soil with a pH between 6.5 and 7.2. Purchase some well-drained soil or make your own using a combination of loam and peat moss. If the soil in your garden already drains fairly quickly, you likely don’t need to change it out.
Make sure that your soil has a pH balance between 6.5 and 7.2 to ensure that your coneflowers absorb the nutrients they need.[4] If you want to test your soil, purchase a digital pH testing probe. Turn it on and insert the probe into the soil. Hold it in place and wait for the probe to register a reading.
If the soil is too acidic, use pulverized or granular lime to raise the pH. You can also use wood ashes if you prefer. If the soil is too basic, add sulfur or aluminum sulfate. Always mix the new material thoroughly into the soil and retest it after a few days to ensure that the pH is within the acceptable range.


Planting the Coneflower Seedlings
-
1Cultivate coneflower seedlings in the late winter if you’re starting with seeds. If you have coneflower seeds, you must grow them into seedlings first. In the late winter, place your seeds in growing pots and put them 1–2 inches (2.5–5.1 cm) below the surface of some well-drained soil.
Water the seeds thoroughly and leave them in the refrigerator for 4 weeks. Take them out in the early spring and wait a few weeks for the seeds to grow.[5] -
2Dig a hole for each seedling that is 12–14 in (30–36 cm) deep. Use a spade or trowel to dig a planting site in the middle of spring. Dig 12–14 inches (30–36 cm) deep and 6–8 inches (15–20 cm) wide for each plant.[6]
- Place each hole 1–3 feet (30–91 cm) away from one another.
-
3Add a 2–4 in (5.1–10.2 cm) layer of compost and add your soil. Pour a 2–4 in (5.1–10.2 cm) layer of compost in the bottom of each hole. Then, fill each hole 3/4 of the way with your potting soil. Do not compact or press the soil down.[7]
- Compost refers to organic materials that have broken down over time into a soil-like material. You can make your own compost by stacking food scraps, leaves, tree bark, grass shavings, and coffee grounds in a pile in your garden.
- You can buy compost, but it’s really easy to make it yourself. Start with a layer of brown organic material, like dry leaves, wood chips, or bark. Then, add a smaller layer of green material and food scraps, like leaves, grass trimmings, or rotted fruit. Continue adding layers 5-10 additional layers and wait 2-3 months for the material to break down. You can layer these ingredients on top of one another in your yard, or leave them outside in a bucket.
-
4Place your seedlings in their holes and fill the remaining space with soil. Lift each seedling out of the growing container and place it in the center of the hole so that the seedling is flush with the surface of the garden.
Fill in the gaps in the ground that surround the seeding with potting soil by gently pouring it into the hole. Do not compact the soil firmly by pressing it into the ground around the plant.[8] -
5Water the plants immediately after you’ve put them in the ground. To keep the plants from drying out or rejecting the soil, water your seedlings after you’ve planted them.
Pour water around the base of each plant until the first few inches of the soil is damp. This will ensure that your plants get a good boost of nutrients as soon as they’re in the ground.[9]Warning: Avoid fertilizer. Coneflowers prefer to get their nutrients slowly over time when they’re first planted, and fertilizer can actually hinder the growing process.


Watering Your Plants
-
1Water the coneflowers once a day until they establish strong roots. During the first few months, water the soil around the base of your coneflowers once a day. Provide enough water to dampen the soil, but avoid overwatering or soaking the soil through.
The roots are established once your coneflowers grow and you see strong leaves sticking out from the base of the plant. Once established, you can stop watering daily.[10]Warning: Do not water your plants if it rains during this period. During periods of intense rain, leave your coneflowers alone for 3-5 days until the soil dries out. Coneflowers typically don’t require a lot of water to develop their root systems.
-
2Avoid watering established coneflowers unless there's a drought. Once the roots are established, you really won’t need to water your plants and they can largely be left alone.
They do not require fertilizer or pruning. So long as it rains once every week or so, your plants should be fine.
During periods of prolonged drought that last more than 10-14 days, water your plants lightly by sprinkling water around the base of the plant.[11]
In general, you do not need to water your coneflowers unless it’s extremely dry and they start to become brittle or begin wilting. Coneflowers are drought-resistant plants, which means that they store water in the roots and are pretty resilient during periods of prolonged dryness. -
3Monitor other nearby plants and transfer them if they start to wilt. Coneflowers can become quite aggressive once they grow, and while they are not considered an invasive species, they can overtake a portion of your garden.
Pay attention to the plants in the 6–10 feet (1.8–3.0 m) area around your coneflowers through the summer. If you see any of your other plants drying out or wilting, transfer them to a different part of your garden.[12]


Handling Pests and Pruning
-
1Divide your plants once every 4 years in the spring or fall. As coneflower heads develop over several growing seasons, larger plants can struggle to stay healthy. To avoid premature wilting, divide your plants once every 4 years.
Do this in the early spring or late fall. Dig your plant out and split the plants through the roots to separate the stems and flower heads into individual plants. Replant them separately in new locations to continue growing your coneflowers.[13]
If you have to divide your coneflowers in the summer, do it on a cool, cloudy day. However, if your plants don’t grow taller than 2 ft (61 cm) in the summer, you may not need to divide your plants at all. -
2Watch out for root rot and apply fungicide as needed. Coneflowers are fairly resilient when it comes to diseases, but they are prone to root rot, especially during periods of heavy rain. If a plant turns brown during the blooming period in the summer, dig the roots out to inspect them.
If they’re broken, brittle, and weak, get a fungicide designed for root rot and follow the manufacturer’s instructions to treat your plant.[14]
Coneflowers can also develop mildew during humid weather. Trim any leaves or stems that develop mildew to prevent it spreading over your plant. -
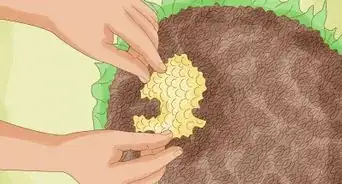
3Leave insects alone if they’re hanging out near your coneflowers. Coneflowers are a species of flower that produce a highly-desirable nectar and seed for beneficial insects and birds. When you see bugs or birds hanging out near your coneflowers, don’t worry about them.
Even if predator bugs do show up, the ladybugs and birds that are attracted to the coneflowers will handle the problem for you.[15]Tip: Coneflowers are one of the few plants that actively improve a garden’s ecosystem by attracting healthy bugs and birds. If you ever struggle with predators in other parts of your garden, consider planting coneflowers to combat the problem.
-
4Trim worn out flowers early in the growing season to encourage growth. To keep your coneflowers beautiful and healthy, cut back flower heads that appear to be drying out or wilting.
Since coneflowers grow multiple heads in the blooming season, some flower heads may not be well positioned to grow healthy.
Use shears to cut these stems off in late spring and early summer to promote the overall health of your plant.[16]
If your coneflowers are well established and appear to be growing healthy, you may not need to do this.
Trimming a large number of bulbs early in the season will cause the plant to bloom later in the fall. This isn’t problematic for the plant, though. Don’t worry if your plants bloom a little later in the year.


Things You’ll Need
Choosing a Planting Site
- Well-drained soil
Planting Your Coneflowers
- Growing pots (optional)
- Spade or trowel
- Water
Watering Your Plants
- Water
- Hose or watering can
Handling Pests and Managing Growth
- Trowel
- Shears


References
- ↑ http://www.gardening.cornell.edu/homegardening/scene1d08.html
- ↑ https://plants.usda.gov/factsheet/pdf/fs_ecpu.pdf
- ↑ https://plants.usda.gov/factsheet/pdf/fs_ecpu.pdf
- ↑ https://plants.usda.gov/factsheet/pdf/fs_ecpu.pdf
- ↑ https://youtu.be/DotNMnA6P98?t=323
- ↑ https://www.almanac.com/plant/coneflowers
- ↑ https://www.almanac.com/plant/coneflowers
- ↑ https://www.wildflower.org/plants/result.php?id_plant=ecpu
- ↑ https://youtu.be/Rp7Ia325qjs?t=179
- ↑ https://youtu.be/Rp7Ia325qjs?t=199
- ↑ https://www.almanac.com/plant/coneflowers#
- ↑ https://www.wildflower.org/plants/result.php?id_plant=ecpu
- ↑ https://ucanr.edu/blogs/dirt/index.cfm?tagname=Echinacea
- ↑ https://www.hortmag.com/weekly-tips/dyingconeflowers
- ↑ https://www.chicagobotanic.org/plantinfo/coneflowers
- ↑ https://mooresvilletribune.com/news/local/flower-bed-maintenance-keeps-gardens-looking-their-best-all-summer/article_0387c1f2-a8dc-11e9-b461-ebe8b100152a.html
- ↑ https://www.mountsinai.org/health-library/herb/echinacea
About This Article