This article was co-authored by wikiHow Staff. Our trained team of editors and researchers validate articles for accuracy and comprehensiveness. wikiHow's Content Management Team carefully monitors the work from our editorial staff to ensure that each article is backed by trusted research and meets our high quality standards.
There are 7 references cited in this article, which can be found at the bottom of the page.
This article has been viewed 27,149 times.
Learn more...
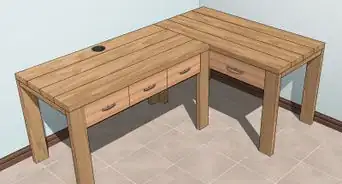
Building a custom gaming desk is easier than you might think and it can save you some serious money! Many gamers have found that simple, inexpensive materials, such as a door and adjustable desk legs, are all they need to create an amazing gaming desk. If you’ve been eyeing custom-made gaming desks with envy, choose your own materials and assemble a desk of your own. Go with an ultra-simple design if you want something purely functional, or add extra features if you want something more aesthetically pleasing.
Steps
Customizing Your Desk Materials
-
1Measure to see how much space you will need for your gaming setup. Place your gaming gear on a table or the floor the way you would like to set it up. Then, measure the area that the gear takes up. Measure the height of the desktop tower as well if you want to place it under the desk. Record these measurements to use when deciding how big to make your desk surface.[1]
- Gaming desks are generally larger than a typical desk because the gear can take up so much space, so be sure of your required desk dimensions before you look for materials.
-
2Choose a door that measures at least 26 by 80 in (66 by 203 cm). Doors make excellent gaming surfaces, are already painted, and they can be less expensive than getting a piece of wood in these dimensions. Look for a door with a flat surface at your local hardware store. You can also shop second-hand stores and yard sales to find a used door, which may be cheaper than buying a new one.[2]
- You can also use a tabletop or a piece of plywood that measures at least that measures at least 26 by 80 in (66 by 203 cm). You could also nail together pieces of wood from an old barn, pallets, and other types of reclaimed wood to cut the cost of this project.[3]
- If you don’t want to paint the door, opt for one in the desired color. Black and white are good options. Also, make sure that the door is free from decorative molding. It needs to be completely flat.[4]
Advertisement -
3Purchase 5 adjustable desk legs from a furniture store or website. These are widely available and they can make assembling your desk a cinch. Purchase legs that you can screw into the underside of the desk. Select the desk leg color and style that will look best with your desk surface.[5]
-
4Get additional wood pieces if you want to add a shelf. To create a shelf for displaying your computer screen or screens, you’ll need one 1 by 6 ft (0.30 by 1.83 m) and two 4 by 12 in (10 by 30 cm) wood pieces. You can also opt for a shorter piece for the shelf surface if desired. Measure to see how much space you will need for your screens. Visit a hardware store and ask them to cut the pieces to these sizes for you.[8]
- Make sure to choose sturdy, hard wood for this feature since the shelf will be holding your computer screens. If the wood is flimsy, it will be unstable and your screens will be more likely to fall off of it.
Tip: If you only want one large, flat surface for your gaming desk, you can skip this. However, a shelf along the back of the desk for screens will increase the surface area of your desk while also adding a pleasing look to it.
-
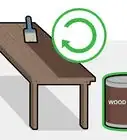
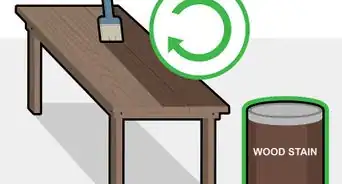
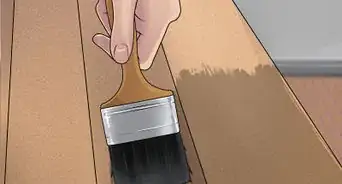
5Select a paint or varnish if you want to change the color of the desk. If you’re using raw lumber to build your desk, you may want to paint or varnish it to change its appearance. However, if the materials you’re using are already painted, then you can skip this.[9]
- White is a popular color for gaming desks, especially if you want to add LED lights to the underside of it. White will reflect the color of the LED lights and make them more noticeable. However, you can paint your desk any color you like.[10]
-
6Get LED lights if you want to add lighting to the underside of the desk. You can attach LED lights to the underside of the desk and shelf (if adding) to enhance the look of it. The lights will make it seem like your desk is glowing. Select 1 or more strings of LED lights in the desired color.[11]
- LED lights are available in craft supply stores, or you can purchase ones meant specifically for gaming desks from an online retailer.


Determining the Ideal Desk Height
-
1Adjust your desk chair to a comfortable level. Sit in your gaming desk chair to find what’s comfortable for you. Try to ensure that your feet are flat on the floor and your knees are bent at 90-degree angles. This is the ideal height for your chair. However, if you prefer a slightly different height, adjust the chair accordingly.[12]
-
2Measure from the floor to the top of the armrests to find the desktop height. Use a measuring tape to find the distance from the top of the chair’s armrests to the floor. Record this measurement. This is your ideal desk height.[13]
- For example, if the distance is 28 in (71 cm), then this is your ideal desk height.
Tip: If your chair does not have armrests, have a friend measure to the bottom of your elbows while you are sitting in the chair.
-
3Subtract the thickness of the desk surface from the height to find the desk leg height. Check the width of your desk surface by measuring it. Then, subtract this measurement from the total desk height. This will give you the ideal height for the desk legs. Adjust the legs to this height before you attach them to the desk.[14]
- For example, if the desk surface width is 1.5 in (3.8 cm), then subtract 1.5 in (3.8 cm) from the total desk height.


Assembling the Desk
-
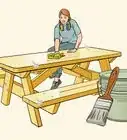
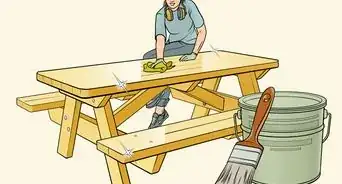
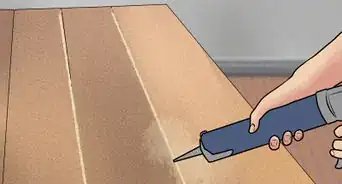
1Sand and stain the door if you want to change or enhance its color. Use spray paint and apply it using a back and forth sweeping motion while holding the can about 8 to 12 in (20 to 30 cm) from the door. Continue to paint until the entire surface is covered. Then, allow the paint to dry completely before turning over the door and doing the other side. You may need to apply 2-3 coats in total to get the desired coverage.[15]
- Make sure that you protect your work surface, such as by placing the door on a tarp or layers of newspaper. Also, wear old clothes or protect your clothing with a painter’s jumpsuit.
- Paint the door in a well-ventilated area, such as outside or in an open garage. Wear a mask or respirator to protect yourself from paint fumes.
Tip: Painting the door is optional. If you like the color of the door as is, leave it alone. However, if you want to change the color of the door, sand down any rough edges with sandpaper and then paint or varnish the door with the desired color.
-
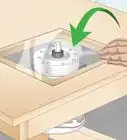
2Attach the legs to the corners of the door or desk surface. Position the legs about 2 to 3 in (5.1 to 7.6 cm) in from each of the corners, and position the fifth leg in the center of the door, near the back of the desk. This will provide additional support for your computer screens. [16]
- The desk legs should come with hardware to attach the legs to the bottom of the desk. Follow the manufacturer’s instructions for how to attach the legs.
-
3Assemble the shelf pieces, if you're using them. Screw the 4 by 12 in (10 by 30 cm) pieces to the ends of the 1 by 6 ft (0.30 by 1.83 m) piece. Use a drill to insert 2 to 3 in (5.1 to 7.6 cm) long wood screws through both layers of the wood. Position them about 4 in (10 cm) apart along the edge of the shelf. Use 3 wood screws per side to attach each of the riser pieces to the ends of the shelf piece.[17]
Warning: Be careful not to insert the screws in at an angle or they may come out through the wood.
-
4Attach the shelf to the main surface of the desk. You can use wood glue to secure the shelf to the desk’s surface. Apply a generous amount of glue to the bottom edges of the risers and position the shelf on the desk where you want it to go. Position the shelf near the back of the desk. You can either center it or place it slightly off to one side. Allow the wood glue to dry for at least 24 hours before using the desk.[18]
- Since the door is so thick, it’s easier to use wood glue than to try to drive screws up through the bottom to attach the shelf.
-
5Add LED lights under the desk with electrical tape for optional flair. Cut the tape into 1.5 in (3.8 cm) strips and use the strips to secure the wire of the LED lights to the bottom of the desk. Position the lights about 1–2 in (2.5–5.1 cm) from the edges of the desk underneath it so that the light will be visible, but the wire will be hidden.[19]
- It’s best to use electrical tape so that the lights will be easy to remove if they burn out or if you want to change the color.


Things You’ll Need
- 26 by 80 in (66 by 203 cm) or larger door or plywood
- Two 1 by 6 ft (0.30 by 1.83 m) wood pieces (optional for shelf)
- Two 4 by 12 in (10 by 30 cm) wood pieces (optional for shelf)
- 5 adjustable desk legs
- Spray paint or varnish (optional for changing the color of the desk surface)
- Tarp or newspapers (optional for painting)
- Protective clothing and a mask (optional for painting)
- Drill or screwdriver for attaching legs
- Wood glue
- Measuring tape
- LED lights (optional)

-Step-9.webp)
References
- ↑ https://www.youtube.com/watch?v=STvBRS5p80w&feature=youtu.be&t=45
- ↑ https://www.popsci.com/build-custom-computer-desk/
- ↑ https://www.bobvila.com/slideshow/15-easy-designs-for-a-diy-desk-48527
- ↑ https://www.youtube.com/watch?v=STvBRS5p80w&feature=youtu.be&t=240
- ↑ https://www.popsci.com/build-custom-computer-desk/
- ↑ https://addicted2diy.com/gaming-computer-desk-how-to-build-your-own/
- ↑ https://www.bobvila.com/slideshow/15-easy-designs-for-a-diy-desk-48527
- ↑ https://addicted2diy.com/gaming-computer-desk-how-to-build-your-own/
- ↑ https://www.popsci.com/build-custom-computer-desk/
- ↑ https://addicted2diy.com/gaming-computer-desk-how-to-build-your-own/
- ↑ https://www.popsci.com/build-custom-computer-desk/
- ↑ https://www.popsci.com/build-custom-computer-desk/
- ↑ https://addicted2diy.com/gaming-computer-desk-how-to-build-your-own/
- ↑ https://www.popsci.com/build-custom-computer-desk/
- ↑ https://addicted2diy.com/gaming-computer-desk-how-to-build-your-own/
- ↑ https://www.popsci.com/build-custom-computer-desk/
- ↑ https://addicted2diy.com/gaming-computer-desk-how-to-build-your-own/
- ↑ https://addicted2diy.com/gaming-computer-desk-how-to-build-your-own/
- ↑ https://www.youtube.com/watch?v=STvBRS5p80w&feature=youtu.be&t=397
About This Article