This article was co-authored by wikiHow Staff. Our trained team of editors and researchers validate articles for accuracy and comprehensiveness. wikiHow's Content Management Team carefully monitors the work from our editorial staff to ensure that each article is backed by trusted research and meets our high quality standards.
This article has been viewed 25,201 times.
Learn more...
Building a deck cover adds shade and shelter to any home’s deck to make it a more useful outdoor space. With the right tools and some basic carpentry skills, you can add a cover to your deck by installing some corner posts and cross-beams. After that, you just need to attach some rafters and then cover them to achieve the look you want. Make the final product look like part of the home by adding actual roofing, or turn it into something more simple and natural, such as a vine-covered pergola.
Steps
Setting the Corner Posts and Cross-Beams
-
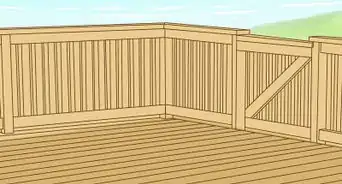
1Measure the length and width of the deck you want to cover. Measure the length using a tape measure and write it down. Measure the width of the deck next and write it down as well.[1]
- You don’t have to measure the length and width of the deck if you don’t want to cover the entire thing. For example, if you just want to build a square pergola in the middle of a larger deck, you can make it 10 ft (3.0 m) by 10 ft (3.0 m).
-
2Measure the height of the roof of the home if you want to attach the cover to it. Use a tape measure to measure from the floor of the deck to the edge of the roof. Write down the measurement.[2]
- If you want to build a free-standing deck cover, then you don’t need to measure the height of the roof. Make any free-standing structure at least 7 ft (2.1 m) tall so there is plenty of clearance under it.
Advertisement -
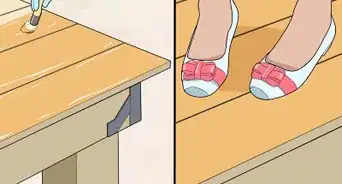
3Screw 6 in × 6 in (15 cm × 15 cm) post mounts into each corner of the deck. Use 3 in (7.6 cm) decking screws to secure the post mounts to the deck. Make sure to screw them into the joists underneath the decking and not only into the decking material.[3]
- Post mounts are metal brackets that will hold the corner posts of the deck cover vertically.
- If you plan to attach the deck cover to the side of the home, then you only need 2 post mounts in the outer corners of the deck.
- If you are making a cover over a concrete patio rather than a deck cover, you will have to bolt the post mounts into the concrete instead of screwing them in place.
Tip: If you aren’t sure where the support joists are under the decking, then unscrew some of the deck’s boards and check where they are. Mark the positions of the joists on the side of the deck’s frame by making a small “X” with a pencil where the joists connect to the frame. That way, you can line up the post mounts with the joists underneath the deck’s boards.
-
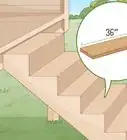
4Cut your 6 in × 6 in (15 cm × 15 cm) posts to the height you need them to be. Cut them to the height of the roof or 7 ft (2.1 m) tall if you are making a free-standing deck cover. Use a circular saw to cut the corner posts to the right length.[4]
- You can get the posts pre-cut at a lumber yard or home improvement center to save time.
- You only need 2 corner posts if you are going to attach the deck cover to the side of the home. They will go in the outer corners of the deck.
-
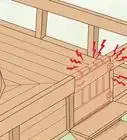
5Cut a 2 in × 8 in (5.1 cm × 20.3 cm) notch for the cross-beams at the top of the posts. Measure from the top of each corner post down 8 in (20 cm) on 1 side and draw a line. You will cut out a 2 in (5.1 cm) deep and 8 in (20 cm) long section from this line to the top of the post on just 1 side of the post. Set the depth on your circular saw to 2 in (5.1 cm) and make about 20 cuts right next to each other, starting at the line and going towards the top of the post, then chisel out the skinny pieces.[5]
- You could also use a reciprocating saw to cut out the notch in 1 piece by making a 2 in (5.1 cm) cut at the line you marked first, then cutting in from the top of the post.
-
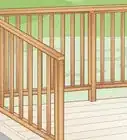
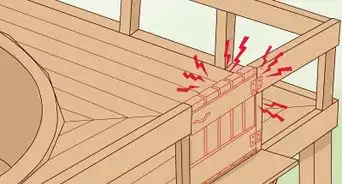
6Set the corner posts in the post mounts and screw them into place. Orient the posts so that the notches for the cross-beams face inwards towards the center of the deck, or towards the home if you are connecting the cover to the side of it. Get a helper to hold each post in place while you put the screws in. Screw 3 in (7.6 cm) decking screws into the corner posts through the holes in the post mounts using an electric drill.[6]
- The number of screws you need depends on how many holes the post mounts have.
- You will have 4 corner posts if you are making a free-standing patio cover, and only 2 if you are attaching one side of the cover to your home.
-
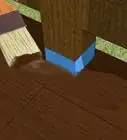
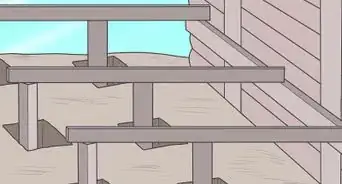
7Screw your cross-beams into the notches you cut at the top of the corner posts. Set the cross-beams into the notches and have a couple helpers hold each beam in place while you stand on a step ladder and screw them to the posts. Screw 4 3 in (7.6 cm) decking screws through each end of the cross-beams into the top of the corner posts using an electric drill.[7]
- You only need 1 cross-beam if you’re going to attach the deck cover to the side of the home. If you are using 4 corner posts then you need 2 cross-beams.
- You need to use weather-resistant wood for the posts and cross-beams. Use pressure-treated pine for an affordable option or use cedar if you want a naturally weather-resistant and more beautiful option.


Installing the Rafters
-
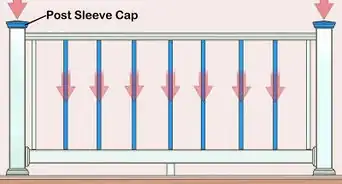
1Nail 2 in × 6 in (5.1 cm × 15.2 cm) joist hangers every 16 in (41 cm). Joist hangers are metal brackets that will support the rafters of your deck cover. Nail them into place along the inside of the cross-beams using a hammer and 1–1.5 in (2.5–3.8 cm) joist hanger nails.[8]
- Screw a 2 in × 6 in (5.1 cm × 15.2 cm) piece of lumber along the whole length of the side of the home if you’re going to attach the patio cover there. You can then nail the joist hangers into place along the board. Never nail joist hangers directly into the side of your home.
-
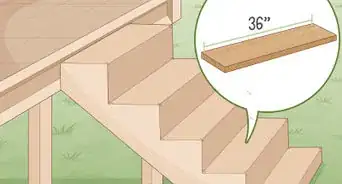
2Cut your 2 in × 6 in (5.1 cm × 15.2 cm) rafters to the right length. Measure from 1 joist hanger to another to double-check how long the rafters need to be. Cut the rafters to the length you need using a circular saw.[9]
- Divide the total length of the cross-beam by 16 in (41 cm) to determine how many rafters you need in total.
- You can get the rafters cut for you at a lumber yard or home improvement center to save time.
-
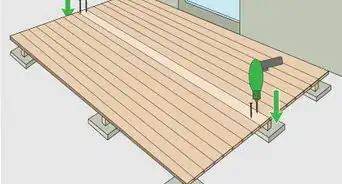
3Set your rafters into the joist hangers and nail them into place. Lay out all your rafters in the notches of the joist hangers. Hammer 1.5 in (3.8 cm) joist hanger nails into each rafter through the holes in the joist hangers to secure them in place.[10]
- The number of nails you need depends on how many nail holes the joist hangers have.
- The frame of your deck cover is now complete and you can go ahead and cover it with any type of roofing you want.


Adding Roofing
-
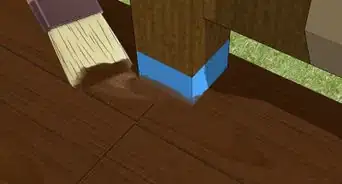
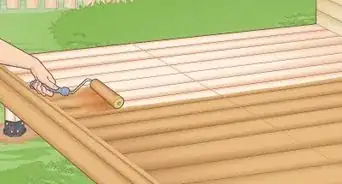
1Cover the rafters with OSB and shingles if you want it to match the home’s roof. Nail OSB sheets into the rafters using a nail gun. Install shingles that match the ones that the home has, such as asphalt shingles, to make the deck cover appear as an extension of the home.[11]
- OSB is a type of engineered wood made of compressed layers of wood strands, kind of similar to particle board.
- This is a good option if you attached the deck cover to the side of the home.
Tip: A similar option that helps the deck cover look like an extension of the home is to have a roofing contractor install flat rubber roofing. This is a highly waterproof material that looks nice next to any other roofing materials.
-
2Cover the rafters with corrugated plastic for a translucent protective roof. Lay out overlapping sheets of corrugated plastic roofing over the rafters. Pre-drill holes every 16 in (41 cm) through the sheets where they will lie on top of the rafters and nail them into place with aluminum screw nails.[12]
- This is a good option if you want protection from the rain and weather over your deck, but still want some light to shine through.
-
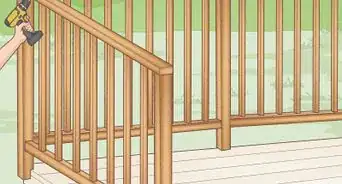
3Nail a wooden trellis to the rafters if you want to let vines grow over the cover. Lay out pieces of wooden trellis over the rafters so that the structure is completely covered. Nail them into place with carpentry nails and a hammer or using a nail gun. Put nails every 16 in (41 cm) or so along each rafter.[13]
- This is a nice option if you just want to add some shade to your deck but keep it more open to the air. You can then put planters with vines next to the corner posts and let them grow up the posts and onto the trellis to add some nature to the deck.


Things You’ll Need
Setting the Corner Posts and Cross-Beams
- Measuring tape
- 2-4 6 in × 6 in (15 cm × 15 cm) corner post mounts
- 2-4 6 in × 6 in (15 cm × 15 cm) corner posts
- 1-2 2 in × 8 in (5.1 cm × 20.3 cm) cross-beams
- 3 in (7.6 cm) decking screws
- Electric drill
- Circular saw
- Step ladder
- Chisel
Installing the Rafters
- 1 2 in × 6 in (5.1 cm × 15.2 cm) rafter for every 16 in (41 cm)
- 2 in × 6 in (5.1 cm × 15.2 cm) joist holders
- 1–1.5 in (2.5–3.8 cm) joist hanger nails
- Hammer
Adding Roofing
- OSB sheets and shingles (optional)
- Nail gun (optional)
- Corrugated translucent plastic roofing sheets (optional)
- Aluminum screw nails (optional)
- Wooden trellis (optional)
- Carpentry nails (optional)


References
- ↑ https://www.mycarpentry.com/patio-cover-plans.html
- ↑ https://www.mycarpentry.com/patio-cover-plans.html
- ↑ https://www.mycarpentry.com/patio-cover-plans.html
- ↑ https://www.mycarpentry.com/patio-cover-plans.html
- ↑ https://www.mycarpentry.com/patio-cover-plans.html
- ↑ https://www.mycarpentry.com/patio-cover-plans.html
- ↑ https://www.mycarpentry.com/patio-cover-plans.html
- ↑ https://www.familyhandyman.com/decks/building-a-deck/how-to-install-joist-hangers/
- ↑ https://www.naturalhandyman.com/iip/infxtra/infcorroofpanels.html
About This Article