This article was co-authored by Walter Brant. Walter Brant is a wikiHow community member and contributor who has been repairing and restoring houses with over 30 years of experience. He works with homeowners to make a wide variety of improvements to make their homes more comfortable and liveable.
There are 8 references cited in this article, which can be found at the bottom of the page.
This article has been viewed 289,688 times.
Building your own deck stairs might seem complicated, but it doesn't have to be! First, take careful measurements so you know exactly how many stairs you'll need to build. Then, frame out your deck and either purchase or build stringers, which are the part of the stairs that the treads and risers will attach to. Finally, add the risers, then the treads—then just sit back and enjoy your outdoor space!
Steps
Calculating the Stair Measurements
-
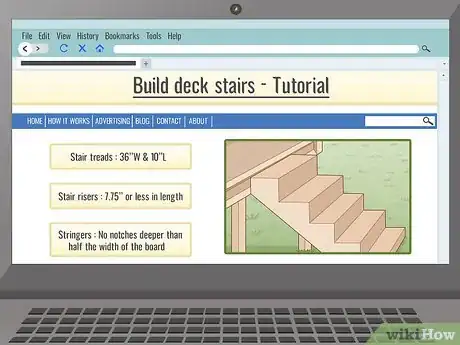
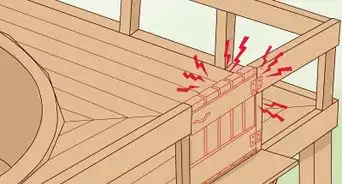
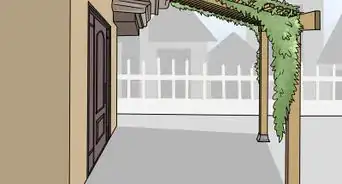
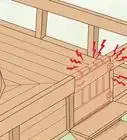
1Check your local building codes regarding deck stairs. Before you begin purchasing materials and building your deck stairs, you need to go online, call your local government, or contact a building inspector to make sure you’re following your local building codes. Building codes can vary, so you need to be sure you’re following your local codes or you could face a fine and be forced to remove your deck stairs.[1]
- Many local governments list their building codes online.
- Note that "riser height" is defined as the height from the top of one tread to the top of the next.
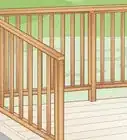
- Stairs with more than 1 step will probably also be required to include a handrail on both sides of the stairs. Open stairs, and the deck they serve, rising over 30 inches may also need guards on any open sides above the point 30 inches high.[2]
Common Building Codes for Deck Stairs
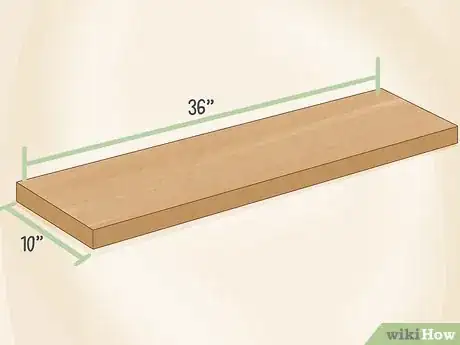
Stair treads: 36 inches (91 cm) wide and 10 inches (25 cm) deep
Stair risers: 7.75 inches (19.7 cm) or less in height
Stringers: No notches (saw-toothed or stair-shaped cuts) deeper than half the width of the board, or the stringer will be too weak -
2Check if you can use pre-cut stringers. Handyman suggests "stopping by a home center or builders' supply store, which both sell pre-cut stringers that are cut to standard dimensions. Using these is the best option unless you need the stairway to be steeper because there is not enough space on the ground."
- Measure the approximate height of the stairway you will build and the maximum space you can use on the ground.
- Check the pre-cut stringers at the store and measure their height and length. If they are longer than you need, you can cut them to size.
- To cut a stringer to size, cut it so the bottom step is not as high as the others. It can be much less high.
Advertisement -
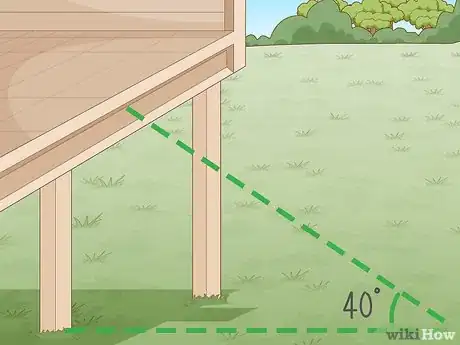
3Imagine a 40-degree slope to find the landing zone of your stairs. The first thing you need to do is find where your stairs will end, or where the landing spot will be. Picture a line running from the edge of your deck down to the ground at a 40-degree angle. Place a tape measure on the ground where you think the stairs will end. It does not have to be measured precisely.[3]
- The 40-degree slope should start the bottom of the support beam of the deck because this is where the stringers will be attached.
-
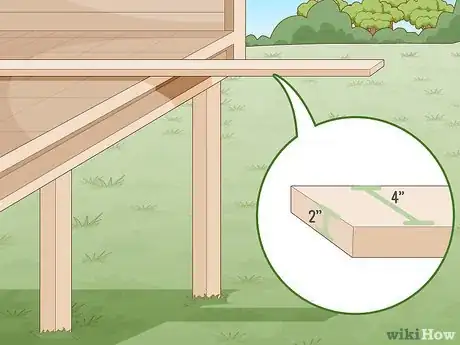
4Rest a straight board on the deck and make it level over the landing spot. Handyman Walter Brant advises "laying a long, straight board on the deck, extending to directly above where the bottom of the stairs will be (the landing spot). Then, set a large level on the board to check that it is level." Brant also suggests to "level the board with shims if it slopes upward toward the landing spot. If the board slopes downward, still level it with shims but also measure from the ground to the board to see how much this raised the end above the landing spot."
- Write down the measurements so you can calculate the materials later.
-
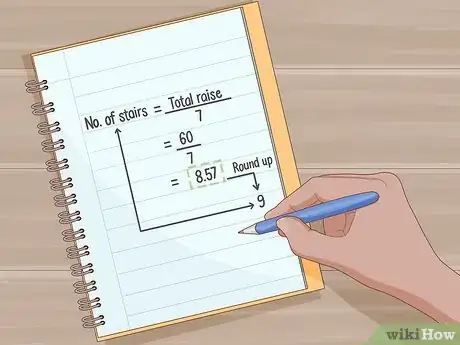
5Divide the total rise by 7 to find the number of 7 in (18 cm) steps. Take the measurement you made of the total rise, divide it by 7, and round the number to find the total number of stairs you’ll need for your deck. Round this number up or down to the closest whole number to find the number of steps.[4]
- For example, if your total rise was 60 inches (150 cm), then divide that number by 7 to get 8.57. Round that number up to get 9, and use 9 steps.
- Write down this number to use in your calculations.
-
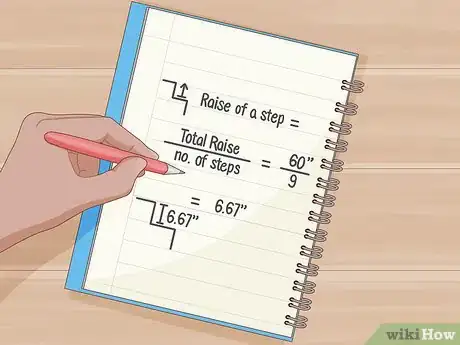
6Find the rise of each step by dividing the total rise by the number of steps. The rise, or height, of each step can be calculated by dividing the total rise by the approximate number of stairs—this will tell you how tall each step will be.[5] According to handyman Walter Brant, "Typical building codes require that stair risers should be no taller than 7.75 inches (19.7 cm). This is the height of each notch in the riser."
- For example, if your total rise is 60 inches (150 cm) and your approximate number of steps is 9, divide 60 inches (150 cm) by 9 to get 6.67 inches (16.9 cm) per step.
-
7Use tread boards that are at least 10 inches (25 cm) wide (deep). The treads boards create the part of the stair that you step on. According to many building codes, the stair treads should be at least 36 inches (91 cm) long (width of stairs) 10 inches (25 cm) deep.[6]
- The number of steps you calculated is the number of treads that you’ll need.
-
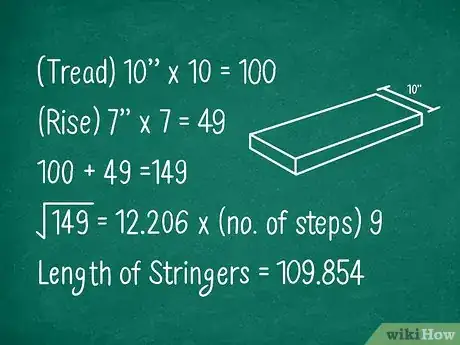
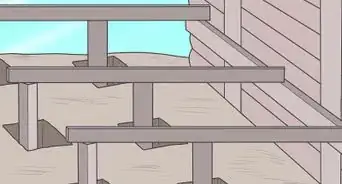
8Find the length of the staircase by calculating the length of the stringers. Stringers are boards that have sawtoothed or stair-shaped notches cut into them and run diagonally along the length of the stairs to support them. To find their length, add together the square of the run, or tread, and the square of the rise. Then take that number, find the square root, and multiply it by the number of steps to find the actual length of the stringers you’ll need.
- For example, if your tread is 10 inches (25 cm), square 10 by multiplying the number by itself, which gives you 100. If your rise is 7 inches (18 cm), square that number by multiplying it by itself to get 49. Add 100 to 49 to get 149, then find the square root of 149, which is 12.206. Multiply that by the number of steps that you have to find the total length of your stringers.
Making the Stringers
-
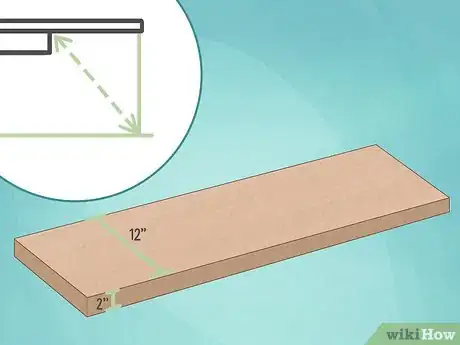
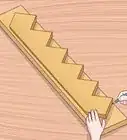
1Cut custom stringers out of 2 in (5.1 cm) by 12 in (30 cm) boards. The stringers are what you’ll attach your treads and risers to, and it’s often difficult or impossible to find pre-fabricated stringers that will fit your deck stairs. You’ll need to cut your own.[7]
- Most building codes stipulate that the stair stringers can’t have notches (saw-toothed or stair-shaped cuts) that are deeper than half the width of the board, or the stringer will be too weak.
-
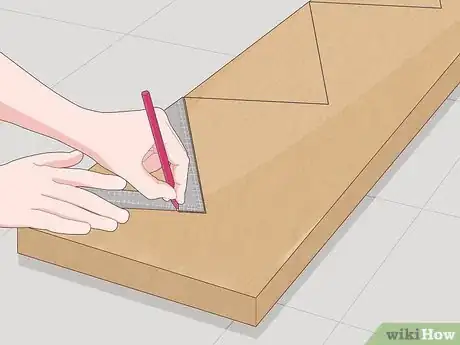
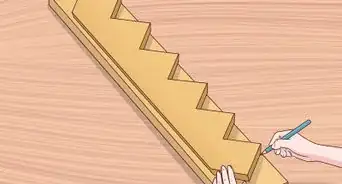
2Use a framing square to mark a sawtoothed pattern as cutting guidelines. Set your framing square to the height of the riser and width of the stair tread and use a carpenter’s pencil to trace along the edges of the framing square to form a sawtooth pattern of steps onto a 2 in (5.1 cm) by 12 in (30 cm) board. Lay the square on the board and mark the lines, then slide the square down and align it with the previous mark before adding the next ones.[8]
- Draw all of your cuttings lines onto the wood first, then check and recheck your measurements before you make any cuts.[9]
- The sawtooth or stair-shaped pattern should match the rise and tread measurements.
-
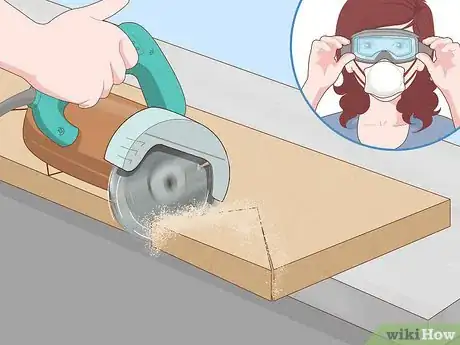
3Cut the notches into the board using a circular saw. Let the blade come to full speed before you cut the wood and cut the saw-tooth notches out by following the guidelines you marked. Don’t cut all the way through the guidelines.[10]
- Be careful when operating a circular saw. Wear safety goggles to prevent sawdust from entering your eyes.
-
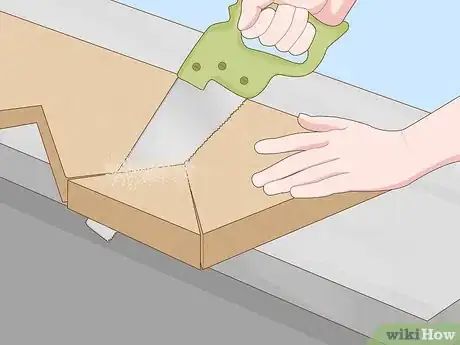
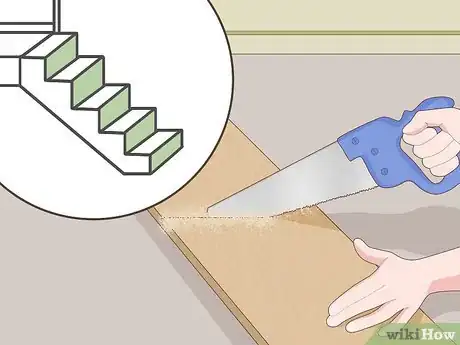
4Finish the notch cuts with a handsaw. The circular saw will cut most of the notch out, but you’ll need to use a handsaw to finish up the cuts without sawing beyond the cut lines. Fit the handsaw into the cut lines and use a back and forth motion to finish the cuts.[11]
- Take care not to cut past the guidelines you marked or it could weaken the stringers.
-
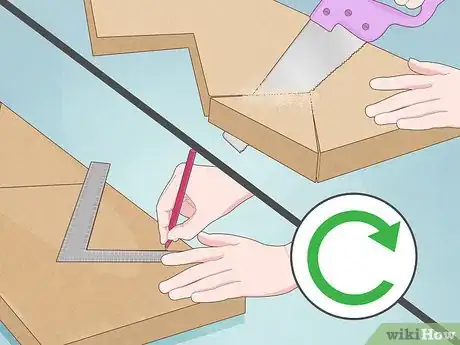
5Repeat the process to cut another stringer. You need at least 2 stringers to support your deck stairs, so use the same measurements and mark a 2 in (5.1 cm) by 12 in (30 cm) board to be cut. Use the circular saw to cut the notches and finish the cuts with a hand saw to separate another stringer from the board. It should be the exact same measurements and cuts as your first stringer.[12]
- Use the first stringer you cut as a template for the next two.[13]
- If you're building the stairs on a surface that isn't level, your stringers may all 3 need to be slightly different lengths. Start by cutting the shortest one, then make the other two slightly longer on the bottom. Avoid using shims to adjust the stringers—they could fall out.[14]
- Measure, mark and cut with precision; the limit for differences between tread depths or riser heights is 3/16 per stair and 3/8 total for a flight of stairs.[15]
Finishing the Deck Stairs
-
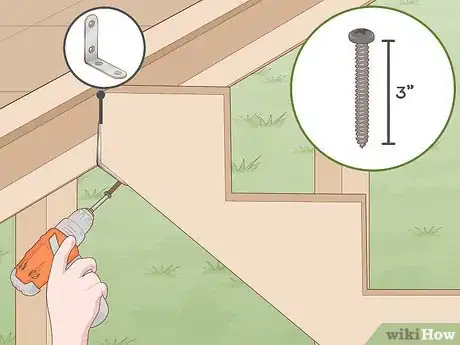
1Screw each stringer to the bottom of the deck frame with a drill. Use L-brackets and 3 in (7.6 cm) deck screws to attach the stringers to your deck. Place the top of the stringer against the bottom of the frame of the deck and screw an L-bracket on each side of the stringer to connect it to the deck.[16]
- After you’ve attached the first stringer, connect the second stringer to the deck by following the same process.
- Use 6 in (15 cm)-long corner braces on the two inside corners—look for the ones labeled "braces for stringers," as they're heavier steel than most braces.
- For extra strength, screw several 3 1⁄2 in (8.9 cm) framing and decking screws diagonally through the stinger into the deck.[17]
-
2Cut the risers to the length of the top of the stringer. Set a riser against the edges of the stringers facing out and use a ruler and pencil to mark cutting guidelines where the riser needs to be trimmed to fit. Use a circular saw to trim the riser, cutting along the guidelines until you cut through the whole board. Repeat the process until all of the risers have been cut to size.[18]
- Use the first riser that you cut to make your guidelines on the rest of the boards so you have a uniform length.
-
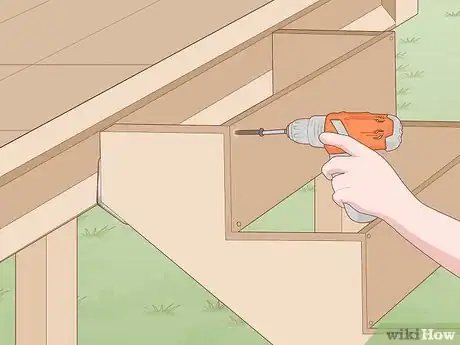
3Attach the risers with 3 in (7.6 cm) deck screws. Place the risers against the edges of the stringers facing out from the staircase. Use a drill to drive the 3 in (7.6 cm) deck screws through the risers and into the edge of stringers where they connect until all of the screw is in the wood.[19]
- Use at least 2 deck screws to firmly secure the riser to the stringer.
- Don’t drill too far into the wood or it could crack.
-
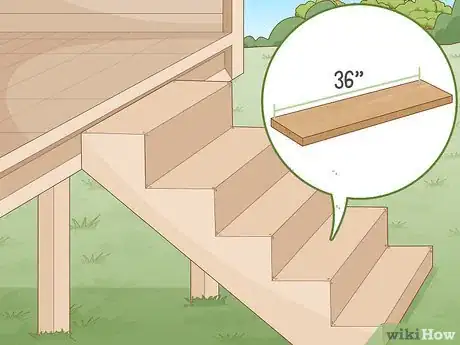
4Trim the treads and drill them onto the stringers. Once you’ve attached the risers, take your 1.5 in (3.8 cm) by 10 in (25 cm) tread boards and cut them to 36 inches (91 cm) in length. Then, lay them across the stringers facing up. Use 3 in (7.6 cm) deck screws to attach the treads to the stringers by drilling through the tread boards and into the edges of the stringers where they connect.[20]
- Use at least 2 deck screws to attach the tread boards.
Warning: Make sure none of the screws are sticking out of the wood or someone could step on it.
-
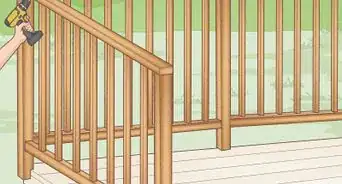
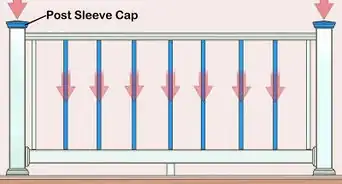
5Add any necessary handrails and guards and call the local officials for any necessary inspection of your completed stairs.
Expert Q&A
Did you know you can get expert answers for this article?
Unlock expert answers by supporting wikiHow
-
QuestionHow can I make sure my stairs will last?
 Walter BrantWalter Brant is a wikiHow community member and contributor who has been repairing and restoring houses with over 30 years of experience. He works with homeowners to make a wide variety of improvements to make their homes more comfortable and liveable.
Handyman
Warnings
- Be careful when operating drills and saws. Wear safety glasses to protect your eyes.⧼thumbs_response⧽
Things You’ll Need
- Carpenter’s pencil
- Tape measure
- A 4 ft (1.2 m) level
- Framing square
- Drill
- 3 in (7.6 cm) deck screws
- Circular saw
- Safety glasses
- Handsaw
- A 2 in (5.1 cm) by 4 in (10 cm) straight board
- 2 2 in (5.1 cm) by 12 in (30 cm) boards
- Decking for risers and treads
References
- ↑ https://www.decks.com/how-to/67/how-to-build-a-deck---stairs-steps
- ↑ NFPA 101 (2015):7.2.2.4.
- ↑ https://www.popularmechanics.com/home/how-to-plans/how-to/a2145/4224738/
- ↑ https://www.familyhandyman.com/decks/how-to-build-stairs-deck/
- ↑ https://www.familyhandyman.com/decks/how-to-build-stairs-deck/
- ↑ https://www.thisoldhouse.com/how-to/how-to-build-deck-stairs
- ↑ https://www.familyhandyman.com/decks/how-to-build-stairs-deck/
- ↑ https://www.familyhandyman.com/decks/how-to-build-stairs-deck/
- ↑ Walter Brant. Handyman. Expert Interview. 2 September 2020.
- ↑ https://www.thisoldhouse.com/how-to/how-to-build-deck-stairs
- ↑ https://www.popularmechanics.com/home/how-to-plans/how-to/a2145/4224738/
- ↑ https://www.familyhandyman.com/decks/how-to-build-stairs-deck/
- ↑ Walter Brant. Handyman. Expert Interview. 2 September 2020.
- ↑ Walter Brant. Handyman. Expert Interview. 2 September 2020.
- ↑ e.g., NFPA 101 (2015): 7.2.2.3.6 (except a bottom riser resting on a landing).
- ↑ https://www.onthehouse.com/building-deck-stairs/
- ↑ Walter Brant. Handyman. Expert Interview. 2 September 2020.
- ↑ https://www.familyhandyman.com/decks/how-to-build-stairs-deck/
- ↑ https://www.thisoldhouse.com/how-to/how-to-build-deck-stairs
- ↑ https://www.thisoldhouse.com/how-to/how-to-build-deck-stairs
- ↑ Walter Brant. Handyman. Expert Interview. 2 September 2020.
About This Article
To build deck stairs, you’ll need a framing square, drill, deck screws, a circular saw, and wooden boards. Before you buy your materials, you'll need to measure the height of your deck, then divide this by the height you want each stair riser to be. Check your local building codes, which will often tell you how high each step needs to be. To fasten your stair treads and risers together, you'll need to make a stringer for each side. You can use the framing square and circular saw to cut right-angled triangles in a sawtoothed pattern in each stringer. When you screw the stringers to your deck, you can easily screw the treads and risers into each set of right-angle triangles. For more tips, including how to work out how much wood you need for your deck stairs, read on!
