X
wikiHow is a “wiki,” similar to Wikipedia, which means that many of our articles are co-written by multiple authors. To create this article, 28 people, some anonymous, worked to edit and improve it over time.
This article has been viewed 502,692 times.
Learn more...
Always wanted to make some nice bookcases for your basement or bonus room, but don't want to spend a fortune? This article will cover the most basic shelving as well as offer simple and inexpensive ways to "dress up" your shelving.
Steps
-
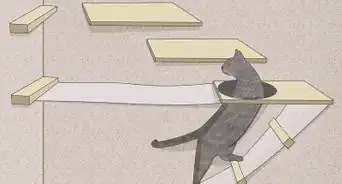
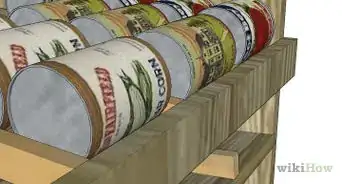
1Design your shelving based on your available space. If you're making built-in bookcases, measure the space available, both at the bottom and the top- don't assume your walls are plumb and square. You will want to break up your shelving with vertical sections every 30" or less- anything more and your shelving will sag. Use no more than 18" to 24" spans for typical 1" wood. If they do start to sag, you can go back and cut small square 1" side panels and mount them vertically in the shelf below for additional support. For built-in bookshelves, design a box to fit the space, and then plan for vertical sections and the shelves to fit into it. You can build it and then slide it into place and mount it.
-
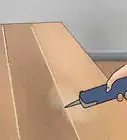
2Make a shopping list for your base frame: 1" x 12" lumber, measuring the length of your outer box, your vertical supports, and your shelving. Remember most wood comes in 96" sections, so you will have some waste. If you plan ahead how you're going to cut them, you can buy some shorter (72") or longer (120") sections to fit your design. Use poplar or maple over the low-end pine boards, since the knots make the wood hard to work with and paint.[1]Advertisement
-
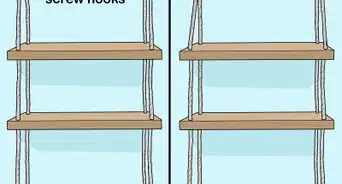
3Make a list for your other materials- supporting 1" x 2" strips x the length of your shelving; 1/8" plywood to cover the back; 4 supporting pins per shelf; lots of wood screws (standard drywall screws work fine) and small wire brads to mount the back.[2]
-
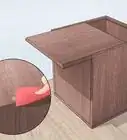
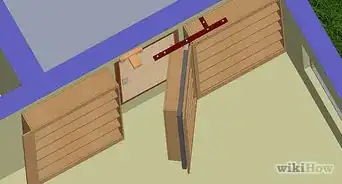
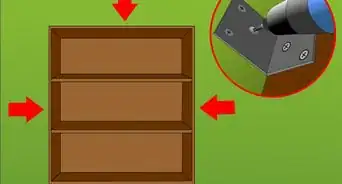
4Cut the wood to fit the design of the base box. Remember to add/subtract the width of the wood itself depending on which way your joints lap. Assemble the box and mount on the plywood backing. Re-measure each vertical section and cut.[3]
-
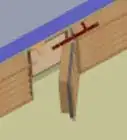
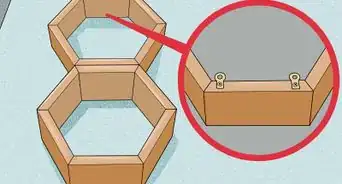
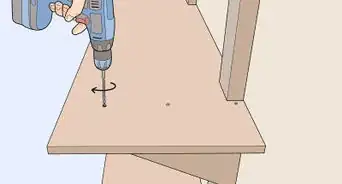
5Drill the necessary holes. Before mounting the vertical sections in the box, either drill holes for the supporting pins or cut grooves (dados) to mount the shelves into. Measure the pin diameter with calipers and find the right bit for a somewhat loose fit, or do trial and error on a scrap of wood. Make sure to drill the holes perpendicular to the wood- use a drill press if you have one. A template to mark the holes is very helpful; If you're not tool-handy skip this step and you can use L-brackets to hold up the shelves later. It's ugly, but functional.[4]
-
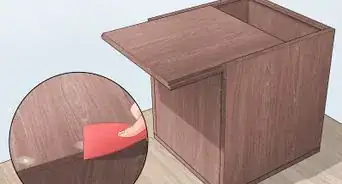
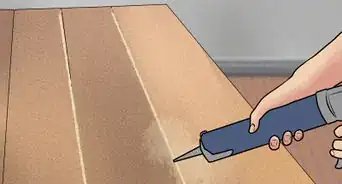
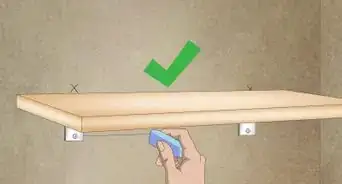
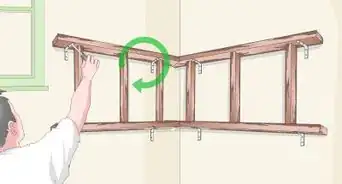
6Mount the vertical sections. Test the joints to ensure they are square. Measure each shelf length and cut. Install pins and test fit. Remove shelves and add 1" x 2" supporting strip to the front for additional support. Re-install shelves and paint. Optionally, use 1-1/2" x 1/4" strips along the vertical supports, sides, and top to cover the joint-work.[5]
-
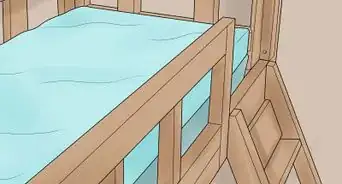
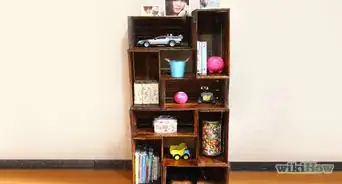
7Finished.
Advertisement
Community Q&A
-
QuestionHow much does this cost?
 AgewalkerCommunity AnswerIt depends on your materials. If you use cheap plywood, you could build a bookshelf for less than $20. If you want something better, like oak, you can expect that price to quadruple. On the other hand, if you use rare or exotic woods, the cost of a small bookshelf could easily exceed $1000 or more.
 -
QuestionWhere can I get help to build a shelf?
 Community AnswerMost good hardware stores will have knowledgeable staff who are willing to offer help or, if they can't, point you in the right direction. There are also plenty of videos and sites online that offer step by step instructions, including tips and tricks to make it look nice. You could also ask friends to help.
 -
QuestionCan I make a mini bookshelf using 3-ply plywood?
 Community AnswerYou could, provided you weren't planning on loading it up with a lot of heavy items. Plywood is good for lightweight projects if it doesn't have a support structure made out of decent wood.
Advertisement
Warnings
- Screw the top of your case into the wall to avoid the possibility of it tipping over once loaded. This is absolutely essential if you plan to use this shelving in a child's room. They will try to climb up your new creation at some point in their lives.⧼thumbs_response⧽
- Always follow manufacturer's directions and warnings related to power tools, especially saws. Never push your hand in the direction of the blade, and keep as much of your body out of the line of the blade (both forward and backward line).⧼thumbs_response⧽
- Always wear safety goggles while using woodworking tools.⧼thumbs_response⧽
Advertisement
Things You'll Need
- Circular saw, radial arm saw, or equivalent
- Workbench or sawhorses
- Drill or drill press
- Screwdriver
- Tape measure
- Carpenter's square
- Sander (optional)
- Pencil
- Materials (see instructions)
- Hammer
- Level
- sandpaper

References
- ↑ https://www.thisoldhouse.com/how-to/how-to-build-bookcase
- ↑ https://www.thisoldhouse.com/how-to/how-to-build-bookcase
- ↑ https://www.familyhandyman.com/woodworking/bookcase/how-to-build-a-bookshelf/
- ↑ https://www.popularmechanics.com/home/how-to-plans/how-to/a3346/4268525/
- ↑ https://www.familyhandyman.com/woodworking/bookcase/how-to-build-a-bookshelf/
About This Article
Advertisement