This article was co-authored by Gonzalo Martinez. Gonzalo Martinez is the President of CleverTech, a tech repair business in San Jose, California founded in 2014. CleverTech LLC specializes in repairing Apple products. CleverTech pursues environmental responsibility by recycling aluminum, display assemblies, and the micro components on motherboards to reuse for future repairs. On average, they save 2 lbs - 3 lbs more electronic waste daily than the average computer repair store.
There are 7 references cited in this article, which can be found at the bottom of the page.
This article has been viewed 129,788 times.
With PC gaming constantly improving, you may find your game play becoming slower, less fluid, or even glitchy as time goes on. However, there are a few simple and effective ways to boost your computer's speed and performance for gaming. This how-to will go over a variety of methods from cleaning up old files to upgrading your hardware in a few easy to follow steps.
Steps
Upgrade Your Graphics Drivers
-
1Identify your graphics card. It is important to know what kind you have before moving forward.[1]
-
2Press the Windows Key on your keyboard. This will open the Start Menu.Advertisement
-
3Enter "Device Manager." Type this without the quotation marks into the search menu. The search may produce multiple results.
-
4Click the Device Manager. This will prompt the Device Manager window to open.
-
5Go to Display Adapters. Expand the category by clicking the arrow to the left of it once. This will display the make and model of your graphics card.[2]
- In most machines you will see both Intel and NVIDIA hardware. Occasionally you will instead find AMD hardware. If you want to improve your gaming performance, you need to update the drivers on your graphics card.
-
6Find new drivers. Now that you know the make and model of your graphics card, you can go to the manufacturer's website and see the updated versions available.[3]


Uninstall Old Programs
-
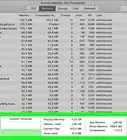
1Uninstall old programs. The more programs you have on your computer, the slower it will run. By deleting unnecessary programs, you can easily improve the efficiency of your device.
-
2Open the Control Panel on your PC. Navigate to the "Uninstall Programs section. In windows 7, 8, 8.1, and 10, these settings are all in different places. You may have to search for the option if you don't see it immediately.
-
3Click on the organization tab and switch it to "Date Last Used". This will allow you to filter through your programs and find the ones you have not used in a while.
-
4Uninstall unused programs. When you find a program that you no longer want, click Uninstall. (Be careful, if you don't know what something is, look it up first, often times some applications are necessary to run games.)


Overclocking the GPU
-
1IMPORTANT, before doing this, make sure your GPU "can" be overclocked, as many are factory locked. If not, skip to the next section.
-
2Overclocking your GPU is running the graphics card beyond the factory setting. This is a potentially damaging method to improve your gaming performance and therefore all precautions should be taken into account. To do this, you should determine the baseline from which your graphics card is currently running.
-
3Download free benchmarking and analytics software. One of the more popular options is the Heaven 4.0 benchmark.[4]
-
4Run the Heaven 4.0 benchmark. This will prompt the settings menu to appear.
-
5Set Resolution to System. You may change some of the other settings if you have the tech know-how, but if you are working with a lower-end card, it is recommended that you refrain from adjusting too much.[5]
-
6Click Run. This will prompt Heaven to play through a series of scene that are designed to test the capability of your device's performance. It may glitch but this is normal.
-
7Click Benchmark. This can be found in the upper left-hand corner of your screen and it will prompt Heaven to go through 26 scenes to test your GPU's performance abilities.
-
8Write down your score. Once the test is complete, a window will appear with your graphics card's score. Write this down so that you can compare it with your score after overclocking it.
-
9Download a GPU tweaking tool. You can find these for free online and some popular options are MSI's Afterburner and EVGA'S PrecisionX software.
-
10Open the software that you have chosen.
-
11Raise the core clock by 5 to 10 MHz. Make sure that the clocks entitles Core Clock and Shader Clock are connected.
-
12Click Apply. You can check to see if your changes were applied by going to GPU-Z and seeing if it matches.
-
13Click Save. You may be prompted to save your settings. Do so and assign a profile.[6]
-
14Repeat the over clocking process. One of two things will occur: either Heaven will run without any problems and you may increase your MHz by 5 to 10, or you graphics card will crash. You can tell that your GPU has crashed if you start to see black glitches, blotches, or bright stars on the screen. This means that your overclock has become unstable and you need to either lower you MHz.[7]
- You will also want to keep an eye on the temperature of your computer. If it gets too hot, you may risk frying your hardware.
-
15Set your new frequency. After you have found the correct frequency for your graphics card, restart your computer. Some overclocking software will prompt you to set the changes you’ve made.
-
16Play through a game. To really make sure you’ve found the right frequency, play though a graphics intensive game and see how it runs.[8]


Disable Superfetch and Prefetch
-
1Go to the Start Menu.
-
2Type "regedit" without the quotation marks into the search box.
-
3Select the appropriate file path. This should be “HKEY_LOCAL_MACHINE\SYSTEM\CurrentControlSet\Control\SessionManager\Memory Management\PrefetchParameters.”
-
4Right-click on EnablePrefetcher as well as EnableSuperfetch.
-
5Hit Modify. This will present you with a window with given values.
-
6Change the given value from 3 to 0.
-
7Restart your computer. Prefetch and Superfetch should now be disabled.[9]


Defragment or TRIM Your Disk
-
1Go to the Start Menu. In the Start Menu, click All Programs, then Accessories, and then go to System Tools.
-
2Select Disk Defragmenter. When files are deleted from your disk, they can become fragmented. This can lead to slower performance on your device. By collecting these fragments you can improve your performance speed.
-
3Select your Windows Disk. If you have Windows 8, proceed to the next step.
-
4Select Defragment Disk
- If you have an SSD, or solid-state disk, do not defrag your computer. Instead, proceed to the next step.
-
5Select Optimize. This will initiate the TRIM command.
-
6Check to see if TRIM is enabled. You can do this by opening the command prompt and inputting a simple command.
-
7Click Start. Type "cmd" without the quotation marks into the search bar and then select "cmd."
-
8Click Run as Administrator.
-
9Wait for a black window, or terminal, to appear.
-
10Enter the command “Fsutil behavior query disabledeletenotify” without the quotation marks. If TRIM is supported, the response will be “= 0.” If you do not receive this response, enter the command “fsutil behavior set DisableDeleteNotify 0” without the quotation marks. If you receive the same response, you may need to upgrade your firmware.[10]
-
11Run through a game. If you still do not notice any change in the quality of game play, try another method.


Adjust the AMD/ATI Control Panel
-
1Right-click on your desktop. Select Catalyst Control Center.
-
2Go to Manage 3D Settings. This can be found to your left. Here you will be able to alter the settings of our graphics in order to optimize game play.[11]
-
3Personalize your settings. Each player and each game may require distinct personalized settings for the optimal gaming experience.


Adjust the NVIDIA Control Panel
-
1Right-click on your desktop. This method is specifically for those with a NVIDIA graphics card.
-
2Select NVIDIA Control Panel.
-
3Go to Manage 3D Settings. You can find this on the left side of your screen.
-
4Personalize your settings. Each player and each individual game may require distinct personalized settings for the optimal gaming experience.


Upgrade Your Hardware
-
1Upgrade your SSD. Also known as a solid-state disk, SSDs are much more efficient than the mechanical hard disks and can greatly reduce the load time and play of a game.
-
2Research your options. There are is a wide range of quality and price range for SSDs and you should determine the best fit for you and your computer.
-
3Upgrade your PC. If you have tried all of the above methods and still do not experience improved game play, it may be time to update your computer to play the latest games.[12]


Warnings
- Although overclocking can help you get better frame rates, it also makes your graphic card generate more heat and consume more electricity. Be sure to have the required amount of cooling and electricity on your Power Supplying Unit (PSU) before overclocking.⧼thumbs_response⧽
- Overclocking decreases the life span of your graphic card. It may also void your warranty in case of some manufacturers.⧼thumbs_response⧽
- Do your research before downloading anything to your computer. Make sure the program is safe before you install and run it.⧼thumbs_response⧽


References
- ↑ http://www.howtogeek.com/135976/how-to-update-your-graphics-drivers-for-maximum-gaming-performance/
- ↑ http://www.howtogeek.com/135976/how-to-update-your-graphics-drivers-for-maximum-gaming-performance/
- ↑ http://www.howtogeek.com/135976/how-to-update-your-graphics-drivers-for-maximum-gaming-performance/
- ↑ http://www.pcgamer.com/how-to-overclock-your-graphics-card/#page-2
- ↑ http://lifehacker.com/how-to-overclock-your-video-card-and-boost-your-gaming-30799346
- ↑ http://lifehacker.com/how-to-overclock-your-video-card-and-boost-your-gaming-30799346
- ↑ http://lifehacker.com/how-to-overclock-your-video-card-and-boost-your-gaming-30799346
- ↑ http://www.pcgamer.com/how-to-overclock-your-graphics-card/#page-2
- ↑ http://www.tomshardware.com/reviews/ssd-performance-tweak,2911-5.html
About This Article