This article was co-authored by Jennifer Levasseur. Chef Jennifer Levasseur is a Personal Chef and the Owner of The Happy Cuisiniere based in Breckenridge, Colorado. She has over 12 years of culinary experience and specializes in Mountain and Contemporary Rustic cuisine. Moreover, she can craft dishes and modify menus to accommodate dietary restrictions, such as gluten-free, vegetarian, vegan, pescatarian, and dairy-free diets. In addition to a Bachelor’s degree in Marketing and Management from the University of Houston, Chef Jennifer holds Associate’s degrees in Culinary Arts and Baking & Pastry Arts from Houston Community College.
This article has been viewed 40,434 times.
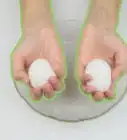
Beaten or whipped egg whites provide a unique lightness to many desserts and other recipes. You have to carefully separate the egg whites from the eggs, making sure the yolks do not break. Then, beat the whites until they foam or form peaks. While getting the egg whites to the right consistency can seem like a challenge, it gets easier once you learn a few simple techniques.
Steps
Separating the Egg Whites
-
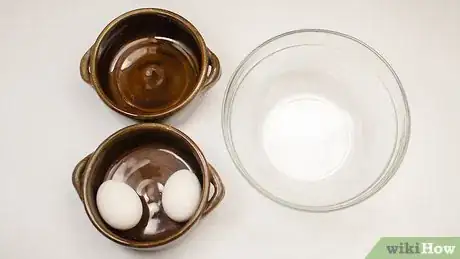
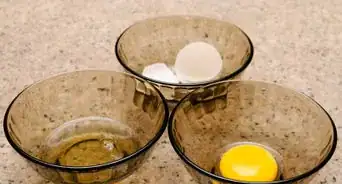
1Set out 3 different bowls to hold the eggs. Using 3 different bowls can help you keep the egg whites separate from the yolks. Choose a glass or metal bowl to collect the egg whites. Then, select a deep glass or metal mixing bowl to beat the egg whites in. Also, select a third container to hold the yolks.[1]
- If any yolk gets in with the egg whites, it can ruin them and you will have to start over.
- Avoid using plastic to store egg whites. Plastic holds onto oil, so even clean plastic can ruin your egg whites.
-
2Crack the first egg against a countertop. Tap the first egg on the countertop, but don't pour the egg into a bowl. Hold the egg upright so the whites and yolk stay in the shell. Gently pull the shell halves apart.[2]
- You can also crack the egg by tapping it against the rim of 1 of the bowls.
Advertisement -
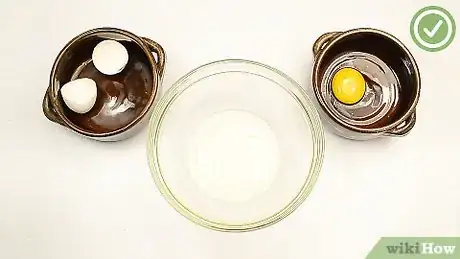
3Pass the yolk between the shell halves. Hold the shell halves over a glass or metal bowl you chose earlier. There are several ways to separate the egg, but the easiest way is to shift the yolk back and forth. Do this several times until most of the egg white has dripped into the bowl.
- Make sure the yolk isn't mixed in with the egg whites. If the yolk has broken, dump the egg into the trash (or use it for something else) and wash out the bowl.
- Carefully pick out any shell fragments that fall into the bowl.
-
4Pour the yolk into your third bowl. Store all of the yolks together in the third container you chose earlier. It can be made from plastic or any other material. The yolks can be used to make pastries, pasta, mayonnaise, sauces, and to bind meat together.[3]
- Check the yolk for shell fragments if you plan on cooking them.
- You can store the yolks in an airtight container in the refrigerator. Pour a little water into the container to prevent them from drying out.
-
5Transfer the egg white to your mixing bowl. Before moving the egg white, check it over for yolk. A little bit of yolk can ruin an entire batch of egg whites. Pour the egg white out of the glass or metal holding bowl. Then, repeat the process from the beginning with your remaining eggs.[4]
- Keeping the egg white in a separate holding bowl prevents the mixing bowl's contents from being tainted if a yolk breaks.
Beating Foamy Egg Whites
-
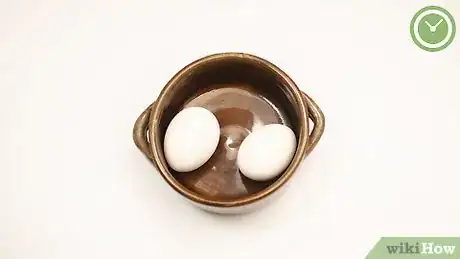
1Warm the eggs to room temperature for 30 minutes. The egg whites get runnier when they reach room temperature, making them easier to beat. You may also notice that you get a greater volume of egg whites when you let the eggs warm up.[5]
- If you use an egg separator, you can let the eggs warm up before cracking them. This makes the whites easier to separate, and you can then beat them right away.
-
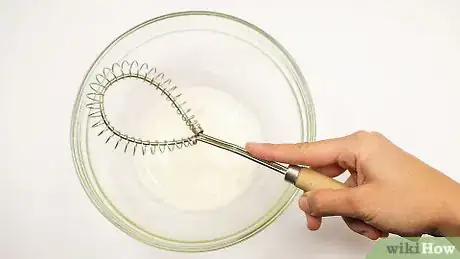
2Hold a metal whisk in your dominant hand. Use only a metal balloon or wire whisk, since plastic whisks can retain oils that ruin the egg whites. An overhand grip works best. Hold the whisk between your thumb and your forefinger, wrapping the rest of your hand around the handle. Use your other hand to hold the bowl steady.[6]
- You can also use an electric mixer or stand mixer. These devices can perfectly beat egg whites without you having to tire out your arm.
-
3Whisk the eggs at a slow pace. Lower your whisk into the egg whites. Begin to move your wrist up and down in a circular motion. A slow pace means the whisk makes less than 4 circuits per second in the bowl.[7]
-
4Whisk for 30 seconds until the egg whites show foamy bubbles. Count the time as you whisk, then check egg whites' consistency. If they are finished, they will have turned into a foam. The foam will be mostly liquid, but it will be a bright white color and have lots of air bubbles.[8]
- You can lift the whisk out of the bowl to get a closer look at the foam.
- If your recipe calls for stiffer egg whites with peaks, continue whipping the egg whites at a higher speed.
Whipping Soft and Hard Peaks
-
1Beat the egg whites until they are foamy. Before you can make the egg whites into peaks, you have to get to the foamy stage. Beat the egg whites for 30 seconds at a slow pace. Check them briefly for the foamy bubbles before continuing.
- The amount of time you need to beat the eggs to reach each stage can vary slightly each time you do this.
-
2Add cream of tartar to stabilize the egg whites. Sprinkle in a little bit of the acidic substance in while the egg whites are still a little runny. Plan on adding about 1⁄8 tsp (0.62 mL) per egg in your bowl.[9]
- You can buy cream of tartar at most grocery stores. If you can't find it, you can also use an equivalent amount of lemon juice or vinegar.
- Salt is now considered a destabilizer, so use an alternative instead.
-
3Beat the eggs at a medium pace for about 5 minutes. After the egg whites become foamy, you need to pick up the pace. Move the whisk fast enough for it to circle the bowl about 4 times in a second. As you whisk, the egg whites will turn white and expand in volume.[10]
- You can switch hands if your arm gets tired, but keep up a consistent rhythm as much as possible so the egg whites don't lose air.
-
4Check the egg whites for soft peaks forming on the whisk. Lift the whisk, pulling some of the egg whites out of the bowl. Look for pointed mounds to appear on the whisk then curl over while you hold the whisk upside down. If your recipe calls for soft peaks, you can stop whisking now.
- If the egg whites do not form peaks, continue beating them until they do.
- Soft peak egg whites can be used to make food like light, fluffy pancakes or waffles.
-
5Add sugar gradually if your recipe calls for it. Dessert recipes such as meringues will instruct you to add sugar. Add about 1 US tbsp (15 mL) of sugar at a time. Pour the sugar down the side of the bowl while continuing to beat the eggs.[11]
- If you add the sugar while the eggs are foamy, your egg whites can lose volume and take longer to whip.
- Pouring the sugar into the center of the bowl can also destabilize the egg whites.
-
6Beat the eggs whites into stiff peaks for 5 minutes. Your arm may already ache, but continue beating the egg whites at a steady, medium pace. The whites should be bright white and solid when you're finished. Lift the whisk to check for pointed mounds that don't fall over.
- When the egg whites are fully beaten, you can tip the bowl without them sliding out.
- If you beat the eggs too much, they will begin to look dry and a dull gray color. They thin and leak liquid.
- Stiff peak egg whites are often incorporated into desserts, including meringues and cake batter.
Expert Q&A
-
QuestionHow do you separate egg whites without a tool?
 Jennifer LevasseurChef Jennifer Levasseur is a Personal Chef and the Owner of The Happy Cuisiniere based in Breckenridge, Colorado. She has over 12 years of culinary experience and specializes in Mountain and Contemporary Rustic cuisine. Moreover, she can craft dishes and modify menus to accommodate dietary restrictions, such as gluten-free, vegetarian, vegan, pescatarian, and dairy-free diets. In addition to a Bachelor’s degree in Marketing and Management from the University of Houston, Chef Jennifer holds Associate’s degrees in Culinary Arts and Baking & Pastry Arts from Houston Community College.
Personal Chef Crack all of your eggs into a bowl first. Then, scoop up the yolks one at a time and separate your fingers so the white will drop back into the bowl.
 -
QuestionCan I whip egg whites with an electronic blender?
 Community AnswerAbsolutely! You'll need less elbow grease that way. Just make sure to watch the mixture very carefully, because you're in danger of over-whipping them.
 -
QuestionCan I whip eggs with a plastic whisk?
 Coco ShuCommunity AnswerIt is best not to. First, a plastic whisk can be too flimsy, and can't really whip-up the egg whites. Also, plastic containers and utensils (as well as aluminum) can stop your egg whites from fluffing up well.
Things You'll Need
- Glass or metal mixing bowl
- Glass or metal bowl to hold egg whites
- Small bowl to hold egg yolks
- Eggs (as required by your recipe)
- Wire whisk or electric mixer
References
- ↑ https://www.incredibleegg.org/cooking-school/tips-tricks/beating-basics/
- ↑ https://www.thekitchn.com/fearless-baking-3-tips-for-sep-118117
- ↑ https://sweets.seriouseats.com/2010/02/how-to-beat-egg-whites-baking-meringues-chiffon-cakes-souffles-slideshow.html
- ↑ https://www.bhg.com/recipes/how-to/bake/how-to-beat-egg-whites/
- ↑ https://www.incredibleegg.org/cooking-school/tips-tricks/beating-basics/
- ↑ http://www.recipetips.com/kitchen-tips/t--404/beating-eggs.asp
- ↑ http://www.recipetips.com/kitchen-tips/t--404/beating-eggs.asp
- ↑ http://www.recipetips.com/kitchen-tips/t--404/beating-eggs.asp
- ↑ https://www.incredibleegg.org/cooking-school/tips-tricks/beating-basics/
About This Article
To beat egg whites, use a metal whisk to beat the eggs in a slow, circular motion for 30 seconds until they get foamy. If your recipe calls for soft peaks, add a pinch of salt and continue whisking the egg whites for 5 minutes at a medium pace. If your recipe calls for stiff peaks, continue beating the egg whites for 5 more minutes until they're bright white and solid. To learn how to separate egg whites from the yolk, keep reading!
