This article was co-authored by Ollie George Cigliano. Ollie George Cigliano is a Private Chef, Food Educator, and Owner of Ollie George Cooks, based in Long Beach, California. With over 20 years of experience, she specializes in utilizing fresh, fun ingredients and mixing traditional and innovative cooking techniques. Ollie George holds a BA in Comparative Literature from The University of California, Berkeley, and a Nutrition and Healthy Living Certificate from eCornell University.
There are 10 references cited in this article, which can be found at the bottom of the page.
wikiHow marks an article as reader-approved once it receives enough positive feedback. This article received 11 testimonials and 100% of readers who voted found it helpful, earning it our reader-approved status.
This article has been viewed 471,654 times.
Eggs are tricky, and it can be hard to boil them without cracking the shells. When eggs are cold, they crack more easily upon exposure to hot water; they may also crack when they jumble into one another or settle at the bottom of the pot. In order to keep your eggs from breaking, you will need to handle them gently, boil them slowly, and keep a close eye on the temperature difference between the egg and the water.
Steps
Preparing Eggs to Boil
-
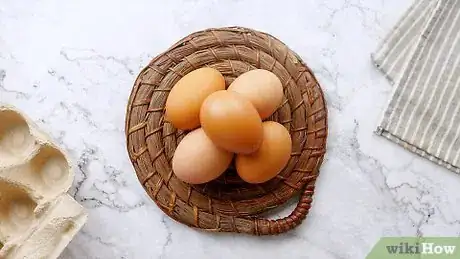
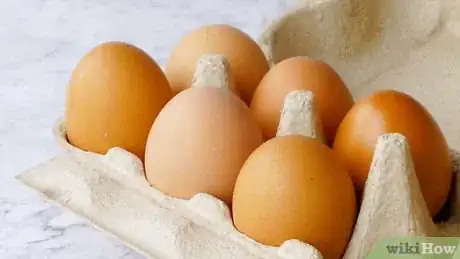
1Bring your eggs to room temperature before cooking. If you keep your eggs in the refrigerator, it's important that you don't try to cook them cold. Eggs crack because gases heat and expand within the shell. When the pressure becomes too great, the gases escape by cracking weak points in the porous shell. Bringing eggs to room temperature before cooking slows down that process.
- If you don't want to wait for the eggs to warm up naturally, try soaking them in hot tap water for a few minutes before cooking.
-
2Use older eggs, if possible. When an egg is fresh, the the outer membrane sticks to the egg shell while the inner membrane sticks to the albumen (the "white"). As an egg ages, these membranes adhere more closely to the shell itself.[1]Advertisement
-
3Release trapped gas to less the likelihood of cracking. Before you submerge an egg, prick the large end of the shell with a clean thumbtack or safety pin. This will allow the trapped air bubbles—which are normally responsible for cracking—to escape during the boiling process.[2]
-
4Sort the eggs and place them in a pot or saucepan. Stack the eggs very gently to avoid cracking. Don't overcrowd the pot—you should only boil one layer of eggs at a time, and they should not be pressing against each other. If you try to boil too many eggs at once, some of them may crack from the weight.[3]
- Test whether your eggs are fresh by placing them into a bowl of saltwater. If the egg sinks to the bottom, it's fresh. If it floats to the top, there's a good chance that it has gone bad.
- Lay a folded cheesecloth inside the bottom of the pot. This helps cushion the eggs so that they are less likely to crack.
-
5Cover the eggs with cold tap water. Fill the pot gently with at least one inch (3 cm) of water. Pour the water against the side of the pan so that it does not disturb the eggs. If you cannot avoid pouring the water onto the eggs, steady them with your hand so that they do not slide around and crack.
- Add half a teaspoon of salt to the water. This makes the eggs easier to peel, and it may help prevent them from cracking. Salted water helps to make the egg white firm up more quickly. It also helps plug small leaks if the shell cracks during the cooking process.
- Never drop eggs directly into a pot of hot water, or the shells will crack and the egg will run (giving you poached eggs). By exposing cold eggs to warm or hot water, you are "shocking" them with a sudden temperature shift, which causes cracks to form. Furthermore, cold water helps to keep the eggs from overcooking.
-
6Add vinegar to the water. Use one teaspoon of vinegar for each egg, and pour it directly into the water before you turn the heat on. Adding vinegar to the water helps the proteins in the egg white coagulate faster to plug any cracks that develop in the shell.[4] This is a common problem, especially with eggs that are very cold.
- You can also wait to add vinegar when an egg cracks in the water. You may notice a bit of white fluid seeping from a cracked egg. Try to be quick here — if you add the vinegar to the water as soon as you notice a crack, the egg should still boil evenly.
- If you don't add the vinegar in time, don't worry. The cracked egg should still boil fine, although it may not look perfect.[5]
- Be sparing. If you use too much, your eggs will taste and smell like vinegar.
Cooking the Eggs
-
1Bring the water to a gentle boil using a medium heat. Let the water boil slowly so that the eggs do not crack from a rapid temperature shift. Cover the pot with a lid. The water will boil a bit more quickly with the lid on, but feel free to leave it off if you want to keep an eye on the eggs.[6]
- Make sure that the eggs don't settle at the bottom, where they'll cook less evenly and break more easily. Stir the water any time that you see the eggs begin to settle. Use a wooden spoon to stir, and be very gentle so that you don't crack the eggs.
-
2Turn off the heat when the water boils. As soon as the water reaches a full boil, turn the heat off and let the eggs sit in the hot water. Leave the lid on the pan. The heat of the water and the remaining warmth from the burner will be enough to finish cooking your eggs. Leave the eggs in the pot for another 3-15 minutes, depending how hard or soft you like them:
- If you like your eggs soft-boiled, remove them from the water within three minutes. The whites should be set, while the yolks should be runny and warm. Be very gentle when you remove the eggs—scoop each egg out with a large spoon to avoid cracking.[7]
- If you like your eggs medium-boiled, take them out of the water in 5-7 minutes. The yolks should be semi-soft in the center, and the whites should be very firm. You should still handle the eggs gently, but you don't need to worry as much about them cracking.
- If you like your eggs hard-boiled, leave them in the hot water for 9-12 minutes. The yolks should be firm all the way through, and you don't need to worry about the eggs cracking. If you want a solid but soft and bright yellow yolk, leave the eggs in water for 9-10 minutes. If you'd like eggs with a harder, pale yellow center, leave them in for 11-12 minutes.
-
3Keep a close eye on the clock, and do not let your eggs overcook. After 12 minutes, your yolk will develop grayish or greenish streaks. The egg is still edible, and the streaks don't have much effect on taste. However, some people find green- and gray-streaked eggs less appetizing.[8] Consider buying a color-changing egg timer, a heat-sensitive indicator that you can place in the water with your boiling eggs. You can find these timers online or at kitschy kitchen-supply stores.[9]
-
4Know when it is safe to eat a cracked egg. If the egg cracks in the water while cooking, it should still be safe to eat — and, indeed, it may still cook normally if the crack is not too severe. If an egg is cracked before you start cooking, do not bother to boil it. Bacteria may well have penetrated the shell and infected the interior, making it potentially hazardous to your health.[10]
Cooling, Peeling, and Storing
-
1Prepare a bowl of ice-water. While the eggs are cooking in the hot water, fill a large bowl with cold water. Dissolve another 1/4-1/2 teaspoon of salt in the water, then add ice to lower the temperature further. When the eggs are done cooking, you will carefully move them into this bowl to stop them from cooking any more.
-
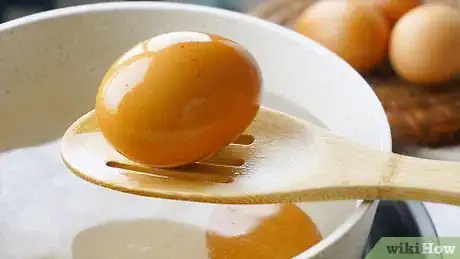
2Chill the eggs to stop the cooking process. After your eggs have cooked for the desired amount of time, gently drain the hot water from the pan, then move the eggs to the bowl of ice-water to stop the cooking process. Remove the eggs one by one with a slotted spoon to avoid cracking. Carefully drop the eggs into the bowl of ice water to bring their temperature down. Let them cool for 2-5 minutes.
-
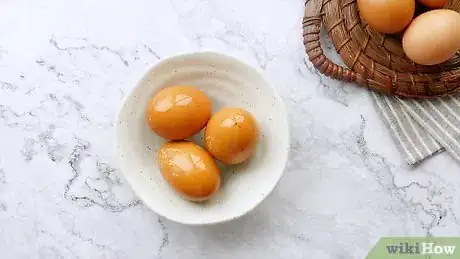
3Refrigerate the eggs or serve them immediately. Once the eggs are cool enough to hold in your hand, put them in the refrigerator for 20-30 minutes to loosen the shells. If you're not particular about how pretty your peeled eggs are—or if you like your eggs warm—you can skip the refrigerator and start peeling them immediately after chilling them.
-
4Make sure that your eggs are thoroughly hard-boiled. Spin an egg on a table to test whether it is hard-boiled without breaking it open. If the egg twirls quickly and easily, it is hard-boiled. If it wobbles, let it cook for longer.
-
5Peel the eggs when you're ready to eat them. Press each egg into a clean, flat surface and roll it in your hand to crack the shell. Start peeling from the fatter end of the egg, where there should be a small empty space under the shell. This makes it slightly easier to peel.
- Rinse the eggs under cold water as you peel them. This helps keep bits of shell and membrane from sticking to the egg.
- It is usually easier to peel eggs once they are cracked. Put the eggs back in the pot with the lid on. Shake the pot back and forth to crack the shells before you begin peeling. You may need to do this several times to crack them all.
-
6Use a teaspoon to keep the egg white intact while you peel it. Pinch off a small section of shell and membrane from the large end. Slip the spoon inside the shell and membrane so that it cups the egg. Then, simply slide the spoon around to peel off sections of shell.
-
7Store eggs in the refrigerator for up to five days. The eggs are ready to eat as soon as you peel them. Store the leftover eggs in a sealed container, and cover them with a wet paper towel. Change the paper towel each day to keep the eggs from drying out. Eat the eggs within four to five days, before they go bad.
- You can also store the eggs in cold water. Change the water each day to keep the eggs from breaking down.
- You can store hard-boiled eggs for several days before you crack and peel them. Keep in mind, however, that they tend to grow somewhat dry and rubbery. It's usually better to keep peeled eggs moist in the fridge than to leave the eggs unpeeled.
Community Q&A
-
QuestionWhy some eggs have red membranes?
 Community AnswerSome eggs have red membranes because of nitrogen oxide. Don't worry; red membranes won't kill you, but they will certainly change the taste of the egg.
 -
QuestionWhy do eggs crack in the fridge?
 Community AnswerThis is a similar effect to why a cold glass cracks when you pour a hot drink into it. To prevent the cracking from happening, allow the boiled eggs to settle to room temperature before putting them into the refrigerator.
References
- ↑ http://www.incredibleegg.org/eggcyclopedia/a/albumen/
- ↑ http://cooking.stackexchange.com/questions/909/how-do-i-prevent-an-egg-cracking-while-hard-boiling-it
- ↑ http://www.ibtimes.com/how-boil-easter-eggs-without-cracking-them-tips-perfect-hard-boiled-egg-1571632
- ↑ http://www.edinformatics.com/math_science/science_of_cooking/boiled_eggs.htm
- ↑ https://www.eatortoss.com/is-it-safe-to-eat-an-egg-that-cracked-during-boiling/
- ↑ http://able2know.org/topic/160972-1
- ↑ http://www.thekitchn.com/how-to-make-a-soft-boiled-egg-kitchn-cooking-lesson-138819
- ↑ http://www.simplyrecipes.com/recipes/how_to_make_perfect_hard_boiled_eggs/
- ↑ http://www.theguardian.com/lifeandstyle/2015/apr/17/how-to-boil-poach-scramble-eggs-back-to-basics-henry-dimbleby
About This Article
If you want to keep your hard-boiled eggs from cracking when you cook them, bring the eggs to room temperature before boiling. Lay a folded cheesecloth inside of your pot, then rest a single layer of eggs on top of the cloth. Fill the pot with cold tap water, then add 1/2 of a teaspoon of salt and bring the water to a gentle boil over medium heat. Turn off the heat when the water boils, and leave the eggs in the water for up to 15 minutes so they can finish cooking, then transfer the eggs to a bowl of ice water to cool. Keep reading for tips on peeling the eggs after you’ve boiled them!
