This article was co-authored by wikiHow staff writer, Nicole Levine, MFA. Nicole Levine is a Technology Writer and Editor for wikiHow. She has more than 20 years of experience creating technical documentation and leading support teams at major web hosting and software companies. Nicole also holds an MFA in Creative Writing from Portland State University and teaches composition, fiction-writing, and zine-making at various institutions.
There are 7 references cited in this article, which can be found at the bottom of the page.
Learn more...
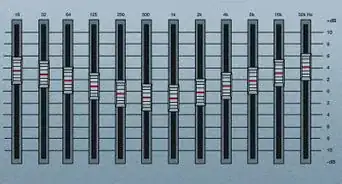
If you're new to FL Studio, the built-in mixer might seem overwhelming. In addition to the master track, you can add up to 125 insert tracks to the mixer, each of which can receive input from a plugin or external audio input. But unlike other DAWs, adding clips to your playlist in FL Studio doesn't automatically create mixer tracks for your instruments and audio. Fortunately, it's easy to add new mixing lines so you can adjust the levels of each clip or instrument individually. This guide will show you three simple ways to add mixing lines for audio in FL Studio 20 and 21.
Things You Should Know
- To add a clip to a new mixer track, select the clip in your playlist, then press Cmd + L (Mac) or Ctrl + L (PC).
- To add a mixer track for an instrument, just right-click the playlist track name and select an instrument.
- If you're using a Channel Rack, select the instrument in the rack, then use Cmd + L (Mac) or Ctrl + L (PC) to add a mixer line for that instrument.
Steps
Adding Audio Clips to Mixer Tracks
-
1Open the Playlist window in your FL Studio project. If you haven't already, you can get there by pressing F5 on your keyboard, or by clicking Playlist in the View menu.[1]
-
2Double-click the clip you want to add to the mixer. You can select any audio clip, such a sample, bassline, or drum track.Advertisement
-
3Press ⌘ Cmd+L (Mac) or Ctrl+L (PC). This quick keyboard shortcut instantly adds the selected clip to the first available mixer channel.[3] You'll now see the name of the clip at the top of the selected mixer channel instead of "Insert (number)."
- If you'd rather choose a specific mixer channel number, click and drag the mouse right on the "Track" box at the top-right corner of the window until the desired track number is in the box.
- The change will take effect immediately. If you set the Track box to 10, the selected audio clip will stay assigned to track 10 on the mixer.


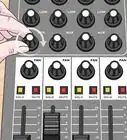
Adding Instruments to Mixer Tracks
-
1Right-click a playlist track name in the left panel. A menu will expand.
- If you don't already have a track for the instrument on your playlist, just press F8 to open the Plugin Picker, then drag the desired plugin to a playlist track.[4]
-
2Select an instrument to instantly add a mixer track (line). You can choose any built-in instrument or VST plugin. This instantly links the select instrument to the playlist track to a new mixer track.[5]
- This will also insert a default pattern on the track, though you can replace it with other clips.


Adding Mixer Tracks from the Channel Rack
-
1Open the Channel Rack (if you haven't already). If you've created a rack for multiple instruments, you can easily route the instruments in the rack to new or existing mixer tracks. To open the Channel Rack, select the track in your playlist, then click the Channel Rack icon near the top-right—it's three horizontal boxes stacked vertically with smaller boxes beside them.
- You can also select the track and press F6 for a quick shortcut.
-
2Select an instrument. If you already have an instrument in the rack that you want to add to the mixer, click to select it. If not, click the + at the bottom of the Channel Rack and select an instrument now.[6]
- Each instrument on the Channel Rack has a field to the left of its name that contains either several dashes or a number. If there's a number in the field, that number corresponds to a mixer track.
-
3Press Ctrl+L (PC) or ⌘ Cmd+L (Mac) to create a new mixer track for the instrument. This automatically adds the selected instrument to the first available insert track in the mixer and titles it appropriately. The number of the mixer track will then appear in the field to the left of the instrument's name.
- Alternatively, you can drag the mouse right on the track number field until you've reached the mixer track number you want to use.
- You can link multiple instruments to the same mixer track if you'd like. Right-click the channel selector (the vertical rectangle) to the right each instrument's name that you want to route together—when you right-click, you can select multiple channels. Then, right-click the desired mixer track and select Channel routing > Link selected channels to this track.[7]


References
- ↑ https://www.image-line.com/fl-studio-learning/fl-studio-online-manual/html/menu_view.htm
- ↑ https://www.image-line.com/fl-studio-learning/fl-studio-online-manual/html/recording_audio.htm
- ↑ https://www.image-line.com/fl-studio-learning/fl-studio-online-manual/html/basics_shortcuts.htm
- ↑ https://www.image-line.com/fl-studio-learning/fl-studio-online-manual/html/generator_plugins.htm
- ↑ https://www.image-line.com/fl-studio-learning/fl-studio-online-manual/html/playlist.htm
- ↑ https://www.image-line.com/fl-studio-learning/fl-studio-online-manual/html/channelrack.htm
- ↑ https://www.image-line.com/fl-studio-learning/fl-studio-online-manual/html/mixer.htm
About This Article