wikiHow is a “wiki,” similar to Wikipedia, which means that many of our articles are co-written by multiple authors. To create this article, 27 people, some anonymous, worked to edit and improve it over time.
There are 9 references cited in this article, which can be found at the bottom of the page.
This article has been viewed 306,208 times.
Learn more...
A message can have a meaning that is far beyond the value of the paper on which it was written. No matter if you're trying to waterproof a handmade card, a handwritten letter of sentimental value, or some other paper document you want to keep safe from the elements - this can be done! By using a few simple ingredients, you can create a barrier on your paper that will protect it from water and weather-proof your document.
Steps
Protecting Paper with Wax
-
1Gather your paper sealing materials. You can apply a seal by rubbing your document with normal household candle wax, although a more complete seal can be accomplished using a dipping technique. To seal your paper with wax, you'll need:
- Normal candle (or beeswax)
- Metal pot (optional; dip technique)
- Paper
- Tongs (optional; dip technique)
-
2Know your options for wax. In a pinch you can use the wax from normal household candles, and you can even use scented ones for a unique scent. Colored candles can tint your paper, giving it a fun and creative touch.
- Classically, paraffin has been used to waterproof clothing, canvas, and other items.[1] However, you should use paraffin in a well ventilated place, and be aware that it is fossil fuel derived and poisonous if ingested.
- A nontoxic wax sealer intended to unwaxed items, like beeswax or Otter Wax, is a great option for consideration.[2]
Advertisement -
3Prepare your paper. You will need to lay your paper on a sturdy, flat surface that is dry and free of dust or grime. You don't want to stain your paper before it's sealed against the elements! Clear any clutter out of your way so that your work area is free and clear.
-
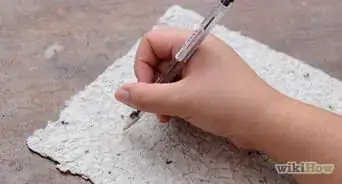
4Apply your wax. You should test your wax on a separate sheet of scrap paper before trying the paper you want to preserve. Different kinds of wax will have different levels of softness, so by rubbing your wax on your scrap paper you'll be able to judge how firmly you'll need to press for the best application.[3] You should do this over all over the document you wish to seal, on the front and back until it has a slick, waxy feel.
- You may need to rub softly many times in a row to get your wax to stick to the paper, or you may be able to press the wax firmly into the paper to apply it in thick swatches.[4]
- Be careful not to rub too hard or you might rip your paper.
-
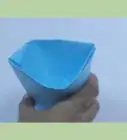
5Use the dip method for application. Rubbing can take time and can sometimes leave an incomplete seal on your paper. Beeswax, however, can be melted in a pot or crock pot so you can dip your document right into the wax. Use medium heat until the wax is in a liquid state. If you are using your fingers, you should be careful not to burn yourself while dipping the paper.
- Dip your document quickly into the beeswax to seal it. Use a pair of tongs to completely immerse the document.
- If you are using your fingers, dip the document in parts. Hold your paper by the dry end until your seal is firm and cool. Then you can turn your document and dip the other portion into the wax.[5]
-
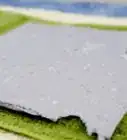
6Examine your seal. The wax will be bonded to the surface of your paper now, and will protect it from moisture, grime, and even dust. Where the wax has not bonded, your paper could still get wet and damaged. Take your wax and cover any spots that you missed, or even places where the wax seal looks thin.
- Use your fingers to test the wax. Especially for lighter wax that bonds clear to your paper, you'll be able to easily feel missed spots, which instead of smooth and waxy will have a bumpy texture, or the texture of paper.
-
7Warm and cure your waxed paper. This is the best way to get the closest, tightest bond between your wax and document. You'll need to warm your wax, gently smoothing it as you do, with a heat source, like a hair dryer. Be sure you do this to both sides of your paper.
- Use moderation when heating; you don't want the wax to drip off completely, you only want to soften it so that it works further into the fibers of your paper.
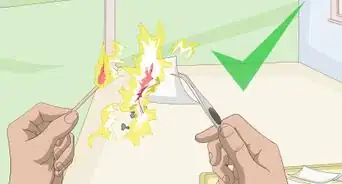
- If you use a different heat source or an open flame heater, like a creme brulee torch, use extreme caution. The last thing you want to do is start a fire and lose your document forever.
-
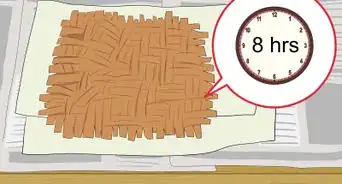
8Maintain your seal. Although the wax will keep your paper safe from the elements, over time your wax seal can wear away. Heat can melt your wax seal, so you should keep this document out of the sun and away from heat. But, outside of heat and light, your wax seal will protect your document for as long as your seal is maintained.
- Resealing your document is as easy as rubbing another application of wax on top of whatever wax remains on your document.
- Wax sealed documents that undergo regular handling and wear will be more likely to rub off wax. These should be checked every few weeks for a thin or worn away seal.
- Wax sealed documents that are kept from light and heat and handled with care can maintain a seal of a year or longer.


Waterproofing with Alum
-
1Collect your coating instruments. To waterproof your paper, you will be making a solution that will alter the surface of its fibers to change its absorbency. This will make your paper not only waterproof, but also more durable. You'll need:
- Alum 8 oz (found in the spice area of grocery stores or online)
- Castile soap 3¾ oz (grated)
- Water 4 pt
- Gum arabic 2 oz
- Natural glue 4 oz
- Flat tray (deep) or wide mouth bowl
- Tongs[6]
-
2Prepare your drying station. When you have treated your paper with your solution, it will need to hang to dry. Clipping your piece of paper to a string or clothesline will be suitable for it to dry. However, droplets of this solution could possibly do damage to flooring or fabrics that aren't intended to be waterproofed. Be sure any droplets land in an appropriate receptacle, on a drop cloth, or onto newspaper.[7]
-
3Ready your water. To mix your ingredients properly, you will need your water to be slightly heated. When your water is warmed, mix your ingredients into the water one at a time.
-
4Stir the solution thoroughly. You will need to stir your ingredients until your solution is an even blend of all its parts. Be sure not to overheat your water during this time; the water can get hot but should not boil.
- The stirring process may take several minutes. Be patient and mix all ingredients thoroughly.
-
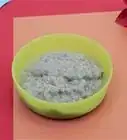
5Transfer your solution for dipping. You should remove your solution from the heat and let it cool for a short time. While the solution is still warm, pour the mixture into a large flat tray with deep rims or a wide mouthed bowl. These will make dipping your paper into your solution easier.
-
6Dip your paper into the alum solution. Use your tongs to hold the paper, and dip it into the mixture, coating it completely. Don't allow the paper to remain in the solution too long, just long enough to coat the paper front and back.
-
7Allow your document to dry. Once coated, remove your paper and hang it from a string or line. You can also use a wire cooling rack covered in wax paper to dry your paper. The wax paper will prevent your counter from any negative reaction to the solution.


Waterproofing with Shellac
-
1Gather your materials to waterproof with shellac. You will need to combine pale shellac along with several other ingredients to create your sealing solution. These ingredients can be bought at craft stores or a pharmacy and are as follows:
-
2Arrange your drying area. You will need to allow your paper to dry after you treat it with your solution, but errant drops of shellac can possibly do damage to your flooring or fixtures. Allowing the paper to hang dry over newspaper is a suitable way to dry your waterproofed document.[10]
- You might also consider a wire drying rack with wax paper place underneath.
-
3Combine your ingredients. Bring your water to a temperature just below the boiling point, as you would when poaching or scalding a food in water. Introduce the ingredients one by one to the water, stirring thoroughly until the solution is even.[11]
-
4Strain out any byproducts with a fine sieve. The bonding process of your ingredients may have left some impurities in your solution. The more impurities in your solution, the cloudier it will be, so you should strain your solution through a fine mesh. If your solution looks relatively clear, you can strain it right into your tray or wide mouthed bowl.[12]
- Cheesecloth or muslin are excellent choices for straining your solution, if you don't have a fine sieve available.
-
5Apply your solution. Now that your shellac sealant is in a bowl or deep tray that allows for easy dipping, take your paper in your tongs. Dip the paper quickly, but completely, in your solution, and then allow your paper to dry at your drying station.[13]


Community Q&A
-
QuestionHow do I waterproof playing cards?
 Community AnswerUse the same method for paper! Laminating is the most common method, then you just have to cut them down to the correct size.
 -
QuestionWill all of these work on printed on printing paper?
 Community AnswerMost likely if the ink is dry and the outer shell isn't wet or damaged and put on neatly.
 -
QuestionCan these be written with a pencil or pen?
 Community AnswerNo. The sharp tip would rip the wax off. A pen could maybe work if you use it lightly, and only on the wax.
Warnings
- Be careful when handling paper near an open flame.⧼thumbs_response⧽
- Never leave a lit candle unattended.⧼thumbs_response⧽
Things You'll Need
Protecting Your Paper with Wax
- Paper
- Normal candle (or beeswax)
Waterproofing with Alum
- 8 oz of alum (found in the spice area of grocery stores or online)
- 3¾ oz Castile soap (grated)
- 4 pt water
- 2 oz gum arabic
- 4 oz natural glue
- Flat tray (deep) or wide mouth bowl
- Tongs
Waterproofing with Shellac
- Pale shellac 5 oz
- Borax 1 oz
- Water 1 pt
- Flat tray (deep) or wide mouth bowl
- Tongs

References
- ↑ http://www.artofmanliness.com/2014/06/03/how-to-wax-your-own-clothing-and-gear/
- ↑ http://craftingagreenworld.com/2011/10/16/how-to-make-beeswax-coated-paper/
- ↑ http://lifehacker.com/5972434/waterproof-any-canvas-bag-with-wax
- ↑ http://www.lookatwhatimade.net/crafts/paper/waterproof-labels/
- ↑ http://craftingagreenworld.com/2011/10/16/how-to-make-beeswax-coated-paper/
- ↑ http://chestofbooks.com/crafts/mechanics/Workshop-Receipts-4/Waterproofing-Paper.html#.Vkvd1PmrTIU
- ↑ http://www.auntannie.com/CraftRecipes/WaxingPaper/
- ↑ http://chestofbooks.com/crafts/mechanics/Workshop-Receipts-4/Waterproofing-Paper.html#.Vkvd1PmrTIU
- ↑ http://lifehacker.com/5896232/how-to-waterproof-matches
About This Article
To waterproof paper, coat it in paraffin or bees wax. Start by melting it in a pot or crock pot over medium heat until it’s liquid. Then, use a pair of tongs to dip your paper completely into the pot. If your pot’s too small to fit your paper in one go, turn it around and dip it in again. Once you’ve coated the paper in wax, use a hair dryer to warm the paper, which will help the wax bond closely and make it waterproof. Alternatively, heat the end of a candle and gently rub it across your paper to transfer the wax. Do this one line at a time until the whole sheet feels slick and waxy. This can take much longer than using a pot, so if it’s a big sheet of paper, you should probably dip it in wax instead. For more tips, including how to waterproof paper using alum or shellac, read on!