wikiHow is a “wiki,” similar to Wikipedia, which means that many of our articles are co-written by multiple authors. To create this article, volunteer authors worked to edit and improve it over time.
wikiHow marks an article as reader-approved once it receives enough positive feedback. In this case, 88% of readers who voted found the article helpful, earning it our reader-approved status.
This article has been viewed 20,113 times.
Learn more...
The ongoing COVID-19 pandemic has drastically changed how we travel. If you want to enter Canada, you'll need to use the ArriveCAN app before you start your travel journey. This is where you provide information about yourself, your travel plans, and your COVID-19 health status. It's mandatory for everyone, including foreign visitors and Canadian citizens, to submit an ArriveCAN form within 72 hours prior to arrival into Canada. Once you cross the border, an officer will review your submission and make a final call on whether you're eligible to enter the country.
Disclaimer: This article was written in March 2022 and serves as a general and unofficial guide for using the ArriveCAN app. However, content on wikiHow may not reflect the most current information as it relates to federal travel guidelines. Readers should always consult the Government of Canada website for the most up-to-date information on travel requirements.
As of October 1, 2022, the Canadian government has ended all COVID-19 border measures, including proof of vaccination, pre-arrival testing, and quarantine/isolation. Travellers are no longer required to use ArriveCAN when entering Canada.[1]
Steps
Getting the App
-
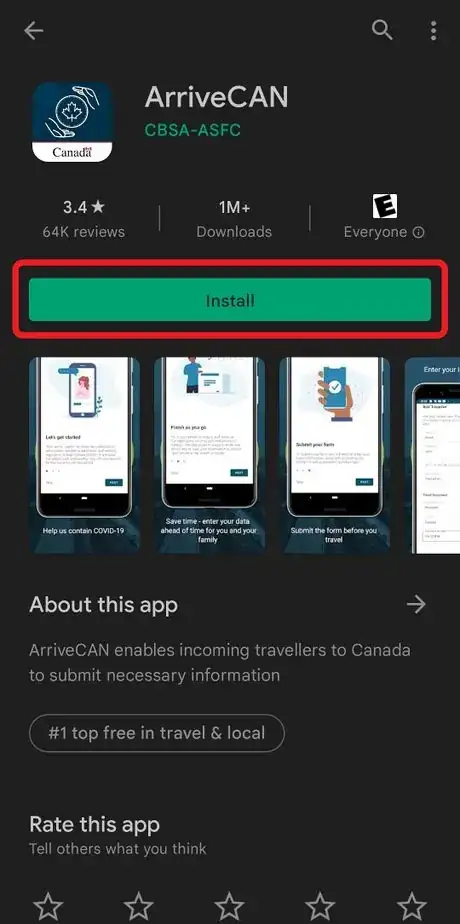
1Download ArriveCAN from your device's app store.
- For iOS devices, use the Apple App Store (requires iOS 12 or above).
- For Android devices, use the Google Play Store (requires Android 6 or above).
- Alternatively, people without an iOS or Android smartphone can use a computer to access the web version of ArriveCAN instead.
-
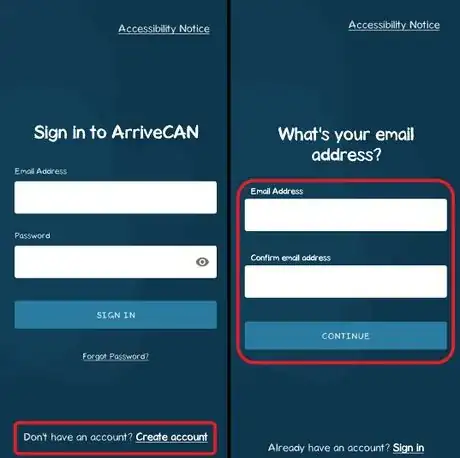
2Make a new account. Click on "Create account" and input your email address and a suitable password. Afterward, check your email for a verification code and enter this into the app to verify your account. Once confirmed, you'll be taken to the home page.[2]Advertisement
-
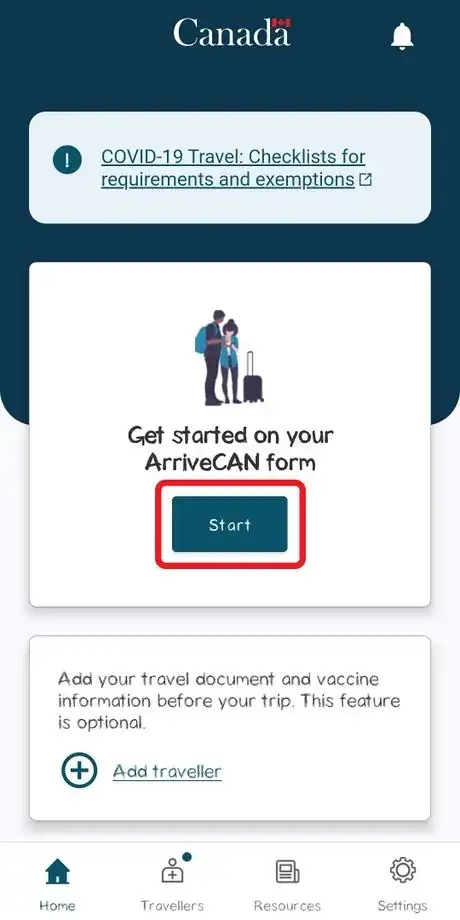
3Tap on Start to begin making a new form.
Entering Your Trip Details
In this first section, you will be providing details of your trip, such as the specific reason for entering Canada, origin country, port of entry, and arrival date.
-
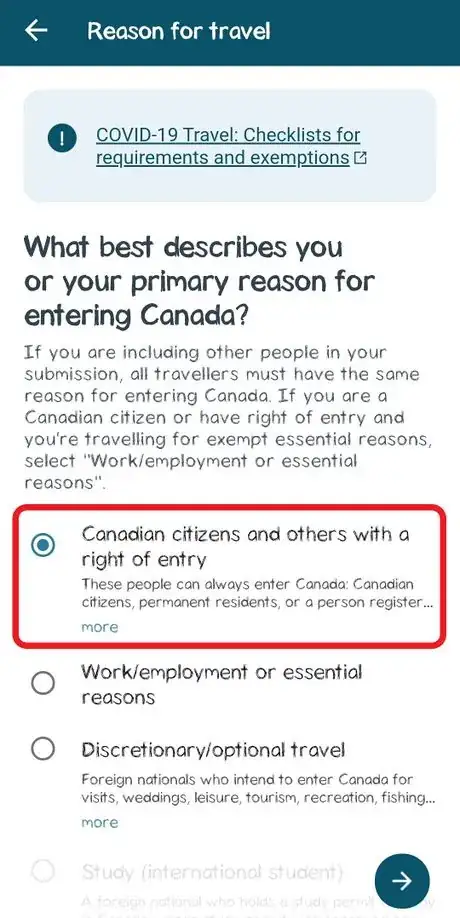
1Select the reason for travel. From this list, choose an option that applies to you and your main purpose for entering Canada.
- Canadian citizens or permanent residents returning home.
- Essential reasons related to your work or employment.
- Discretionary travel (for tourism, leisure, and recreation).
- International students with a valid visa.
- Compassionate entry (e.g. taking care of a sick family member, providing end-of-life support, or attending a funeral).
- Family reunification (to reunite with an immediate or extended family member).
- Other reasons not described in the above options.
-
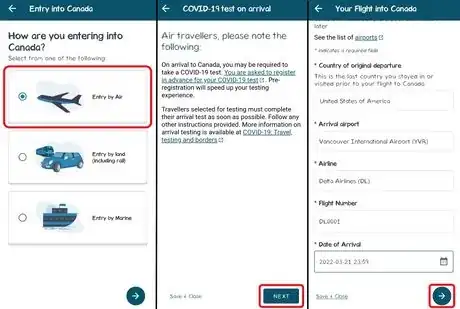
2Specify how you'll be entering the country. Once you make a selection, you'll need to enter your travel details on the next page, which will be different depending on the option you chose.[3]
-
Entry By Air: if you'll be flying on a plane or other aircraft.
- Acknowledge that you may be subjected to on-arrival testing once you land at the airport.
- Enter the country you'll be originating departing from, the specific airport you'll be arriving at (e.g. Vancouver International Airport / YVR), airline (e.g. Delta Airlines / DL), flight number, and date of arrival.
-
Entry By Land: if you'll be crossing a land border in a car, truck, bus, or train.
- Enter the specific port of entry or border crossing (e.g. Ambassador Bridge / Windsor-Detroit) and date of arrival.
-
Entry By Marine: if you'll be travelling on a boat, ship, ferry, or other watercraft
- Enter the country you'll be originating or departing from, specific port of entry or dock (e.g. Toronto Harbour Pier 35), and date of arrival.
-
Entry By Air: if you'll be flying on a plane or other aircraft.
-
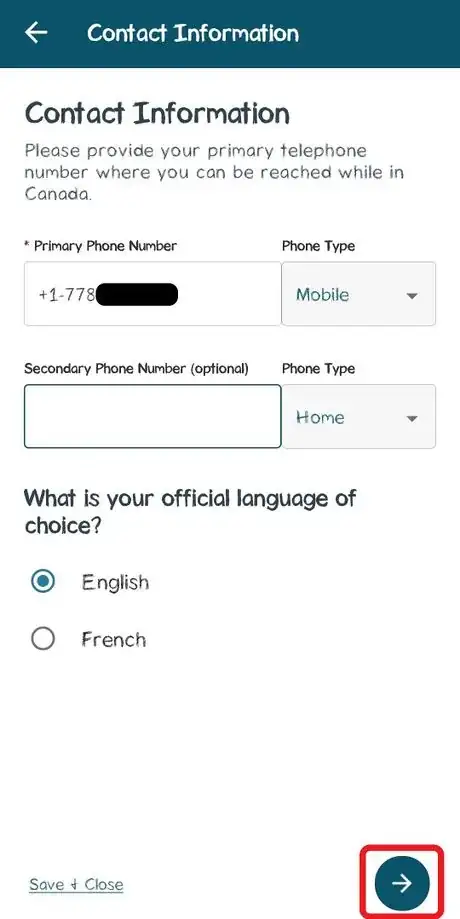
3Provide your contact information and language preference. You'll need to give a valid phone number in case officials need to reach you, as well as specify between English or French (the two official languages of Canada).
Entering Your Traveller Information
In this second section, you'll be providing personal information about yourself as a traveller, such as your passport or other travel documents and vaccination status.
-
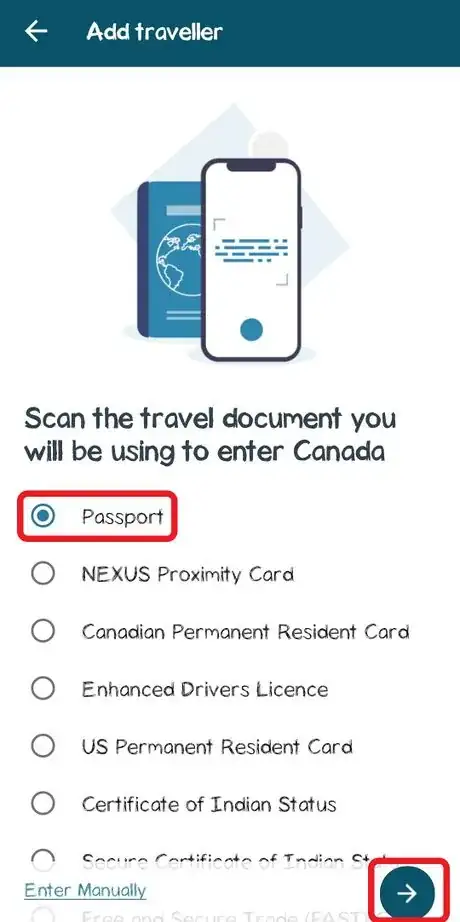
1Select the type of travel document you'll be using to enter Canada. This list includes but not limited to:
- Passport
- NEXUS card
- Permanent Resident card
- Birth certificate
-
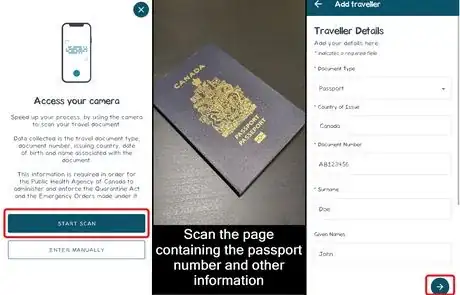
2Provide details of your document into the app. You can either use the device camera to scan the document and automatically upload the necessary information, or enter everything manually. Regardless of whether you're scanning or manually entering, ensure that all of the information is exactly how it appears on the document. This includes:
- The document type.
- Country of issue.
- Document number.
- Surname and given name (legal full name).
- Date of birth.
-
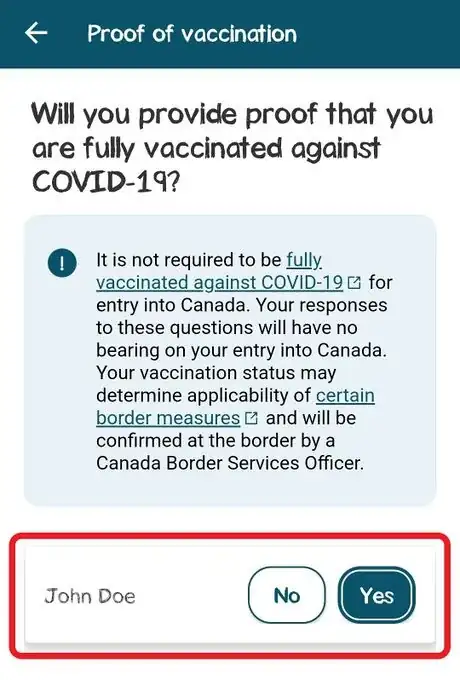
3Answer whether or not you can provide proof of COVID-19 vaccination. To enter Canada, all travellers must be fully vaccinated (2 doses).
- If you have received both of the required vaccine doses and are able to provide information, tap on "Yes".
- If you are unvaccinated (no doses at all) or not able to provide proof, tap on "No". If you choose this option, you'll need to acknowledge that you must be fully vaccinated to qualify for border exemptions. At this point, answer a final Yes/No question if you're unable to receive a vaccine for medical reasons; you'll need to then provide proof of a valid medical exemption.
-
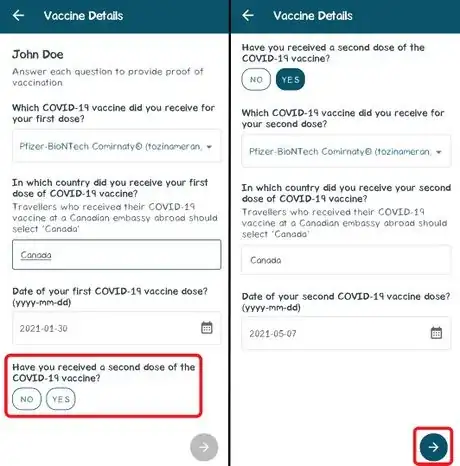
4Provide details of your vaccination. On this page, choose the specific vaccine used for the first dose (e.g. Pfizer-BioNTech, Moderna, AstraZeneca, etc), the country in which it was given, and the date you've received it.
- Answer the Yes/No question if you've received a second dose.
- If you choose "Yes", provide the same information.
- If you choose "No", click on the next arrow and continue through the acknowledgments regarding medical exemptions.
- Answer the Yes/No question if you've received a second dose.
-
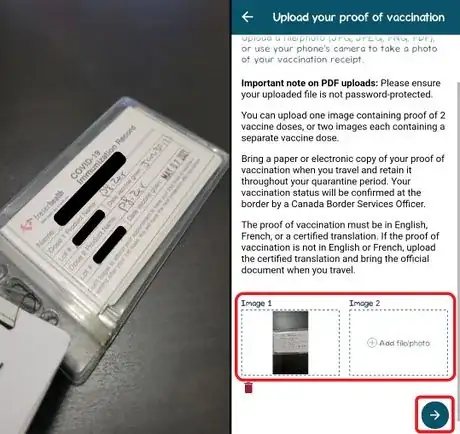
5Upload your proof of vaccination. This is where you upload a copy of the physical vaccine card or certification.
- You can either use your camera to take a new photo, or upload an existing one saved on your device (the file format must be JPG/JPEG, PNG, or PDF). Up to two images can be uploaded.
- Proof of two vaccine doses must be provided. The text should be legible, and the language should be English, French, or a certified translation.
-
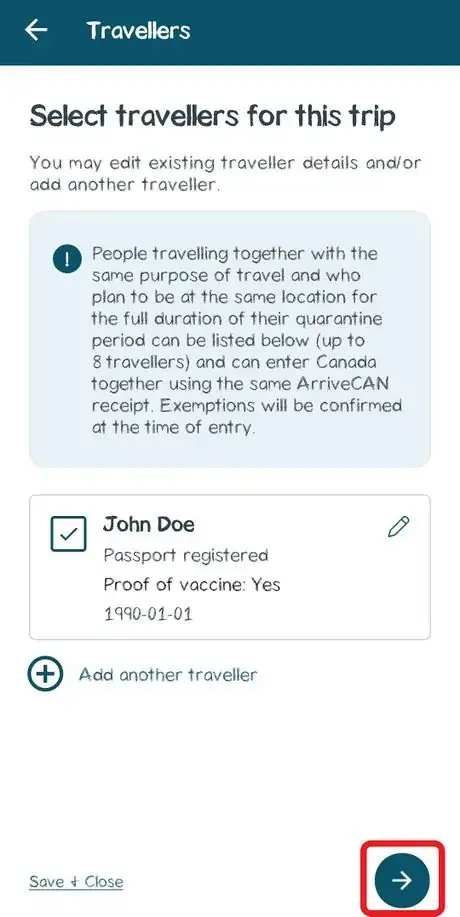
6Tap on the next arrow to continue onto the next set of questions.
Entering Information Related to Testing Requirements
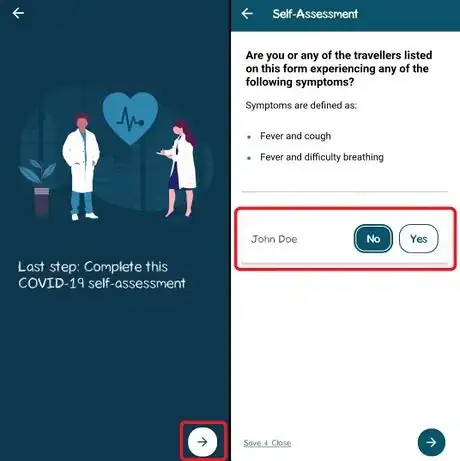
In this third section, you'll provide information on your COVID-19 status, including whether you've tested positive or are able to give proof of a negative result.
-
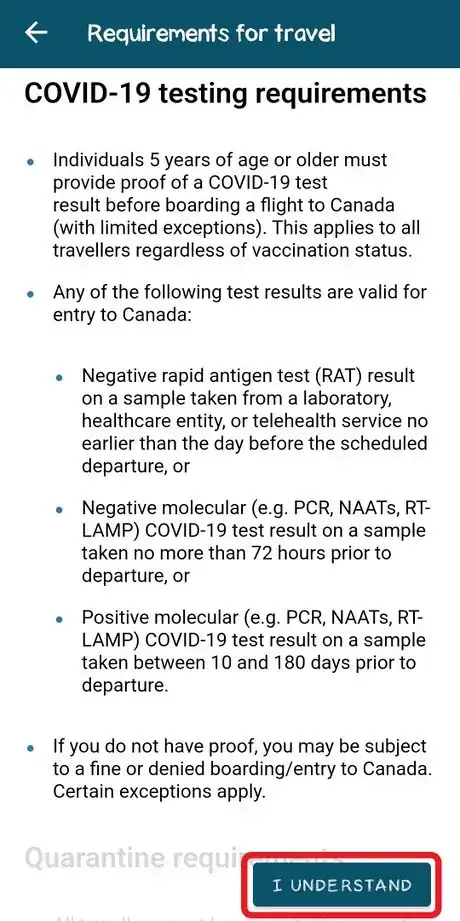
1Review and acknowledge the requirements all travelers must satisfy. This includes pre-arrival testing and ensuring you have a suitable quarantine plan. Tap on I understand to proceed.
- Pre-arrival test results can either be from:
- A negative rapid antigen test no earlier than 1 day before arrival.
- A negative molecular (PCR, NAAT, or RT-LAMP) test no earlier than 3 days before arrival.
- A positive molecular test between 10 days and 180 days (6 months) before arrival.
Note: As of April 1, 2022, fully-vaccinated travellers are no longer required to do a pre-arrival COVID-19 test. However, people without the "fully-vaccinated traveller" exemption (i.e. partially vaccinated or completely unvaccinated) must still undergo pre-arrival testing.[4]
- Pre-arrival test results can either be from:
-
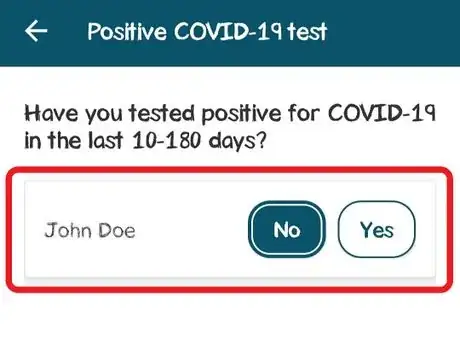
2Answer whether you have tested positive in the last 6 months. If you've recently recovered from COVID-19, you can travel as long as you are medically cleared and more than 10 days has elapsed since the positive test result. This is to ensure you have recovered from the infection.
-
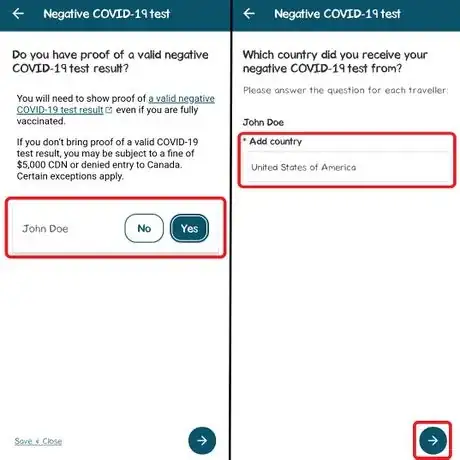
3Answer whether you have proof of a negative COVID-19 test result.
- As of April 1, 2022, fully-vaccinated travellers are exempt from performing pre-arrival testing and are not required to give proof of a negative test result. People who are totally unvaccinated or have only received 1 out of 2 vaccine doses must still undergo pre-arrival testing.
- If yes, enter the country where you've received the test.
-
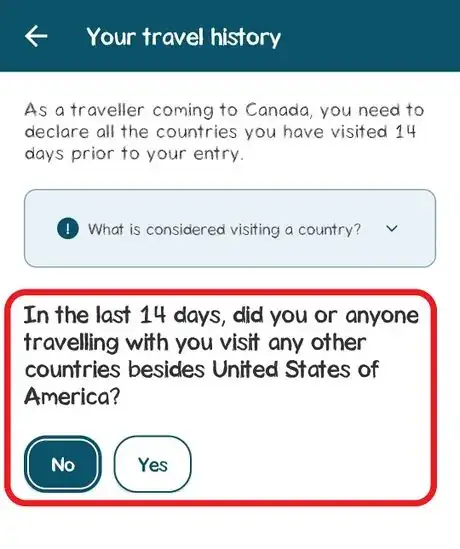
4Answer whether you've visited another country other than the United states in the last 14 days. The rationale for this question is to track potential cases of COVID-19 variants originating from other countries.
- This question also applies to anyone accompanying you during the trip.
Entering Your Quarantine Plan
In this fourth section, you'll provide information on your accommodations in the event you are selected to undergo mandatory quarantine.
-
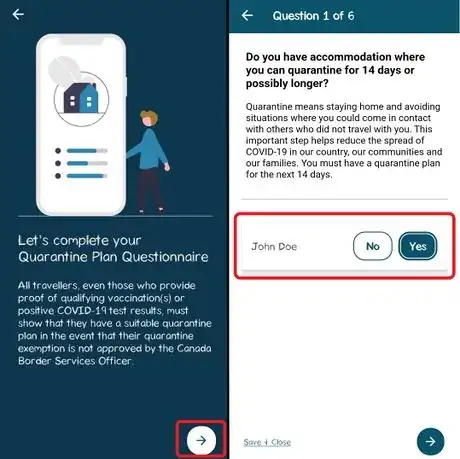
1Answer the series of six questions related to your specific place of accommodation. These questions include:
- Whether you have accommodation where you can stay for at least 14 days.
- Whether you can avoid contact with other people in the household, including guests and people you didn't travel with.
- Whether you can access basic essentials such as food, water, medications, and utilities without interacting with anybody.
- Whether this location contains people with an increased risk of severe illness due to a COVID-19 infection (such as elderly or immunocompromised people).
- Whether this location contains people who deal with COVID-19 or at-risk populations in their line of work (such as healthcare workers or first responders).
- Whether this location is considered to be a group living environment (such as a dorm or apartment with roommates).
-
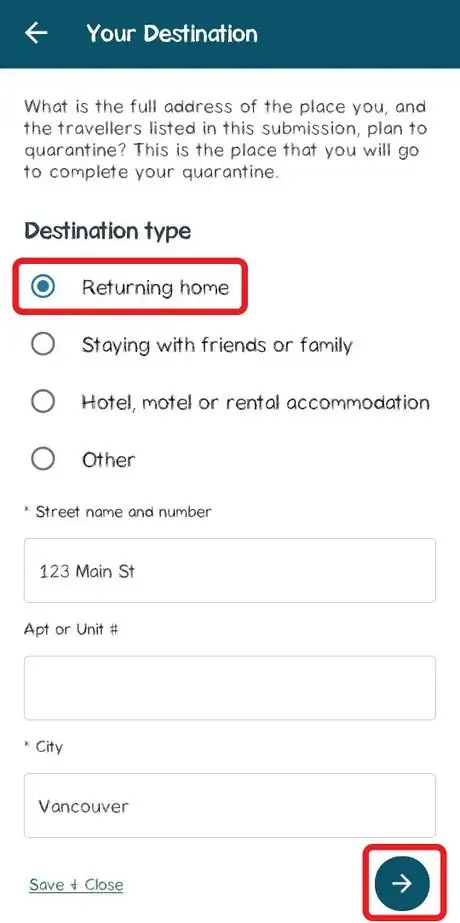
2Provide location information. This is where you'll specify where you'll be staying. On this page, submit the following:
- Destination type (e.g. if you're returning back home, or staying with friends, family, or in a hotel room)
- Street address, city, province, and postal code
Submitting Your Form
-
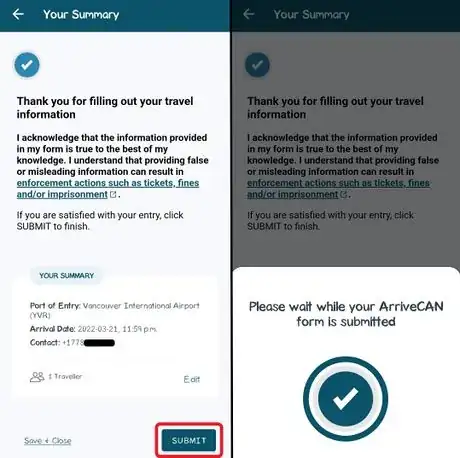
1Review and submit your form. You must ensure all information is accurate. If you want to make any changes, tap on the back arrow to edit the form. Otherwise, tap on Submit to send off your form.
-
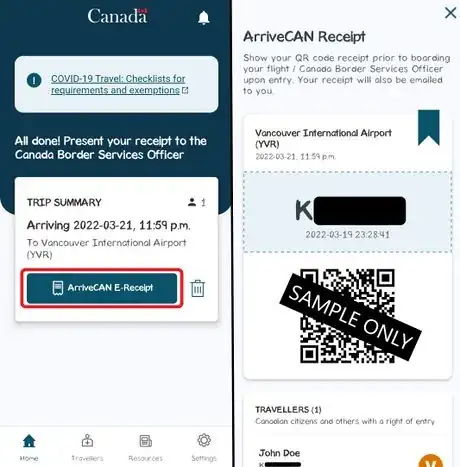
2Keep the receipt and be prepared to show it to a border officer. Once your form has been submitted, you'll receive a receipt with a QR code, both in the ArriveCAN app and in your email. During your travel, you will need to show this receipt to a border officer, who will use the information you provided to determine your final eligibility to enter Canada.
- You may choose to take a screenshot or physically print out the receipt if you wish.
- Pay attention to the letters beside your name. These letters provide additional information to the border officer based on your form. If a certain letter appears with your name, you may be asked to clarify information with the officer in person.
Community Q&A
-
QuestionHow do you complete this on a computer?Go to the web version of ArriveCAN (arrivecan.cbsa-asfc.cloud-nuage.canada.ca/en/welcome). The process for making an account and submitting your information should be the same.
-
QuestionI entered the wrong arrival time and point of entry by mistake. How do I fix this?If you're still working on the form, you can always click on the back arrows to return to the previous questions to change your answers. But if you've already submitted the form and received a QR code, you will need to delete the whole thing and submit a new form. Go to the app's main page and tap on the trash can icon to delete the existing form and start over.
Warnings
- Submitting an ArriveCAN form is a legal requirement for crossing the border into Canada, regardless of citizenship. The purpose of this form is to determine eligibility and/or exemptions for travellers wishing to enter the country during the pandemic. As such, all information must be truthful and accurate. Consequences for refusing to use ArriveCAN or providing false information may include: fines, being denied entry, increased questioning and longer waits, or mandatory quarantine.[6]⧼thumbs_response⧽
References
- ↑ https://travel.gc.ca/travel-covid
- ↑ https://cantruck.ca/wp-content/uploads/2021/03/Infosheet-EN_public.pdf
- ↑ https://cantruck.ca/wp-content/uploads/2021/03/Infosheet-EN_public.pdf
- ↑ https://www.canada.ca/en/public-health/news/2022/03/government-of-canada-will-remove-pre-entry-test-requirement-for-fully-vaccinated-travellers-on-april-1.html
- ↑ https://travel.gc.ca/travel-covid/travel-restrictions/covid-vaccinated-travellers-entering-canada
- ↑ https://www.canada.ca/en/public-health/services/diseases/coronavirus-disease-covid-19/arrivecan.html
