wikiHow is a “wiki,” similar to Wikipedia, which means that many of our articles are co-written by multiple authors. To create this article, 36 people, some anonymous, worked to edit and improve it over time.
wikiHow marks an article as reader-approved once it receives enough positive feedback. In this case, 89% of readers who voted found the article helpful, earning it our reader-approved status.
This article has been viewed 387,939 times.
Learn more...
Wood lathes can be used to create functional furniture components, beautiful decorative wood projects such as candlesticks and bowls, or even toys such as tops and yo yos. These machines range in size from hobby models that fit on a work bench to large industrial-sized machines weighing hundreds of pounds, but they all share some basic elements. Here are some instructions for using these unique machines.
Steps
-
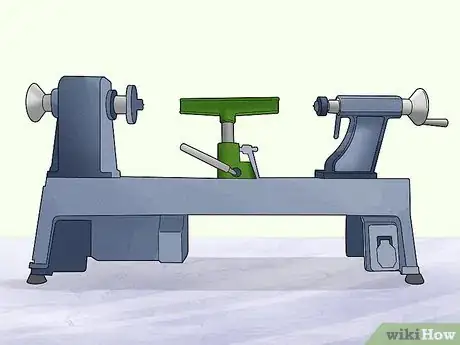
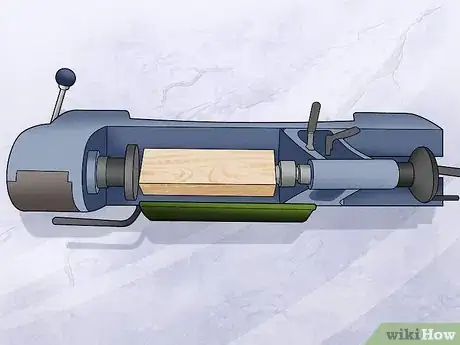
1Select a lathe suitable for your project. Bench top lathes can be ideal for turning small projects like ink pens and yo-yos, larger machines may be used for making spindles used in furniture and handrail styles. Here are some differences in wood lathe specifications:
- Bed length is the distance between centers, or the maximum length of the stock that can be turned.
- Swing is the term used to describe the largest diameter stock that can be turned.
- Horsepower is the amount of torque the lathe motor develops, which in turn will determine how heavy an item can be turned without overloading this critical component.
- RPMs are the revolutions per minute the stock can be turned. Here, note that most, if not all lathes have variable speed capabilities. A lathe with a very low speed range allows the user to start a piece of odd shaped, unbalanced stock without excessive vibration, and high speed machines can speed the work while making obtaining a fine, smooth finish easier to achieve.
- Weight and composition. Heavier machines with cast iron beds and steel frames offer a good, solid work platform, but can be difficult to move if you are operating it in a crowded workshop where you will be storing it when it is not in use.
-
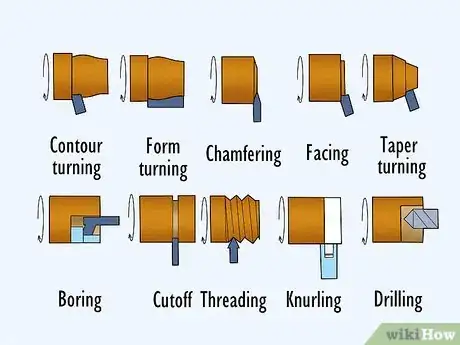
2Choose the lathe operation you are going to begin with. A simple task might be to turn a square or irregularly shaped piece of wood to a true cylindrical shape, often the first step to forming a spindle or other round item.Advertisement
-
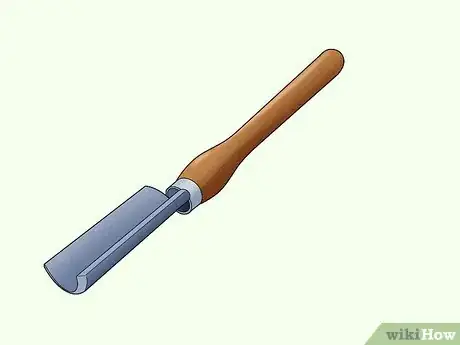
3Select the correct cutting tools for your objective. Lathe tools are called chisels. They feature long, round, curved handles to afford a solid grip and sufficient leverage to enable the turner to control the cutting edge accurately with minimal fatigue. Common wood chisels simply are too short and are ill-designed for this purpose. Here are a few of the many types turning tools you may find:
- Gouges. These usually have specially shaped cutting edges for performing particular cuts, such as bowl gouges, with concave, curved cutting edges to form the smooth, curved surface of a bowl, or vee, or knurling gouges for cutting grooves or knurls in wooden spindles.
- Scrapers. These are often flat or slightly curved chisels for removing wood from flat or cylindrical shapes, or for roughing out a shape.
- Parting tools. These are thin, vee tipped tools for cutting off work pieces.
- Spoon cutters have a spoon shaped cutting edge and are also often used for shaping bowls.
- Other tools you may encounter are skew chisels, fluted gouges, spindle gouges, and nose chisels.
-
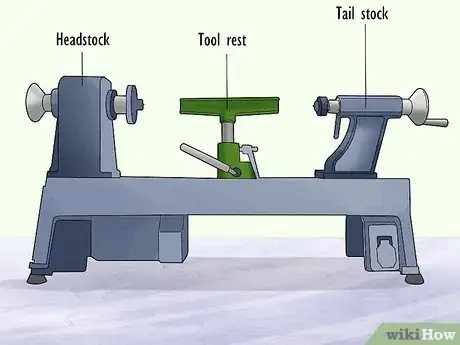
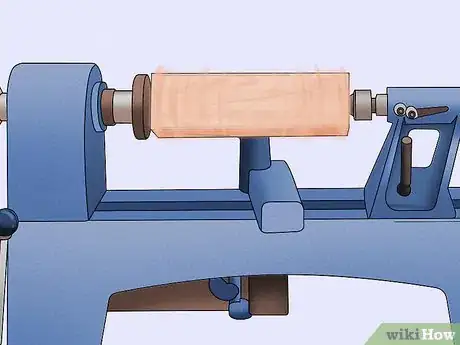
4Learn the components of your lathe. A basic wood lathe consists of a bed, headstock, tailstock, and tool rest. Here are the functions of each of these parts.
- The headstock consists of the drive train, including the motor, pulleys, belts, and spindle, and for a right handed turner, will be located on the left end of the lathe. Mounted on the end of the headstock facing the tailstock is the spindle and the spur center or for face turning such as bowls and plates, or other flat or face work, the face plate assembly.
- The tail stock is the free spinning end of the lathe, and has the tailstock spindle and the cup center, as well as a hand-wheel or other feature for clamping or securing the work piece between the lathe centers.
- The tool rest is similar to a mechanical arm with a metal guide bar to support the chisel used for turning the work piece. It usually can be adjusted by sliding the length of the bed at its base, with an intermediate arm that can swing from a parallel to a perpendicular position in relation to the lathe bed, and the upper arm, which holds the actual tool rest bar. This assembly has as many as three swivel joints, all of which tighten with a setscrew or clamp to keep it secure while turning is in progress.
-
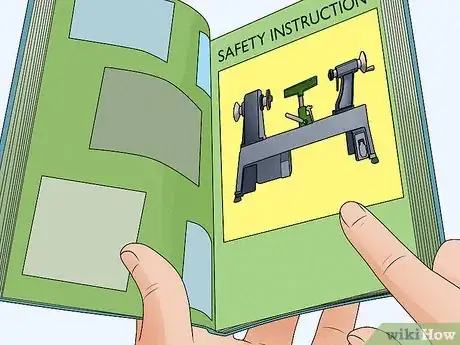
5Read your owner's manual before proceeding with actual lathe work for specific instructions, features and detailed safety instructions. Keep your owner's manual handy for reference if you decide to purchase accessories for your particular lathe, for maintenance instructions, and for reference to capacities and specifications for your machine.
-
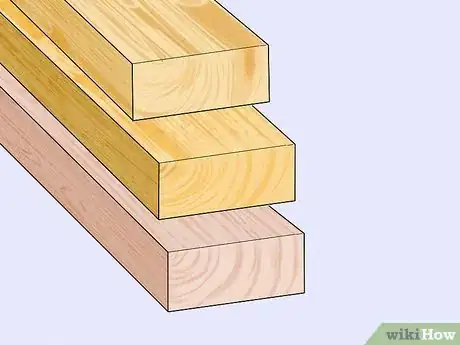
6Select a suitable piece of wood for your project. For a beginner, using a softwood like southern yellow pine, lodge-pole pine, or balsam fir may be a good idea. Look for a piece with fairly straight grain, and few, tight, knots. Never turn a split piece of stock, or one with loose knots, these may separate during turning, and become projectiles traveling at a significant speed.
-
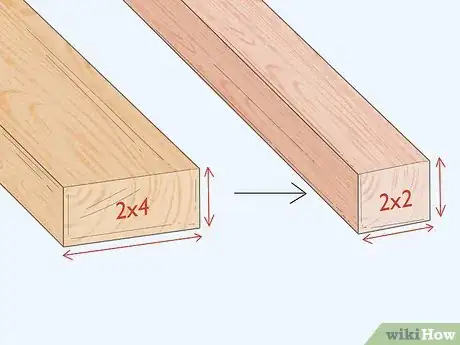
7Square the stock. For example, if you are going to begin with a piece of 2X4 lumber, rip it to a nominally square shape, such as 2X2. You can then chamfer, or bevel the square corners, effectively creating an octagonal piece, which will reduce the amount of wood that must be removed to reach your desired cylindrical shape.
-
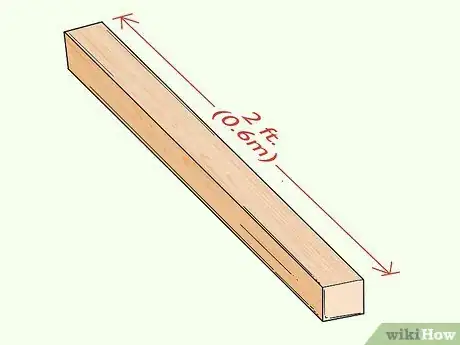
8Cut the stock to the desired length. For a beginner, starting with a relatively short length, less than 2 foot (0.6 m) long for an intermediate, or medium sized lathe, is a good choice. Longer work pieces are difficult to true, and maintaining a uniform diameter along the length of a longer piece can take a lot of work.
-
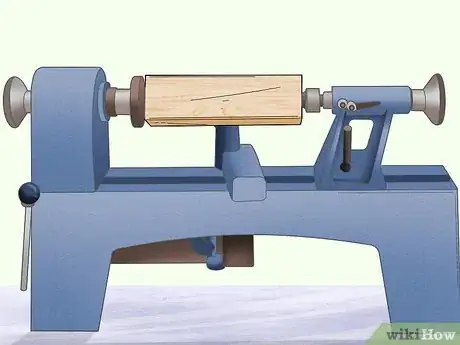
9Mark the center of each end of your stock, and position it between the lathe centers. Assuming the tailstock is not locked in position, slide this until it pushes the cup center into the tail end of your work piece. Using the hand crank, tighten the tailstock spindle so that it pushes the stock into the spur center, mounted on the headstock spindle. Make sure the work piece is securely held, and all clamps are tightened, otherwise, the work piece may fly off the lathe while you are turning. Also make sure the lathe keys are out of the machine before you start
-
10Position the tool rest parallel to the length of the work piece, keeping it far enough back to allow the work piece to rotate without hitting it, but as close as possible. A good working distance is about 3/4 of an inch. Remember, the closer the tool rest is to the turning work piece, the more leverage and better control you will have with your knife (chisel).
-
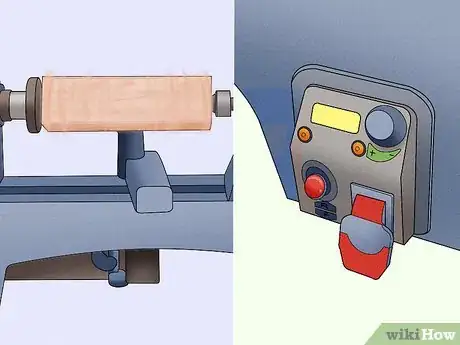
11Free spin, or hand turn the work piece to make sure it doesn't hit the tool rest. It is a good practice to always turn a work piece by hand before turning the lathe on, making sure it has sufficient clearance.
-
12Choose the chisel you will use for the turning operation. A roughing gouge is a good choice for beginning to turn an irregular or square work piece down to a round shape. Practice holding the tool on the tool rest, using your left (again, for right handed persons) hand on the metal blade behind the tool rest, and your right near the end of the handle. Keeping your elbows in, and braced against your body will give you better control of the tool.
-
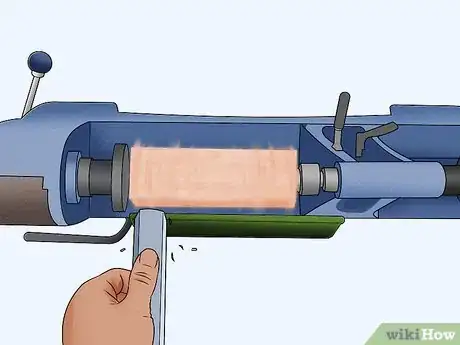
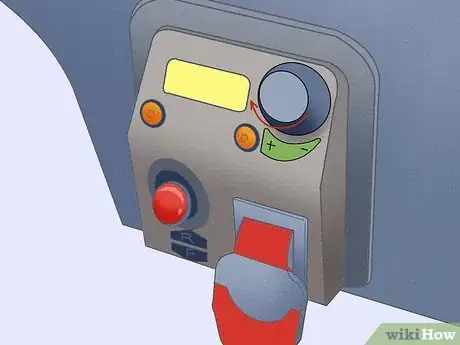
13Turn the lathe on, making sure it is at the lowest speed setting. Place the cutting edge of the tool on the rest, keeping clear of the rotating work piece, check your grip, and slowly begin easing it toward the work piece. You want to move in toward it perpendicular to the work piece, until the cutting edge just touches the wood. Forcing it or moving too quickly will cause the tool to jam into the wood, and it will either break off, or you will lose your grip on the tool if the lathe doesn't stall out. This is one of the most dangerous steps in beginning turning.
-
14Feel the resistance of the cutting edge and watch the size of the chips being cut from the work piece. When truing, you will want to cut small chips, less than 1/4 of an inch in length.
-
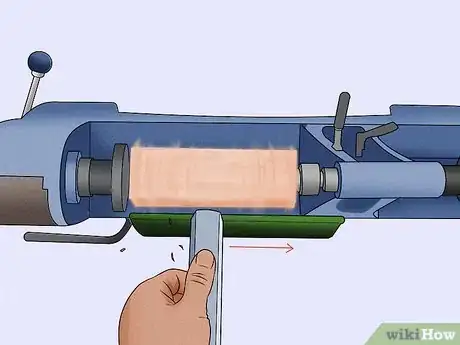
15Begin moving the cutting edge parallel to the rotation of the work piece, continuing to make a light cut along its length. When using a roughing gouge or similar tool, you can cant, or pitch the tool edge so chips are thrown at an angle from the work piece, so you do not become covered with them while you turn. Twist the tool slightly and observe the flight path of the chips to adjust it so they fly away from you to your right or left.
-
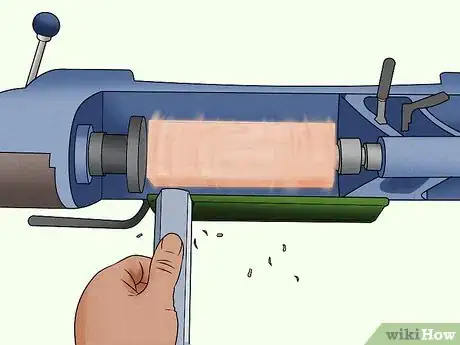
16Continue pushing the tool into the stock gradually, in passes, so that you remove a roughly equal amount of wood with each pass. This will eventually cut away the angular corners, leaving your work piece round, and with practice, cylindrical in shape.
-
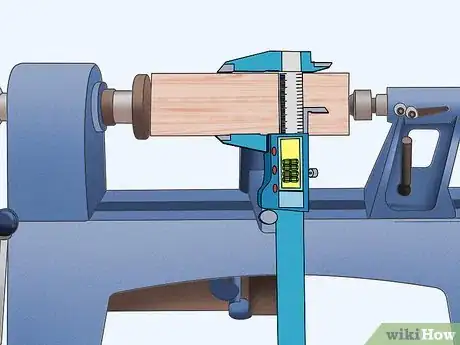
17Stop the lathe frequently when you are just beginning, to check your progress, look for stress cracks in the wood, and clear debris which may begin to accumulate on the lathe bed. You may want to use a pair of calipers to check the diameter of your work piece along its length so you finish with the desired diameter.
-
18Smooth the finished round work piece by increasing your lathe speed, and holding your cutting tool so it barely contacts the wood, then moving it slowly along the work piece’s length. The slower your tool movement, and finer, or lighter the cut, the smoother the finished cut will be.
-
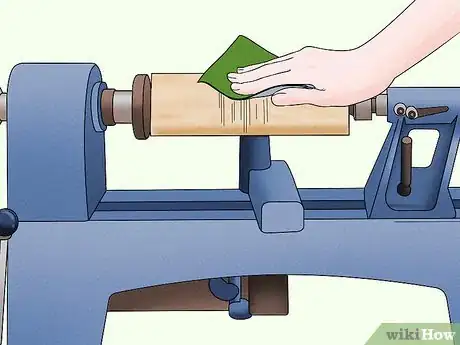
19Sand the work piece when you are finished cutting if desired. You can sand the stock by hand while it is turning if you use caution. Turn the lathe off, and swing the tool rest out of the way, then select a suitable grit and type of sandpaper for this process. Turn the lathe back on, and hold the paper lightly against the wood, moving it back and forth to prevent removing too much wood from one area of the work piece.
Community Q&A
-
QuestionI'm using round dowel sticks on my small lathe. It is hard to get them fit on center so they spin smooth and true. How can I consistently find the center of the end of these round dowels?
 Community AnswerUse a center finder template to mark a line across the end of the dowel. Rotate the dowel in the center finder and mark another line. Where those lines intersect is the center of the dowel. You may find it helpful to set the drive spur and live center by drilling a small hole at the center mark at both ends using a drill. The center spurs of the drive center and live center will then "home" more easily, and are less likely to wander while you adjust the tailstock to hold the piece securely in the lathe.
 -
QuestionDoes the top or bottom turn toward the operator?
 Community AnswerIf the motor is running in 'forward' mode, the top comes toward you. If it is running in reverse for sanding, the bottom comes up first.
 -
QuestionWhich direction is the rotation of a wood lathe?
 Community AnswerTowards the operator - the wedge of the cutting tool should be able to "dig" into the work.
Warnings
- Do not operate the lathe if excessive vibration is noticed.⧼thumbs_response⧽
- Be aware of loose clothing or hanging strings or ties, keep all clothing well away from spinning project..⧼thumbs_response⧽
- Consider a turner's smock, a heavy, full body apron when turning large work pieces and making heavy cuts.⧼thumbs_response⧽
- Turn off the lathe and allow it to come to a complete stop before leaving the machine.⧼thumbs_response⧽
- Wear a respirator when working with woods that create fine dust (such as junipers, cedars, and very tight-grained hardwoods like black walnut) or woods you may be allergic to.⧼thumbs_response⧽
- Observe all safety tips found on the machine.⧼thumbs_response⧽
- Wear eye protection, preferably a face shield, when turning.⧼thumbs_response⧽
- Tie long hair back securely to prevent scalping.⧼thumbs_response⧽
- Free spin your work pieces before turning the lathe on to make sure they clear the tool rest.⧼thumbs_response⧽
- Make sure all fittings and mounts are tight.⧼thumbs_response⧽
- Do not operate power machines where flammable liquids are present.⧼thumbs_response⧽
- Inspect tools for chips, cracks, or damaged handles before using and during heavy use.⧼thumbs_response⧽
- Read the safety warnings in your lathe's owner's manual before beginning.⧼thumbs_response⧽
Things You'll Need
- Lathe
- Turning tools
- Wood stock
- Safety equipment
