This article was co-authored by wikiHow staff writer, Nicole Levine, MFA. Nicole Levine is a Technology Writer and Editor for wikiHow. She has more than 20 years of experience creating technical documentation and leading support teams at major web hosting and software companies. Nicole also holds an MFA in Creative Writing from Portland State University and teaches composition, fiction-writing, and zine-making at various institutions.
There are 12 references cited in this article, which can be found at the bottom of the page.
The wikiHow Tech Team also followed the article's instructions and verified that they work.
This article has been viewed 9,534 times.
Learn more...
Procreate Pocket is the iPhone version of Procreate, the iPad-only illustration app. You can sketch, paint, and draw in Procreate Pocket using your finger or a stylus. But unlike the iPad version of Procreate, Procreate Pocket doesn't work with the Apple Pencil—if you want to use a stylus, you'll need a basic one with no "smart" features. This wikiHow article will show you how to get started with Procreate Pocket on your iPhone.
Steps
Creating a New Canvas in Procreate Pocket
-
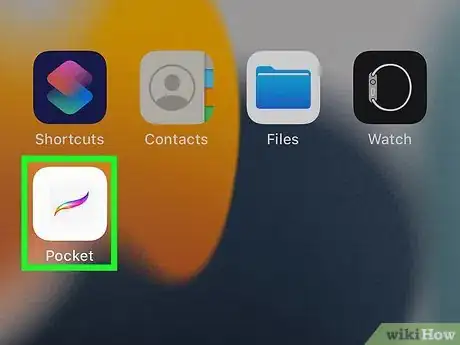
1Open Procreate Pocket on your iPhone. This takes you to the gallery, where you'll find any drawings you've been working on in the app. You can tap a drawing to open it for editing, or create a new canvas to start something fresh. We'll create a new canvas!
-
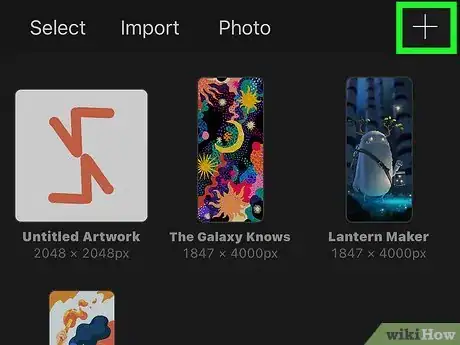
2Tap the plus +. It's at the top-right corner. This opens the New Canvas menu.Advertisement
-
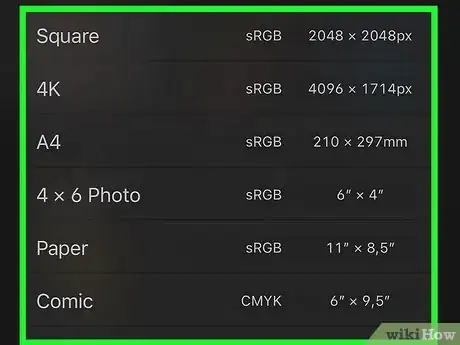
3Try a canvas template. You can use any of the preconfigured canvas sizes to get started if you'd like. Just tap the name or size of the canvas to open it and start working.
- To edit one of the templates before selecting it, just swipe left on the template and tap Edit. You can now adjust the size and resolution before you begin.
-
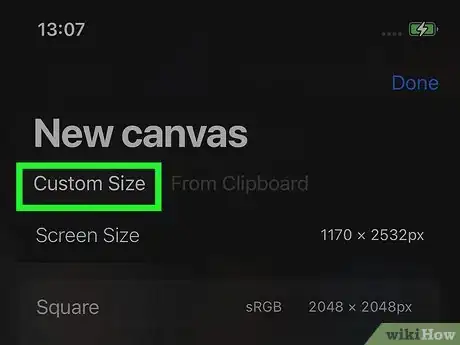
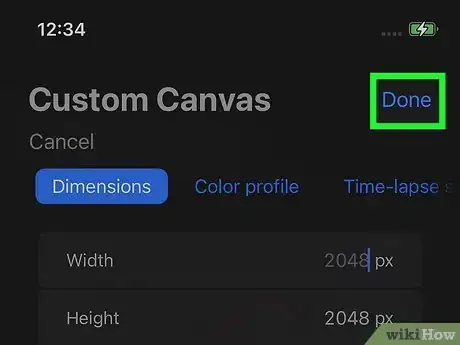
4Tap Custom Size to create a custom canvas. If templates aren't your thing, you can create a canvas from scratch. This lets you specify the canvas' dimensions, color profile, properties, and time-lapse settings.[1]
- If you plan to print your work, choose CMYK as the Color Profile. Otherwise, choose RGB.
- 300 DPI will look great on-screen and in print jobs.
- Procreate Pocket can create a time-lapse video of your progress on a project. Tap Time-lapse settings to adjust these features.
- You can tap Canvas properties to set a different background color (the default is white), including a transparent background.
- You can even name the custom canvas so you can easily select it next time. Just tap the Untitled Canvas field at the top and enter your name.
-
5Tap Done to create your canvas. If you created a custom canvas or edited one of the presets, this will create your new canvas.
Learning Your Way Around
-
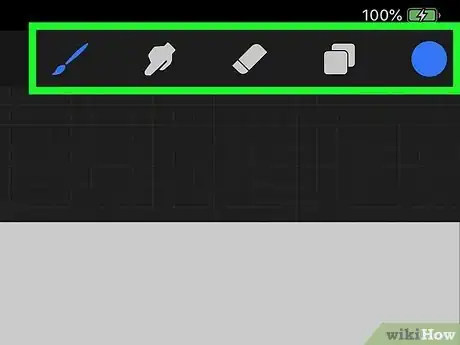
1Find the painting tools at the top-right corner of the workspace. The 5 icons at the upper-right corner are the tools you'll use to sketch, paint, and smudge.
- Tap the paintbrush icon to view the Brush Library, which contains all of the pencils, brushes, and pens you can use to draw and paint. The Library is organized by category and contains dozens of options to get you started. You can also design your own brushes and import brushes you download elsewhere.[2]
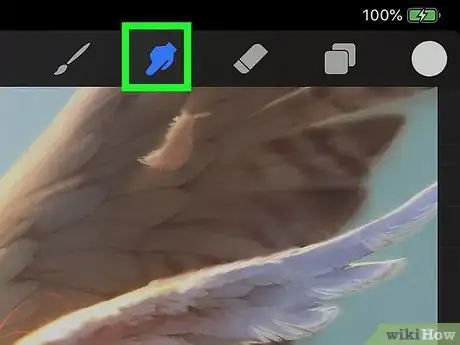
- Tap the smudging finger icon to open the Smudge tool, which allows you to blend and mix colors with your finger or a compatible stylus.
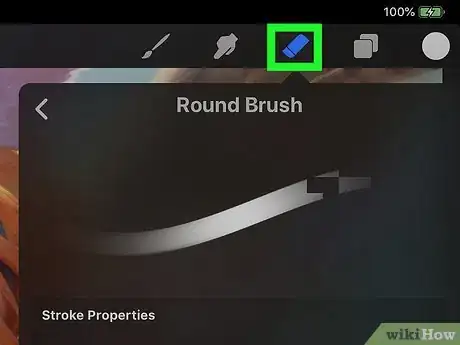
- Tap the eraser icon to open the Eraser, which lets you fix mistakes. You can customize the size and shape of the eraser manually or by choosing options from the Brush Library.
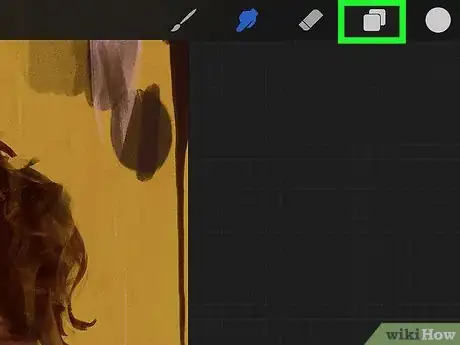
- Tap the two overlapping squares to launch the Layers panel, which is a tool that allows you to place different components of your artwork on separate layers so you can edit them individually.
- Tap the circle to open the color palette, which is where you can select colors for your tools.
-
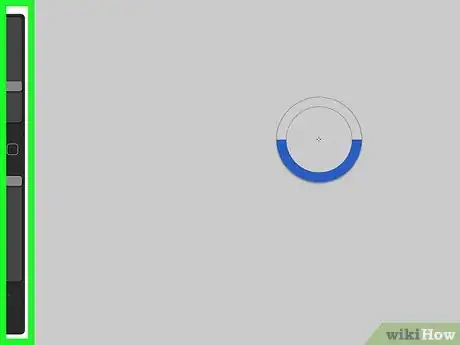
2Modify tool size and pressure (or opacity) with Brush Sliders. You'll see two sliders on the left panel:
- The top slider is for brush size, which lets you increase or decrease the size of your pen, brush, smudging tool, or eraser. Drag up to increase the size, and down to decrease it.
- If your iPhone has 3D Touch, the bottom slider controls the opacity of the tool you're using. Slide your finger up to increase opacity (make the tool less transparent), or down to decrease it.
- If your iPhone doesn't have 3D Touch, this slider adjust the tool's pressure instead. Drag up to increase the pressure, drag down to decrease it.
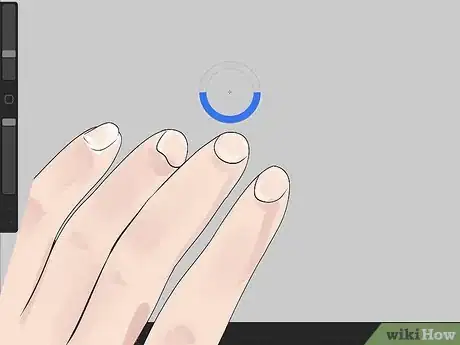
- Regardless of whether you have 3D Touch or not, you can switch between Opacity and Pressure on the second slider. Tap and hold the bottom slider until you feel a haptic tap (or see a visual pulsation on the slider). This swaps the function of the slider.
-
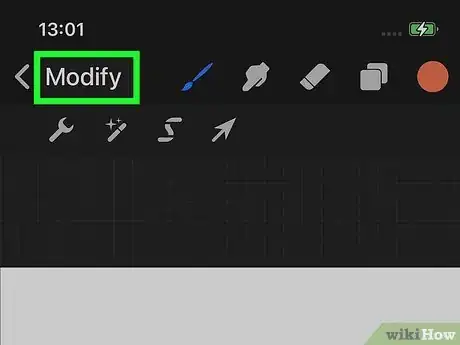
3Tap the Modify option. It's at the top-left. This opens the Modify screen, where you'll find many important editing tools.
-
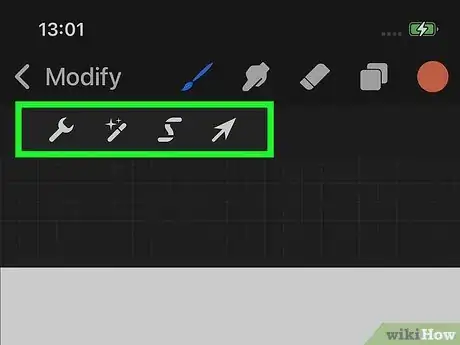
4Use the tools on the Modify screen.
- Tap the back arrow at the top-left to open your Gallery, which is where you can create new canvases, open existing artwork, and share images with others.
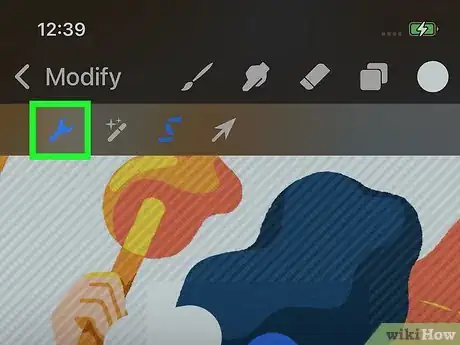
- Tap the wrench to open the Actions menu, which is where you can crop, resize, flip, insert objects, access drawing guides, and modify the canvas.
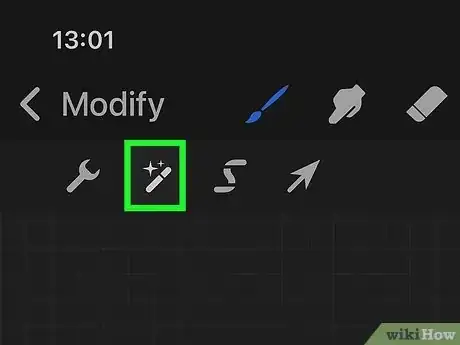
- Tap the magic wand icon to see Adjustment tools. This is where you'll find color adjusters, as well as filtering tools like blur, sharpen, noise, clone, liquify, and chromatic aberrations.
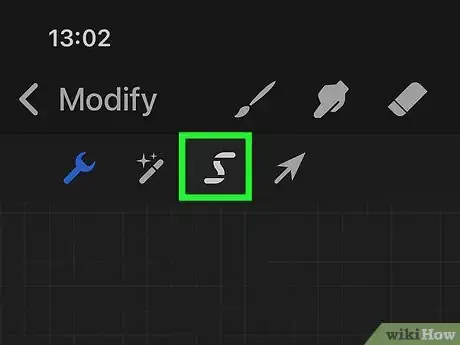
- Tap the S to open the Selection tool, which lets you isolate any part of your art to modify separately from the rest.
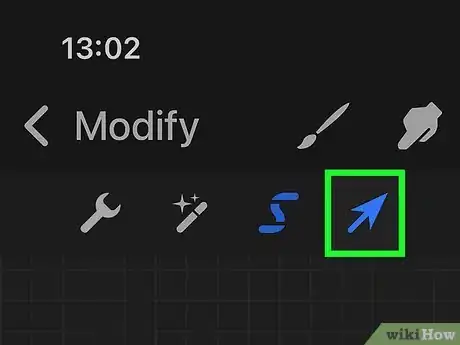
- Tap the arrow to open the Transform tool, which lets you move, resize, and otherwise modify selections.
-
5Learn how to use Cards. Cards are the rectangles that appear at the bottom of each menu you launch from the Modify screen (except for the gallery). Each card contains buttons, submenus, settings, and other options. You can activate a card easily—just tap and hold it and then swipe down.
-
6Toggle the interface and tools on and off. To draw or paint without distracting menus and icons on the screen, tap 4 fingers together at the same time to hide the interface tools. Tap 4 fingers again to bring the tools and menus back up.
Using the Drawing Tools
-
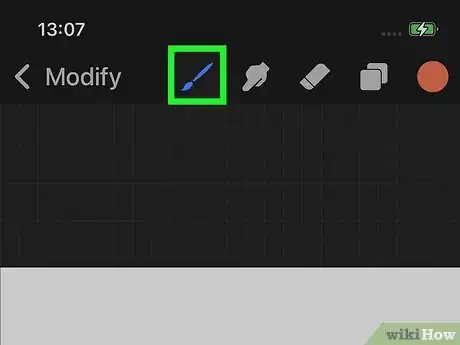
1Tap the brush icon to open the Brush Library. It's in the upper-right corner of Procreate. This displays all of the installed brushes, pens, and other drawing implements in neatly-organized categories.
- Although the Apple Pencil is widely used on the iPad version of Procreate, Apple Pencil won't work on an iPhone, nor will other "smart" stylus tools. You can, however, use a standard iPhone-compatible stylus such as an Adonit (Jot, Dash, Pixel, or Mark), Wacom Bamboo Sketch, and MoKo Universal Active Stylus Pen.[3]
-
2Tap the brush you want to use. You can use pencil and pen "brushes" for sketches and paintbrush-like brushes for adding color.
-
3Select a color. Tap the colored circle at the top-right to open the color panel, and then tap the color you want to use.
-
4Select the brush size and opacity. On the left sidebar, you'll see two tall rectangular sliders. The top rectangle is for adjusting the brush size—drag your finger or stylus up or down to change the size of the drawing tool. The bottom rectangle adjusts the opacity.[4]
-
5Drag your finger or stylus on the canvas to draw. You can switch between brushes, colors, and tools at any time while drawing.
-
6Tap with two fingers to undo at any time. This is a quick gesture that will undo the last action.[5] You can also undo the last action by tapping the back-arrow icon on the left sidebar. You can undo up to 250 actions.
-
7Tap the Smudge tool to smudge your art. This is the finger icon at the upper-right corner. Like with the Brush tool, you can choose a "brush" and select its size and opacity. Then, use your finger or the stylus to smudge over the desired area.
-
8Tap the Eraser tool to erase anything. The Eraser works like the Smudge and Paint tool in that it lets you choose a brush and customize its size and opacity. Once you choose an eraser "brush," you can use your finger or the stylus to remove lines and color from the canvas.
Using Layers
-
1Tap the two overlapping squares to open the Layers panel. This icon is at the top-right corner of your workspace. When you're creating a more elaborate art piece, you can place individual elements of your project on their own layers so you can modify them separately.
-
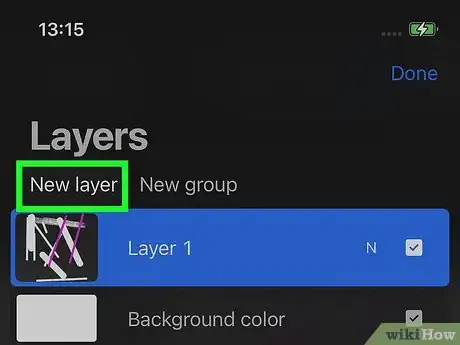
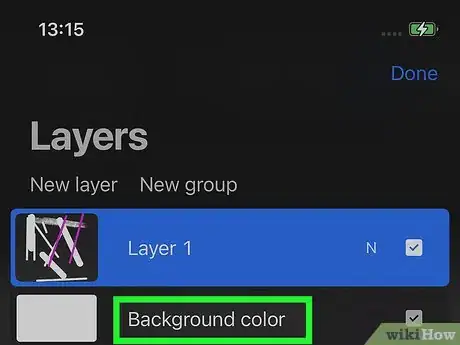
2Tap the New layer to add a new layer. This places adds a new layer on top of your existing layer (the Background Color layer).
-
3Name your new layer. You'll want to give your layer a descriptive name that describes the type of content that will be on it, such as "Accents" or "Shadows." Tap the layer twice, select Rename, and then name your layer.
-
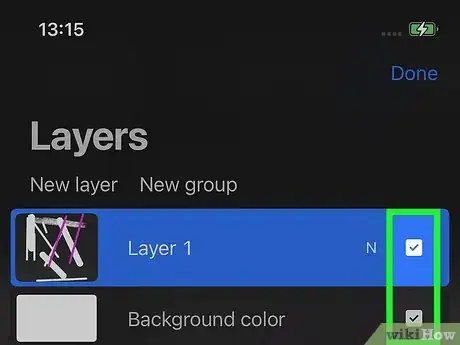
4Tap the checkbox next to a layer to hide/unhide it. This lets you work on individual layers without seeing the one you've hidden. If you hide the Background Color layer, you'll be creating a transparent background, which is great for exporting images as PNG.[6]
-
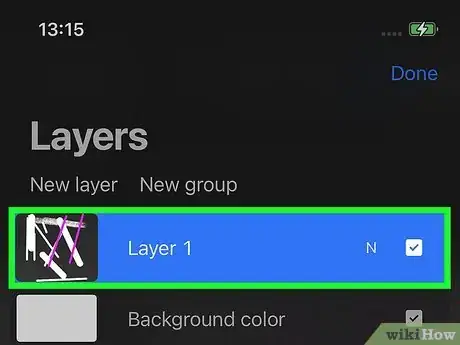
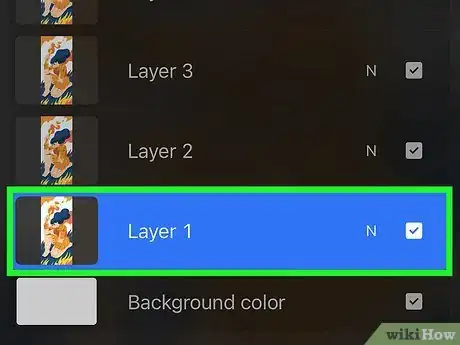
5Tap any layer in the Layers panel to make it the active layer. Once you're working with multiple layers, you can tap the layer you want to work on to switch to it instantly.
-
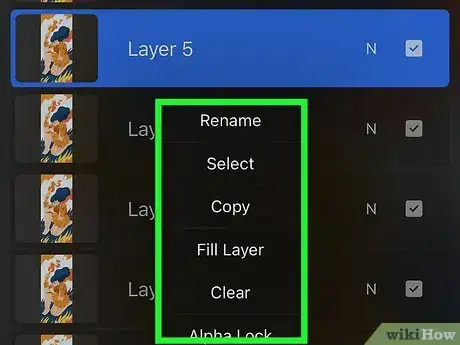
6Tap a layer twice to open the Layer Options. This displays options for the selected layer, including options to rename, copy, select, lock, and fill with color.[7]
- Tapping Select selects everything on the layer that isn't transparent.
- To clear everything on a layer without deleting it the layer itself, tap Clear.
- Drag layers to other positions to rearrange them.
Selecting and Transforming
-
1Tap the Modify menu. It's at the top-left corner of the workspace.
-
2Tap the "S" tool to open the Selection toolbar. This tool is in near the upper-left corner of the Modify screen. The Selection toolbar will appear at the bottom-center part of the screen.[8]
-
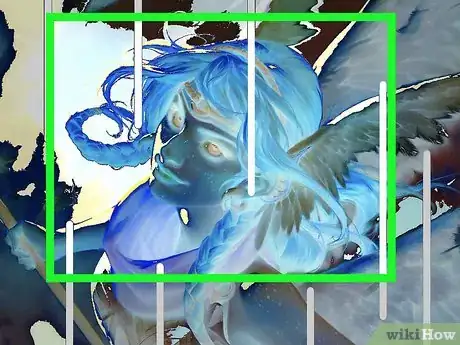
3Choose a Selection mode. When you use a Selection mode, a dotted line will appear around the area you select. You can then modify the selection using any tools in Procreate Pocket. The 4 selection modes are:
- Automatic: This feature lets you tap multiple areas of the drawing that you want to select.
- Freehand: Use this tool to freehand draw a selection line around the area of the image you want to select.
- Rectangle: Choose this mode to draw a rectangle or square around the item you want to select.
- Ellipse: This option lets you draw a circle around an area to select it.
-
4Draw or tap your selections. If you're using Automatic selections, just tap the items you want to select. Otherwise, use the stylus or your finger to surround the area you want to select.
-
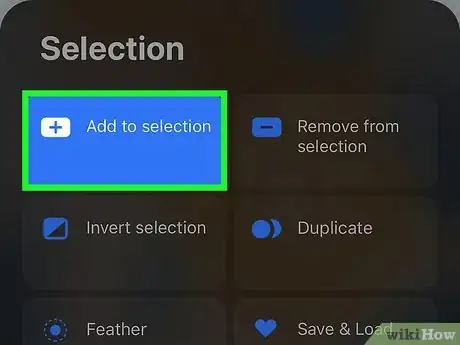
5Tap Add to apply your selection. Now that you've selected an area, you can use any of your drawing tools on the selection, add color, and transform it. You can also add more selections now.
- You can also switch to the tool you want to use to immediately start using it on the selection instead of choosing Add.
-
6Tap the arrow at the top of the Modify screen. This switches ot the Transform tool, which you can use to move or manipulate the active selection(s).
-
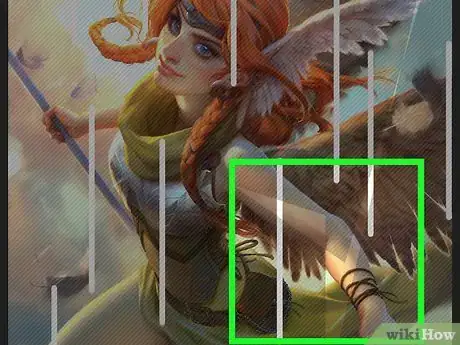
7Drag a selection to move it. You don't need to choose another tool to move the selection—simply tap and hold within the selected area and drag the selection to another region.[9]
-
8Resize or stretch the selected area. To change the dimensions and/or perspective of the selection:
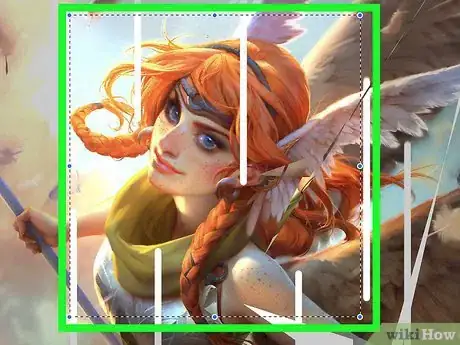
- Tap the Freeform icon at the bottom to stretch the selection in any direction. Just tap and drag any of the any of the blue nodes to bend or stretch the selection to the desired size. This ignores the original proportions of the selection.
- Tap the Uniform icon to resize the selection while retaining its original proportions. This allows you to resize a section without warping it.
- Tap the Distort icon to distort the selection, which allows you to change the viewing perspective. Drag any of the corners in the desired direction to shift the perspective.
- Tap the Warp icon to move any corner, side, or part of the inner mesh of the selection to warp in one or more directions.
Using Adjustment Tools
-
1Tap the Modify menu. It's at the top-left corner of the workspace.
-
2Create a selection or select a layer. You can use the tools on the Adjustment menu to change colors, adjust sharpness, and apply filter affects.
-
3Tap the magic wand icon. It's in the upper-left corner of the Modify screen. This expands 4 cards at the bottom of the screen.
-
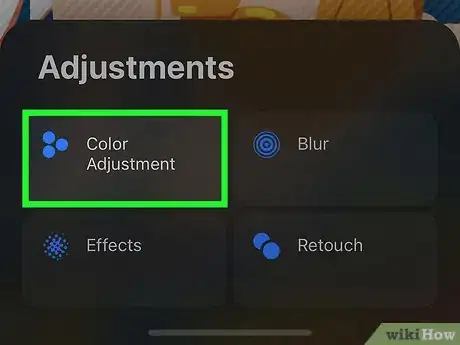
4Tap Color Adjustment to modify colors. Here you can adjust the Hue, Saturation, Brightness, Color Balance, Curves, and Gradient Map.[10] Each option has its own set of sliders you can adjust for the perfect color and brightness.
-
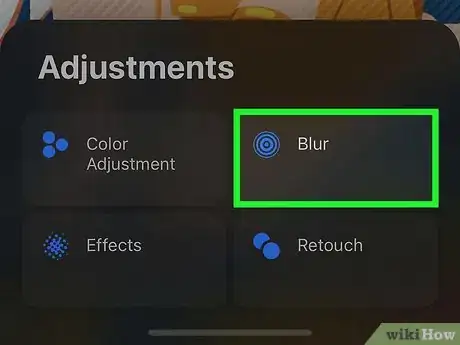
5Tap Blur to select a blurring effect. You can choose from three blurring effects (Gaussian Blur, Motion Blur, and Perspective Blur) .
- If using Gaussian or Motion Blur, drag your finger in the desired direction.
- If using Perspective Blur, drag the disc to shift the perspective.[11]
-
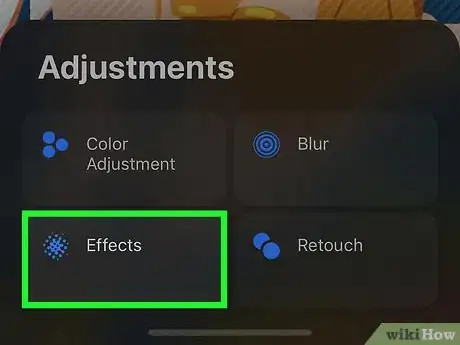
6Tap Effects to try different filters. This card is where you'll find options like Noise, Sharpen, Bloom, Glitch, Halftone, and Chromatic Aberration.
-
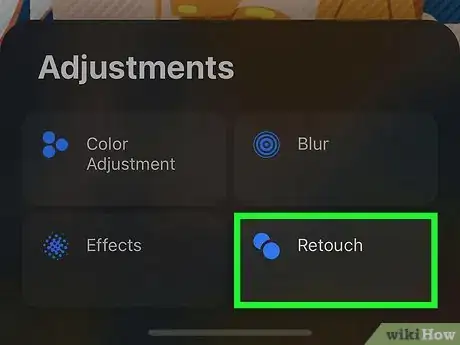
7Tap Retouch to find the Liquify and Clone tools.
- The Liquify tool adds warping effects such as Push, Twirl, Pinch, Expand, and Crystals.
- The Clone tool lets you copy and paste one selection to another area. Just position the selector over the area you want to copy, and then tap the area where you want that selection to appear.
Using Drawing Guides and Drawing Assist
-
1Tap the Modify menu. It's at the top-left corner of the workspace.
-
2Tap the wrench icon. This opens the Actions menu at the bottom of the screen.
-
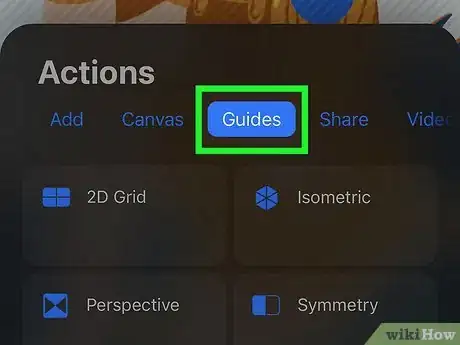
3Tap the Guides tab. This is where you'll find Drawing Guides, which are lines and grids that can help you draw.
-
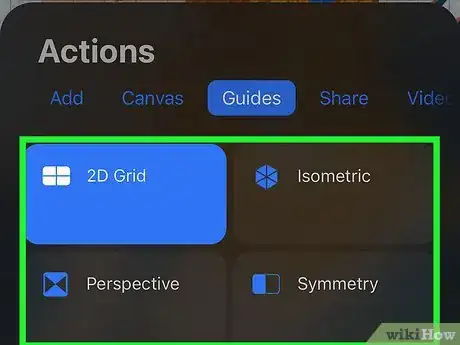
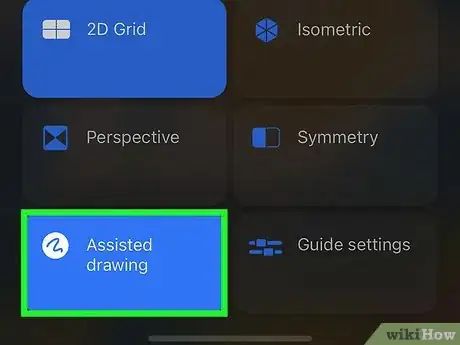
4Select a Guide mode. Tap any of the cards on the bottom to place that card's type of guide:
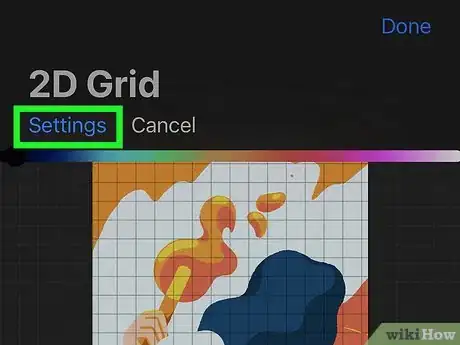
- 2D Grid adds a basic square grid pattern, which is helpful for drawing flat shapes.
- Isometric creates a triangular grid used for drawing in 3D.
- Perspective uses a star-shaped grid tot help you create 3D shapes with vanishing points.
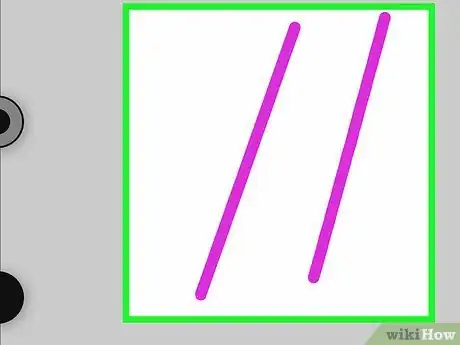
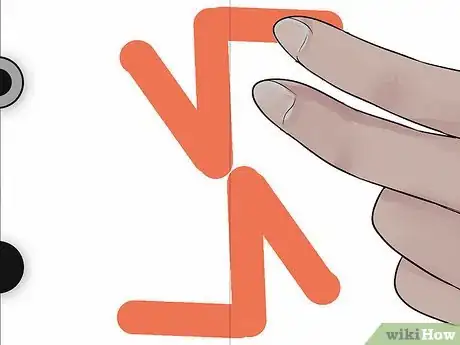
- Symmetry mirrors what you draw on one side of a grid line to the other, making it easy to create tiles and kaleidoscopic designs.[12]
-
5Tap the Settings card to modify the Guide lines. Here you can adjust the Opacity, Thickness, and Grid Size using the provided sliders.
-
6Tap Assisted Drawing to turn on Drawing Assist. This tool aligns your strokes with the guides you placed, which is sort of like using a ruler when drawing on paper.
- Toggle Drawing Assist back off if you want to draw freehand/against the guides.
- Symmetry Guides always use Drawing Assist.
References
- ↑ https://procreate.art/handbook/pocket/gallery/gallery-create/
- ↑ https://procreate.art/handbook/pocket/interface-gestures/interface/
- ↑ https://www.digitalcameraworld.com/buying-guides/best-stylus-for-ipads-and-iphones
- ↑ https://procreate.art/handbook/procreate/brushes/paint-smudge-erase/
- ↑ https://procreate.art/handbook/procreate/interface-gestures/gestures/
- ↑ https://procreate.art/handbook/pocket/layers/layers-interface/
- ↑ https://procreate.art/handbook/pocket/layers/layers-options/
- ↑ https://procreate.art/handbook/pocket/selections/selections-interface/
- ↑ https://procreate.art/handbook/pocket/transform/transform-freeform/
About This Article
1. Create a canvas.
2. Tap the brush icon.
3. Select a brush.
4. Adjust the opacity and thickness.
5. Select a color.
6. Tap and hold with your finger or stylus to draw.
7. Create new layers for each element.
8. Use Adjustments to create effects.
9. Try Drawing Guides with Drawing Assist for more complicated drawings.
