X
wikiHow is a “wiki,” similar to Wikipedia, which means that many of our articles are co-written by multiple authors. To create this article, 9 people, some anonymous, worked to edit and improve it over time.
This article has been viewed 45,399 times.
Learn more...
Getting a new art program can be daunting at first, especially if you haven't used one before. This guide will explain most of the features of Paint Tool SAI so you can get started creating your masterpieces.
Steps
-
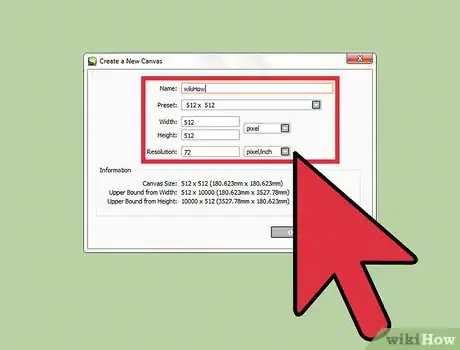
1Create a new image. Once you have the program open, go to the top left of the window and hover over the "File" button, then click "New".
-
2Choose a name and size for your canvas. Type a name you want for your image in the box labelled "Name," then pick the width and height you want in the boxes labelled "Width" and "Height".Advertisement
-
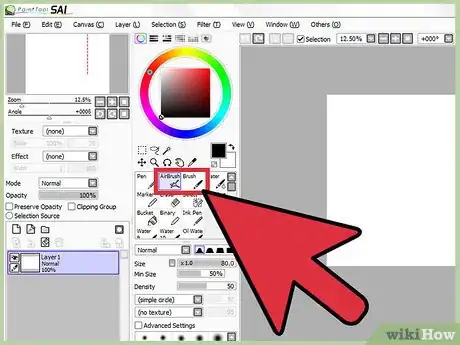
3Choose from the default brushes. Play around with the brushes on the side to find one that fits what you need. The basic brushes are:
- "Pen", which is solid and doesn't blend,
- "Brush", which is similar to pen but blends with whatever colour is underneath it,
- "Eraser" removes any colour,
- "AirBrush" is like "Brush" but has blurry edges,
- "Water" has hardly any colour, but can blend two colours together without adding any.
-
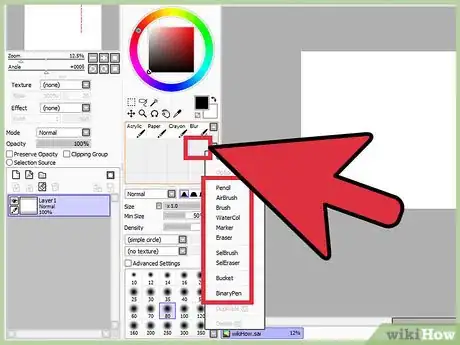
4Add a brush. If you scroll underneath the default brushes, you will see empty grey boxes. These are spaces to add your own custom brushes.
- Right click on one of these boxes and choose an option to base your brush off.
- Either right click on your new brush and select "Options," or double click it. This will open the "Custom Tool" menu.
- In the menu, you can change the name, description, stroke and pressure stabilizers, and a shortcut key which you can press to automatically select your brush.
-
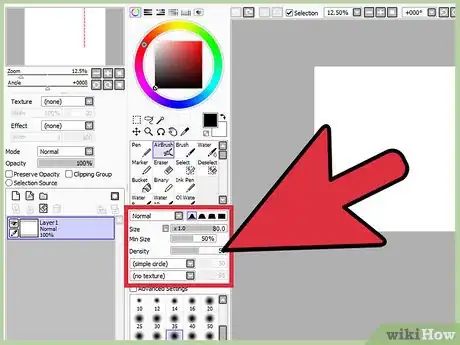
5Change brush settings as needed. Sometimes default brush settings aren't what you need, so you will eventually need to change them. All the settings are under the area where you select brushes.
- The four black icons directly below the brush selection control how blurry the edges of your brushes are.
- "Min Size" determines how small your brush can get when pressing lightly on a pen tablet. "Density" is how opaque or transparent the brush is.
- The "(simple circle)" drop-down menu lets you choose the shape of the brush and the "(no texture)" one gives the brush an overlay, the sliders nest to the drop-down menus control how strongly these settings appear.
- Blending controls how much the brush colour blends with the colours around it.
- Dilution is how much colour your brush hold when it goes over other colours.
- Persistence determines how long the brush holds the colour over unpainted areas when it blends with something.
-
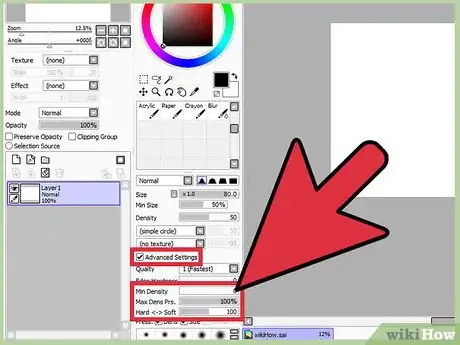
6Change advanced brush settings if desired.
- "Min Density" is the same as "Min Size" mentioned in the previous step, but this affects density instead of size.
- "Max Density Pressure" is how much pressure it takes to get to 100% density.
- "Hard Soft" is for how much pressure you use when using the brush, hard meaning you push down a lot and soft for more gentle people.
-
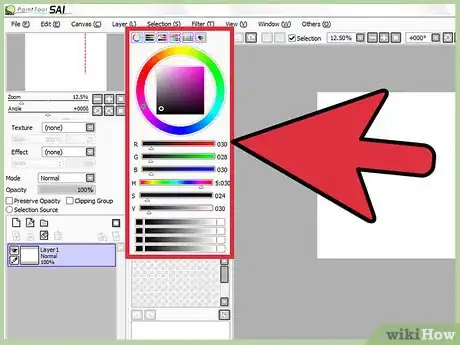
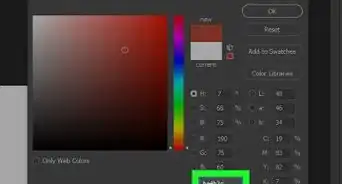
7Choose a colour. Above the brushes is a rainbow-coloured circle with a square inside it. Click anywhere along the circle to select a hue. Click in the square to change the saturation and brightness. There are additional options above the colour wheel:
- An "RGB Slider" that lets you select a colour by mixing different amounts of red, green, and blue,
- A "HSV Slider" is an alternative way to change the hue, saturation, and brightness,
- The "Colour Mixer" gives you a slider to put two colours in to select and colour in between them,
- "Swatches" lets you save colours for later by right-clicking and selecting "Set",
- A "Scratchpad" allows you to test your colours and brush settings without modifying your artwork.
-
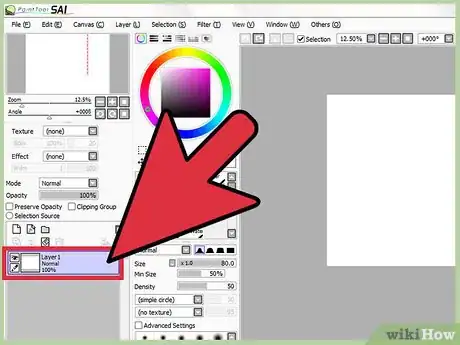
8Use layers. On the side of your window, there should be a large grey box with a small purple box inside it that says "Layer 1." Layers are like painting on sheets of glass and placing the sheets on top of each other to make a picture. They allow you to change parts of an artwork without touching the rest and change how things overlap in your artwork.
- On each layer there is an image of an eye, clicking the icon will toggle the visibility of the layer.
- Above the list of layers there is an icon of a blank page with a folded corner, clicking that will give you a new layer.
- Next to the new layer button is the "New Linework Layer" button. This gives you a special kind of layer that has a different set of tools.
- Next to that is the "New Layer Set" button, pressing it gives you folders you can put groups of layers in and control them as if they're one.
- Underneath the new layers there are two ways to merge a layer into the one beneath it.
- Under the new set button there's a button to clear the layer you have selected and next to that you can press the trash can to delete the layer entirely.
- Double-clicking the layer will let you change it's name.
-
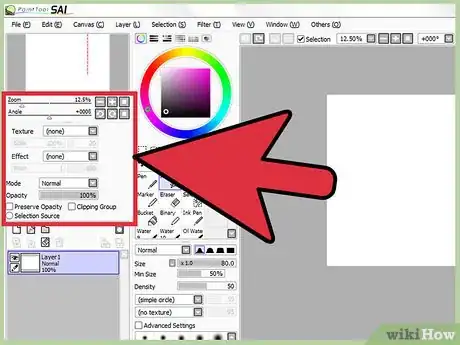
9Use layer effects. Above the layer options you will find drop-down menus called texture, effect, and mode as well as a slider for opacity and some check-boxes.
- Texture gives your layer a texture. Scale changes how big the texture appears and the slider to the right changes how strongly the texture appears.
- Effect is very similar to texture.
- Mode effects how the layer interacts with other layers.
- Opacity controls the transparency
- Preserve opacity prevents you from painting any where on the layer that isn't already painted
- Clipping group is similar to preserve opacity but it is based off hat is on the layers below it instead of itself and and everything out of the visible area still exists it's just hidden until you uncheck the box or add the the layer below.
-
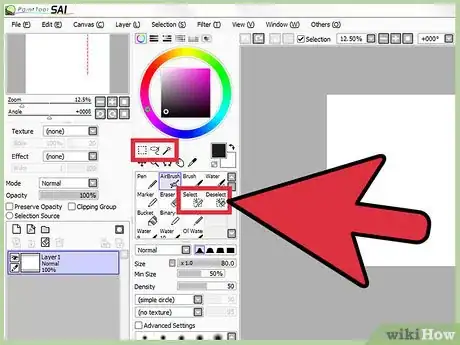
10Select. There are two brushes called "Select" and "Deselect" as well as a dotted square, a dotted lasso, and a "Magic Wand", these are all used for selecting areas to move, rotate, scale, or paint without going outside the boundaries. If you click on the dotted square when you have something selected, there will be buttons to transform, scale, deform, rotate, and flip the selected area.
Advertisement
Community Q&A
-
QuestionCan I draw a perfect circle with PaintTool SAI?
 Community AnswerThere isn't an actual shape-drawing tool in SAI. However, what you can do is make a dot with a 500 point sized brush, then erase the center of it with a 450-point sized brush. In other words, draw with a larger brush, then erase with a smaller brush.
 -
QuestionHow do you save it in a way that you can continue editing?
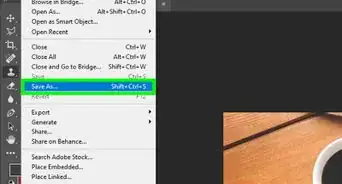
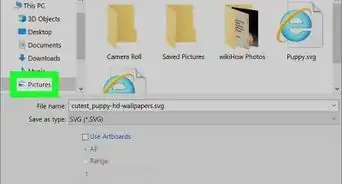
 Community AnswerGo to file, then press Save As, then save it. You'll see it in your pictures folder. Click on it, and then it'll take you back.
 -
QuestionHow much does it cost to buy the full version of PaintTool SAI?
 Community AnswerIt should cost you about $50 USD.
Advertisement
About This Article
Advertisement

