This article was co-authored by wikiHow staff writer, Nicole Levine, MFA. Nicole Levine is a Technology Writer and Editor for wikiHow. She has more than 20 years of experience creating technical documentation and leading support teams at major web hosting and software companies. Nicole also holds an MFA in Creative Writing from Portland State University and teaches composition, fiction-writing, and zine-making at various institutions.
There are 8 references cited in this article, which can be found at the bottom of the page.
The wikiHow Tech Team also followed the article's instructions and verified that they work.
This article has been viewed 8,467 times.
Learn more...
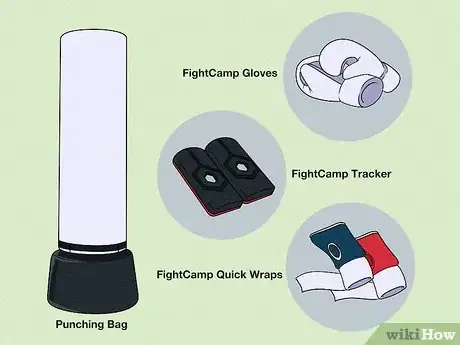
This wikiHow teaches you how to get started with FightCamp, the interactive boxing workout app for iPhone and iPad (Android version coming soon). A FightCamp subscription, which costs $39/month, gives you access to hundreds of on-demand workouts taught by professional boxing trainers. You can monitor your progress using FightCamp's punch trackers, which fit securely into your FightCamp hand wraps. All you'll need to get started are your FightCamp punch trackers, boxing gloves, a punching bag, a subscription to Fight Camp, and an iPhone or iPad to run the FightCamp app.
Steps
Getting Started
-
1Purchase your FightCamp package. Before you can start working out with FightCamp, you'll need FightCamp punch trackers, which are a part of the app's interactive experience.[1] Trackers provide live statistics during your workouts and monitor your progress in the program. When you purchase your trackers, you'll also be setting up your Fight Camp subscription, which costs $39/month and is required to use the service. You have three options for purchasing your package:
- FightCamp Connect ($439): This is the most affordable package and comes with a set of trackers and a set of quick wraps for your hands. If you choose this package, you'll need to buy your punching bag, gloves, and other materials separately. And while a punching bag is technically not required to use FightCamp, it does improve the accuracy of your trackers and give you a better workout.
- FightCamp Personal ($1219): If you're new to boxing and plan to do it yourself (or want to share with up to 5 people), this package comes with everything you'll need to get started: trackers, quick wraps for your hands, a free-standing punching bag and support ring, a heavy workout mat, and boxing gloves.
- FightCamp Tribe ($1349): This package is similar to the Personal package, but comes with two pairs of adult boxing gloves, a second pair of quick wraps, and one pair of kids boxing gloves.
- The $39/month membership fee is required to use FightCamp and is not a part of any of the packages. The card you use to purchase your package will be used automatically to activate your membership once you start using the FightCamp app.[2]
-
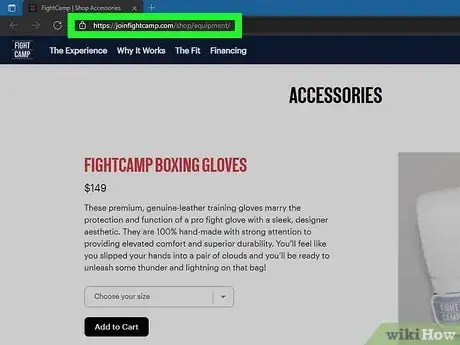
2Get boxing gloves and wraps. The easiest way to get boxing gloves and wraps is to purchase them FightCamp as part of FightCamp Personal or Tribe, or from the equipment shop at https://joinfightcamp.com/shop/equipment. All FightCamp packages come with quick wraps that are designed to hold your punching trackers in place, but you can use your own gloves if you prefer.
- Rather than choosing gloves specifically for men or women, you should shop based on the size of your hand, and the type of workout you're doing. Lighter gloves are great for speed training, while heavier gloves are more appropriate for strength training. The heavier the gloves, the better the protection between your hand and the surface you're punching.
- Because FightCamp's quick wraps have special pockets for the required punching trackers, you'll want to use them over other types of wraps.
Advertisement -
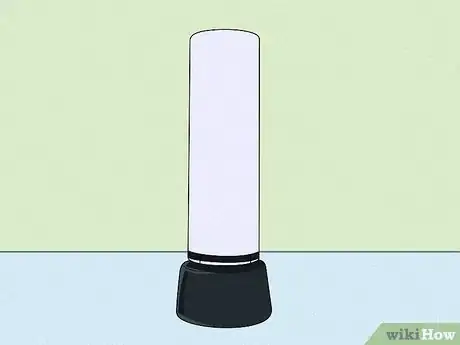
3Set up your punching bag. In addition to giving you the best workout, using a punching bag with FightCamp ensures that your trackers can accurately measure your performance. You can use any punching bag, but FightCamp recommends using their high-rated, easy to set up free-standing bag, which comes with the Personal and Tribe memberships.
- If you decide to purchase a bag on your own, you can opt for any bag type, including a traditional hanging bag or speed bag, both of which you can mount to your ceiling. Speed bags won't work for kickboxing, though, and some FightCamp workouts include some kicking.
- Most adults will find best results with a hanging or free-standing bag that's at least 80 pounds.[3]
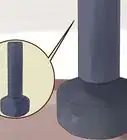
- If you're using FightCamp's official bag, you'll need to fill its base with either water or sand. FightCamp recommends filling the base with 350 pounds of sand to prevent the bag from moving around as you punch and kick your way to optimal fitness. If you don't have 350 pounds of sand laying around, you can fill it with water instead. Filling the bag with water makes it weigh in at about 250 pounds—still pretty heavy, but more likely to move around while you work out.[4]
-
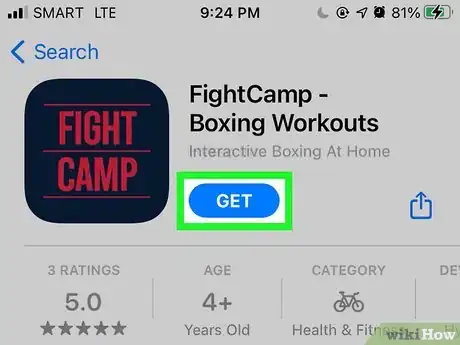
4Download the FightCamp app. As of July 2021, FightCamp is only compatible with iOS, which means you'll need an iPhone or iPad to use the app. You can download the app from the App Store.
-
5Stream the FightCamp app to a TV (optional). If you feel comfortable propping your iPhone or iPad up and looking at it while you work out, there's no need to get a TV involved. But if you need a bigger screen, you have two options for projecting FightCamp onto a TV:
- If you have a TV that supports AirPlay (Apple TV, for example), you can mirror your phone or tablet's screen to the TV.[5] Just make sure your phone/tablet and TV are connected to the same Wi-Fi network. Turn on your TV, and then open your iPhone or iPad's control center by swiping down from the top-right corner of the Home screen (if your iPhone doesn’t have a Face ID) or swiping up from the bottom of the Home screen (if it does have Face ID). Then, tap Screen Mirroring and select your TV when it appears.
- If you don't have an AirPlay-compatible TV, you can use an Apple Lightning-to-HDMI adapter to plug your iPhone or iPad into your TV's HDMI port. Just connect the Lightning end of the adapter (the smaller end) to your phone or tablet's charging port, and connect the HDMI end to one of your TV's available HDMI ports. Switch to the appropriate port using your TV's remote control to see your iPhone or iPad's screen.
Setting Up Your Trackers
-
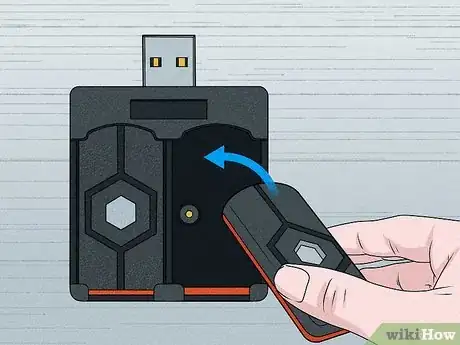
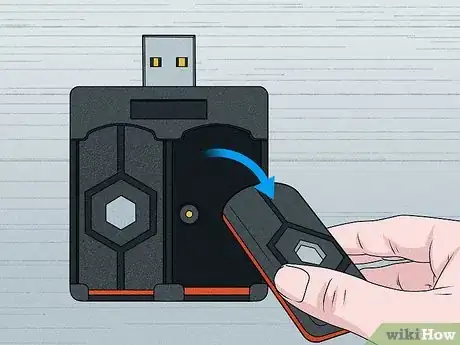
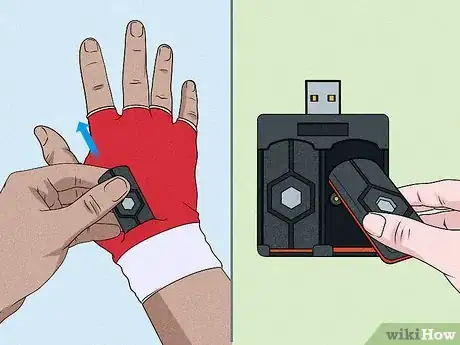
1Place the trackers in the provided charger. The charger is a square device with a protruding USB connector. When inserting, the rounded edge should face the USB connector. The trackers should easily click into place.
-
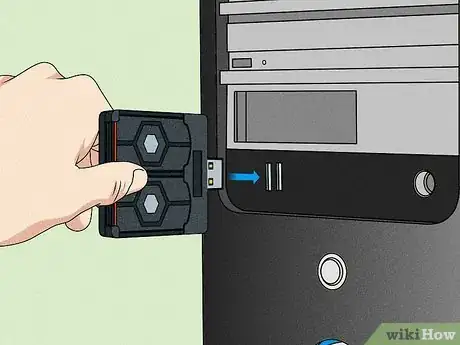
2Connect the tracker charger to a power source to charge. You can plug the USB end of the charger into any USB power source, including your computer. It takes 60 minutes to charge your punch trackers.
- The light on the trackers will remain solid yellow while charging until you've reached about a 90% charge. At that point, the light will turn solid green. When the trackers are fully charged, the lights will blink green rather than stay solid.[6]
- Charged trackers should last for about 10 hours of use before you need to charge them again.
- FightCamp instructors recommend leaving your trackers charging in the charger whenever you aren't using them.[7]
-
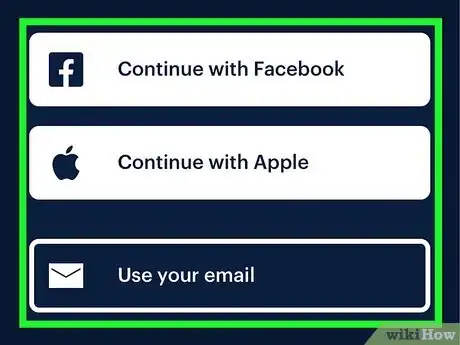
3Log in to the FightCamp app. When you open the app for the first time, you'll be prompted to sign in. If you already signed up on the FightCamp website when ordering your package, use the same login information you created on the site. If not, you can create an account using your Facebook login (select Facebook), or by entering an email address and password (select Use your email).
-
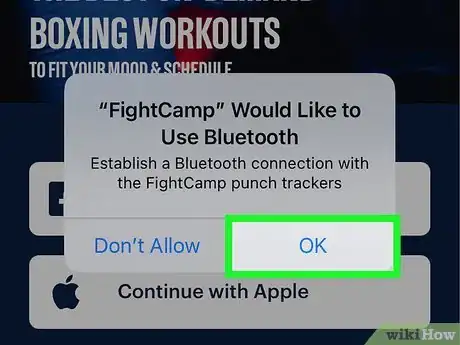
4Allow the app to access Bluetooth. The first time you launch FightCamp, you'll be asked to give the app permission to use Bluetooth on your iPhone or iPad. This is required so that you can pair your phone or tablet with your trackers. Follow the on-screen instructions to give permission.
-
5Remove your trackers from the charger. They should be easy to pop right out of the charger.
-
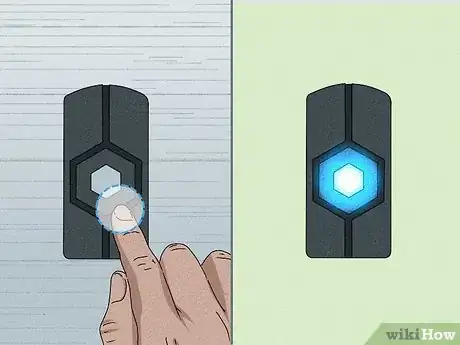
6Double-tap each tracker. Tap each tracker twice, quickly and firmly, to activate them. The lights on each tracker will blink quickly as they try to connect to the FightCamp app. When the trackers are connected to the app, they'll blink more slowly.
- Once you pair your trackers to the FightCamp app for the first time, they should automatically pair next time when you open the app and double-tap the trackers.
Putting On Your Wraps and Trackers
-
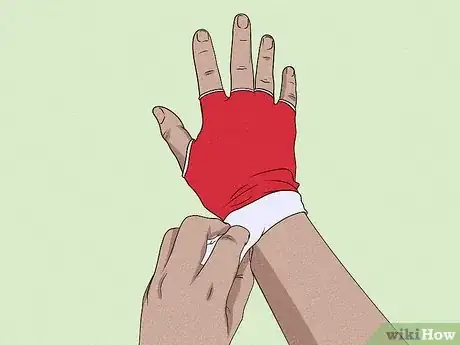
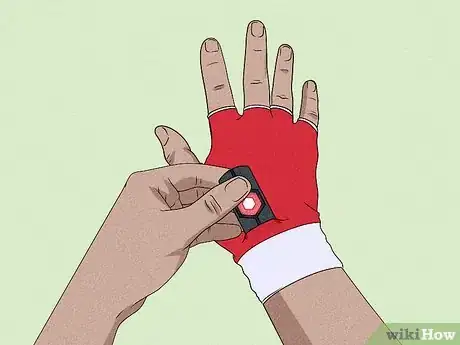
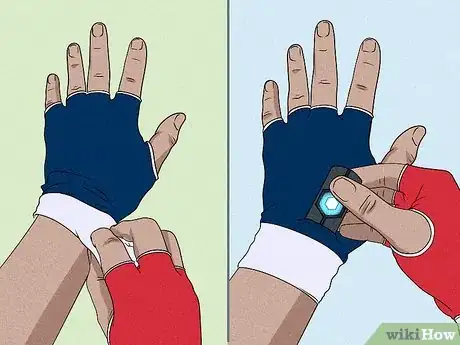
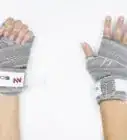
1Place your right hand inside the red quick wrap. Putting on a quick wrap is like putting on a glove—you'll start by inserting your hand into the glove-like part of the wrap. Your thumb should stick out of the large round hole at the center, and the padding should go all the way up to your knuckle.[8] The flap for your punching tracker will be on the front of your wrist.
- The two holes at the top are for your remaining fingers—two fingers in each of the two holes.
-
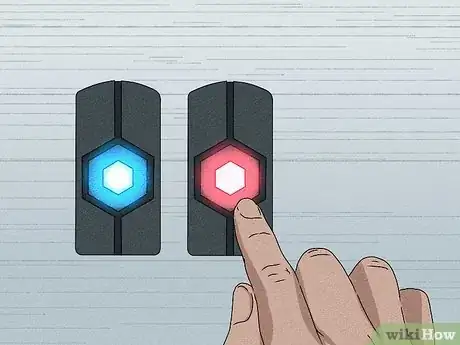
2Double-tap your punching trackers. A firm double-tap will wake the trackers. Once awake, you'll see a red light on one tracker, and a blue light on the other.
-
3Slide the tracker with the red light into the quick wrap holder. This is the slot on the top of your right wrist. The flat side of your tracker should be facing down, and the light should be facing up.[9]
- The tracker must be on the wrist, not your hand, to accurately capture your punches.
-
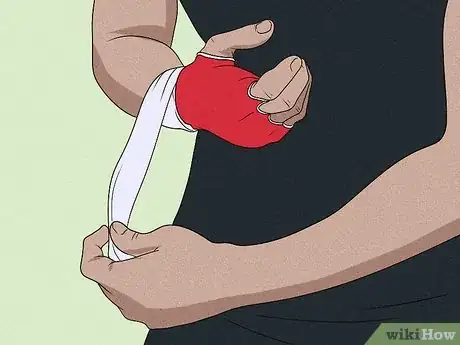
4Wrap the rest of the wrap around your wrist. Pull the long ribbon-like portion of the wrap across your wrist horizontally, and continue wrapping it around your wrist tightly (but not too tightly) so that your wrist is fully supported and the tracker is held in place. The text on the wrap should be facing out so the Velcro can properly adhere.
- You should not feel like you are cutting off circulation to your hand. Just wrap it tight enough that your wrist doesn't flop around.
-
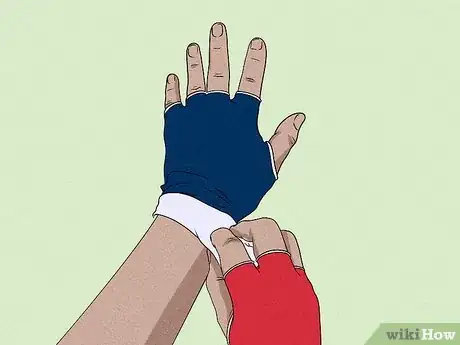
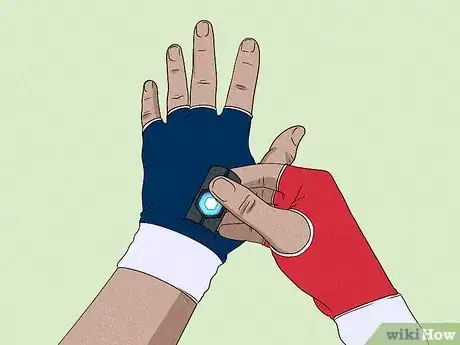
5Place your left hand into the blue quick wrap. Just as you did with the right (red) quick wrap, insert your hand into the glove-like portion, with your thumb protruding from the center hole, and your other four fingers in the two top holes (two fingers in each hole). Make sure the rectangular punching tracker is at the top of your wrist, and that the padding of the wrap comes up to your knuckle.
-
6Insert the blue tracker into the blue quick wrap and finish wrapping your wrist. Make sure the flat side is facing down. Then, rotate the ribbon part of the wrap around your wrist (with the text facing up) until your wrist feels fully supported and the tracker is secure. If the wrap feels too tight, loosen it a little bit—don't cut off your circulation!
Starting a Workout
-
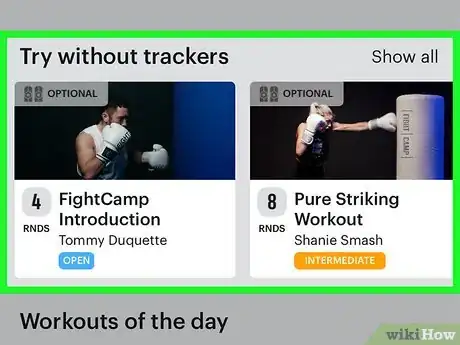
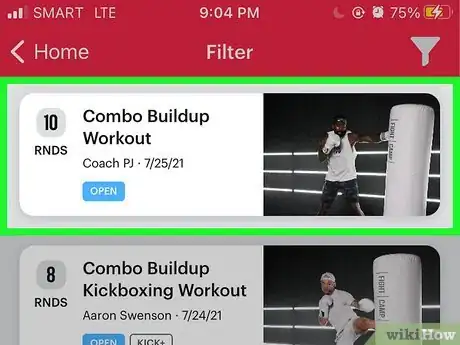
1Browse for a workout. When you open the FightCamp app, you'll arrive at the Home screen. This is where you'll find a browsable list of workouts. All workouts are taught by professional trainers and are meant to emulate an in-person boxing workout class. Although the lessons and workouts are pre-recorded, you'll see your progress on the screen live as you work out.
- To see all possible workouts, tap See all at the top-right corner. You can then filter the results by tapping the funnel icon at the top-right and selecting parameters, such as the type of workout, the number of rounds in the workout, the combo level (experience level), and even the trainer. Tap Apply at the bottom to view the list of workouts based on your criteria.
- In addition to a list of workouts, you'll also see the Paths section. Paths are groups of workouts designed to get you to a certain place in your boxing journey. The Prospect Path is for beginners, the Contender Path is for boxers with more experience, and the Kickboxing Path is for those just beginning to kickbox, as well as seasoned kickboxers.
- The Boxing Skills section contains class-like workouts that are geared toward teaching you boxing skills.
-
2Tap a workout to learn more about it. When you select a workout, you'll see its duration, number of rounds, combo level (open, intermediate, or advanced), punch goal (if applicable), and leaderboard ranking. You can also tap Details to see what you'll be doing in each round, and for how long you'll be doing each of those things.
- If the combo level is labeled "Open," it includes basic, entry-level punch combinations and is good for beginners.
- Workouts with the "Intermediate" combo level are designed for boxers with more than three months of boxing experience at a boxing gym. If you struggle with Intermediate workouts, complete the Prospect Path first!
- Advanced level workouts are geared for boxers with 10+ months of boxing experience.
-
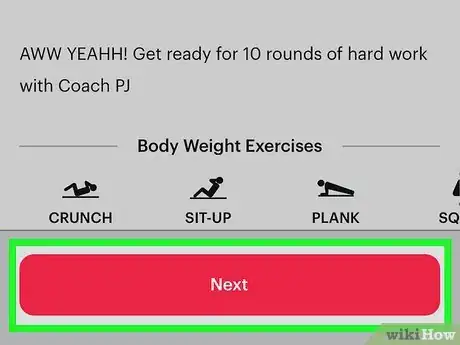
3Tap Next on a workout you'd like to do. It's at the bottom of the screen.
- If Bluetooth is disabled, you'll see a message in the "Trackers" section telling you to enable it now. Once enabled, your trackers should automatically pair. If they don't, double-tap each tracker to pair them now.
-
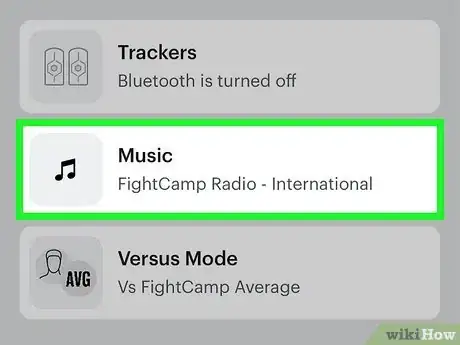
4Select your music. You can go with the default music if you'd like, or tap Music to choose a genre you like better.
-
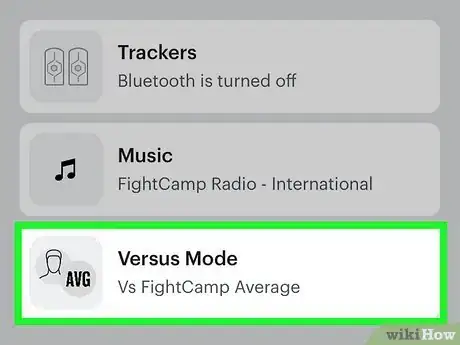
5Select a workout mode. Tap the bottom Mode tile to choose how you want to compete.
- Select VS FightCamp Average to compete against the average FightCamp user's performance. You're not actually competing against a real person with this option—instead, it's a virtual representation of the average person on FightCamp.
- Select VS Opponent to compete against another FightCamp member privately. After selecting this option, you'll be prompted to choose the person you want to compete with from the leaderboard. You'll only be able to compete with people who've already done this workout at least once.
- Tap VS You to compete against your own high score for this workout. This option is only available if you've done the workout at least once before.
- Tap Solo if you'd rather not compete at all. If you choose this option, your results won't appear on the leaderboard.
-
6Put on your wraps and trackers. If you haven't already, you'll want to make sure your wraps and trackers are properly placed before you continue. Once you start the workout, you'll only have 60 seconds to put on your gloves and get started—this will help save you time.
-
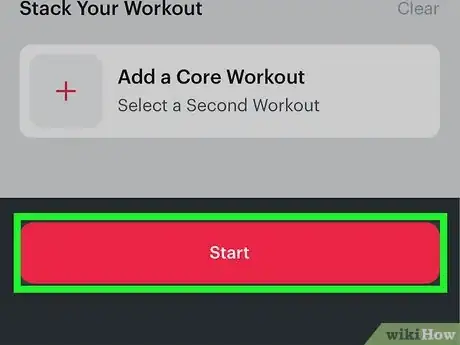
7Tap Start to begin. It's at the bottom of the screen. The workout begins with an introduction from the instructor, which gives you time to put on your gloves.
-
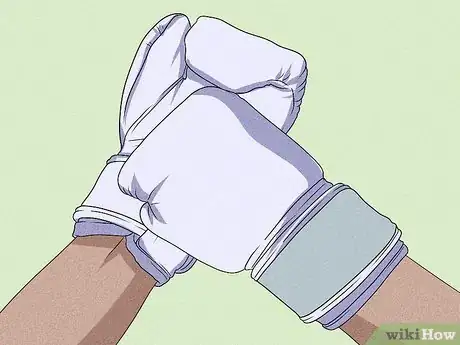
8Put on your gloves and begin. If the workout doesn't require gloves, you can obviously skip that part. the 2-minute warmup will begin. Just place your hands into the gloves, and then wrap the velcro tightly enough around your wrist to support it.
- It might be a little difficult to get your second glove on after putting on the first. Don't be afraid to ask someone for help! You'll get the hang of it soon enough.
Completing a Workout
-
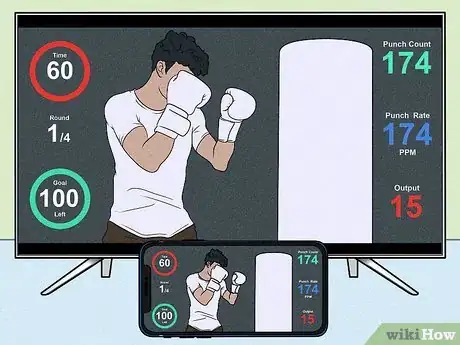
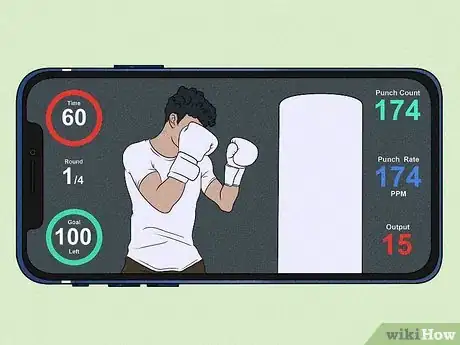
1Follow along with the trainer. As you work out, you'll see your details on the screen. You may have to tap the screen once to bring up the details if you don't see the following:
- The left side of the screen is where you'll find the time remaining in your workout, the round you're on, and what remains of your punch goal (if applicable to your workout).
- On the right you'll find your punch count, the speed of your punches (punches per minute), and your total output. All of this information is collected from your trackers and displayed in real time as you work out. If you're not doing a workout or interval that requires punching, the punch count will freeze.
-
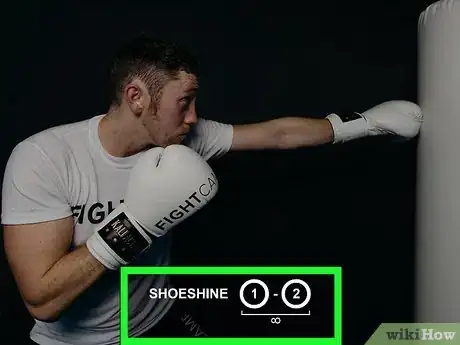
2Check the exercise bar for specific instructions. The exercise bar at the bottom tells you what you should be doing at each interval. If you're doing a combination punch exercise, you'll see numbers inside of circles and squares. If a number is inside of a circle, it means that type of punch should go to the head. If it's inside of a square, it should go to the body. You'll learn about boxing numbers while completing the Prospect Path, but here's a quick list of what each number means:
- 1: Jab
- 2: Cross
- 3: Lead-Hook
- 4: Rear-Hook
- 5: Lead-Uppercut
- 6: Rear-Uppercut
-
3Disconnect and charge your trackers after the workout. When the workout is finished, you'll see your stats, and an icon of your trackers at the top of the screen. To disconnect your trackers, tap the trackers icon, and then choose a mode:
- For best results, put the trackers into Sleep Mode by tapping the switch. When the trackers are in sleep mode, they use very little energy, and can last up to 2-3 weeks without being charged again. If you put the trackers to sleep, all you'll need to do to wake them again is double-tap them once you open the FightCamp app.
- Select Turn Off Trackers to power off your trackers completely. This puts the trackers into a deep sleep mode, using no battery power while they are off. However, when you want to use them again, you'll need to charge them for at least 5 seconds and then pair them to the app again
-
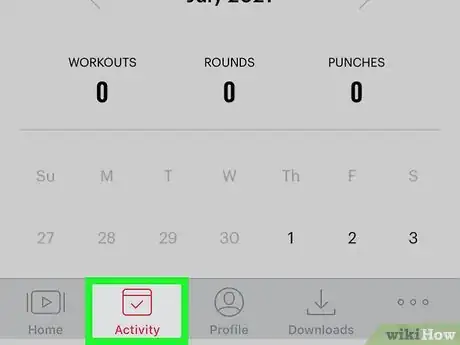
4Monitor your stats on the Activity tab. This tab is at the bottom of the FightCamp app. This is where you can monitor your progress. The top displays your total stats for the week, but you can tap a specific day to see information for that day only.
- Tap the Calendar tab to view stats for any particular day in the past.
- Tap the Progression tab to see your punch and output totals by day, a month-to-month comparison, and your lifetime stats.
References
- ↑ https://support.joinfightcamp.com/hc/en-us/articles/360018164753-Are-the-punch-trackers-necessary-to-do-the-FightCamp-workouts-
- ↑ https://support.joinfightcamp.com/hc/en-us/articles/360018520794-How-much-does-FightCamp-cost-overall-
- ↑ https://blog.joinfightcamp.com/blogs/home-boxing-equipment/what-punching-bag-should-i-buy-for-at-home-use
- ↑ https://joinfightcamp.com/user-manual/
- ↑ https://support.joinfightcamp.com/hc/en-us/articles/360002190154-How-to-stream-FightCamp-to-a-TV
- ↑ https://joinfightcamp.com/user-manual/
- ↑ https://blog.joinfightcamp.com/blogs/boxing-training/how-to-start-your-fightcamp-workout-tips-tricks
- ↑ https://www.youtube.com/watch?v=MWS04-mHe4U
- ↑ https://www.youtube.com/watch?v=HLIKnk1H3Ns
