This article was co-authored by Ez's Painting LLC. Ez's Painting LLC is a team of Painting Professionals based in Olympia, Washington. With more than twelve years of experience, the EZ's Painting team specializes in both commercial and residential painting projects. Ez's Painting LLC holds a contractor license in the state of Washington.
There are 11 references cited in this article, which can be found at the bottom of the page.
This article has been viewed 47,365 times.
You can turn almost anything into a fun, customizable surface using chalkboard paint. This article will show you how to paint various surfaces using chalkboard paint, including wood, walls, and glass. Project ideas are also included in this article.
Steps
Painting Wooden Surfaces
-
1Use chalkboard paint on wood. You can turn almost any wooden surface into a chalkboard, or you can use chalkboard paint to create labels on boxes and storage containers. This section will not only teach you how to paint a wooden surface, but also how to prepare it for painting.
-
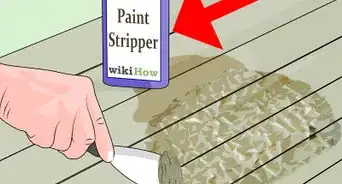
2Sand your surface, if necessary.[1] The texture of the wood will still show after you have painted your piece, so if you want a smoother finish, sand it down with 120- to 200-grit sandpaper. Use a sanding block, and sand along the wood grain.[2] Once you are done sanding, wipe the surface clean with a tack cloth to get rid of any of any dust caused by the sanding.Advertisement
-
3Cover any areas you don't want painted with painters tape. This will help you get a nice, sharp edge. You can create different shapes by using adhesive stencils, or make your own out of thin sheets of plastic.
-
4Apply primer to your surface and let it dry.[3] You can use a regular, flat paintbrush, a foam brush, or a paint roller. You can also use a spray-on primer as well. Once you are done painting, wait for the primer to dry. This can take anywhere from 2-4 hours. Refer to the instructions on the can for specific drying times, as each brand is different.
- Make sure that you are in a well-ventilated area.
- If you are using a spray-on primer, hold the can 6–8 inches (15–20 cm) away from the surface and spray with light, even strokes.
-
5Sand the primed surface and add a second coat of primer, if necessary. Depending on how textured the wood grain is, you may need to sand the primed surface. Once the primer has dried, use a fine-grit (120 to 220 grit)[4] sandpaper to gently sand the surface down. Make sure that you go with the grain. Wipe away any dust with a tack cloth, and reapply the primer.
-
6Apply the first coat of chalkboard paint and let it dry.[5] After the primer has dried, you can apply the first coat of paint using a regular, flat paintbrush, a foam brush, or a paint roller. You can also use chalkboard spray paint as well. When applying the paint, make sure that you go along the wood grain. Most paint will dry within two to four hours. Read the manufacturer's recommendations on the container for more specific drying times.
- If you are using a spray-on chalkboard paint, make sure that you are in a well-ventilated area.
- Hold the can 6–8 inches (15–20 cm) away from the surface and spray in light, even strokes.
-
7Apply a second coat of paint and let it dry. Once the first coat of chalkboard paint has dried, apply a second coat, but this time go against the grain. If you cannot see the grain, then paint in the opposite direction—so if you painted up-and-down the first time, paint left-to-right the second time.
-
8Remove the painter's tape. Once the paint has dried, use a craft knife or scissors, to lightly score the edges where the tape meets the paint. This lessens the chances of the paint ripping when you remove the tape. Once you have scored the edges, pull the tape off, slowly and carefully.
- If the are any uneven areas, either fill them in with paint using a fine-tipped brush, or scrape them off using your fingernail or a craft knife.
-
9Prepare the surface for use. Let the paint cure for three days. Once the paint has cured, rub white chalk over the entire painted surface, then wipe it off using a damp cloth. You can now write or draw on your surface.[6]
- Refer to the manufacturer's directions on the can for more specific curing times.
- Some craft-grade paints are ready in as little as 24 hours, while others require more than 3 days to finish curing.


Painting Walls
-
1Use chalkboard paint on walls. You can turn most walls into a fun, interactive surface with chalkboard paint. This works great in kitchens, offices, and playrooms. It allows you to write recipes and shopping lists. It can also be used as an outlet for your creativity. This section will teach you how to apply chalkboard paint to a wall.
-
2Remove any fixtures, appliances, and hanging ornaments. If the wall you are planning has anything on it, you will need to move it out of the way. If you are unable to move large items, such as appliances, then consider covering them with a protective plastic cloth.
-
3Protect any light switches, outlets, baseboards, and window sills. You can either remove the light switches, outlet covers, and baseboards, or you can cover them with painter's tape. Cover any window sills with painter's tape as well. Be sure to seal the tape using a pallet knife or a flat painter's knife.
-
4Fill any dents or holes with wall filler. Unless you will be screwing something back into the hole, you will need to fill it in using wall filler. Any holes or dents in the wall will remain after you paint the wall, so you will need to fill them in.
-
5Prime the wall surface and let it dry. In order to help create a smooth surface and help the chalkboard paint adhere better, you will need to prime the surface of your wall. There are two ways you can do it:
- You can sand the wall using a sanding pole. Once you are done, make sure to seep and mop up any dust.
- You can also paint it with primer instead.[7] Simply apply the primer with a paint roller and wait for it to dry.
-
6Consider applying wall liner. If your wall is still bumpy and textured, even after priming it, you may need to apply wall liner. Heavily-textured walls, such as brick and drywall, will retain their texture even after painting. You will need to cut the wall liner down to the width of your wall (not the height). How you apply the liner will depend on what type of liner you buy:[8]
- If you bought a wall liner with an adhesive backing, you will need to soak it in water. Once the back of the liner is tacky, start applying it.
- If you bought plain wall liner without adhesive, you will need to apply the adhesive to the back. Some adhesives come premixed, while others need to be mixed with water.
- Once the adhesive is ready, spread it onto the back of the wall liner, then press it to the wall, just where the ceiling begins and the wall ends.
- The paper should extend the entire width of the wall. Be sure to smooth out any air bubbles or ripples. Keep applying liner sheets until the entire wall is coated.
-
7Paint around the windows and wall edges. Using a paint brush, start applying the paint around the windows (if they are in the wall you are painting) and around the wall edges. This means that, if you are painting an entire wall, you will be painting the crease between the walls and the crease where the wall and ceiling meet. Wait for the paint to dry, about two to four hours, and apply a second coat.
-
8Stir the paint and pour some into a paint pan. Do not pour all of the paint out at once. Not only will you be painting in small sections, but the paint may dry before you have finished using it. Whenever you refill your paint pan, be sure to stir the paint so that the particles do not settle.
-
9Use a roller to paint the walls and wait for it to dry. Apply the paint using an up-down motion. Work in small sections at a time. Wait for the paint to fully dry. This will take two to four hours, but refer to the manufacturer's instructions on the can for more specific drying times.
- Be sure to clean your paint roller before setting aside while you wait for the paint to dry. If you don't, the paint may dry on the roller, ruining it.
-
10Apply a second coat of paint and it dry. Once the first layer has completely dried, you may apply a second coat, using the same up-and-down motion as before. Let the paint dry for three days; this will allow the paint to cure and make it ready to be used as a chalkboard.
-
11Remove the tape and any other coverings. Once the paint has dried to the touch, you can start returning any appliances to their former positions. Wait until the paint has cured, however, before removing the painter's tape.
-
12Prime the surface by covering it with chalk. After the paint has dried and cured, you will need to prepare the surface for use by covering it with chalk. Once you have the entire surface covered, wipe it clean again with a damp cloth. Your wall is now ready to be used.


Painting Glass Surfaces
-
1Use chalkboard paint to personalize candle holders, mason jars, and wine glasses. Chalkboard paint will adhere to glass surfaces, but you will need to handle the piece with care after you have painted it so that the paint will not chip. This section will instruct you on how to apply chalkboard paint to glass.
- In order to paint porcelain mugs and plates, you will need special chalkboard paint designed specifically for porcelain.
- Most such paints will require longer curing times, or will need to be baked in the oven once the paint has dried.
- Paint your porcelain mug or paint, and then refer to the manufacturer's instructions for more specific curing times and baking temperatures.
- Some paints need several weeks to cure, while others must be cured for a few days and then baked in your oven.
-
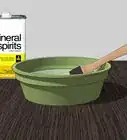
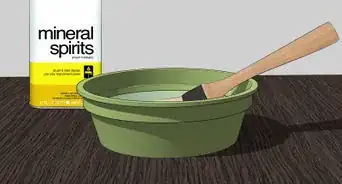
2Clean the glass surface with rubbing alcohol. Soak a cotton ball with rubbing alcohol and wipe the surface of the glass clean. This removes any oil and residue that might prevent the paint and primer from sticking properly.
- If you do not have any rubbing alcohol, you can use glass cleaner instead.
-
3Block off any areas you don't want painted with painter's tape. In order to get sharp, clean lines, you will need to cover the areas that you do not want painted with painter's tape.
- You can also use adhesive stencils, or make your own by cutting shapes out of thin sheets of plastic.
-
4Prime the surface of the glass. In order to get the chalkboard paint to stick to the glass, you will need to prime it. There are two ways in which you can do it:
- Prime the surface you want painted with spray-on or paint-on primer. Be sure to use one intended for glass surfaces and to let it dry completely.
- Buff the surface of the glass with steel wool. Be sure to wipe the surface down again with rubbing alcohol to get rid of any dust caused by the buffing.
-
5Paint on the first layer of chalkboard paint and wait for it to dry. You can use a regular paintbrush or a foam brush. You can also use chalkboard spray paint instead, which will give you the smoothest finish, but it may not be as durable and be prone to chipping and scratching. Wait until the paint has dried before moving on to the next coat.
- Refer to the paint can for specific drying times; just because the paint feels dry when you touch it doesn't mean that it has completely dry.
- Drying can take anywhere from 2-4 hours, although some craft-grade brands might be ready in less than an hour.
- If you are using spray-on paint, hold the can 6–8 inches (15–20 cm) away from the surface you are painting, and apply a light, even coat.
-
6Apply a second coat and let it dry. Once the first coat has dried, apply a second coat. You will need to let the paint cure for three days before you can use it as a chalkboard.
-
7Remove the painter's tape. Lightly score the edges of the painter's tape with a craft knife or scissors, and pull the tape off. By scoring the edges, you lessen the chances of the tape tearing the paint when you remove it.
- If there are any gaps along the edges, fill them in with paint. If there is any excess paint, scrape it off with a craft knife.
-
8Prepare the surface for use with chalk. Before you can use your chalkboard surface, you will need to let it cure for three days. Once the paint has cured, you will need to "condition" the surface by rubbing white chalk over it, and then wiping the chalk off. Your surface is now ready to use.[9]
- Refer to the manufacturer's instructions for more specific drying times. Some surfaces will be ready in less than three days, while others will need to cure for longer.
-
9Wash your glass surface with care. Do not put your painted glass in the dishwasher or let it soak in water. Doing so may cause the paint to chip or flake off. Instead, wash the glass using dish soap and a sponge or a dishcloth. Do not scrub the painted areas, or they may scratch off.


Using Chalkboard Paint for DIY Projects
-
1Use chalkboard paint to make labels. You can paint labels on bowls, ceramic pots, and even dressers using chalkboard paint. You can then write whatever you want using chalk. When the contents of the container change, you can simply wipe the chalk off with a damp cloth and write something new.
-
2Use chalkboard paint to make a fun, interactive surface. You can paint walls, table tops, and even refrigerators with chalkboard paint. Not only do these make great outlets for creativity, but you can also use the chalkboard surface in your kitchen to write down recipes and shopping lists.
- Make sure that your wall is smooth before you prime and paint it. Bumpy, porous surfaces, such as brick, will make it difficult to write on it with chalk later.
- You will also need to use painter's tape to mask off anything you don't want painted, such as window trims and baseboards.
-
3Use adhesive stencils to create interesting shapes. Your painted patch of chalkboard does not have to be square or rectangular. You can use adhesive stencils, or make your own, to make your painted area look like a heart, circle, or oval.
-
4Stick a shape onto your surface, paint everything, and then peel the shape off when the paint has dried. You will be left with a patch of unpainted wood or glass.
-
5Create a permanent grid or title on your surface with regular paint. Once your chalkboard paint has dried and cured, you paint a grid or title onto it with regular paint. This works great for calendars, charts, menus, and anything that you want to have a permanent grid or title on.[10]
- You can paint your grid or title using regular paint and a small brush, or you can use paint pens.
- Do not use a water-based paint or paint pens. Your design will come off when you clean the board with water.
-
6Mix your own chalkboard paint to get custom colors. Add two tablespoons of unsanded tile grout to one cup of acrylic or latex paint. Stir, and paint your surface as you would with store-bought chalkboard paint. Once it is dry, sand it lightly with 150 grit sandpaper. Condition the surface by covering it with white chalk, and then wiping the surface clean with a damp cloth.[11]
-
7Create garden plant markers. Label your herbs and plants in your garden by painting garden plant markers with chalkboard paint, and then writing the herb or plant names on the surface with chalk.
-
8You can make your own markers by gluing flat pieces of wood to popsicle sticks or wooden skewers. You can use squares, rectangles, circles or ovals. You can even create fancy markers by buying wooden shapes with flourished edges and corners.
-
9Make your painted surface magnetic by priming it with magnetic paint. Apply five to six coats of magnetic paint onto your surface, waiting 30 minutes for each coat to dry before adding another.[12] Once the last coat of magnetic paint has dried and cured, apply your chalkboard paint and let it cure for three days before conditioning it with white chalk.
- You can condition your chalkboard by rubbing white chalk all over it, and then wiping it off with a damp cloth.
- Be sure to stir your magnetic paint often to prevent the particles from settling.[13]
- Magnetic paint is not very strong, and may not be able to hold larger magnets.
- Refer to the instructions on the paint can before applying the chalkboard paint, as some require only three days to cure, while others require up to five.
-
10Make your painted surface magnetic by painting it over galvanized steel. You can also create a magnetic chalkboard by painting over a sheet of galvanized steel. Make sure that your sheet of metal is magnetic before painting it.[14]


Community Q&A
-
QuestionHow should I clean my chalkboard wall before I re-cover it with more chalkboard paint?
 Community AnswerAll you need is a little water to remove any chalk residue. Once you've cleaned away the chalk residue, you can go ahead and repaint.
Things You'll Need
- Chalkboard paint
- Paintbrush, foam brush, or paint roller
- Painter's tape
- Primer (optional)
- Fine-grit sandpaper (optional)
- Steel wool (option)
- Rubbing alcohol (optional)
Warnings
- Handle your painted glass with caution so that the paint doesn't chip off.⧼thumbs_response⧽
- Be sure to use proper ventilation when using any spray-on paint or primer.⧼thumbs_response⧽
References
- ↑ Ez's Painting LLC. Painting Professionals. Expert Interview. 12 January 2022.
- ↑ The Painted Surface, How to Use Chalkboard Paint
- ↑ Ez's Painting LLC. Painting Professionals. Expert Interview. 12 January 2022.
- ↑ Bob Vila, Quick Tip: Choosing Sandpaper
- ↑ Ez's Painting LLC. Painting Professionals. Expert Interview. 12 January 2022.
- ↑ Benjamin Moore, How to Use Chalkboard Paint
- ↑ Do It Yourself, How to Make a Chalkboard Wall
- ↑ Home Guides, How To: Wall Liners
- ↑ Benjamin Moore, How to Use Chalkboard Paint
- ↑ Benjamin Moore, How to Use Chalkboard Paint
- ↑ Martha Stewart, Chalkboard Paint Home Helpers
- ↑ DiY Ready, How to Make Magnetic Chalkboard
- ↑ DiY Ready, How to Make Magnetic Chalkboard
- ↑ The Decorologist, Don't Use Chalkboard and Magnetic Paint Until You Read This
- ↑ Hudson Paint, How to Apply Chalkboard Paint
- Benjamin Moore, Creative & Easy Chalkboard Paint Ideas
About This Article