This article was co-authored by wikiHow staff writer, Travis Boylls. Travis Boylls is a Technology Writer and Editor for wikiHow. Travis has experience writing technology-related articles, providing software customer service, and in graphic design. He specializes in Windows, macOS, Android, iOS, and Linux platforms. He studied graphic design at Pikes Peak Community College.
The wikiHow Tech Team also followed the article's instructions and verified that they work.
This article has been viewed 53,004 times.
Learn more...
This wikiHow teaches you how to use AutoHotkey on a Windows computer. AutoHotkey is a free Windows scripting language that allows you to program different actions with various keyboard shortcuts. The following steps will show you how to install AutoHotkey as well as program a few basic scripts to enter text, run programs, and open websites using simple keyboard shortcuts.
Steps
Installing AutoHotkey
-
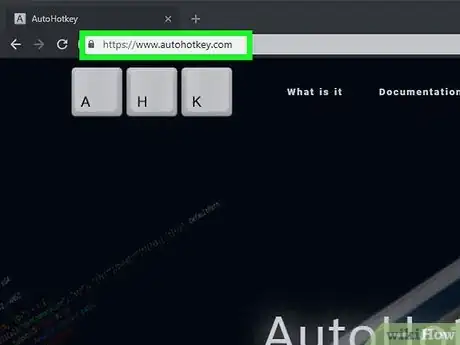
1Go to https://autohotkey.com in a web browser. Using your preferred web browser, go to official AutoHotkey website.
-
2Click Download. It's the green button in the center of the page.Advertisement
-
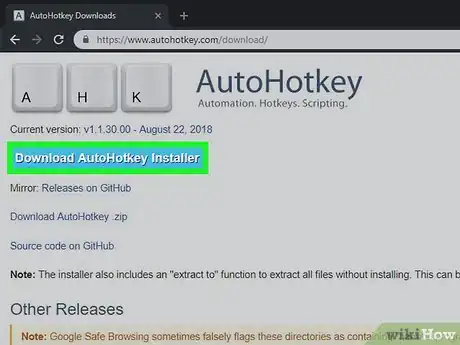
3Click Download AutoHotkey Installer. It's the blue button at the top of the page. This will start the download of the AutoHotkey installer.
-
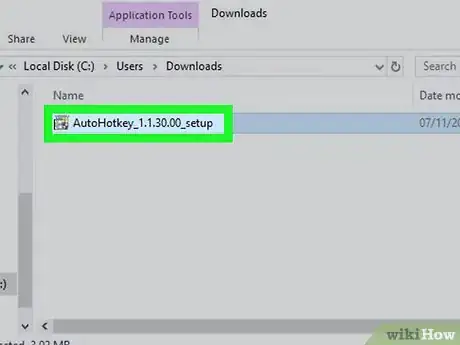
4Run the installation file. Double-click the installation file you just downloaded to start the installer.
- By default, all your downloaded files can be found in your Downloads folder.
-
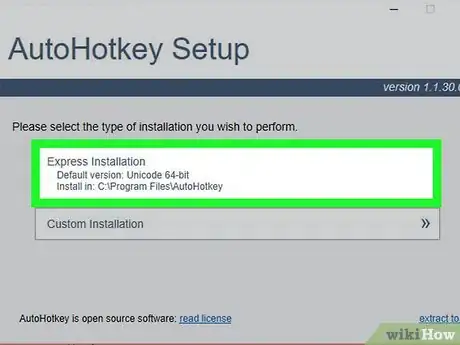
5Click Express Installation. It's the first option in the AutoHotkey Setup wizard. This will install AutoHotkey on your computer with the default configuration.
- When it's finished installing you can click "Run AutoHotkey" to launch some of the documentation about AutoHotkey.
Creating a Script
-
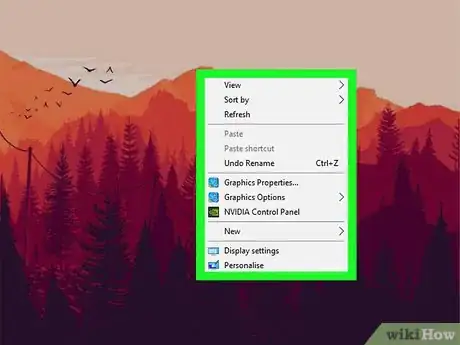
1Right-click your desktop. When you right-click on any blank part of your desktop, this opens a drop-down menu.
-
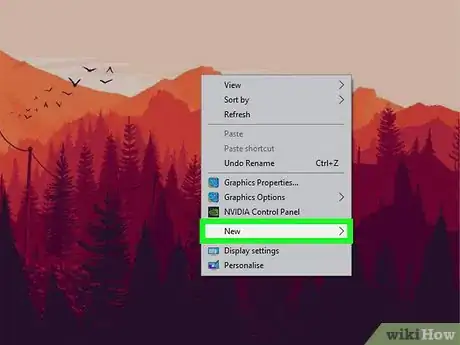
2Hover the mouse over New. When you place the mouse cursor over "New" you will see a list of programs you can create a new file for.
-
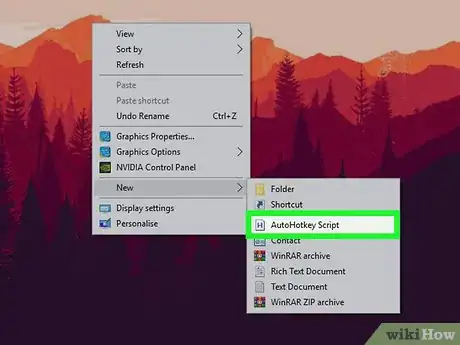
3Click AutoHotkey Script. This will create a new AutoHotkey script on your desktop. It will have an image of a white page with a red "H" on it.
-
4Rename the AutoHotkey file. By default, the new document will be named "NewAutoHotkeyScript.ahk" and it will be highlighted, allowing you type a new name for your script.
- Be sure not to erase the file extension of ".ahk" at the end. Your file must end with the ".ahk" file extension or else it won't work with AutoHotkey.
-
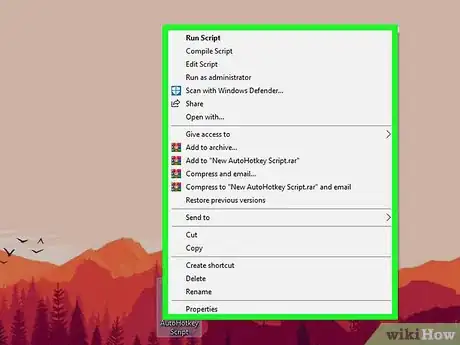
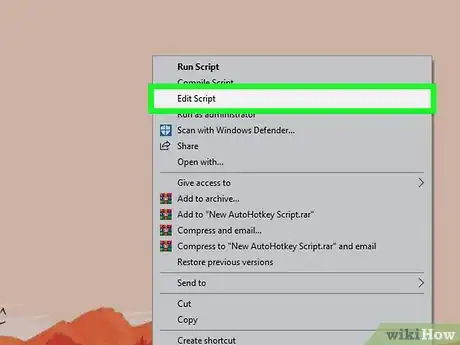
5Right-click your new script. This will open a drop-down menu with additional options for the file.
-
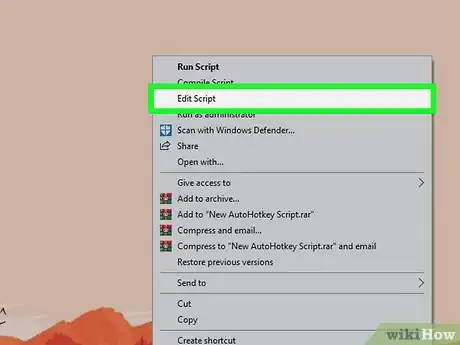
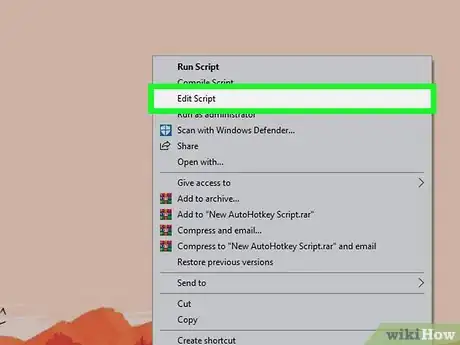
6Click Edit Script. It's the third option from the top. This will launch the AutoHotkey script in Notepad. This is where you will write the programming to create your first AutoHotkey script.
- There is some code and text already inserted into the first few lines of every new AHK script, you can ignore this and leave it alone for now.
Creating a Hotkey
-
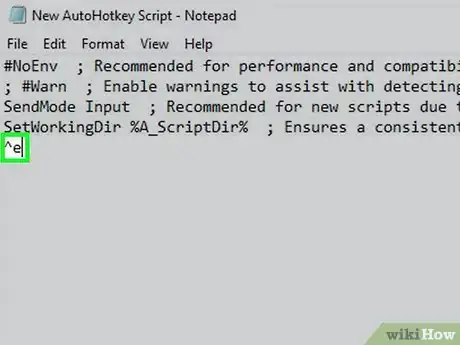
1On a new line, type the code for the keyboard shortcut you want to assign. For example, if you want to assign a command that does something when you press the key combination of Ctrl+E, you would type ^e. Each lowercase letter represents its own key, while special keys have their own symbols:
- + = ⇧ Shift
- ^ = Ctrl
- ! = Alt
- # = ⊞ Win (Windows key)
- Click here for a complete list of key commands.
-
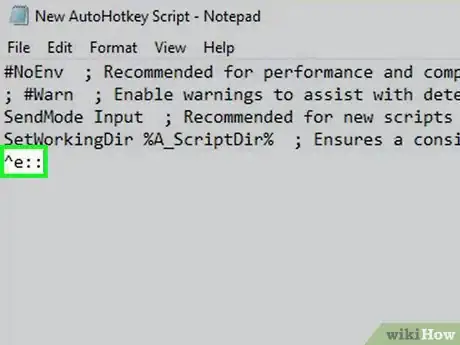
2Type two colons after the keys you assigned. Any key or key combination you typed needs to be followed by ::. So in our example, the first line of our code would look like:
^e::
-
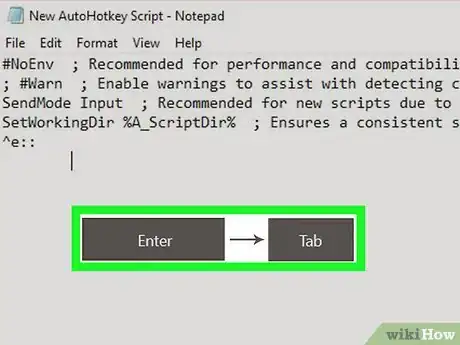
3Press ↵ Enter to go to the next line and press Tab ↹ to indent. You'll type the command for what will happen with then hotkey is pressed on the line below the two colons. You can indent the line by pressing "Tab" or by typing several spaces
- You don't have to indent the command line but it will keep your code organized and easy to read if you have errors later.
-
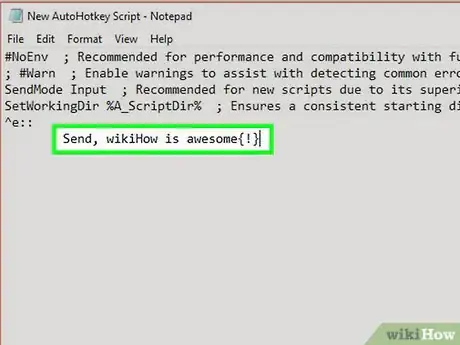
4Type Send, and then type a message. The Send command will automatically type a message when a Hotkey is triggered. Anything you type after the comma will be typed automatically when you press the assigned Hotkey. For our example, if you wanted to include the message "wikiHow is awesome!" your code would look like:
- Special characters, like the exclamation mark, must be enclosed in braces { } so it isn't confused with the symbol for the "Alt" key.
^e::
    Send, wikiHow is awesome{!}
-
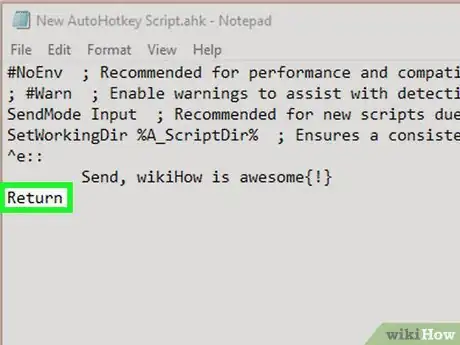
5Press ↵ Enter to go the next line and type Return. The Return command denotes the end of a command and stops the code from going to the lines below.[1] Your finished code should look like:
^e::
    Send, wikiHow is awesome{!}
Return
-
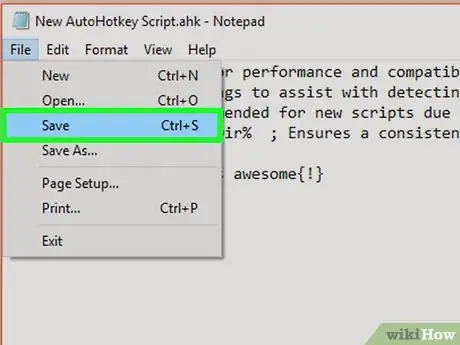
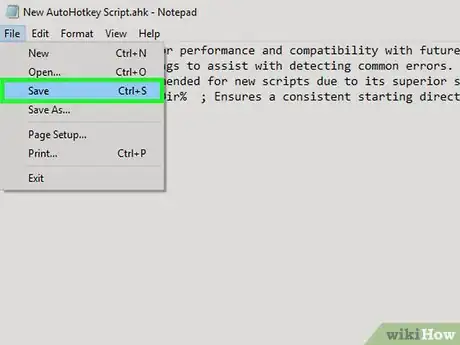
6Save your script. Click "File" in the menu bar at the top of Notepad and click "Save" in the drop-down menu. This will save the code you've added to the script file.
- You can close Notepad once your work has been saved.
-
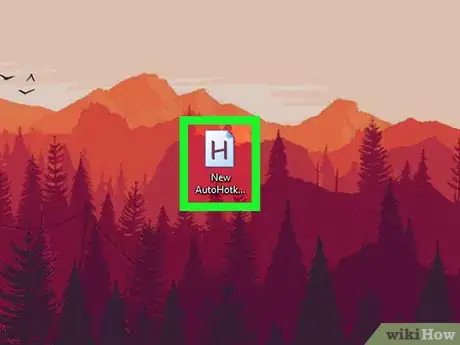
7Run the script. Double-click the script file on your desktop to run the script. You'll see a green AutoHotkey icon appear in your system tray on the bottom-right of your screen. This indicates that an AutoHotkey script is active.
-
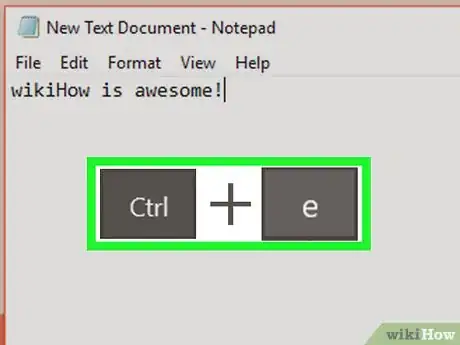
8Test your Hotkey. Open a new word processing app or any app you can type text and press your Hotkey combo. In our example, if you press Ctrl+E you'll see the text "wikiHow is awesome!" instantly appear.
Creating a Hotstring
-
1Open your script or create a new one. You can open the script you were working on earlier and add a new command to it or create a new script from scratch.
- Right-click the script and select "Edit Script" to edit the previous script.
- Right-click the desktop and go to "New," then select "Auto Hotkey Script."
-
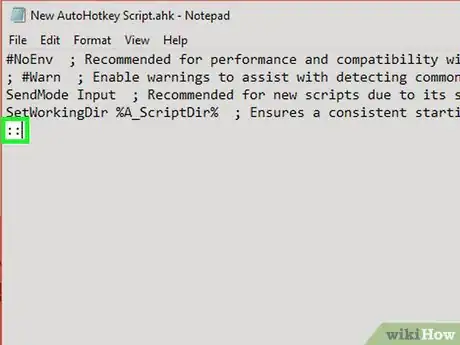
2Go to a new line and type two colons. A Hotstring command starts with :: at the beginning.
- A Hotstring can take a word or phrase you type and replace it with a different word or phrase.
-
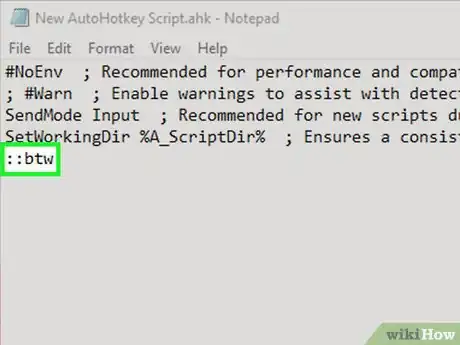
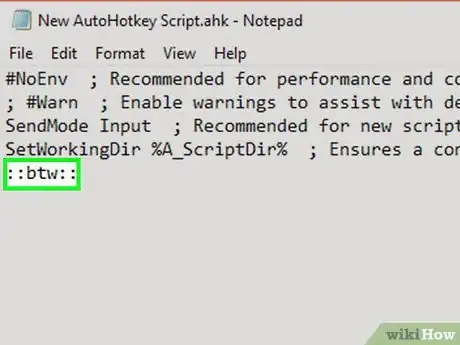
3Type the letters, word, or phrase you want to replace. For example, you can create a Hotstring so that every time you type the acronym "btw" it would automatically change it to "By the way," so you didn't have to type it all out. In that example, so far your code would look like:
::btw
-
4Type two more colons again. This will separate the end of the message you want to replace from the words or you want to replace it with. Using our example, the code would look like:
::btw::
-
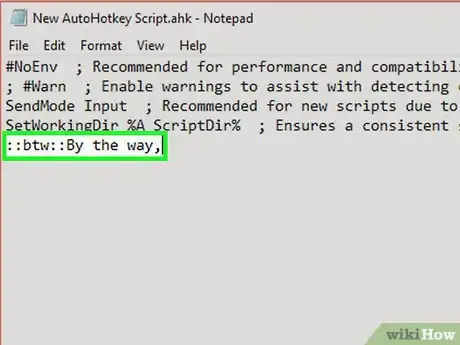
5Type the message you want to replace it with. The message you type after the second pair of colons will automatically replace the first message in between the two sets of colons. In our example, the code would look like:
- Hotstrings don't need a "Return" command and the end because they are self-contained on one line of a script
::btw::By the way,
-
6Save and run the script to test it out. Just like before, save your work by clicking "File" and "Save"—then double-click the script to run it. Then open any app or program you can type in to test it out. When you type the letters "btw" onto any page, it should immediately be replaced with "By the way," in the text field.
Launching Apps or Websites
-
1Open your script or create a new one. You can open the script you were working on earlier and add a new command to it or create a new script from scratch.
- Right-click the script and select "Edit Script" to edit the previous script.
- Right-click the desktop and go to "New," then select "Auto Hotkey Script."
-
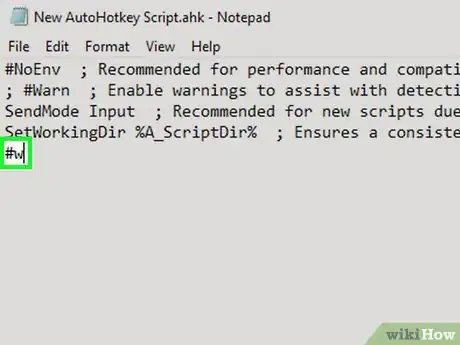
2On a new line, type the code for the Hotkeys you want to assign. For example, if you wanted to open the wikiHow website whenever you pressed they keys Wind+W, you would type the code #w because "#" is the symbol for the Windows key and "w" is the code for the W key. In that example, the code would look like:
#w- Click here for a complete list of key symbols if you want to use a different key combination for your Hotkey.
-
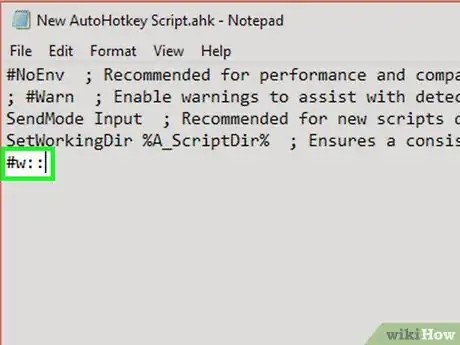
3Type the two colons, then go to the next line and indent. Immediately after typing the code for the keyboard shortcut, type two colons :: and then press ↵ Enter to go to the next line. Indent the line using several spaces or the Tab ↹ key.
- You don't have to indent the command line but it will keep your code organized and easy to read if you have errors later.
-
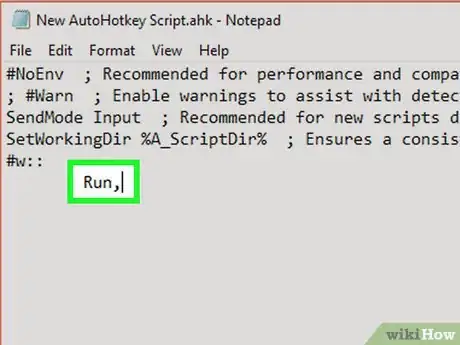
4Type Run,. The Run command can be used to launch any program, application or website. Type Run, with the comma at the end and Auto Hotkey will look for the name or location of any program or website listed after the comma. In our example, the code so far would look like:
#w::
    Run,
-
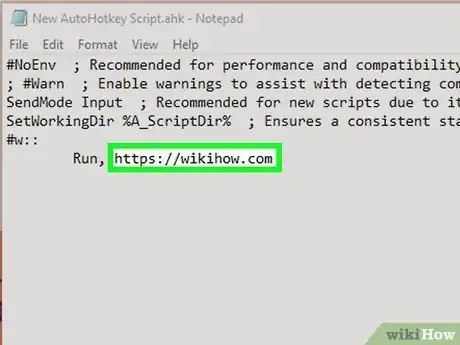
5Type the full location of any program on your computer or type any website's full URL. For example, if you wanted your Hotkey to launch Internet Explorer, you would type C:\Program Files\internet explorer\iexplore.exe after the Run command. In our example, since we want to launch the wikiHow website, our code would look like:
#w::
    Run, https://wikihow.com
-
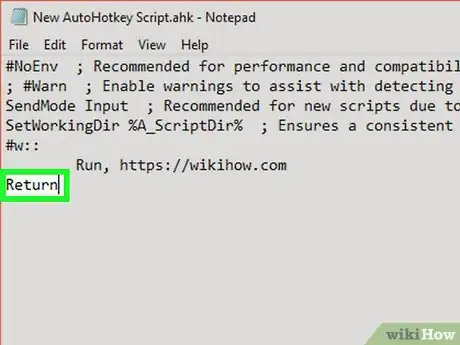
6Press ↵ Enter to go the next line and type Return. The Return command denotes the end of a command and stops the code from going to the lines below. In our example. your finished code should look like:
#w::
    Run, https://wikihow.com
Return
-
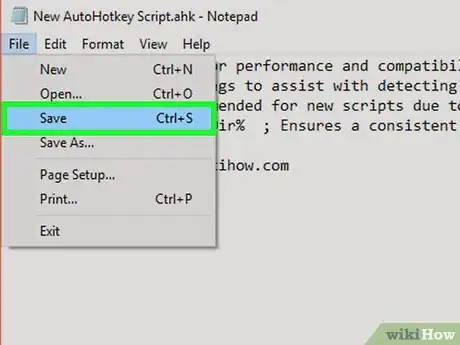
7Save and run the script to test it out. Just like before, save your work by clicking "File" and "Save"—then double-click the script to run it. If you followed our example, whenever you press the key combination of ⊞ Win+W, the wikiHow website will open in your default browser!
References
About This Article
1. Install AutoHotkey from https://www.autohotkey.com.
2. Right-click the desktop and click New.
3. Click AutoHotkey Script.
4. Right-click the script icon and select Edit Script.
5. Enter the code for the keyboard shortcut followed by two colons.
6. Press Enter.
7. Type "Send" followed by the word(s) or command.
8. Press Enter.
9. Type "Return" and save the file.
10. Double-click the script to run it.
