This article was co-authored by wikiHow staff writer, Nicole Levine, MFA. Nicole Levine is a Technology Writer and Editor for wikiHow. She has more than 20 years of experience creating technical documentation and leading support teams at major web hosting and software companies. Nicole also holds an MFA in Creative Writing from Portland State University and teaches composition, fiction-writing, and zine-making at various institutions.
There are 9 references cited in this article, which can be found at the bottom of the page.
This article has been viewed 498,509 times.
Learn more...
Adobe Illustrator is a premium application used for creating vector graphics for print or the web. Developed alongside with Adobe Photoshop as a companion product, Illustrator is the standard for making logos, graphics, comics, fonts, and much more. This wikiHow teaches you how to start using the basic functions of Adobe Illustrator.
Steps
Creating a Project
-
1Open Adobe Illustrator. You'll find it in your Windows Start menu or your Mac's Applications folder.
-
2Click Create new. If you don't see this option, you can press Ctrl+N (Windows) or ⌘ Cmd+N (Mac) to create your new project.[1]Advertisement
-
3Select the Print or Web tab. If you're planning to print out your creation, click Print at the top of the New Document window. If you want to use the graphic online, select Web.
-
4Select a document size. There are several preset document sizes from which to choose. You also have the option of creating a custom-sized canvas by adjusting the values in the right panel.
- All customization options for the document's size, resolution, orientation, and color mode are in the right column.
- If you want to specify a resolution for a printed document, select that resolution from the "Raster Effects" menu in the right panel.
-
5Click Create to open the new document. Now that you've created a document, you can get to know Illustrator's most common tools.


Drawing Shapes
-
1Click and hold the Shape tool. It's the rectangle in the toolbar that runs along the left side of the screen. A menu of various shapes will appear.
- Repeat this step each you want to switch between different shape tools.
-
2Click Rectangle Tool. This selects a tool that allows you to draw squares and rectangles.
-
3Click the mouse on the canvas and drag in any direction. Your rectangular shape will appear as you drag.[2]
- If you want to draw a perfect square, drag until you see a pink line crossing the shape diagonally—this line indicates that the square is equal on all sides.
-
4Click and hold the Shape tool and select Polygon Tool. This tool lets you specify the number of sides you want your shape to have.
-
5Click the canvas once to enter the number of sides. Clicking the canvas will make a dialog box appear. Enter the number of sides you want your shape to have.
- For example, if you want to draw an octagon, enter 8.
-
6Click and drag the canvas to draw your shape. Just as you did with the rectangle, drag outward until you've made the shape the desired size.
- You can also create circles and stars with this menu the same way you have with rectangles and polygons.


Drawing Straight and Curved Lines
-
1Click and hold the Pen tool on the toolbar. It's the button that looks like a pen on the right side of the screen. A list of different pen tool options will appear.
- The Pen tool can be used to create paths using straight or curved lines. Unlike using an actual pen (or a digital paintbrush tool), you'll create lines and curves with the pen tool by creating individual segments connected by anchor points.[3]
-
2Click Pen Tool. It should be the first option in the tool menu.
-
3Click the mouse where you want the line to begin. We'll start by drawing a series of straight lines. This adds an anchor point (which looks like a small dot or square) to the canvas. Don't drag the mouse like you're actually drawing, just click once.
-
4Click the mouse where you want the line segment to end. The line segment will now appear.
- If you see directional lines around the segment, this means you accidentally dragged the tool instead of clicking a new anchor point.
-
5Click additional anchor points to add additional segments. The most recent anchor point you click shows up as a filled-in square, while previous points are hollow.
-
6Close the path (or leave it open). When you're finished with a particular line or shape, you have a couple of options for moving on to the next exercise:
- If you want to create a closed shape, hover the mouse cursor over the first anchor point you created, then click the small dot that appears next to the pen's pointer. This shape can then be selected and edited the same way you'd work with shapes created with the Shape tool.
- If you don't want to close the path, just select a different tool or press Ctrl (PC) or ⌘ Cmd (Mac) as you click a blank area of the canvas.
-
7Click and hold a new point to start a curved line. If you deselected the Pen Tool, go back and select it again first. Don't lift your finger from the mouse after clicking the canvas.
-
8Drag the cursor to set the slope of the curve. To do this, just drag in the direction in which you want this line segment to curve. Lift your finger from the mouse cursor once the slope is set.
-
9Click and hold the desired endpoint of the segment. Don't move your hand just yet.
-
10Create a C or S-shaped curve. The direction you drag the cursor depends on the type of curve you want to create:
- Drag the cursor in the opposite direction to the previous line to make a C-shaped curve (an arc).
- Drag in the same direction of the previous line to create an S-shaped curve.
-
11Add additional curved segments. Click and hold a new point to add the next segment, then drag in the direction of the desired slope as you did before. Continue adding curved segments until you're finished with the path.
-
12Close the path (or leave it open). As you did with the straight segments, you can close the path or choose to leave it open.


Editing Shapes and Objects
-
1Click the Selection tool. It's the arrow at the top of the toolbar that runs along the left side of the workspace. This is the tool you'll need to use when you want to select and manipulate existing objects on the canvas.
- You can use this method to manipulate shapes, lines, and text you've added to your document.
-
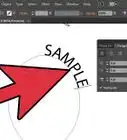
2Click the object you want to edit. Selecting an object will surround it with a handled border.
- To select multiple objects at a time, hold down the ⇧ Shift key as you click each object.
-
3Drag any of the outer handles to the desired size. Dragging a handle will extend (or shrink) the size of the object in that direction.
- Hold the ⇧ Shift key to constrain proportions if you want to avoid changing the actual shape.
-
4Drag an object from the center point to move it. This is the most basic way to move an object.[4] You can also use your keyboard's arrow keys if you wish.
- To move selected objects by a specific distance, click the Object menu, click Transform, and then click Move to bring up the dialog. Enter your desired position and click OK.
- Cutting and pasting is another option. Click the Edit menu at the top and select Cut to remove the selected object and copy it to your clipboard. Then, click the Edit menu and select Paste to insert it back into the document.
-
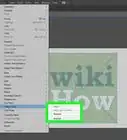
5Add color to a selected object. Double-click the Fill box in the Properties panel (usually at the bottom-right corner of the workspace) to bring up the color palette, then click the desired color to fill the selected object.[5]
- To change the color of the selected object's surrounding outline, double-click the Stroke box in the Properties panel, then select a color.


Tracing an Image
-
1Import the image you want to vectorize. One of the most common uses for Illustrator is the creation of vector images based on images from other applications (such as hand-drawn artwork that’s been scanned or creations made in Photoshop). Vector images can be scaled to any size without distorting the image, which makes them great for printed materials. To import an image:[6]
- Click the File menu at the top.
- Click Place.
- Select the image you want to edit.
-
2Click the Selection tool. It's the arrow button at the top of the left toolbar.[7]
-
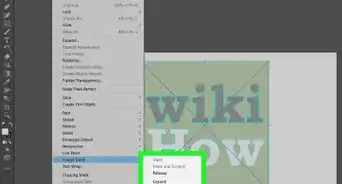
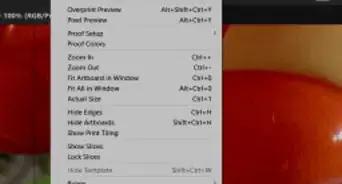
3Click the Window menu. It's at the top of the screen (Mac) or at the top of the app (PC).
-
4Click Image Trace on the menu. This adds the Image Trace panel to the workspace.[8]
-
5Check the box next to "Preview." It's at the bottom-left corner of the Image Trace panel.
-
6Select the desired color mode from the "Mode" menu. This menu is also in the Image Trace panel.
- For example, if your image is in black-and-white, select Black and White from the menu. If it's grayscale, select Grayscale, etc.
-
7Drag the slider to the desired color depth. The slider will either be labeled Color, Grayscale, or Threshold. The preview will adjust to show you the results.
-
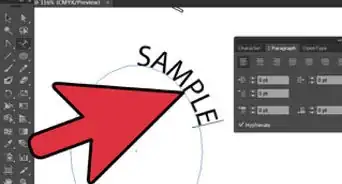
8Click Advanced on the Image Trace panel to adjust other options. In this section you can:
- Drag the "Paths" slider until your image looks clear.
- Drag the "Corners" slider until the edges of the image are crisp (but not sharp or scraggly).
- Drag the "Noise" slider to decrease the number of extra pixels included in the final image.
-
9Click Trace. It's at the bottom of the Image Trace panel. This traces the image based on the settings you entered.
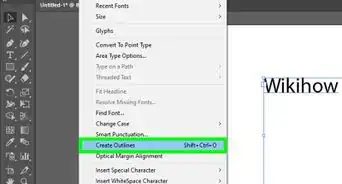
-
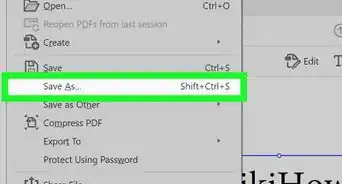
10Save the image as a vector graphic file. Here's how:[9]
- Click the File menu.
- Click Save As.
- Select a saving location and enter a file name.
- Select Illustrator (*.AI) as the file type to save as an Illustrator file, or SVG (*.SVG) to save the vector in a more web-friendly format.
- Click Save.


Community Q&A
-
QuestionHow do I type words?
 Community AnswerClick the T button on the toolbar. Then, click and drag on the page to create a space for you to type. After that you can write what you want. You can adjust the size and font in the menu bar when still selecting the T on the toolbar.
 -
QuestionHow do I duplicate design to put pictures on the left side and right side?
 SAHIL LODHACommunity AnswerWe can duplicate design by first selecting the design and press the ALT key on your keyboard with clicking left mouse button as well and drag it wherever you want to.
 -
QuestionHow can I copy and paste previous text to make more words in the same font and color?
 Community AnswerIf you are in the same textbox, you can simply select and ctrl c/v. If you want to copy the whole textbox, go to your layers, find your text and copy/paste the whole layer. Or, simply use the move tool, click on the text, ctrl c, ctrl v (or ctrl f - this will copy it exactly on top of original text); or use the move tool, hold alt and move the text with the mouse. If you want to copy text from external source (for example, a webpage), you need to Google the font they're using or find something similar.


References
- ↑ https://helpx.adobe.com/illustrator/how-to/draw-buildings.html
- ↑ https://helpx.adobe.com/illustrator/how-to/design-draw-shapes.html
- ↑ https://helpx.adobe.com/illustrator/using/drawing-pen-curvature-or-pencil.html
- ↑ https://helpx.adobe.com/illustrator/using/moving-aligning-distributing-objects.html
- ↑ https://helpx.adobe.com/illustrator/using/painting-fills-strokes.html#apply_a_fill_color_to_an_object
- ↑ https://helpx.adobe.com/illustrator/using/importing-artwork-files.html
- ↑ https://www.laurenaloiadesigns.com/my-blog/how-to-edit-a-jpeg-image-using-adobe-illustrator
- ↑ https://www.stickermule.com/blog/how-to-use-image-trace-in-adobe-illustrator
- ↑ https://helpx.adobe.com/illustrator/using/saving-artwork.html
About This Article

1. Convert raster images to vector graphics.
2. Draw scalable graphics that can be printed at any size.
3. Create business or organizational logos that work for the web and print.
4. Draw perfectly straight lines by connecting segments.
5. Fill objects with color.