This article was co-authored by wikiHow staff writer, Darlene Antonelli, MA. Darlene Antonelli is a Technology Writer and Editor for wikiHow. Darlene has experience teaching college courses, writing technology-related articles, and working hands-on in the technology field. She earned an MA in Writing from Rowan University in 2012 and wrote her thesis on online communities and the personalities curated in such communities.
This article has been viewed 46,533 times.
Learn more...
While the Xbox Console Companion app on your Windows 10 computer should automatically update through the Microsoft Store, there are exceptions and you might need to manually update it.[1] This wikiHow will teach you how to manually update the Xbox Console Companion app on Windows 10.
Steps
-
1
-
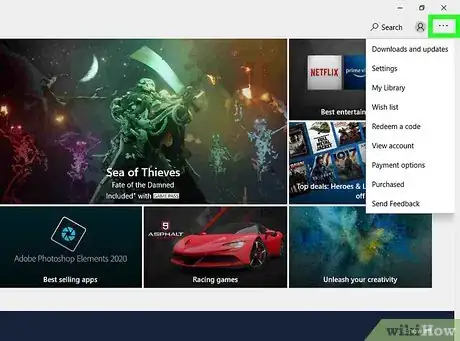
2Click ••• . This three-dot menu icon is in the top right corner of the app window.Advertisement
-
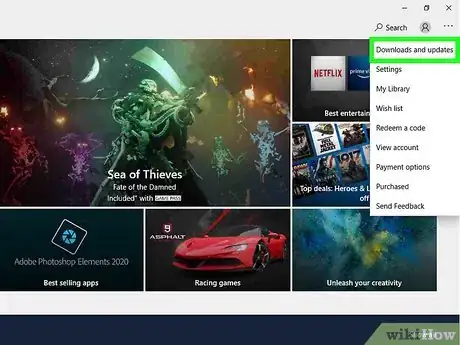
3Click Downloads and updates. It's usually the first option in the menu.
-
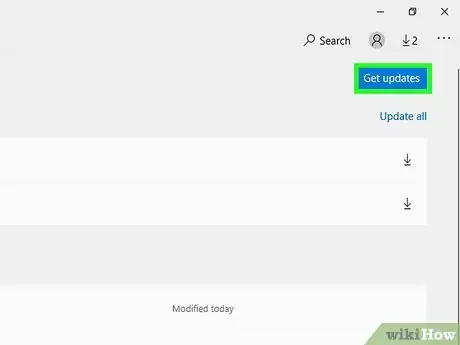
4Click Get Updates. If an update is available, it will immediately start installing.[2]
- If this isn't working, check to see if your Microsoft Store needs to update. Click the Start logo > Settings > Update & Security > Windows Update > Check for Updates and click Install now if there is an update available.
- If you're still experiencing issues, go to the Start logo > Settings > Update & Security > Troubleshoot > Windows Store apps > Run the troubleshooter.[3]
References
- ↑ https://support.xbox.com/en-US/help/games-apps/apps-help/verify-version-xbox-app-on-windows-10
- ↑ https://support.microsoft.com/en-us/account-billing/fix-problems-with-apps-from-microsoft-store-93ed0bcf-9c12-3df6-6dda-92ec5d0415ac
- ↑ https://support.microsoft.com/en-us/account-billing/fix-problems-with-apps-from-microsoft-store-93ed0bcf-9c12-3df6-6dda-92ec5d0415ac
About This Article
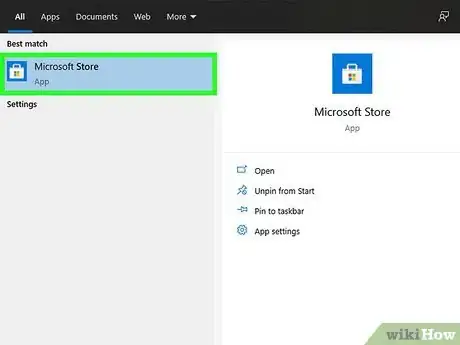
1. Open the Microsoft Store.
2. Click the three-dot menu icon.
3. Click Downloads and updates.
4. Click Get Updates.
-Step-13.webp)







-Step-13.webp)


