A simple guide to unmounting removable drives & images in Windows, macOS, and Linux
X
This article was co-authored by wikiHow staff writer, Jack Lloyd. Jack Lloyd is a Technology Writer and Editor for wikiHow. He has over two years of experience writing and editing technology-related articles. He is technology enthusiast and an English teacher.
This article has been viewed 24,140,712 times.
Learn more...
This wikiHow teaches you how to unmount a drive that is connected to your computer. Unmounting a drive is the same thing as ejecting a drive. You cannot unmount your computer's main hard drive (e.g., the hard drive where your operating system is installed).
Things You Should Know
- If you're using Windows, right-click the drive in File Explorer and click "Eject" on the Manage tab.
- On a Mac, just select the drive in Finder and click the Eject button.
- To unmount in Linux, use "sudo umount" followed by the mount point.
Steps
Method 1
Method 1 of 3:
On Windows
-
1
-
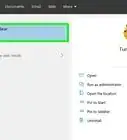
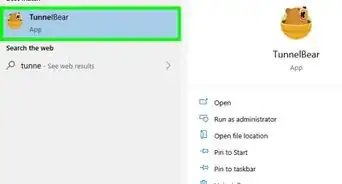
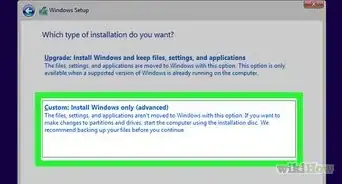
2Open File Explorer. Click the File Explorer icon. Older Windows 10 versions will have the name shown next to the icon as pictured above.
- Windows 7 and Vista: select Computer from the right column.
Advertisement -
3Ensure you're on This PC, Computer, or My Computer. The option will be listed in the left pane.
- The names differ among Windows versions.
-
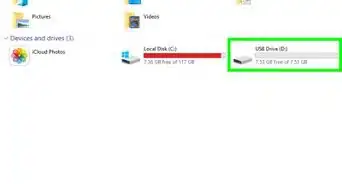
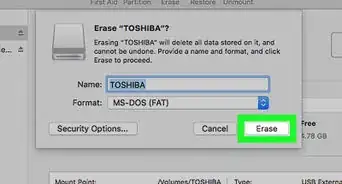
4Click on the drive you wish to unmount. A list of all currently active drives will be available under the "Devices and drives" heading towards the middle of the page.
- This drive must be either a removable drive (e.g., a flash drive or SD card) or a secondary internal drive.
-
5Click the Manage tab. It's in the ribbon at the top of the File Explorer window.
- In case your Windows version is missing the ribbon, simply right-click the drive instead.
-
6Click the ⏏ Eject button.
- You'll find this option in the "Media" section of the ribbon.
-
7Remove the drive from your computer. After clicking this button, you'll see the drive's icon disappear from the File Explorer window, and a notification letting you know that it's safe to remove the drive will appear.
- Gently disconnect the drive from your computer to complete the unmounting process.


Advertisement
Method 2
Method 2 of 3:
On a Mac
-
1Open the Finder. This app, which resembles a blue and gray face, is usually found in the Dock at the bottom-left.
-
2Locate your drive's name. It will be on the left-hand side of the Finder window below the "Devices" heading.
- This must be a removable drive (e.g., a flash drive, external hard drive, or a virtual mounted drive).
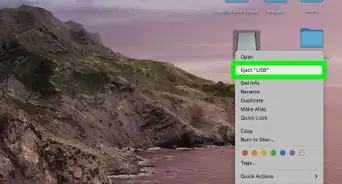
-
3Click ⏏. It's to the right of your drive's name. Doing so will "eject" the drive, which removes it from your Mac's available drives.
-
4Remove the drive from your computer. Once the drive has been safely unmounted, you can remove the physical drive from your Mac computer.


Advertisement
Method 3
Method 3 of 3:
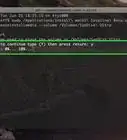
On Linux

-df--h---1.png)
Community Q&A
-
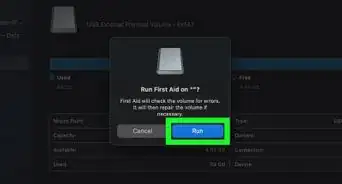
QuestionHow do I fix an unmounted hard drive disk utility on my MacBook Pro when it doesn't show up anymore?
 Community AnswerLook for errors in the hardware (look for problems in the physical drive or drive connector). It usually does that when there is a physical error so try connecting the drive to a different computer to see if there are any problems.
 -
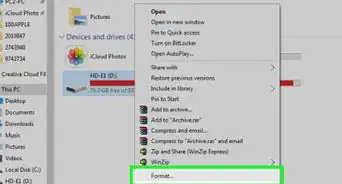
QuestionHow do I dismount a drive that doesn't have an "eject" button? On This PC, nothing happens if I click on the popup in the taskbar.
 Community AnswerYou can right click on the partition and press eject. Or rght click on 'My Computer', and select manage>Storage>Disk Management>.
Advertisement
Warnings
- Failing to unmount a drive before disconnecting it may result in data loss or corruption.⧼thumbs_response⧽
Advertisement

About This Article
Jack Lloyd
wikiHow Technology Writer
This article was co-authored by wikiHow staff writer, Jack Lloyd. Jack Lloyd is a Technology Writer and Editor for wikiHow. He has over two years of experience writing and editing technology-related articles. He is technology enthusiast and an English teacher. This article has been viewed 24,140,712 times.
How helpful is this?
Co-authors: 42
Updated: October 25, 2022
Views: 24,140,712
Categories: System Maintenance and Repair | External Storage Devices
Advertisement