This article was written by Nikia Londy and by wikiHow staff writer, Hunter Rising. Nikia Londy is a Hair Augmentation Specialist and the Founder and CEO of Intriguing Hair, a one-stop solution for women from all ethnicities wanting to purchase high-quality human hair extensions, hairpieces, and wigs. With over 16 years of experience, she specializes in artificial hair integrations, hair extensions, hair loss, hairpieces and wigs, and non-surgical hair replacement. Nikia holds a BA in Organizational Leadership from Charter Oak State College and received her Cosmetology Certification from Blaine Beauty School. She is also a member of the American Hair Loss Council.
There are 15 references cited in this article, which can be found at the bottom of the page.
This article has been viewed 15,774 times.
If you're looking for a low-maintenance style to rock with short, textured hair, twists are perfect for your locks. Twists keep your hair tightly coiled up so it doesn't dry out or get frizzy, and they're easy enough for you to do at home. Keep reading for everything you need to know to twist your hair using a comb or using a two-strand braid to create a stylish ‘do!
This article is based on an interview with our hair augmentation specialist, Nikia Londy, founder and CEO of Intriguing Hair. Check out the full interview here.
Steps
Comb Twists
-
1Wash your hair with sulfate-free shampoo. Your hair will hold tighter coils if it’s freshly washed. Lather the sulfate-free shampoo into your hair down and work it all the way down to your roots. When you’re finished washing your hair, rinse all the shampoo out with clean water.[1]
- Shampoos that contain sulfate can irritate your scalp and dry out your hair so it looks frizzy.
-
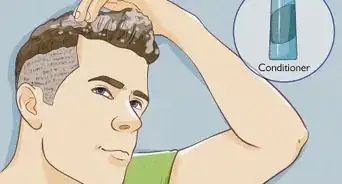
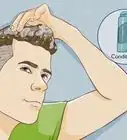
2Apply leave-in conditioner to your hair. While your hair is still damp, put a coin-sized amount of leave-in conditioner in your hand and lather it into your hair. Run your fingers through your hair to spread the conditioner until it’s fully absorbed.[2]
- Using a leave-in conditioner makes your hair softer and easier to work with, and it helps prevent your twists from drying out.
Advertisement -
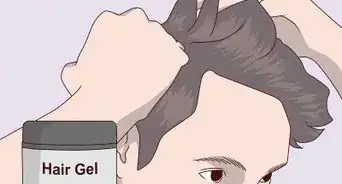
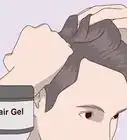
3Dip the teeth of a rattail comb in gel or braid cream. A rattail comb has a long pointed tip on one side to make precise lines when you section your hair. Dip the first few teeth at the end of the comb into a container of hair gel or braid cream so they’re fully coated. The gel or braid cream helps ensure the coils stay tightly twisted and hold their shape.[3]
- If you’re twisting someone else’s hair, you can put a large dab of gel or braid cream on the back of your hand. That way, you won’t have to reach as far to dip your comb for the next twist.
-
4Comb through a 1 in (2.5 cm) section of hair to detangle it. Start with hair near the edge of your hairline so it’s easier to see what you’re doing. Pinch the section of hair between your fingers. Run the teeth coated in the gel or cream through the hair, starting from the roots, and working toward the ends.[4]
- If the hair above the section you’re twisting is getting in the way, use a hair clip to pin it up.
- If you want to make precise parts in between each section, pull the tipped end of the rattail comb gently across your scalp to straighten out stray hairs.
-
5Spin and pull the comb through the hair section to twist it. Put the teeth of the comb coated with gel in your hair near your roots. Gently spin the handle of the comb as you slowly pull the section of hair down. Keep spinning the comb until you reach the ends of the strands and have a tightly-coiled twist in your hair. Carefully pull the ends of your hair out of the comb to finish your first twist.[5]
- You can spin the handle of the comb clockwise or counterclockwise. Just be sure to remember which direction you spin it so you do it the same way for each twist.
-
6Finish the twist with your fingers. Wipe any excess gel or braid cream that squeezes out of your hair when you twist it onto your fingers. Since the ends of your strand might be loose, rub the excess product on them and twist them together with your fingers for a cleaner look.[6]
- If you have thick hair, the twist may stay coiled by itself. If you have thinner hair and worry about the twist coming undone, clip it with a hair elastic or hair clip.
-
7Twist sections of hair in horizontal rows across your head. Comb through the section of hair that’s right next to your first twist. Make sure the sections are about the same size and spin your comb in the same direction so your twists look uniform around your head. When you finish one row of twists, start a new row right above it and work towards the top of your head.[7]
- If your hair starts to dry out, spritz it with some water from a spray bottle.
- Ask a friend to help you out if you have some trouble seeing or reaching the hair on the back of your head.
Two Strand Twists
-
1Wash your hair with sulfate-free shampoo. Sulfates can irritate your scalp and dry your hair out, so stick with sulfate-free shampoo instead. Lather the shampoo into your hair and work it all the way down to your roots. Just rinse the shampoo out as soon as you’re finished washing and pat it towel-dry.
- Your hair will be easier to work with and hold its shape better when it’s washed.
-
2Rub leave-in conditioner through your hair. Using a leave-in conditioner moisturizes your hair and helps you detangle it so it’s a lot easier to twist. Put a coin-sized amount of conditioner into your palm and work it into your hair while it’s still damp. Keep rubbing the conditioner into your hair until you can’t see it anymore.[8]
-
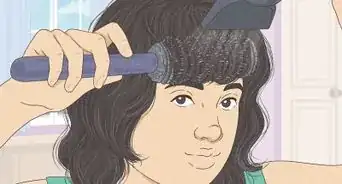
3Comb through your hair to detangle it. Gently run a wide-toothed comb through your hair to make sure there aren’t any knots or snags. If your comb catches in your hair, carefully untangle your hair with your fingers before running your comb through it again.[9]
- Be careful not to force your comb through your hair, or else the strands could break or pull out.
-
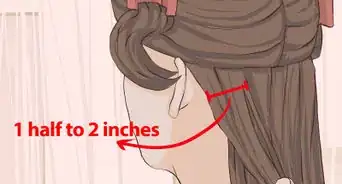
4Section a row of your hair into boxes with a rattail comb and gel. Start with the edge of your hairline above your forehead or on the back of your head. Make a horizontal part in your hair about 1–2 in (2.5–5.1 cm) above your hairline with your rattail comb. Split the row you just made into boxes that are all the same size by making vertical parts with your comb.[10]
- Run the pointed tip of the rattail comb along the parts to pick up any stray hairs.
- Each box gives you 1 twist. Make the boxes smaller if you want more twists in your hair, or smaller if you want to put fewer twists.
- Take a fingertip-sized dab of hair gel and run it over your parts to help them hold better.
-
5Split the first box in half into 2 smaller sections of hair. Take half of the hair in one box and pinch it between your fingers with one hand. Then, use your other hand to pinch the other half of the hair.[11]
-
6Twist the 2 strands of hair together into a tight coil. Start at the roots of each strand so your twists are the tightest. If you’re twisting your hair clockwise, bring the left strand over the right strand. For counterclockwise twists, bring the right strand over the left. After each twist, pull the hair gently to lock it in place. Keep twisting until you reach the ends of the strands.[12]
- You can twist your hair in either direction, but keep it consistent for all of your twists so they look uniform.
- Put a little gel on the end of the twist to help it hold its shape even better.
-
7Continue sectioning and twisting all of your hair. Finish twisting all of the boxes of hair in the first row you sectioned off. Then, comb another horizontal part to make a new row with boxes of hair that are the same size as the first. Keep sectioning and twisting your hair one row at a time until you reach the top of your head.[13]
-
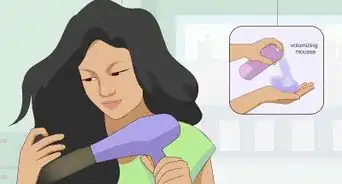
8Use foaming mousse and a hairdryer to tame any flyaway hairs. Squeeze a palmful of the foaming mousse onto your hand and gently work it over your hair and into your twists. Once you’ve evenly spread the mousse, turn your hairdryer on low and go over your hair until the mousse completely sets.[14]
Things You’ll Need
Comb Twists
Two Strand Twists
References
- ↑ https://www.gq.co.za/grooming/5-essential-hair-care-tips-for-black-guys-16553666
- ↑ https://youtu.be/DtHOLZz5ulc?t=117
- ↑ https://youtu.be/_vT87OUScI8?t=247
- ↑ https://youtu.be/VuWlNLanzJs?t=154
- ↑ https://youtu.be/9iREgjI0Was?t=108
- ↑ https://youtu.be/9iREgjI0Was?t=108
- ↑ https://youtu.be/9iREgjI0Was?t=189
- ↑ https://youtu.be/JnSc6SfTknA?t=219
- ↑ https://youtu.be/JnSc6SfTknA?t=246
-Step-1.webp)
-Step-2.webp)
-Step-3.webp)
-Step-4.webp)
-Step-5.webp)
-Step-6.webp)
-Step-7.webp)
-Step-8.webp)
-Step-9.webp)
-Step-10.webp)
-Step-11.webp)
-Step-12.webp)
-Step-13.webp)
-Step-14.webp)
-Step-15.webp)
