This article was co-authored by wikiHow Staff. Our trained team of editors and researchers validate articles for accuracy and comprehensiveness. wikiHow's Content Management Team carefully monitors the work from our editorial staff to ensure that each article is backed by trusted research and meets our high quality standards.
There are 7 references cited in this article, which can be found at the bottom of the page.
The wikiHow Video Team also followed the article's instructions and verified that they work.
This article has been viewed 63,032 times.
Learn more...
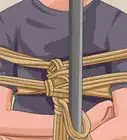
When you want to tie a rope to a pole, the best way to do so is by using a type of hitch knot. For a quick temporary knot, use a clove hitch. If you want something more secure that won’t slip, go with the rolling hitch. Both of these knots are fast and easy to learn, so add them both to your knot repertoire and you’ll be ready to tie a rope onto a pole in a variety of situations, such as when you’re mooring a boat on a railing or tying a horse to a post. If you don’t have a pole handy, you can also use these hitch knots to fasten a rope to something similar like a sturdy tree branch.
Steps
Using a Clove Hitch for a Quick Hold
-
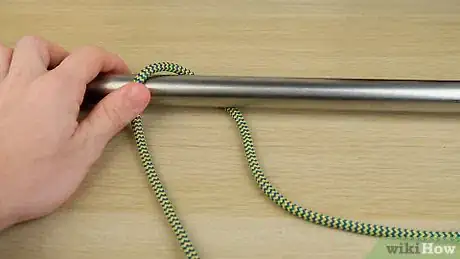
1Wrap 1 end of your rope around the pole and under the standing end. Straighten out your rope and grab 1 end. Loop it around the pole so that it passes under the long end of the rope.[1]
- The standing end is the remaining long length of rope, or the part that you aren’t using to tie the knot.
- Only use the clove hitch to temporarily tie something to a pole because it has the potential to slip or bind on itself under strain.
- For example, a clove hitch can work if you just want to quickly tie a boat up to a railing to hand something off to someone, but don’t need to secure the boat all the way in order to leave it there.
-
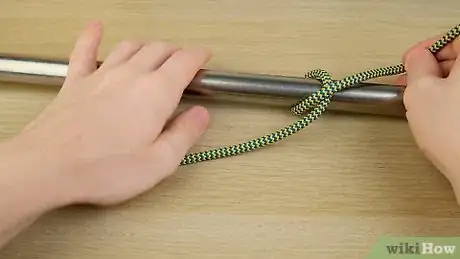
2Pass the end of the rope over the standing end and around the pole again. Cross the end of the rope up and over the standing end where it is resting on the pole. Loop it around the pole a second time, without passing it under the standing end of the rope this time.[2]
- You should just have a simple loop around the pole at this point with the rope crossed over itself diagonally in the middle.
- If you’re tying the rope to a vertical pole, the end of the rope will cross over the standing end towards the top. If you’re tying the rope to a horizontal pole, the end of the rope will cross over the standing end to the left side.
Advertisement -
3Slide the end of the rope under itself parallel to the standing end. Slip the tip of the rope under the diagonal section of itself that passes over the lead end. Pull it through so that it is parallel to the standing end and the ends of the rope are going in opposite directions.[3]
- The knot will now look like 2 loops of rope around the pole with a diagonal section of rope crossed over top of them.
-
4Pull the ends of the rope tight to finish tying the clove hitch knot. Grab the short end of the rope in 1 hand and the long end in the other. Pull the ends in opposite directions to tighten the knot all the way.[4]
- The clove hitch knot is the same as using 2 half hitches.
Securing a Rope with a Rolling Hitch
-
1Put 1 end of the rope around the pole and cross it over the standing end. Grab your rope and loop the end of it once around the pole, passing it underneath the long standing end of the rope. Cross the end up and over top of the standing end after you loop it around the pole and underneath.[5]
- Avoid using the rolling hitch with slippery ropes made out of polyethylene and polypropylene. It can slip and come undone if you tie it with these types of rope.
-
2Wrap the end of the rope around the pole and the standing end again. Continue passing the end of rope around the pole after you cross it up and over the standing end. Do not pass it underneath the standing end this time.[6]
- Your knot should look like 1 loop around the pole with 2 diagonal sections of rope crossed over top of it at this point.
- The end of the rope will cross over the standing end towards the top if you’re tying the rope onto a vertical pole. If you’re tying the rope onto a horizontal pole, the end of the rope will cross over the standing end towards the left.
-
3Loop the end of the rope around the pole a third time above the standing end. Wrap the end of the rope around the pole parallel to the standing end of the rope. Do not cross the end of the rope over the standing line this time.[7]
- Now the knot will look like 2 straight loops around the pole and 2 diagonal sections of rope around the pole. The ends of the rope will be facing in opposite directions.
- The end of the rope will be on top of the standing end towards the top of the pole if you’re attaching the rope to a vertical pole. The end of the rope will be next to the standing end on the left side if you’re putting the rope on a horizontal pole.
-
4Slip the tip of the rope through the second wrap you made and pull it tight. Slide the end of the rope under the closest diagonal section of rope and pull it through on top of the next diagonal section of rope. Pull both ends of the rope in opposite directions to tighten the knot and secure it in place.[8]
- As long as you don’t tie a rolling hitch with slippery rope, it won’t slip or bind at all. This means you can both tie and untie it when there is a load on it.
- You can tie 2 rolling hitches for extra security when there is a load on your rope.
Warnings
- Make sure any pole or similar object you tie a rope to is sturdy and won’t break if there is weight on the rope.⧼thumbs_response⧽
- Don’t use a clove hitch on its own if there is a load on your rope. It would be better to use 1-2 rolling hitches for maximum security.[10]⧼thumbs_response⧽
References
- ↑ https://www.animatedknots.com/clove-hitch-knot-rope-end
- ↑ https://www.netknots.com/rope_knots/clove-hitch
- ↑ https://www.animatedknots.com/clove-hitch-knot-rope-end
- ↑ https://www.101knots.com/clove-hitch.html
- ↑ https://www.animatedknots.com/rolling-hitch-knot
- ↑ https://www.netknots.com/rope_knots/rolling-hitch
- ↑ https://www.animatedknots.com/rolling-hitch-knot
- ↑ https://www.boatus.com/magazine/2017/april/how-to-tie-a-rolling-hitch.asp
- ↑ https://www.outdoorlife.com/photos/gallery/hunting/2012/02/essential-knots-how-tie-20-knots-will-keep-you-alive/
