This article was co-authored by wikiHow Staff. Our trained team of editors and researchers validate articles for accuracy and comprehensiveness. wikiHow's Content Management Team carefully monitors the work from our editorial staff to ensure that each article is backed by trusted research and meets our high quality standards.
There are 7 references cited in this article, which can be found at the bottom of the page.
The wikiHow Video Team also followed the article's instructions and verified that they work.
This article has been viewed 18,881 times.
Learn more...
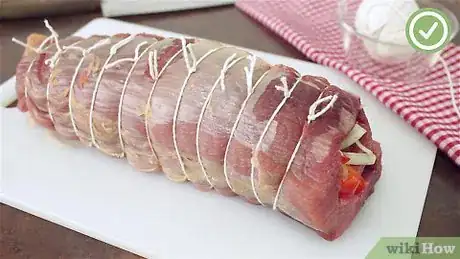
A butcher’s knot is most commonly used to secure meat for roasting. Tied meat tends to cook evenly and can be easier to carve. You can tie stuffed meat with a butcher’s knot using one long piece of twine wrapped continuously around the meat. This will help keep the stuffing intact. You can also wrap and tie multiple pieces of twine around rolled meat for roasting. This knot is not difficult to learn, and you may be surprised to find other uses for it, such as tying up packages.
Steps
Using One Long Piece of Twine
-
1Measure and cut a length of kitchen twine. Lay it next to your meat so you can measure before you cut. This will ensure that you have cut the proper length of twine to entirely wrap your meat (or package). If the meat isn't rolled your meat, measure a length 5 times as long as the meat.[1] If you’ve rolled your meat, measure enough twine to wrap it around twice.[2]
- To roll the meat, first, fold in any edges that are not even. The meat should roughly look like a rectangle.
- Start at one end of the meat, and roll it up tightly, keeping in mind that uniform rolls will cook more evenly. If thinner edges are hanging out, they will cook faster than the roll itself.[3] Take care to keep stuffing intact as you roll it up.
-
2Slide the twine under the left end of the meat and leave one side longer. The longer side of the twine should have enough length to completely wrap and tie the meat. Leave enough length on the short end to tie a knot.
- The short end of the knot should have a few extra inches.[4]
Advertisement -
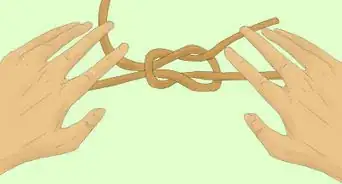
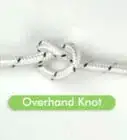
3Tie an overhand knot on top of the meat. Loop one end of the twine and push the other end through it. Pull tightly to secure the knot. This will hold the string in place as you tie the meat.[5]
-
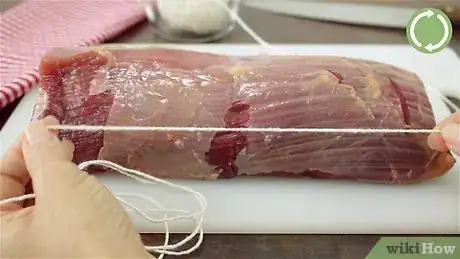
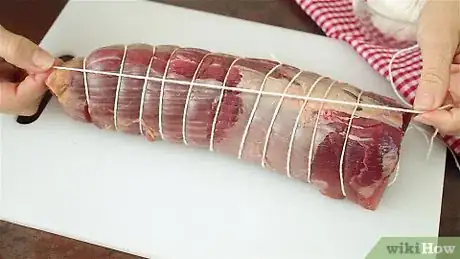
4Run twine longwise, hold in place with the other hand, and wrap. Space the ties 3⁄4 to 1 1⁄4 in (1.9 to 3.2 cm) apart. This will hold the meat's shape and help keep the stuffing in place. Holding the twine in place helps keep its position while you wrap. [6]
-
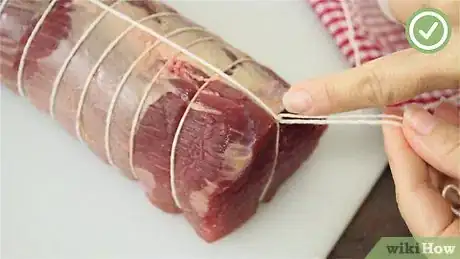
5Slip the end over and under the wrapped twine, at the top.[7] Make sure the twine is pulled tightly through. This secures the wrap and holds the meat’s shape.
-
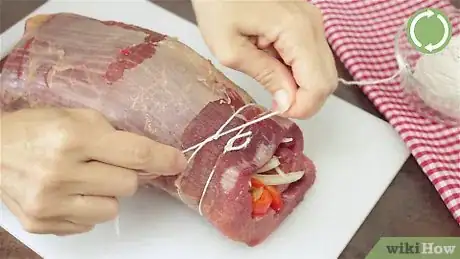
6Wrap and tie the rest of the roll. Make sure your ties are snug, but not so tight that the meat bulges. Bulging meat may result in lost stuffing. The desired result is a roll that stays in place and looks even and beautiful when cooked.
-
7Wind the twine longwise around the meat and back up to the top. You’ll need to flip the meat over to run it longwise down the middle of the underside and back up to the top. The twine will be perpendicular to the rest of the twine, and it should line up with the very first knot you made.
- Try holding the meat in one hand as you wrap the twine with the other.[8]
-
8Tie an overhand knot and trim the ends. Make a loop with one end of the twine and pass the other end through it. Evenly trim the ends so that they are a few inches in length. This will keep them from dragging in the roasting pan.
Tying Multiple Pieces of Twine
-
1Cut a length of twine. Cut enough twine to go around rolled meat twice.[9] Measure 5 times the length of meat that hasn’t been rolled up yet.[10]
- To roll the meat, trim or fold in any edges that are not even. Try to get it in a rectangle.
- Roll the end of the meet up tightly. You want a uniform roll so that it cooks evenly. Thicker rolled meat will cook slower than thin edges that are hanging out.[11] Watch for stuffing that might fall out as you roll.
-
2Slide the twine under the meat and bring the ends up. There should be slightly more twine in your right hand than in your left hand. Reverse these instructions if you are left-handed.[12]
-
3Wrap the longer end counterclockwise around the shorter one. Do this as close to the meat as possible to ensure that you get a nice snug wrap and to prepare to tie a slip knot.
-
4Make a loop and push the end up under it, then tighten.[15] This is a slip knot. Tighten it up by pulling the left side then the right. The left side of the string will tighten around the meat while the right side tightens the knot.
- A slipknot can be tightened or loosened as needed.
-
5
-
6Tie the next piece about an inch from the one before. Spacing each tie correctly, meaning 0 3⁄4 to 1 1⁄4 in (1.9 to 3.2 cm) from the previous one, will keep your meat in place and help it cook evenly. If the meat is stuffed, this will keep the stuffing from falling out.[18]
-
7Continue tying lengths of twine until all of the meat is tied up. Make enough ties to hold the meat’s shape and keep the filling in place if you stuffed the meat. Remember to snip the ends after each tie to keep the roll tidy.
Things You’ll Need
- Kitchen twine or string
- Scissors or a sharp knife
References
- ↑ https://www.goodhousekeeping.com/uk/food/cookery-videos/a657317/how-to-tie-a-butchers-knot/
- ↑ https://www.bbc.com/food/techniques/how_to_tie_a_butchers_knot
- ↑ https://www.saveur.com/article/Video/VIDEO-How-to-Roll-and-Tie-a-Roast#page-2
- ↑ https://www.goodhousekeeping.com/uk/food/cookery-videos/a657317/how-to-tie-a-butchers-knot/
- ↑ https://www.animatedknots.com/overhand/index.php
- ↑ https://www.goodhousekeeping.com/uk/food/cookery-videos/a657317/how-to-tie-a-butchers-knot/
- ↑ https://www.goodhousekeeping.com/uk/food/cookery-videos/a657317/how-to-tie-a-butchers-knot/
- ↑ https://www.goodhousekeeping.com/uk/food/cookery-videos/a657317/how-to-tie-a-butchers-knot/
- ↑ https://www.bbc.com/food/techniques/how_to_tie_a_butchers_knot
- ↑ https://www.goodhousekeeping.com/uk/food/cookery-videos/a657317/how-to-tie-a-butchers-knot/
- ↑ https://www.saveur.com/article/Video/VIDEO-How-to-Roll-and-Tie-a-Roast#page-2
- ↑ https://www.bbc.com/food/techniques/how_to_tie_a_butchers_knot
- ↑ https://www.animatedknots.com/butchers/index.php
- ↑ https://www.animatedknots.com/overhand/index.php
- ↑ https://www.bbc.com/food/techniques/how_to_tie_a_butchers_knot
- ↑ https://www.animatedknots.com/doubleoverhand/index.php
- ↑ https://www.bbc.com/food/techniques/how_to_tie_a_butchers_knot
- ↑ https://www.netknots.com/rope_knots/butchers-knot
