This article was co-authored by wikiHow Staff. Our trained team of editors and researchers validate articles for accuracy and comprehensiveness. wikiHow's Content Management Team carefully monitors the work from our editorial staff to ensure that each article is backed by trusted research and meets our high quality standards.
This article has been viewed 94,692 times.
Learn more...
When installing a ground rod, you need to make sure that electricity will easily flow through it into the earth. We'll show you how to check the resistance of a ground rod using a ground meter and an earth electrode tester.
Steps
Using a Clamp-on Ground Meter
-
1Get a clamp-on ground meter. A clamp-on ground meter is a specialized electronic machine that checks electrical resistance. You can only use this type of meter to check resistance in a multi-grounded system, not on an isolated ground rod.[1] Keep in mind that while this is the easiest method, it's also the least accurate.[2]
- The clamp-on meter will give you a reading in "ohms," which is the unit of measurement for resistance. It may be signified with the symbol "Ω" on the meter.
- A clamp-on meter allows you to check the resistance of an installed ground rod without disconnecting it from the electrical supply.[3]
- Working with electricity can be dangerous! If you don't have the right tool or aren't sure how to use it, contact an experienced electrician or lineman for help.
-
2Clamp the meter on the ground rod. Open the clamp by pressing the lever on the side of the meter and holding it down. Then put the clamp around the grounding electrode conductor or the top of the ground rod. Let the clamp close by letting go of the lever.[4]
- Clamp the meter near the ground rather than at the top of the rod.
Advertisement -
3Turn on the meter. How you start the meter depends on the specific brand you have. Some simply have a button that says "power" or "on."[5] Others have a dial that needs to be set to ohms.
-
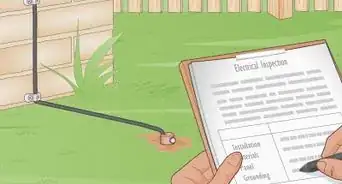
4Check the resistance reading on the meter. Your clamp-on ground tester will have a screen that will show you a numeric reading.[6] The lower the number on the meter, the better your grounding rod is working. In general, a reading under 25 ohms means that your ground rod has a good connection to the earth.[7]


Using an Earth Electrode Tester
-
1Get an earth electrode tester. This is an older type of resistance meter that uses multiple ground probes and wires to assess a ground rod's resistance. This type of tester is usually available at hardware and home improvement stores, as well as from online retailers.
- Using an earth electrode tester instead of a clamp-on tester will take a lot more time and effort. If you have the option of using a clamp-on meter instead, do it.
-
2Insert 2 ground probes into the ground. The ground probes need to be inserted into the ground at specific distances away from the ground rod. The furthest ground probe needs to be at a distance that is 10 times the length of the ground rod. For instance, if the ground rod is 8 feet (2.4 m) long, the furthest probe should be 80 feet (24 m) away. The second ground rod should be located halfway between the furthest probe and the ground rod.[8]
- The ground probes are typically about 1 foot (0.30 m) long. They should be inserted into the ground until the top of them is just visible.
- The leads that come with earth electrode testers are typically very long, so they should reach the required distance.
-
3Connect all three leads. The three leads your meter comes with should be inserted into the openings on the meter. Then, the other end of 1 of the leads needs to be connected to the top of the ground rod. The other 2 each need to be connected to one of the ground probes.
- In general, it doesn't matter which lead goes to which ground rod or probe. However, the lead for the furthest ground probe should be the longest one so that it will reach.
-
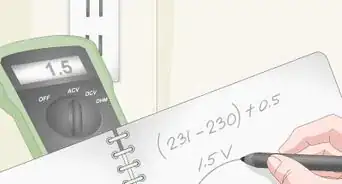
4Turn on the meter and take a reading. How you turn on the meter depends on the specific type of meter you have. Most have a dial that should be set to the ohm symbol or to a mark that says "3 pole," which is referencing your 3 points of contact with the earth. Once the meter is on, read what the screen says.
- If a ground rod has a good connection to ground, its reading should be a number below 25.[9]
-
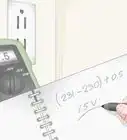
5Verify your original reading. Move one of your probes to a location 2 feet (0.61 m) closer to the ground rod. Take a reading of the resistance once again. Then move that same probe so it is 2 feet (0.61 m) closer to the second probe than it was originally. Take another reading. All the readings that you get should be very similar.[10]
- To ensure that your ground rod is sufficient, the average of all 3 readings should be less than 25 ohms.


Reducing Grounding System Resistance
-
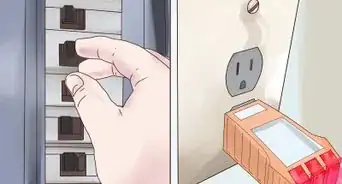
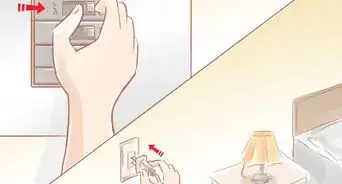
1Make sure the grounding system connections are secure. If you don't get a satisfactory ground reading, check your grounding system for problems. Make sure the clamp that connects the ground rod and the grounding circuit conductor is very tight. Also ensure that the ground electrode conductor is solidly connected to the grounding bar in the electrical panel.
- Most electrical systems also have secondary grounding means, such as the grounding bar being connected to a cold water pipe that goes into the ground. Make sure that the secondary grounding means is also securely connected.
-
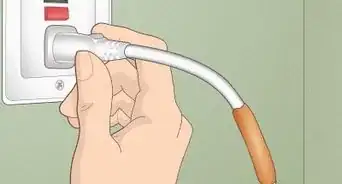
2Install a new ground rod in a different location. In some instances, ground rods can be installed in areas where the earth has a lot of resistance. For instance, if a ground rod is driven into a very rocky and dry area it may not conduct electricity into the ground well. If this is the case for your ground rod, the best solution is to drive a different rod into a different location.
- This may not require you to put a ground rod a long distance away from the original rod. Even a few feet can make a difference for the ground resistance.
-
3Install a second ground rod. If you have too much resistance in your initial ground rod, you can connect a second one in series to reduce the overall resistance. This will ensure that any ground fault will be able to go to ground easily.
- Your second ground rod should be located at a distance that is equal to the length of your ground rod. For example, if your first ground rod is 8 feet (2.4 m) long, your second ground rod should be located 8 feet (2.4 m) from the first ground rod.


Community Q&A
-
QuestionI replaced a 16V transformer for a doorbell, that was mounted on my electric panel box. The old transformer had no ground wire, but the new one does. Can I drill a hole in the box to attach the ground?
 Upnorth HereTop AnswererNo, you would generally need to run the equipment grounding conductor (EGC) in the same cable as the line and neutral conductors that supply the transformer in its new location, terminating all three conductors inside a junction box. The EGC wire would then attach to the transformer's wire as well as the junction box, if the box is metal. You could also use properly installed metallic conduit as the EGC path to ground.
 -
QuestionIn the article, “How to test a ground rod” under reducing ground system resistance it states to place an additional rod 8ft from an 8ft long rod. This is incorrect. It should be twice that.Upnorth HereTop AnswererIn NEC (2014): 250.53(A)(3) and 250.53(B) seem to say additional electrode rods shall "not be less than 1.83 m (6 feet) apart". However, it is noted that the "paralleling efficiency is increased by spacing them twice the length of the longest rod."
-
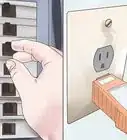
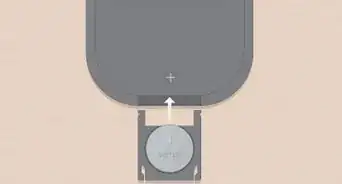
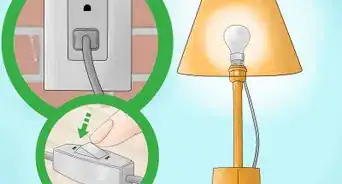
QuestionIs the ground slot on electrical outlets live?Upnorth HereTop AnswererYes, the grounded slot in electrical outlets is "live" in the sense that it is intended to conduct the power used by devices plugged into it, same as the "hot" slot. It also happens to be grounded at the service panel, if done properly, as is the grounding slot in a three-slot receptacle. The grounding conductor is, however, intended for safety from electrocution, not to carry any significant power during normal use.
-Electric-Shock-Step-8.webp)


-Step-6-Version-2.webp)


References
- ↑ https://www.aemc.com/userfiles/files/resources/usermanuals/Ground-Testers/3705_EN.pdf
- ↑ https://www.ecmweb.com/content/article/20893807/who-cares-about-25-ohms-or-less
- ↑ https://www.electriciantalk.com/threads/ground-rod-ohm-testing.7047/
- ↑ https://youtu.be/G2OtgeDkTLs?t=50
- ↑ https://www.aemc.com/userfiles/files/resources/usermanuals/Ground-Testers/3705_EN.pdf
- ↑ https://www.aemc.com/userfiles/files/resources/usermanuals/Ground-Testers/3705_EN.pdf
- ↑ http://www.ecmweb.com/content/who-cares-about-25-ohms-or-less
- ↑ https://www.flameport.com/electrical_testing/installations/earth_electrode.cs4
- ↑ http://www.ecmweb.com/content/who-cares-about-25-ohms-or-less
About This Article

You can test a ground rod using either a clamp-on ground meter or an earth electrode tester. To set up a clamp-on ground meter, all you need to do is clamp the meter onto the ground rod or grounding electrode conductor, turn it on, and take the reading. To use an electrode tester, you’ll need to place 2 probes into the ground at specific points. Place the first probe 10 times the length of the ground rod away. Place the second probe halfway between the first probe and the ground rod. Connect 2 leads from the probes to the machine and another lead from the rod itself to the machine, then take a reading. 25 ohms or lower means that your ground rod has a good connection to the earth, but the lower your reading, the better your ground rod is working. For more tips, including how to reduce ground system resistance, read on!