This article was co-authored by Jesse Kuhlman. Jesse Kuhlman is a Master Electrician and the Owner of Kuhlman Electrician Services based in Massachusetts. Jesse specializes in all aspects of home/residential wiring, troubleshooting, generator installation, and WiFi thermostats. Jesse is also the author of four eBooks on home wiring including "Residential Electrical Troubleshooting" which covers basic electrical troubleshooting in residential homes.
There are 14 references cited in this article, which can be found at the bottom of the page.
This article has been viewed 158,382 times.
Knowing how to test a battery charger, whether it’s for the rechargeable kind used in small appliances or the one that powers your automobile, can be useful for making sure that the device is reloading batteries to a usable level. The procedure for testing a battery charger is similar regardless of the type of battery you’re working with. Connect the positive and negative test probes of a multimeter tool to the corresponding contact points on the charger. The device will then give you a reading displaying the voltage being put out by the charger.
Steps
Performing a Test on a Small-Battery Charger
-
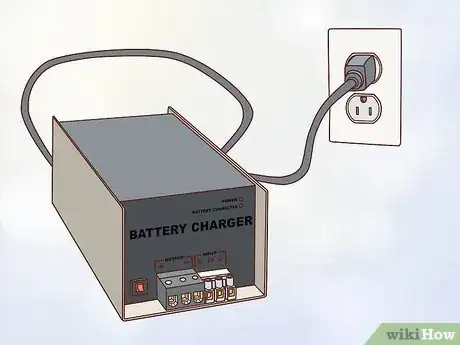
1Plug your battery charger into a wall outlet. To determine whether or not your battery charger is putting out as much voltage as it’s supposed to, you’ll first need to make sure that there’s electricity running to it. Hook the power cord up to a nearby AC outlet. This will cause the charger to begin channeling electricity, which you’ll measure using a multimeter tool.[1]
- If your battery charger has a separate On/Off switch, go ahead and flip it to the “On” position.
- A multimeter, also sometimes known as a “voltmeter,” is a type of instrument designed to test the power levels of various electrical devices. You can pick up a digital multimeter from any hardware shop or electronics supply store for as little as $10-20.[2]
-
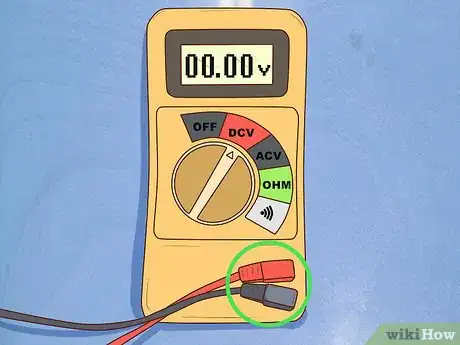
2Attach the test probes of your multimeter to their corresponding ports. Most multimeters come with a pair of detachable colored probes, one black and one red, that are used to measure the electricity running through the poles of a battery or charger. Insert the end of the black, or negative, probe into the port on the multimeter labelled “COM.” Then, insert the red, or positive, probe into the port labelled “V.”[3]
- In some cases, the test probe ports may be color-coded rather than labelled, depending on the design of the specific model you're using.
- If your multimeter features built-in test probes, you can skip this step.
Advertisement -
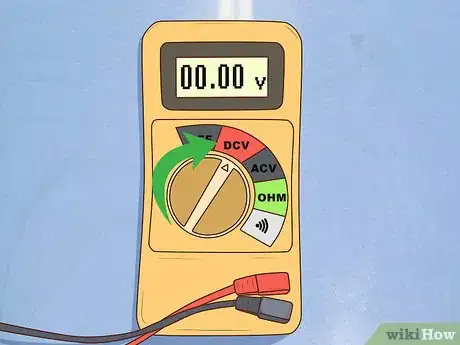
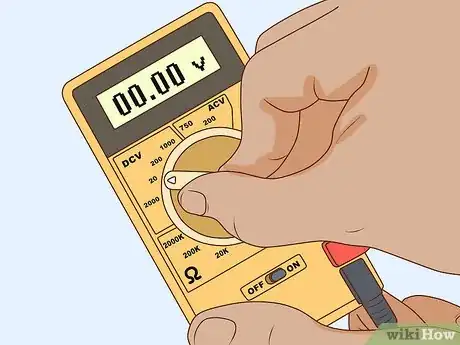
3Set the multimeter to “DC.” Locate the dial on the face of the tool indicating the different testing modes. Twist the dial until the pointer enters the “DC” range, stopping on the next-highest setting to the voltage of the charger you'll be measuring. This will prepare the tool to test your battery charger, which supplies DC, or “direct current,” power.
- To test a standard AA battery, which is about 1.5 volts, you would use the "2 DCV" setting.
- “Direct current” means that the electricity runs straight from the device generating it to the device receiving it.[4]
Warning: Operating your multimeter on the wrong settings could overload it, or even result in more serious damage such as an explosion. To avoid this, always double-check that it's set for the type of current you're gauging at a voltage higher than that of your device.
-
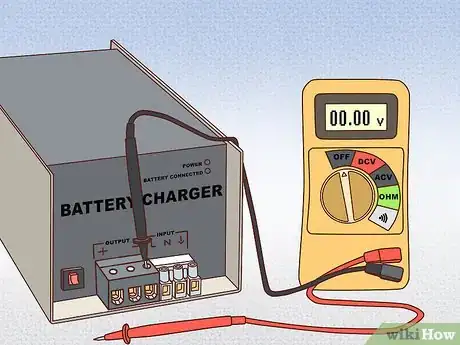
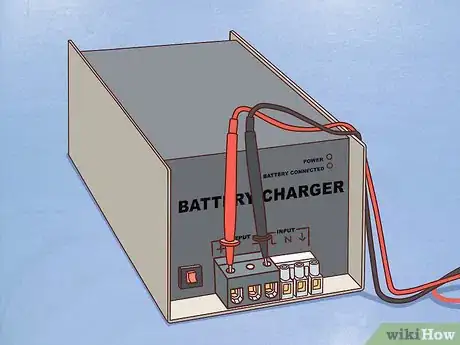
4Touch the black test probe to the negative contact point on the charger. If the charger you’re testing hooks up to a battery via a power supply cord, press the tip of the probe against the side of the metal prong at the end of the jack. If you’re testing a receptacle charger like the kind used to reload rechargeable AA batteries, hold the probe to a section of the exposed metal on the side of the charging chamber marked “-”.[5]
- Some multimeters have input ports that make it possible to plug certain types of power supply jacks directly into the tool.
-
5Hold the red test probe against the charger’s positive contact point. Insert the tip of the probe into the barrel at the end of the power supply jack, which is what transmits the live current. To take a reading for a receptacle charger, hold the probe to a section of the exposed metal on the side of the charging chamber marked “+”.[6]
- If you accidentally get your poles mixed up, the multimeter may display a negative reading (or no reading at all). Switch the position of the probes and try again.
-
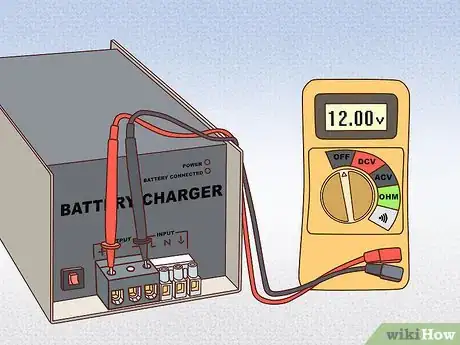
6Check the number displayed on the multimeter’s display screen. This number indicates how many volts of DC power the charger is putting out. Your battery charger needs to be supplying at least an equal voltage (preferably higher) to the batteries you’re charging in order to restore them to their full capacity in a timely fashion.[7]
- If you’re not sure exactly how much, consult to the instruction booklet included with your battery charger, or look for the information somewhere on the charger itself.
- For reference, a standard lithium ion battery is rated for around 4 volts of electricity. Larger devices and appliances may run on batteries or battery packs that put out 12-24 volts.[8]
- If your battery charger tests well below the recommended output, it may be time to invest in a new one.
Testing a Car Battery’s Charging Capabilities
-
1Turn on your vehicle’s battery. Once the battery is on, switch on the headlights to “load” the battery and reduce any surface charge that the battery may have built up. However, don’t start the engine just yet. Before you test how well the battery is charging, you’ll take what’s known as a “static” reading to confirm the battery’s current level of charge.[9]
- If you like, you can also turn on your vehicle’s radio, fan, emergency flashers, and other electrical components to load the battery even more.[10]
- Eliminating surface charge helps to ensure a reading that accurately reflects the alternator’s charging capabilities.
-
2Set your multimeter to “DC." Turn the dial that controls your multimeter’s test mode so that it’s primed to measure DC current in the next-highest voltage range to your vehicle's battery. Like small appliance batteries, car batteries rely on direct current electricity to power the motor, headlights, fans, and other electrical components.[11]
- Car batteries typically put out 12 volts of electricity, which is about 6 times more than most personal use batteries. To avoid overloading your multimeter, make sure you have it set to a voltage higher than that of your battery (20 DCV on most tools).[12]
-
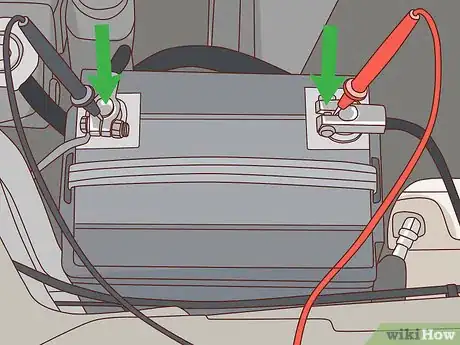
3Connect the multimeter test probes to your vehicle's battery terminals. The best way to do this is to insert the tips of the probes vertically into the spaces between the terminals themselves and the surrounding metal fittings. That way, you can ensure that they don’t accidentally slip out at any point during your test. Position the negative probe first, followed by the positive probe.[13]
- Immediately after attaching both probes, your multimeter should display a reading somewhere in the range of 12.6 volts. This is the battery’s static voltage, which only shows that it’s holding a charge, not that it’s charging the way it’s supposed to.[14]
Tip: Installing alligator clips on the ends of the test probes could come in handy if you’re having trouble keeping them on the terminals.[15]
-
4Start your vehicle’s engine. The number displayed on the multimeter will drop suddenly as the starter pulls power from the battery to begin turning the over the engine. Allow the engine to continue running for about 5 minutes to give the alternator a chance to charge the battery a small amount.[16]
- If your headlights or other electrical components dim or cut out momentarily when you start up the engine, it could be a sign that your battery is going bad.
-
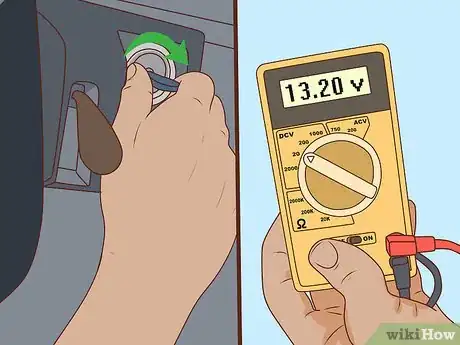
5Shut off the vehicle completely and look for a reading of 13.2 or higher. Turn the key in the ignition to turn off everything at once, including the lights, radio, and other electrical components. As you do, the multimeter should display a new reading. If this reading is higher than the battery’s static voltage, it means that the alternator is doing its job and charging the battery correctly.[17]
- If there’s no change in the reading, a failing alternator could be to blame. Consider making an appointment to have your vehicle looked at by a professional.[18]
- Look for a reading within the same range if you’re testing an external battery charger.
Our Most Loved Articles & Quizzes
Community Q&A
-
QuestionHow do I know if my battery charger is working?
 wikiHow Staff EditorThis answer was written by one of our trained team of researchers who validated it for accuracy and comprehensiveness.
Staff Answer wikiHow Staff EditorStaff AnswerOne of the best ways to tell is to hook it up to a multimeter and test the voltage. Make sure your multimeter is set to the DCV setting.
 -
QuestionHow do you troubleshoot a battery charger?
 wikiHow Staff EditorThis answer was written by one of our trained team of researchers who validated it for accuracy and comprehensiveness.
Staff Answer wikiHow Staff EditorStaff AnswerStart by testing the resistance on the charger with your multimeter. You should get a reading of 0.00, or no more than 0.05. High resistance will prevent the charger from working properly. Next, set the charger to a specific voltage setting and attach the voltmeter. If the reading on the voltmeter doesn’t match the voltage setting on the charger, the charger is likely bad and will need to be replaced.
 -
QuestionHow does a cordless drill battery charger work?
 wikiHow Staff EditorThis answer was written by one of our trained team of researchers who validated it for accuracy and comprehensiveness.
Staff Answer wikiHow Staff EditorStaff AnswerThese chargers take electricity from your home power supply and pass it into a discharged battery. The charger passes a voltage into the battery that is higher than the battery voltage, then gradually decreases the voltage until the battery is full.
Things You’ll Need
Performing a Test on a Small-Battery Charger
- Small battery charger
- Multimeter
Testing a Car Battery’s Charging Capabilities
- Vehicle battery
- Multimeter
- Alligator clips (optional)
References
- ↑ https://kussmaul.com/pdfs/ac%201200%20troubleshooting%20guide.pdf
- ↑ https://www.bobvila.com/articles/how-to-use-a-multimeter/
- ↑ https://www.bobvila.com/articles/how-to-use-a-multimeter/
- ↑ https://www.scienceabc.com/innovation/ac-vs-dc-alternating-current-or-direct-current-which-is-better.html
- ↑ https://www.youtube.com/watch?v=U-ODhSLJOr4&feature=youtu.be&t=92
- ↑ https://www.youtube.com/watch?v=U-ODhSLJOr4&feature=youtu.be&t=107
- ↑ https://kussmaul.com/pdfs/ac%201200%20troubleshooting%20guide.pdf
- ↑ https://van.physics.illinois.edu/qa/listing.php?id=566&t=which-battery-is-better:-c-or-d
- ↑ https://www.youtube.com/watch?v=COJr7OB23Hw&feature=youtu.be&t=65
- ↑ https://www.youtube.com/watch?v=u2j4sT8vVRs&feature=youtu.be&t=53
- ↑ https://www.youtube.com/watch?v=COJr7OB23Hw&feature=youtu.be&t=72
- ↑ https://www.bobvila.com/articles/how-to-use-a-multimeter/
- ↑ https://www.w8ji.com/battery_and_charging_system.htm
- ↑ https://www.youtube.com/watch?v=COJr7OB23Hw&feature=youtu.be&t=105
- ↑ https://sciencing.com/connect-wires-alligator-clip-7777430.html
- ↑ https://www.youtube.com/watch?v=u2j4sT8vVRs&feature=youtu.be&t=88
- ↑ https://www.w8ji.com/battery_and_charging_system.htm
- ↑ https://www.angieslist.com/articles/signs-you-need-replace-your-alternator.htm
